Sequences
Send follow-ups on a timer, see who is in each sequence and how it is doing.
2 min video14 stepsEnglish and हिंदी
Language
Step by step
The same steps in writing, with a screenshot for each.
1. Your sequences
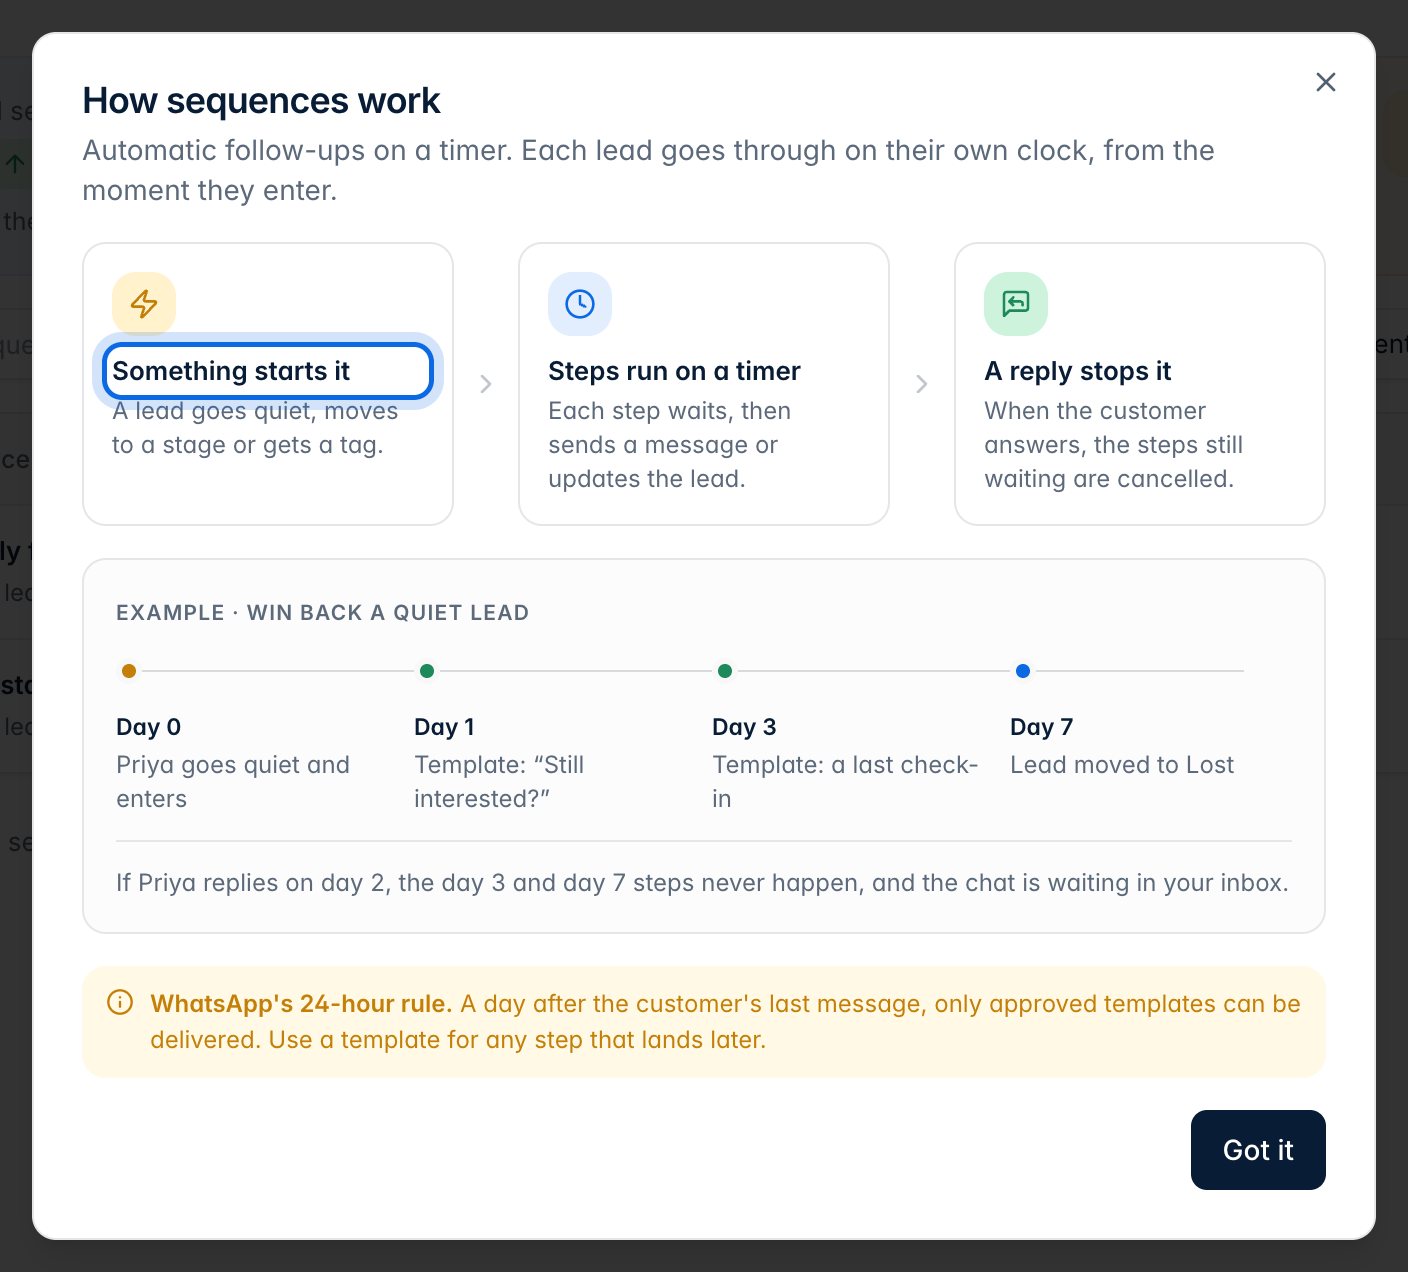
A sequence sends follow-ups on a timer. Something starts it for a lead, each step waits and then runs, and a reply from the customer can stop it.
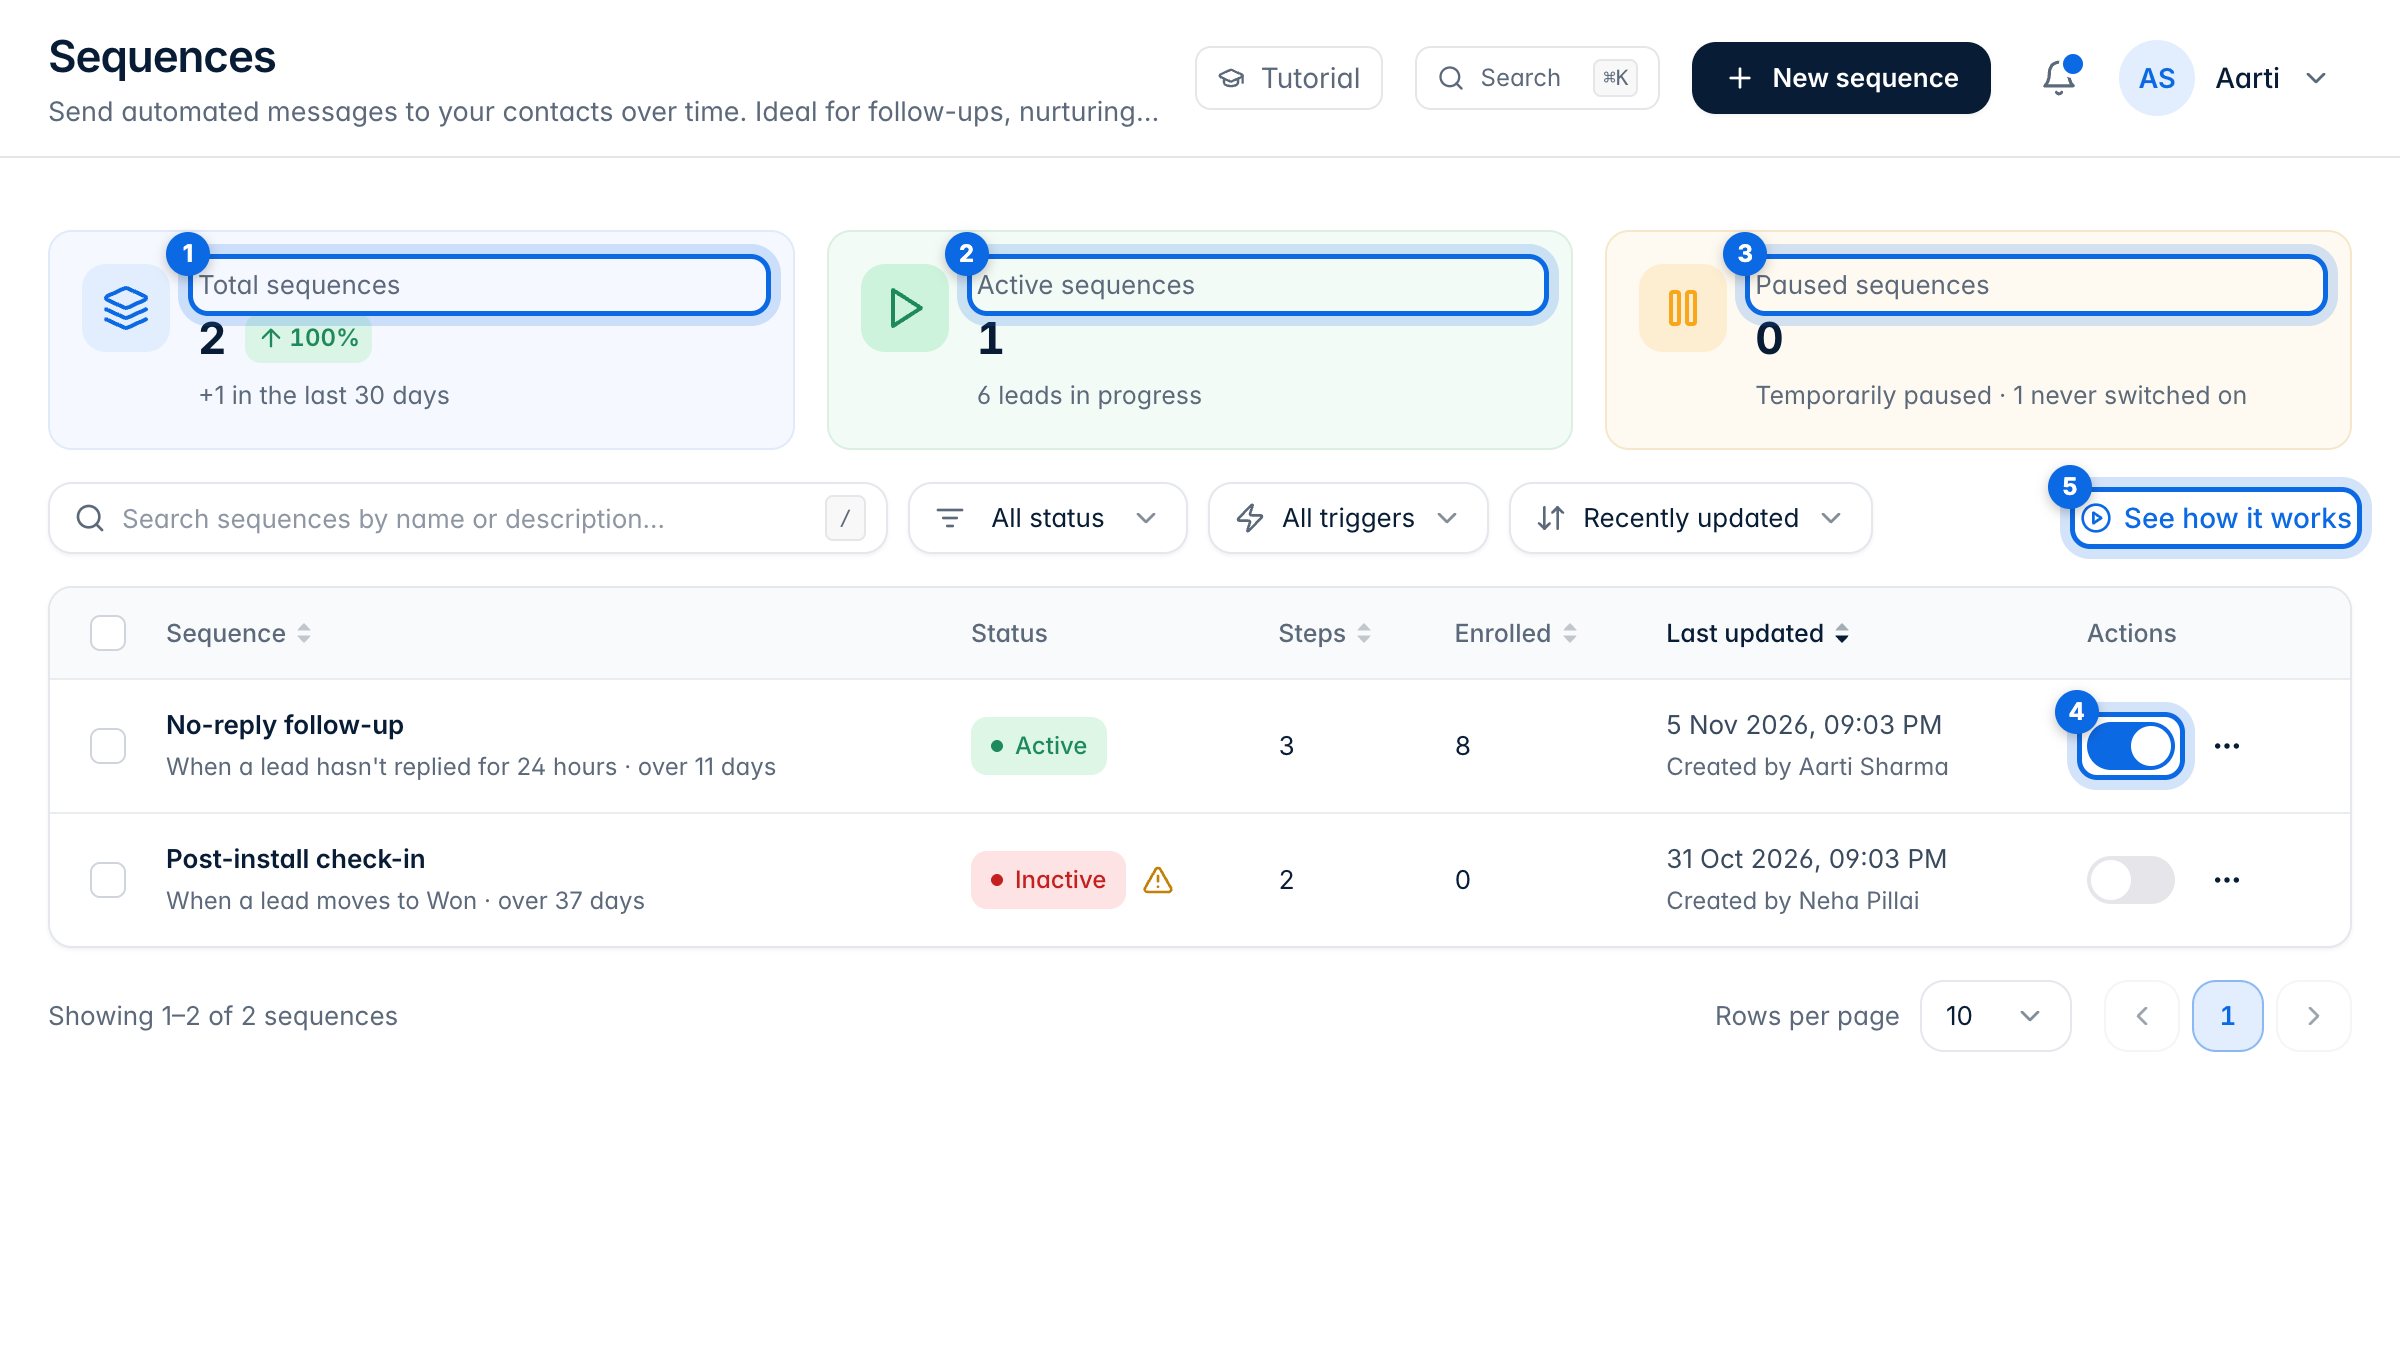
The cards count your sequences (1), the ones that are on (2) and the ones paused (3). The switch on a row (4) turns a sequence on or off. See how it works (5) explains sequences with an example.
Each lead goes through on their own clock. Keep WhatsApp's 24-hour rule in mind: a day after the customer's last message, only approved templates can be sent, so use a template for any step that lands later.
2. Search and filter
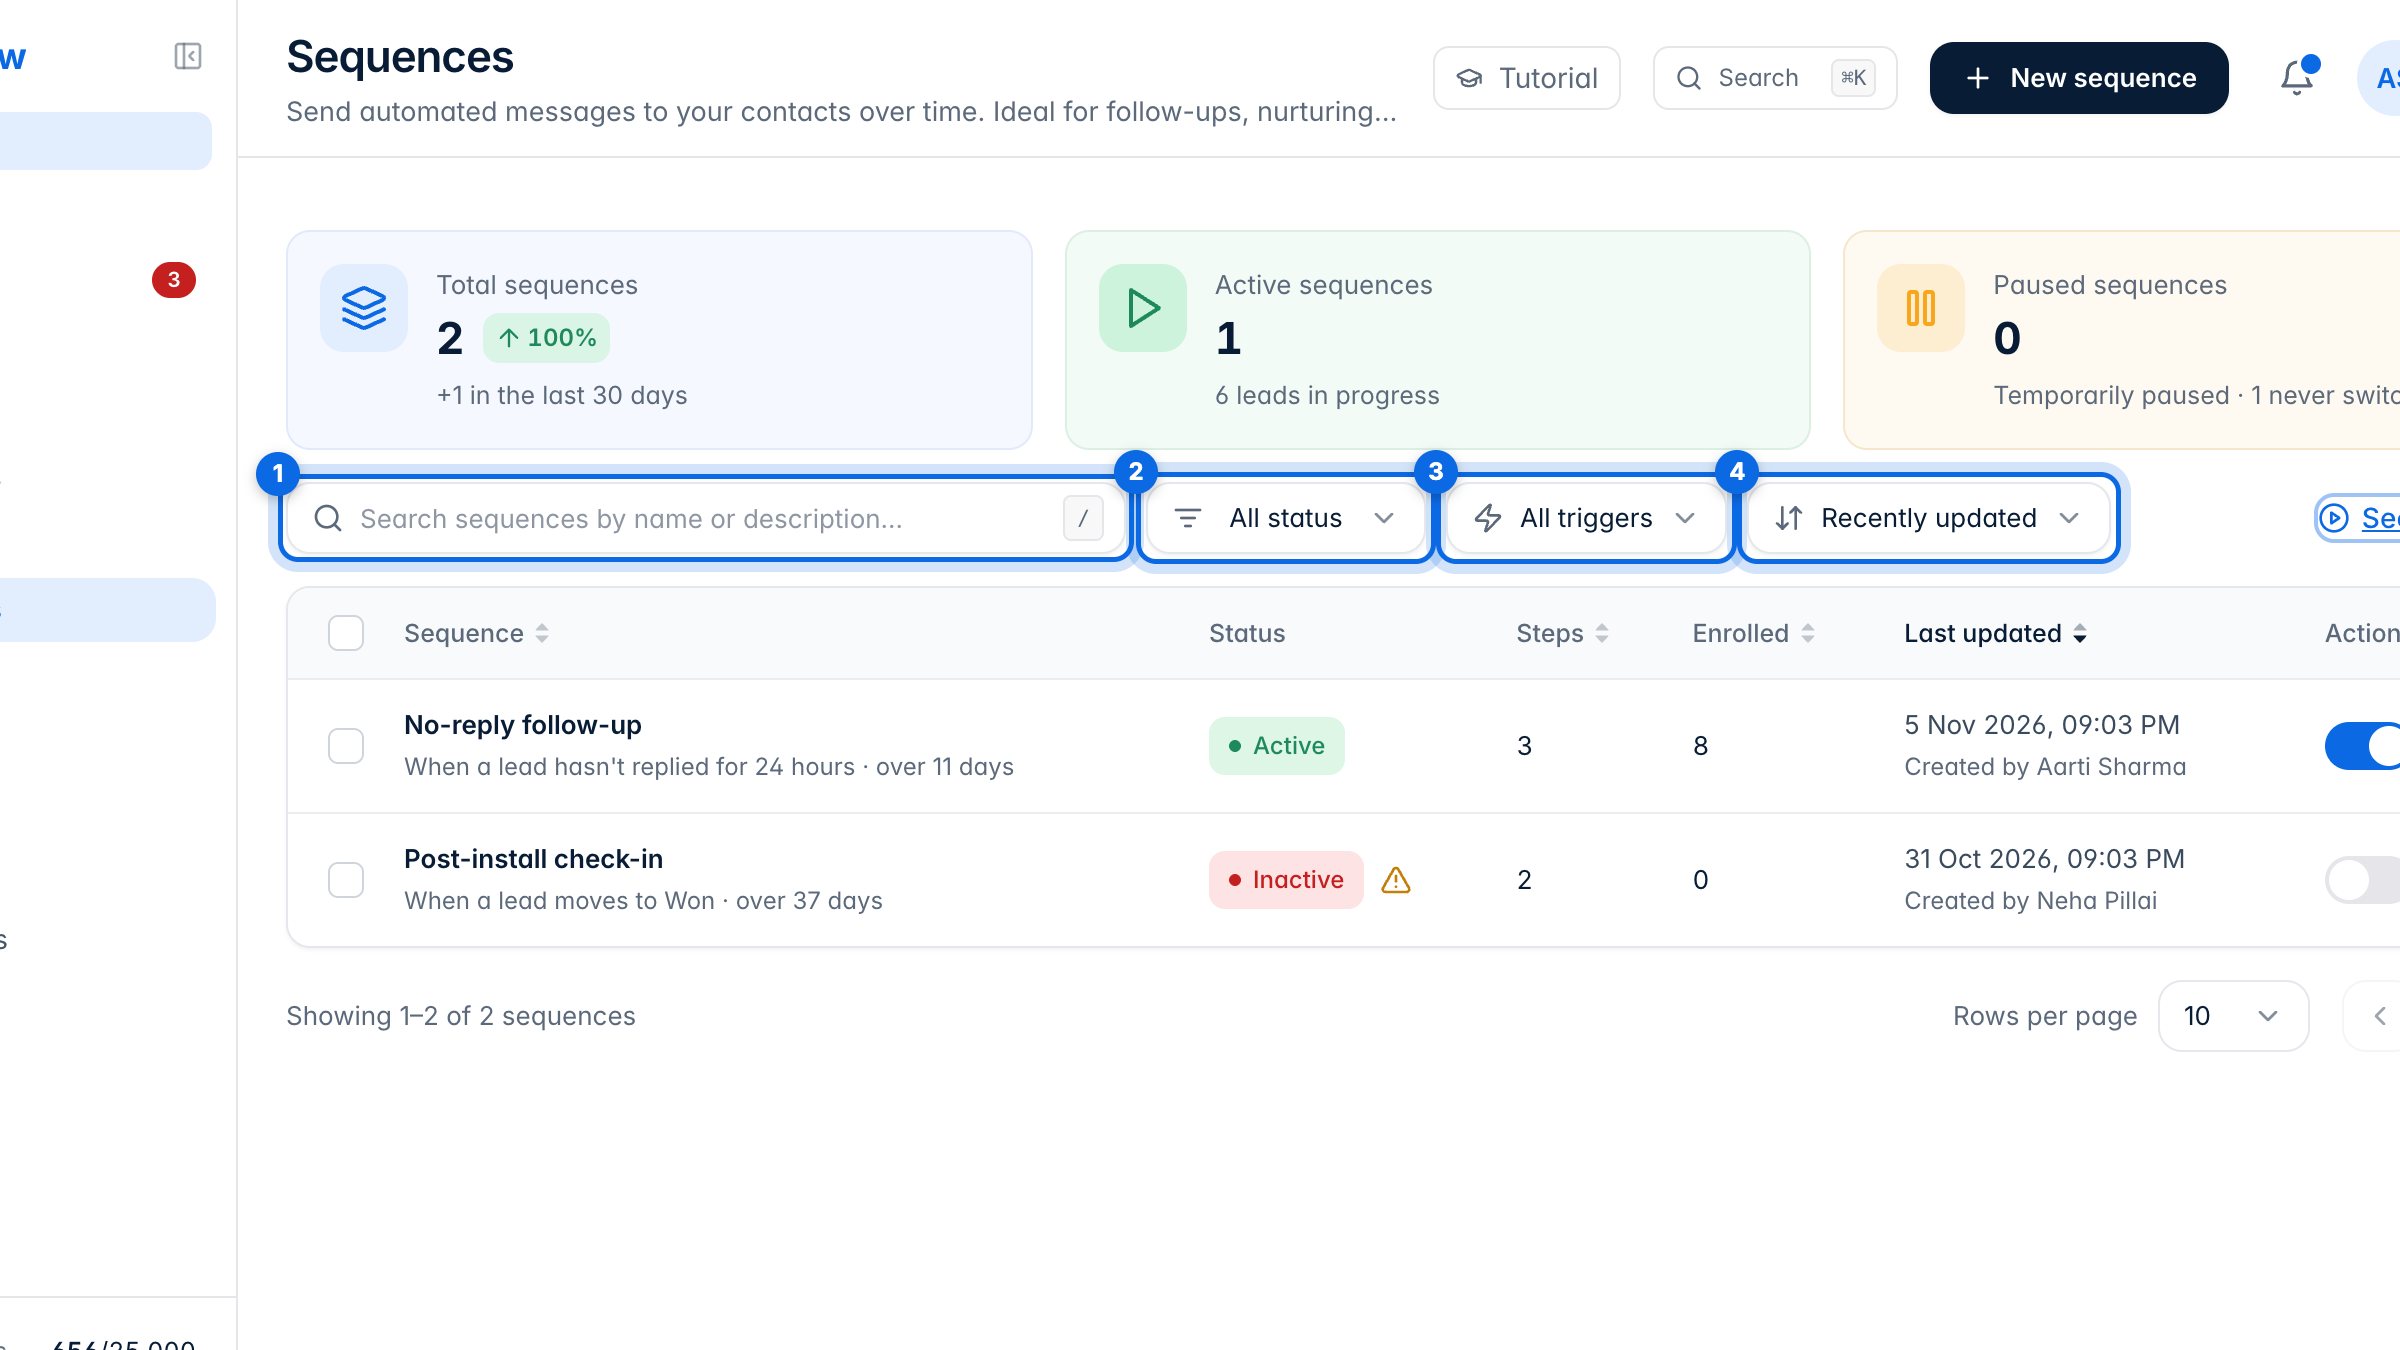
Search by name or description (1). Filter by status (2) or by what starts the sequence (3), and change the order (4).
3. Start a sequence
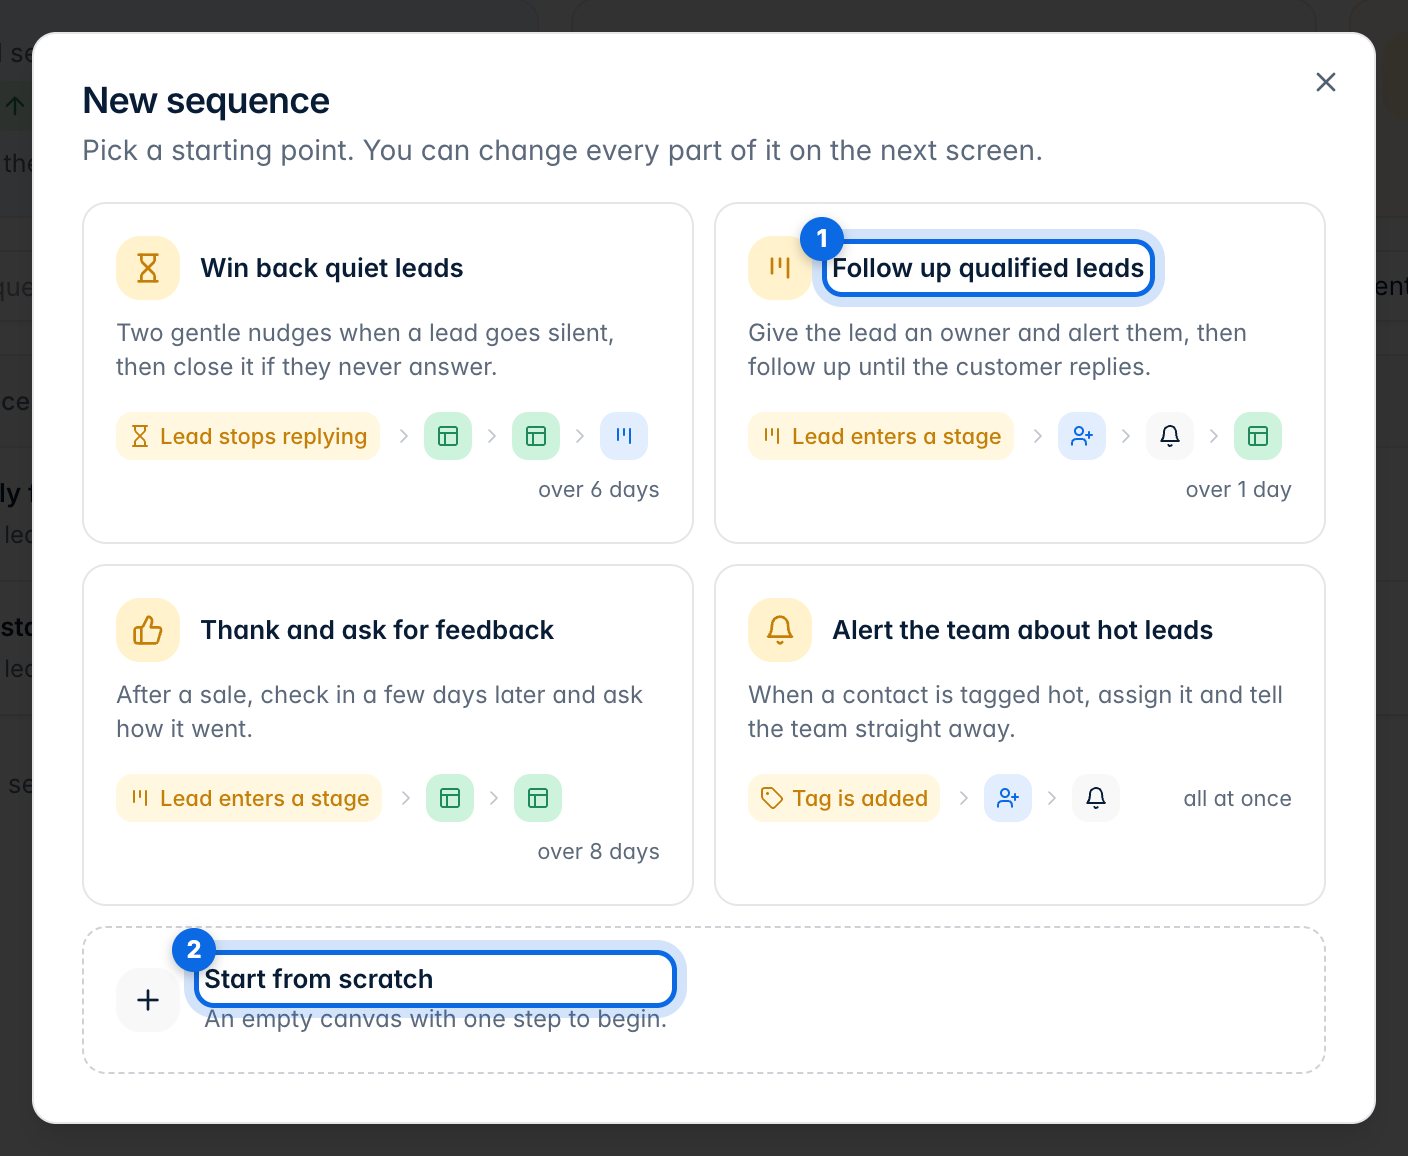
Click New sequence and pick a starting point (1), or start from scratch (2). You can change every part of it on the next screen.
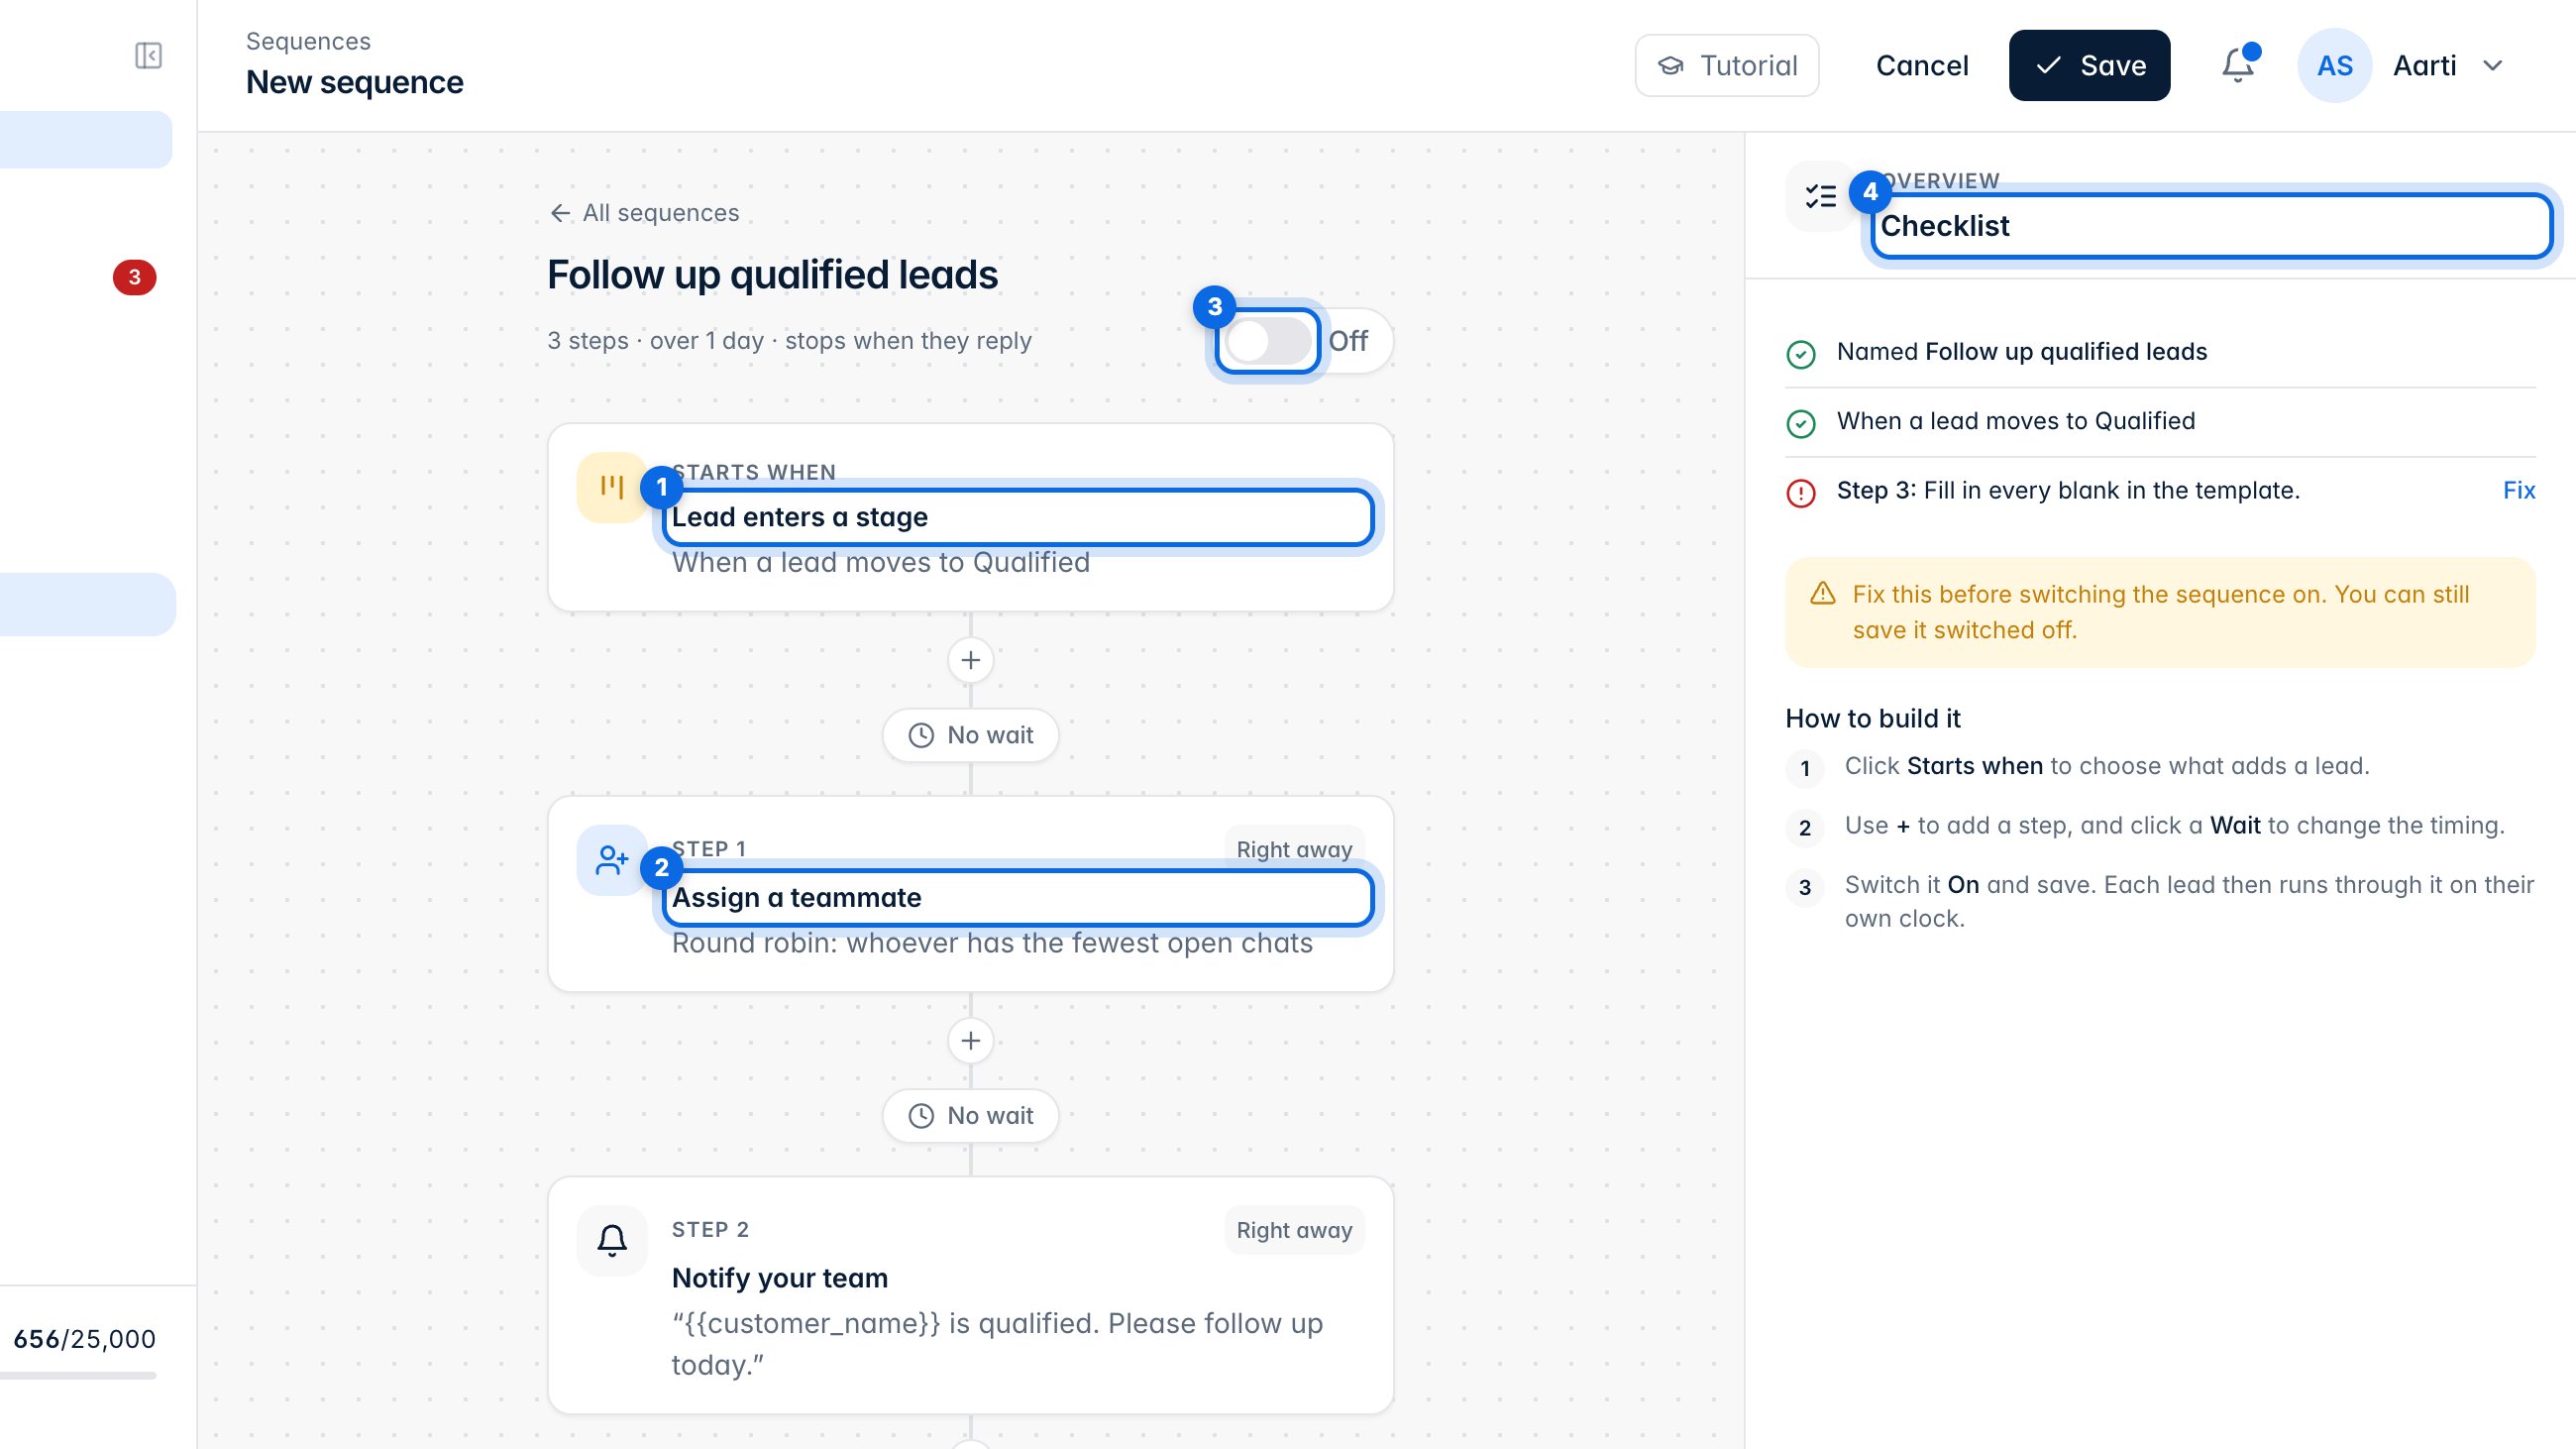
The builder shows what starts the sequence (1) and each step in order (2). The switch (3) turns it on. The checklist (4) lists anything to fix before it can be switched on; you can still save it switched off.
4. What starts it
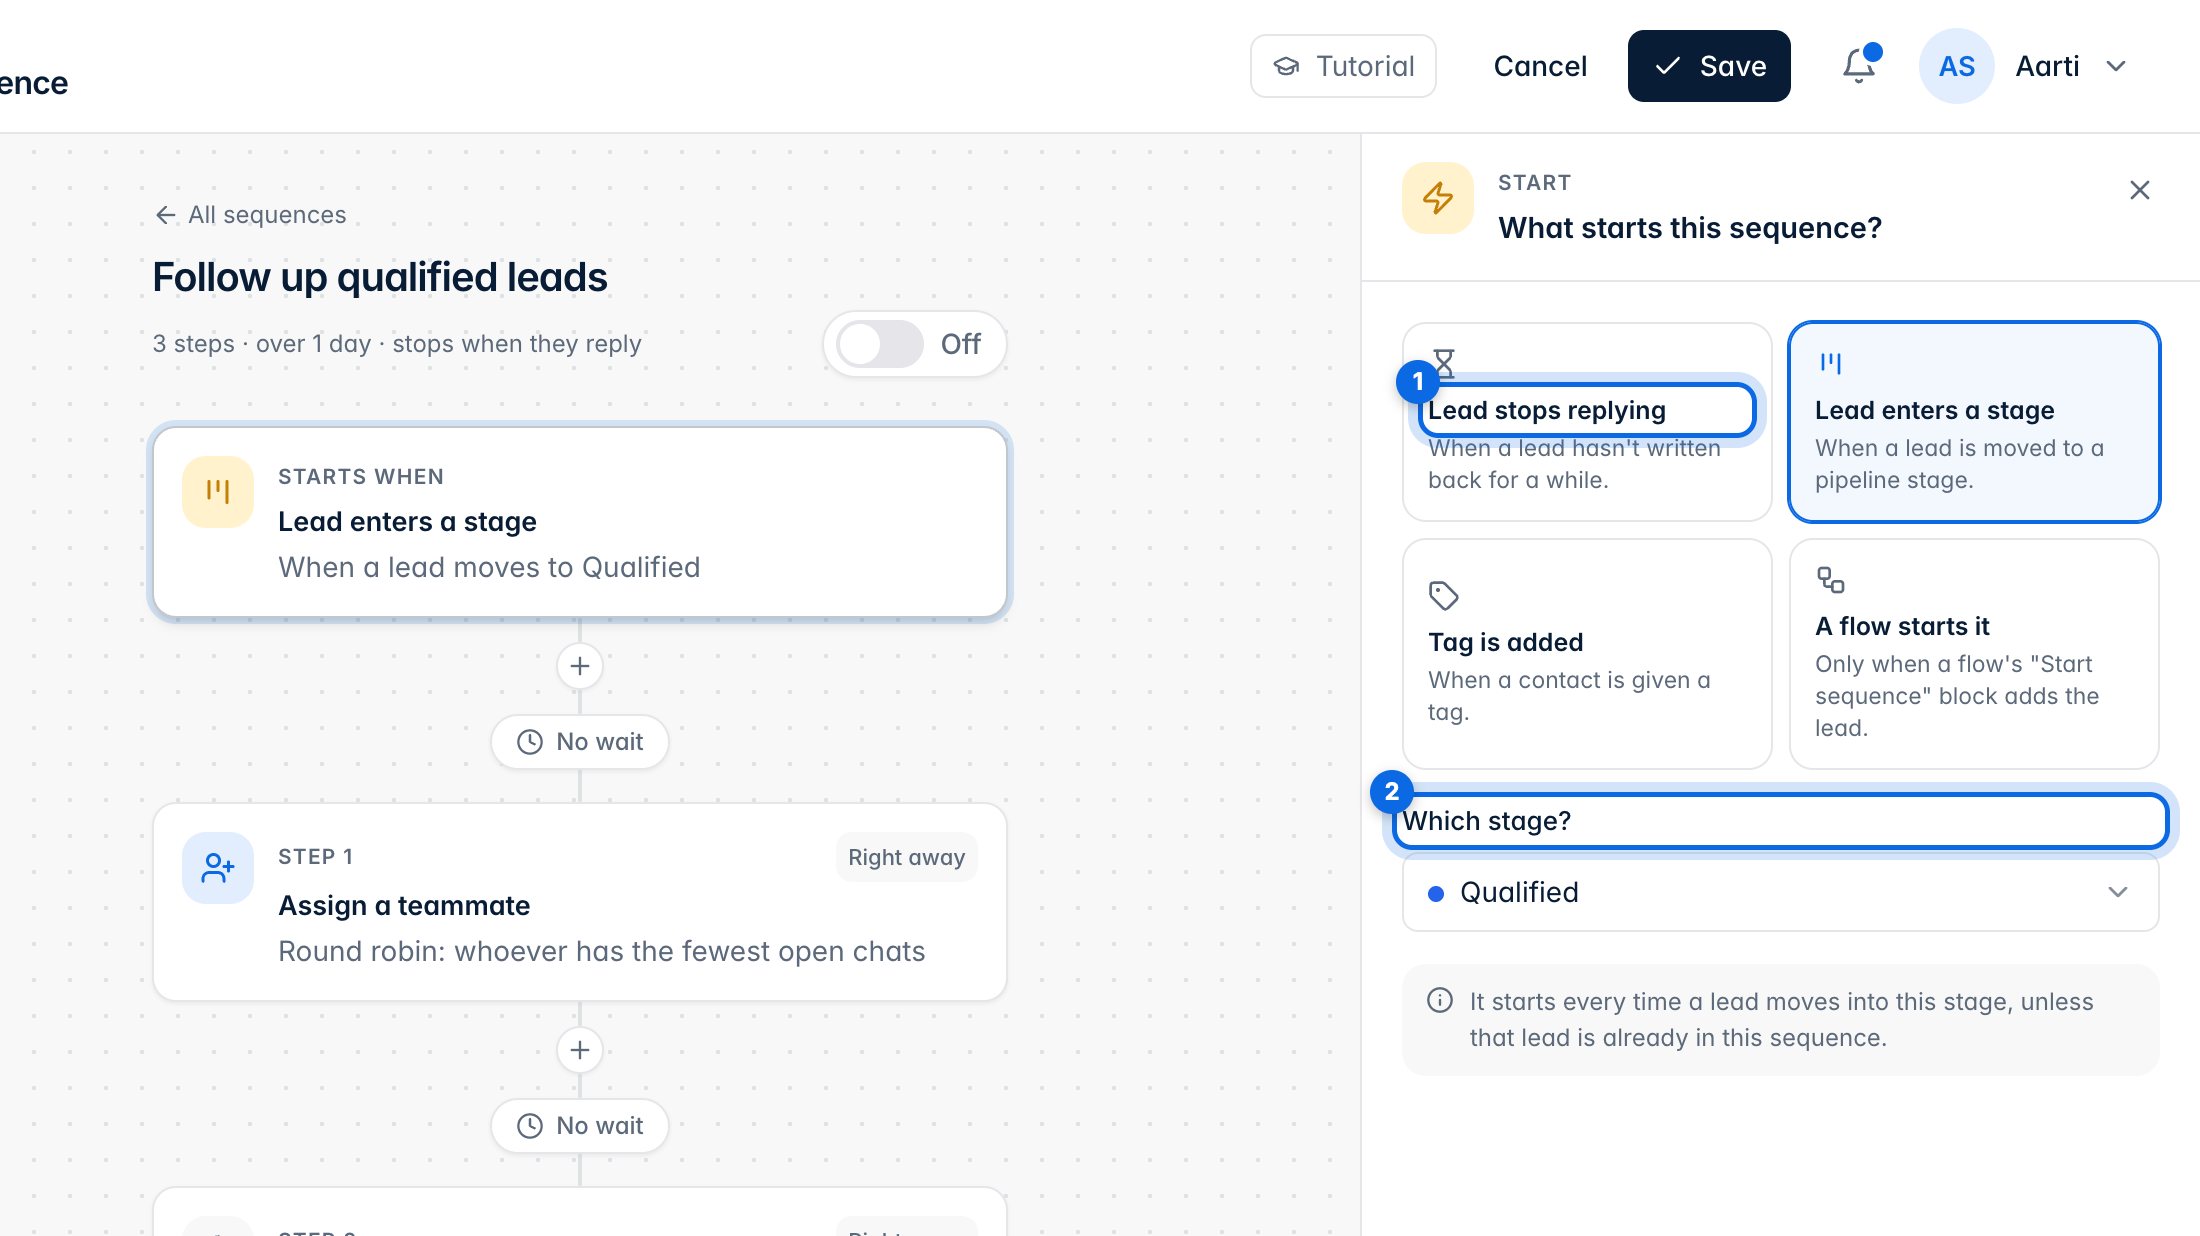
Click Starts when and choose what adds a lead (1): they stop replying, they enter a pipeline stage, a tag is added, or a flow starts it. For a stage, pick which one (2). A lead already in the sequence isn't added twice.
5. Edit the steps
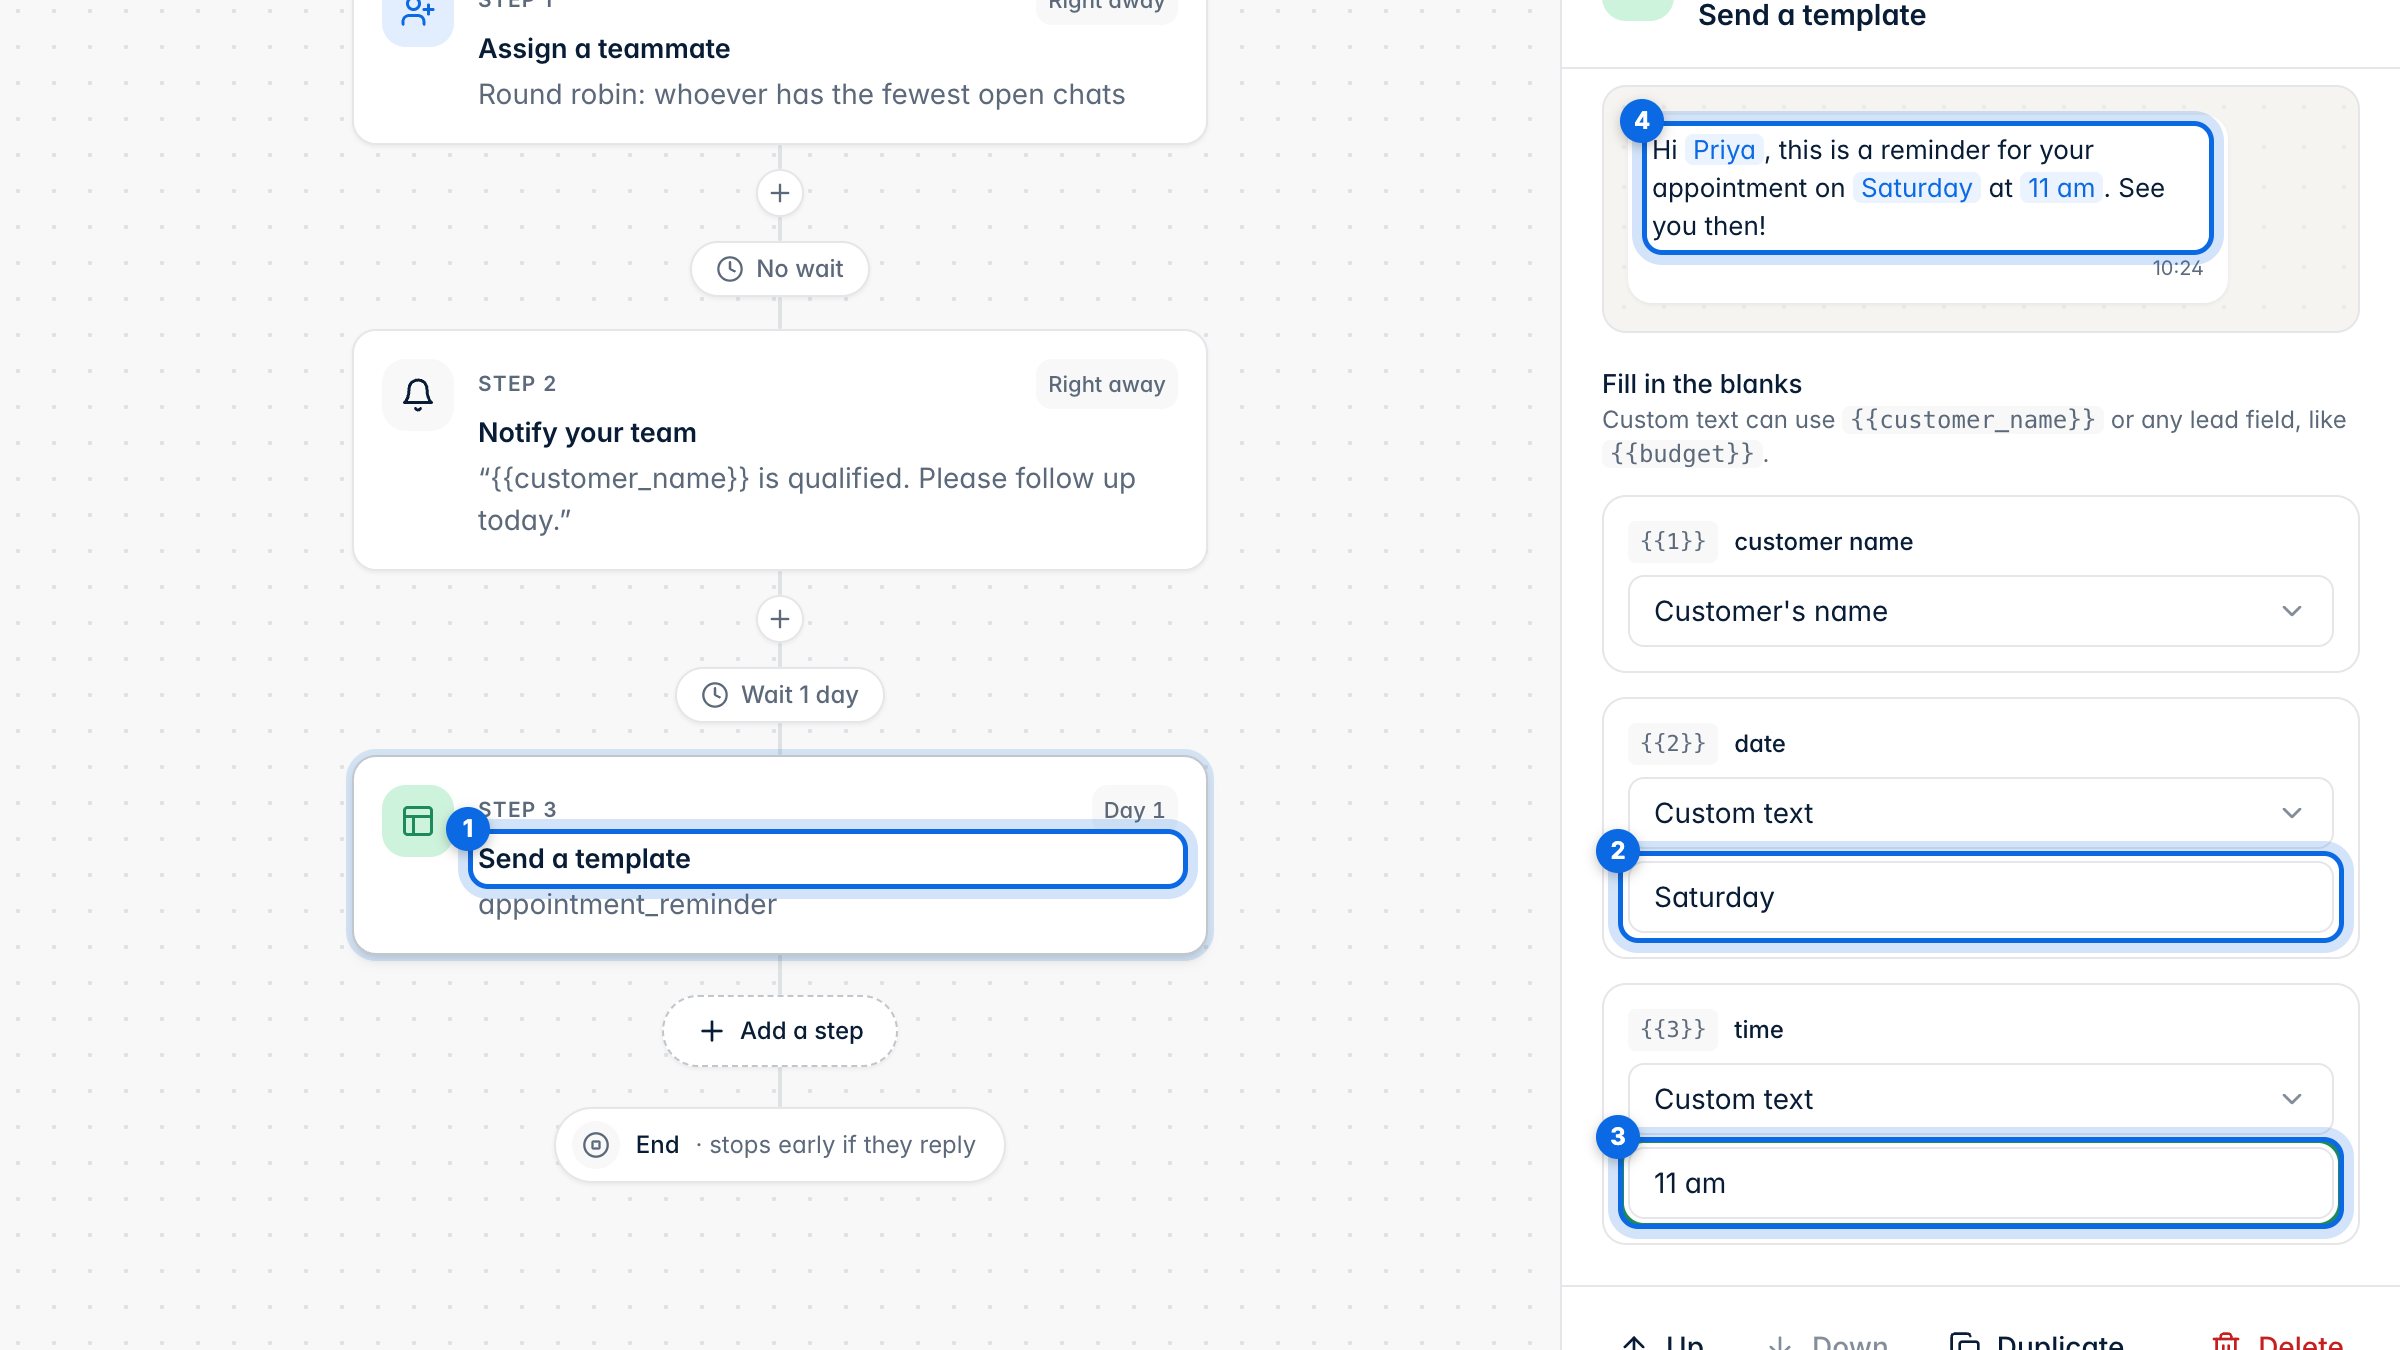
Click a step (1) to edit it. For a template, fill every blank (2, 3) with the customer's name, a lead field or your own text. The preview (4) shows the message.
6. Timing and new steps
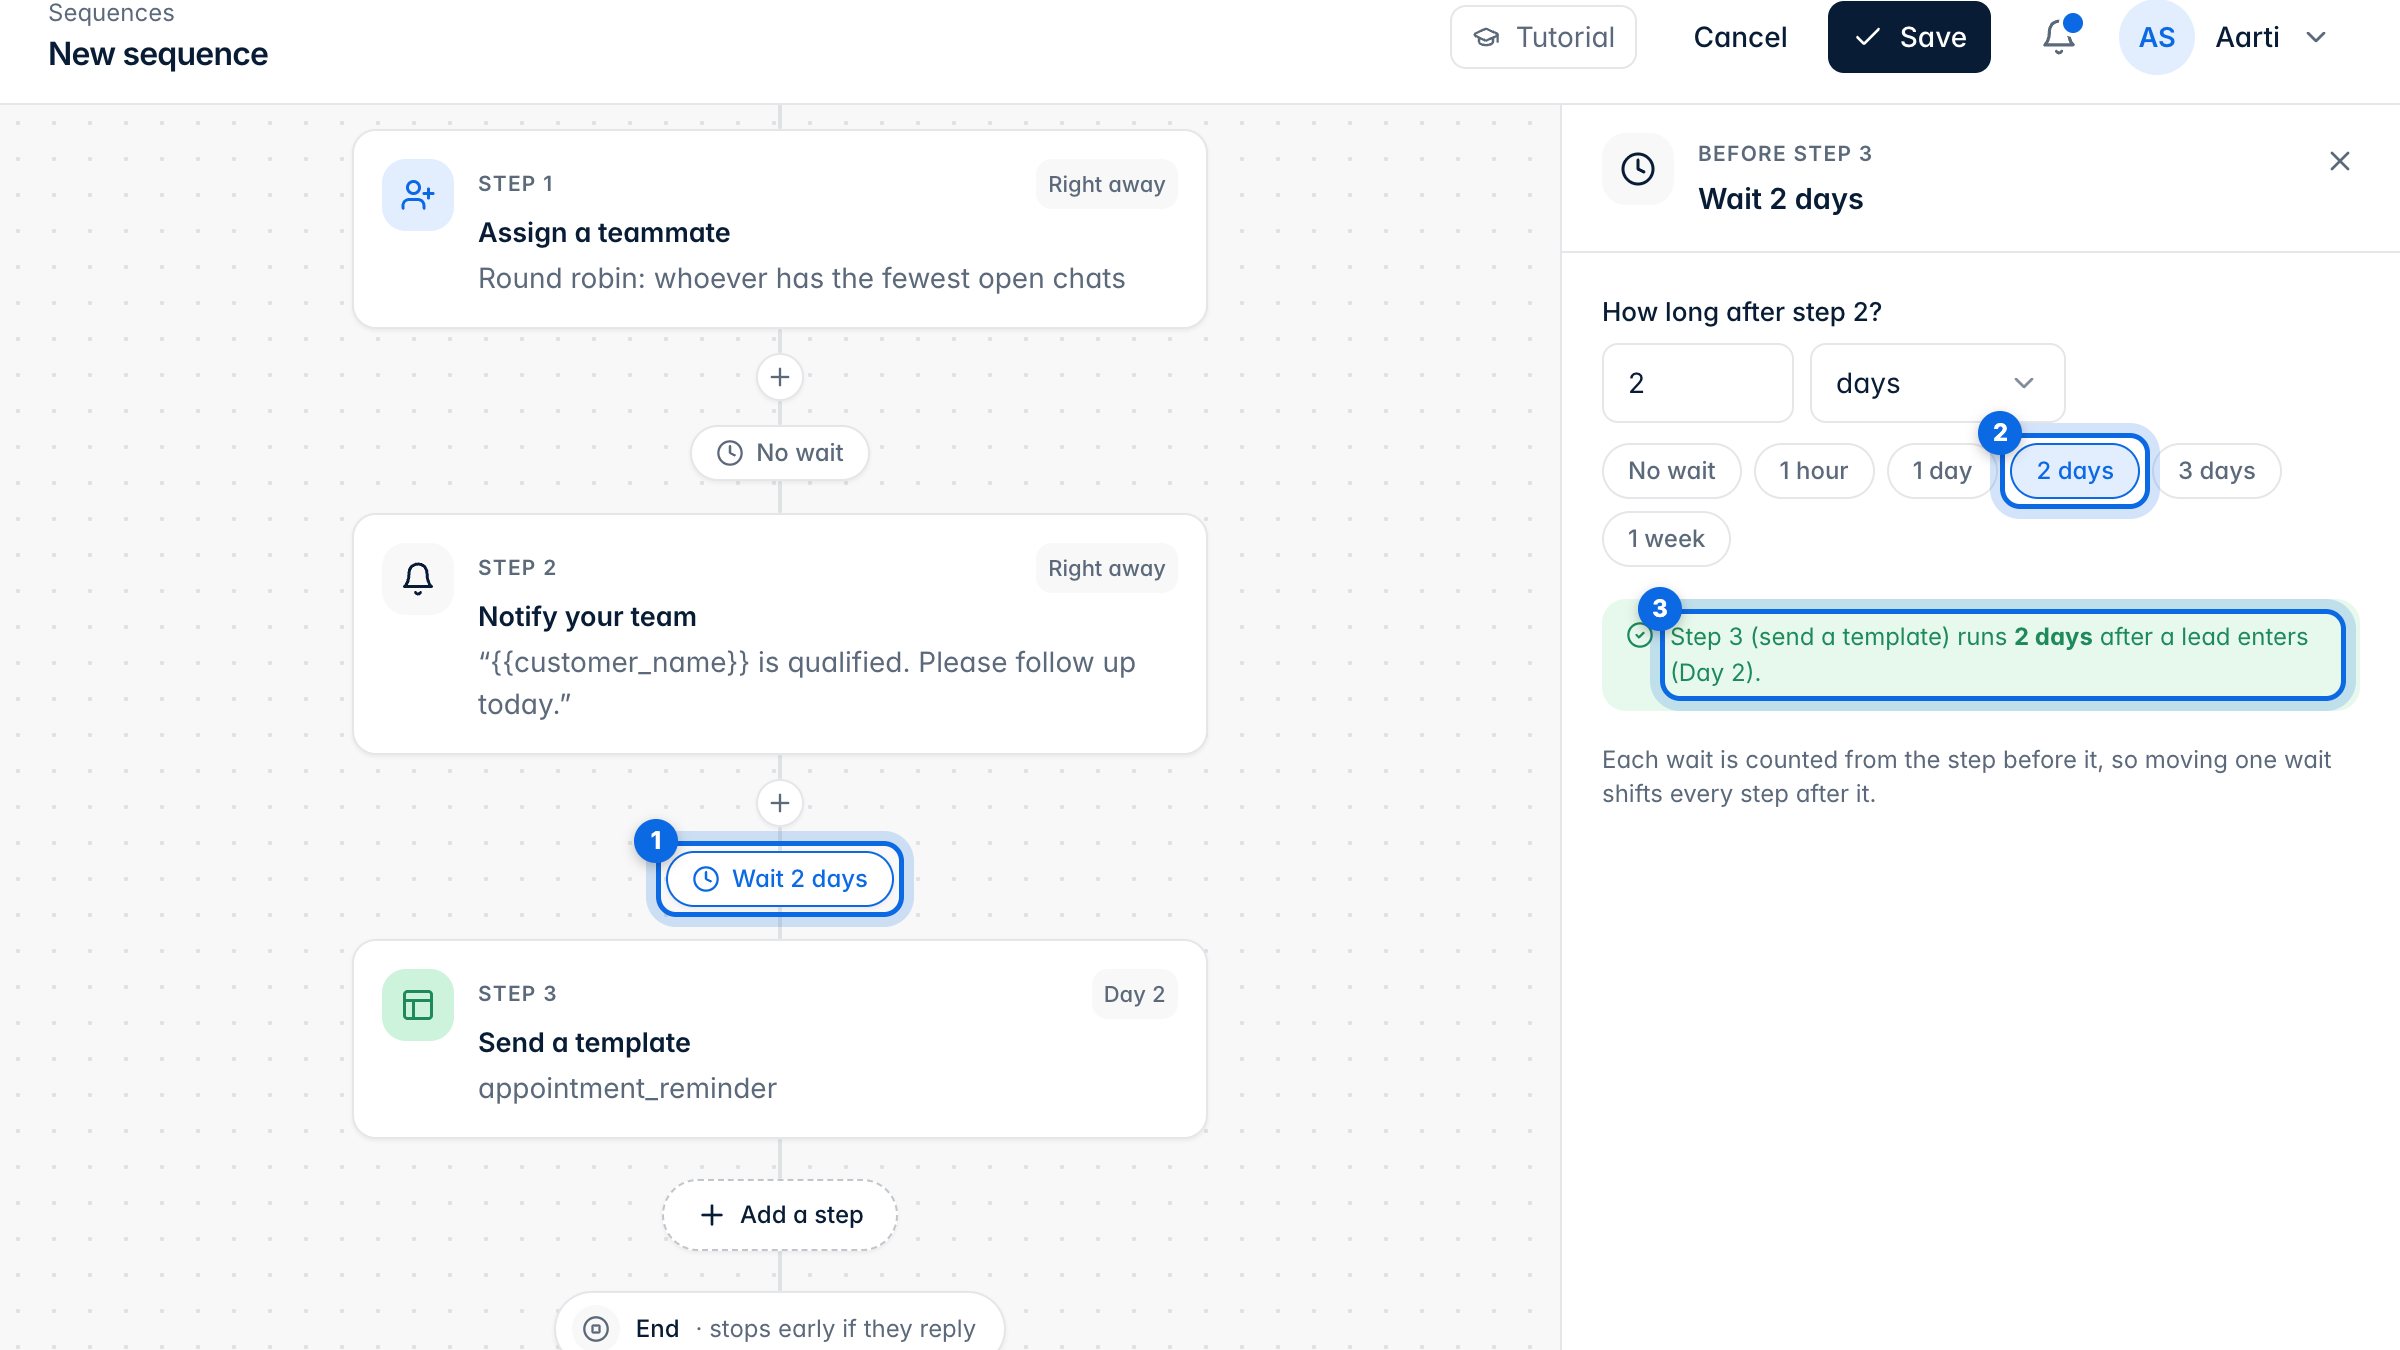
Click a wait (1) to change it (2). Each wait counts from the step before it, and the note (3) shows which day the next step lands.
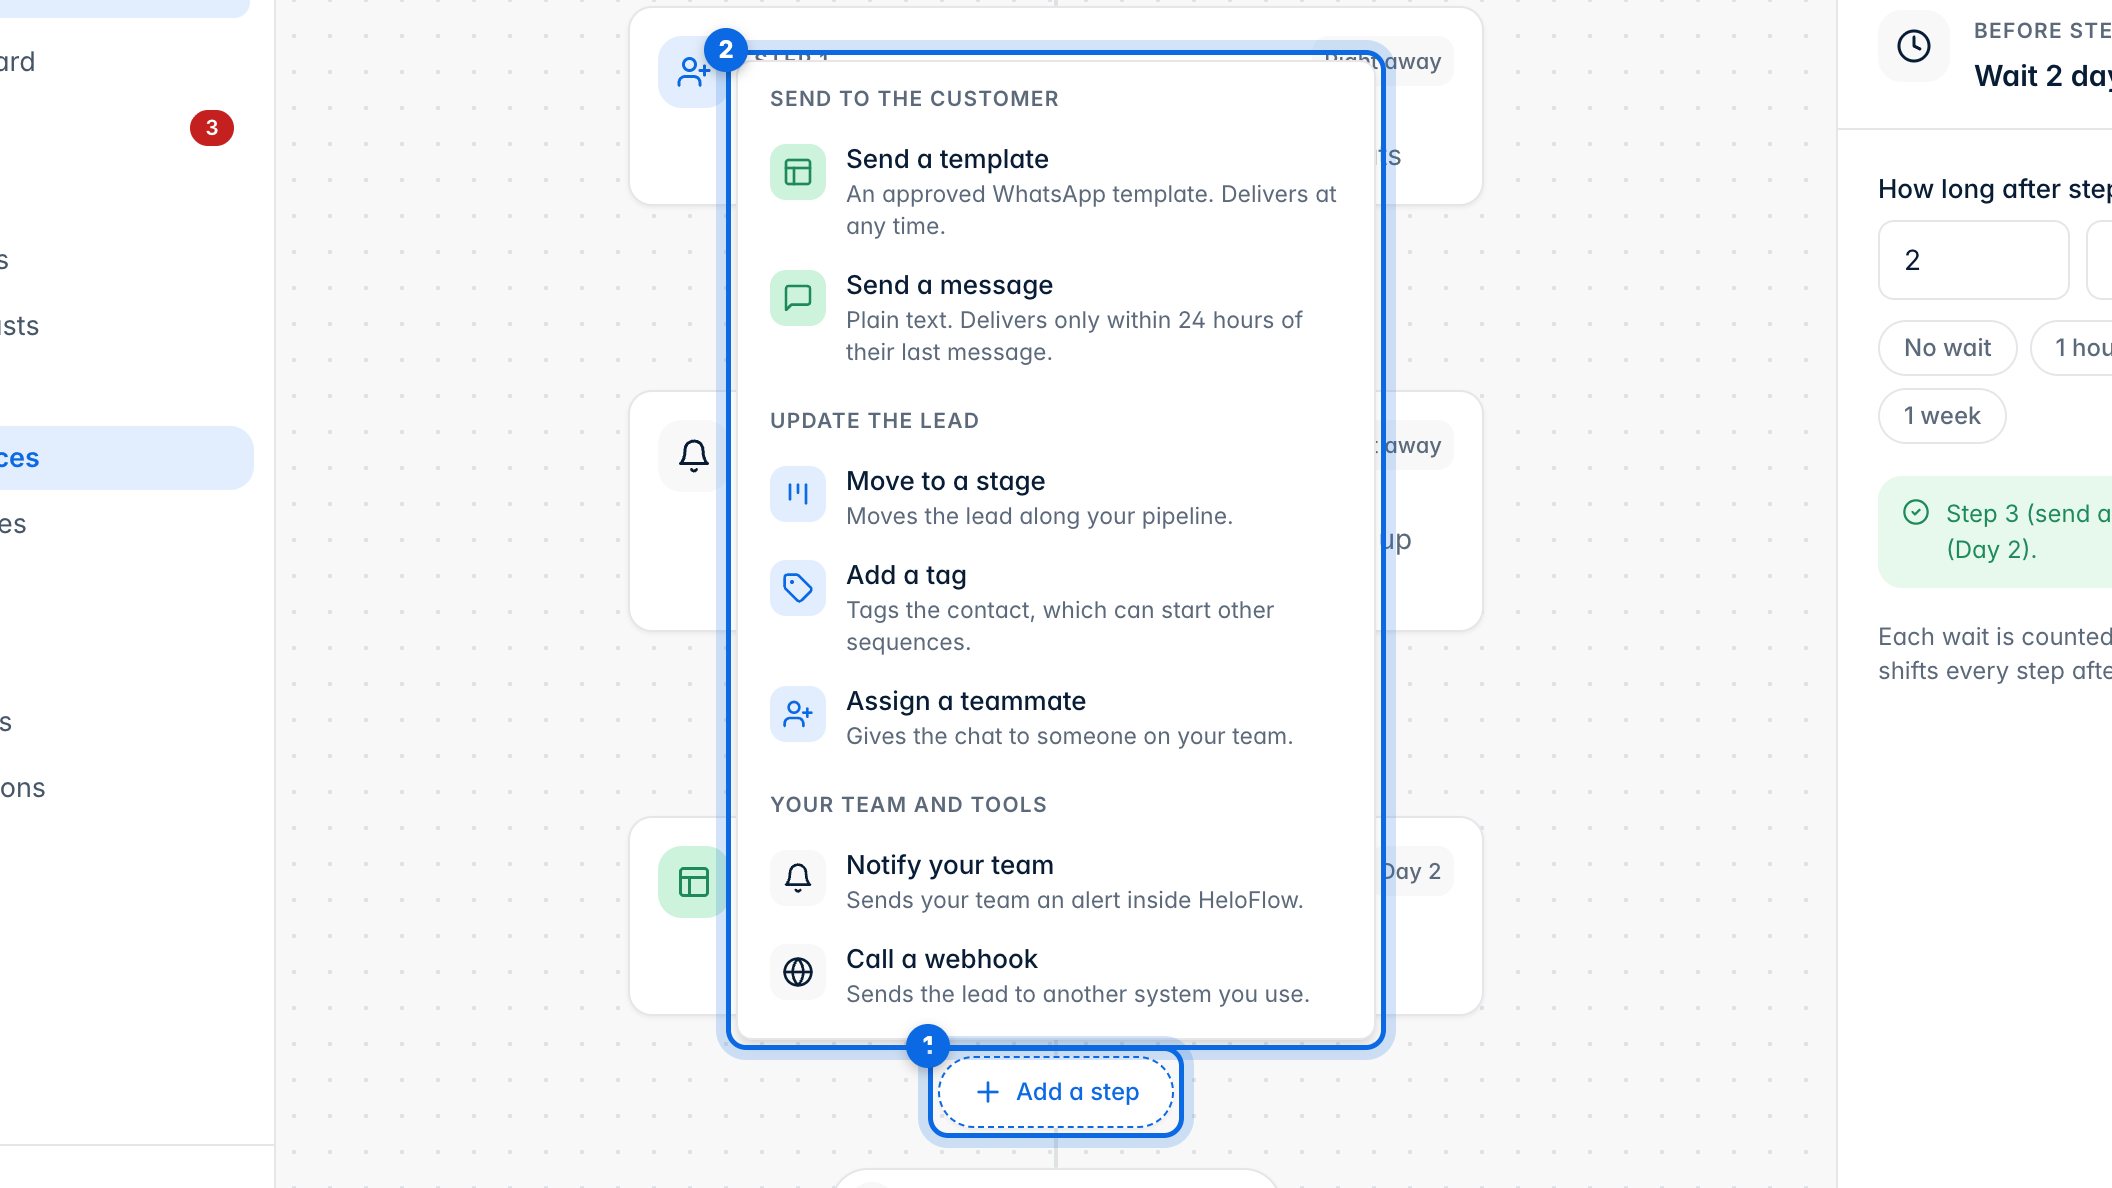
Add a step (1) offers (2): send a template or a message, move the lead to a stage, add a tag, assign a teammate, notify your team, or call a webhook. A plain message only reaches people who wrote in the last 24 hours.
7. Switch on and save
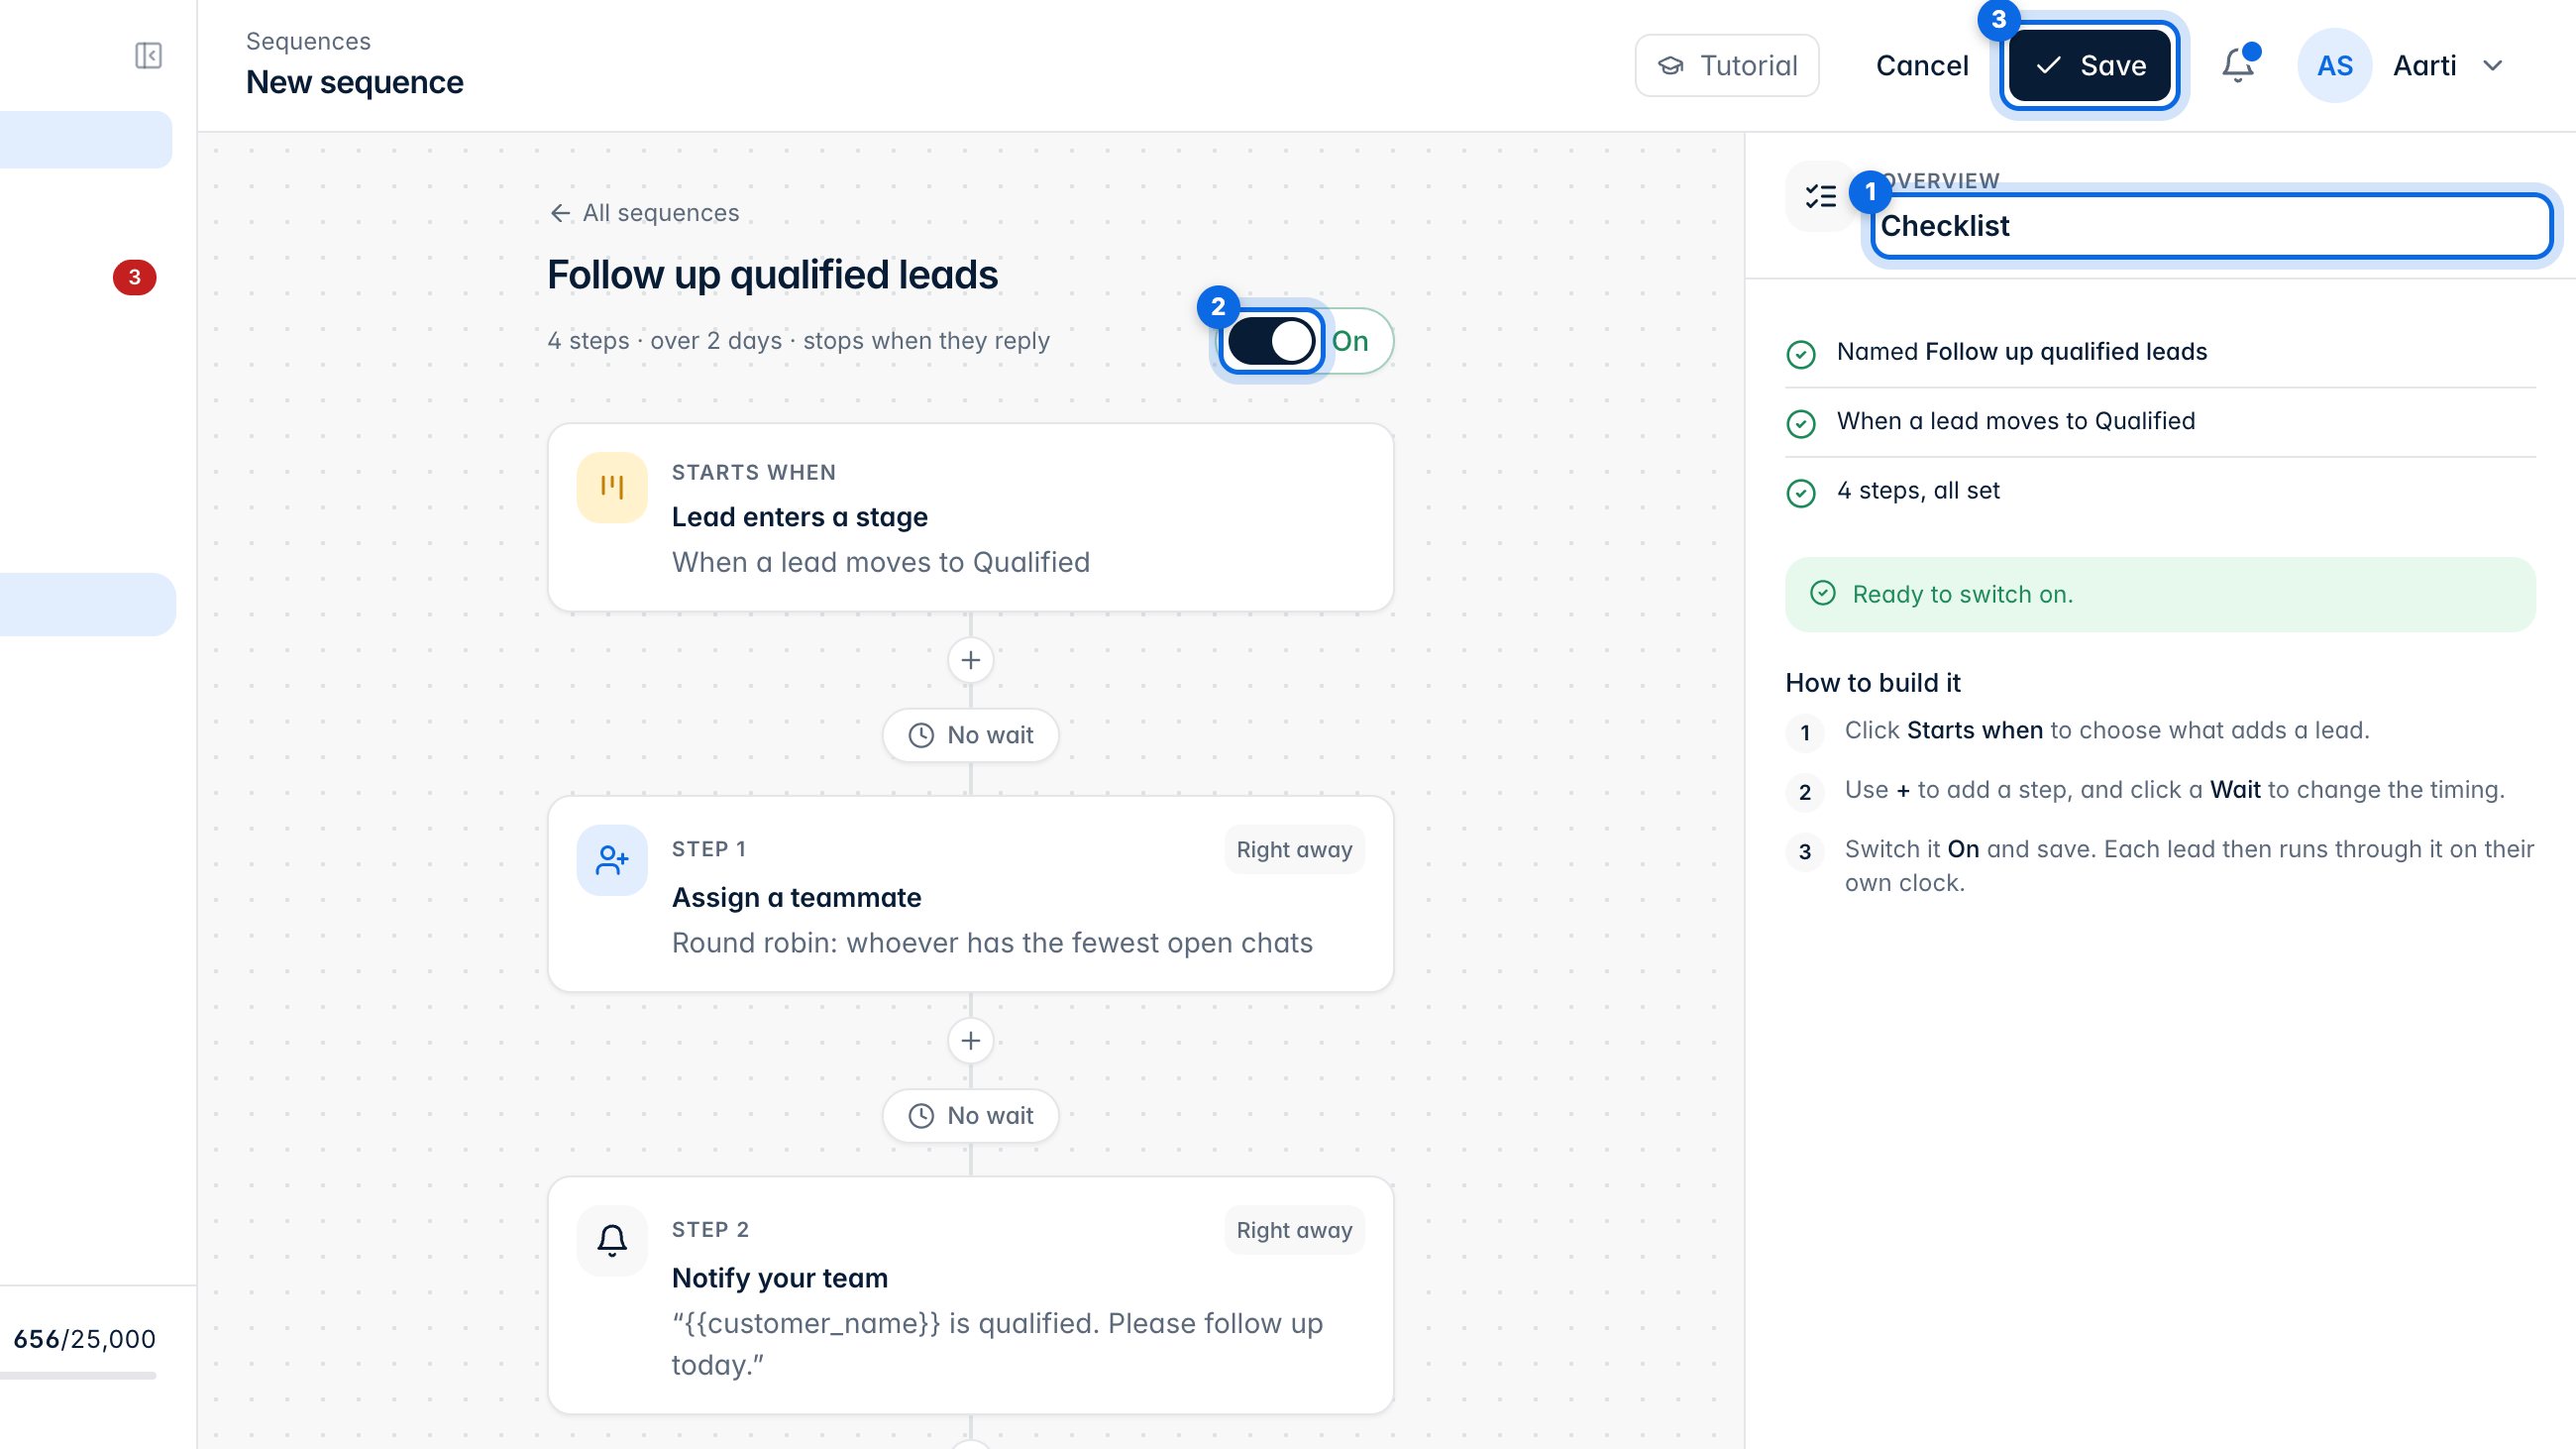
When the checklist (1) is all green, turn the switch on (2) and click Save (3). From then on, every lead that matches joins it.
8. Who's in it
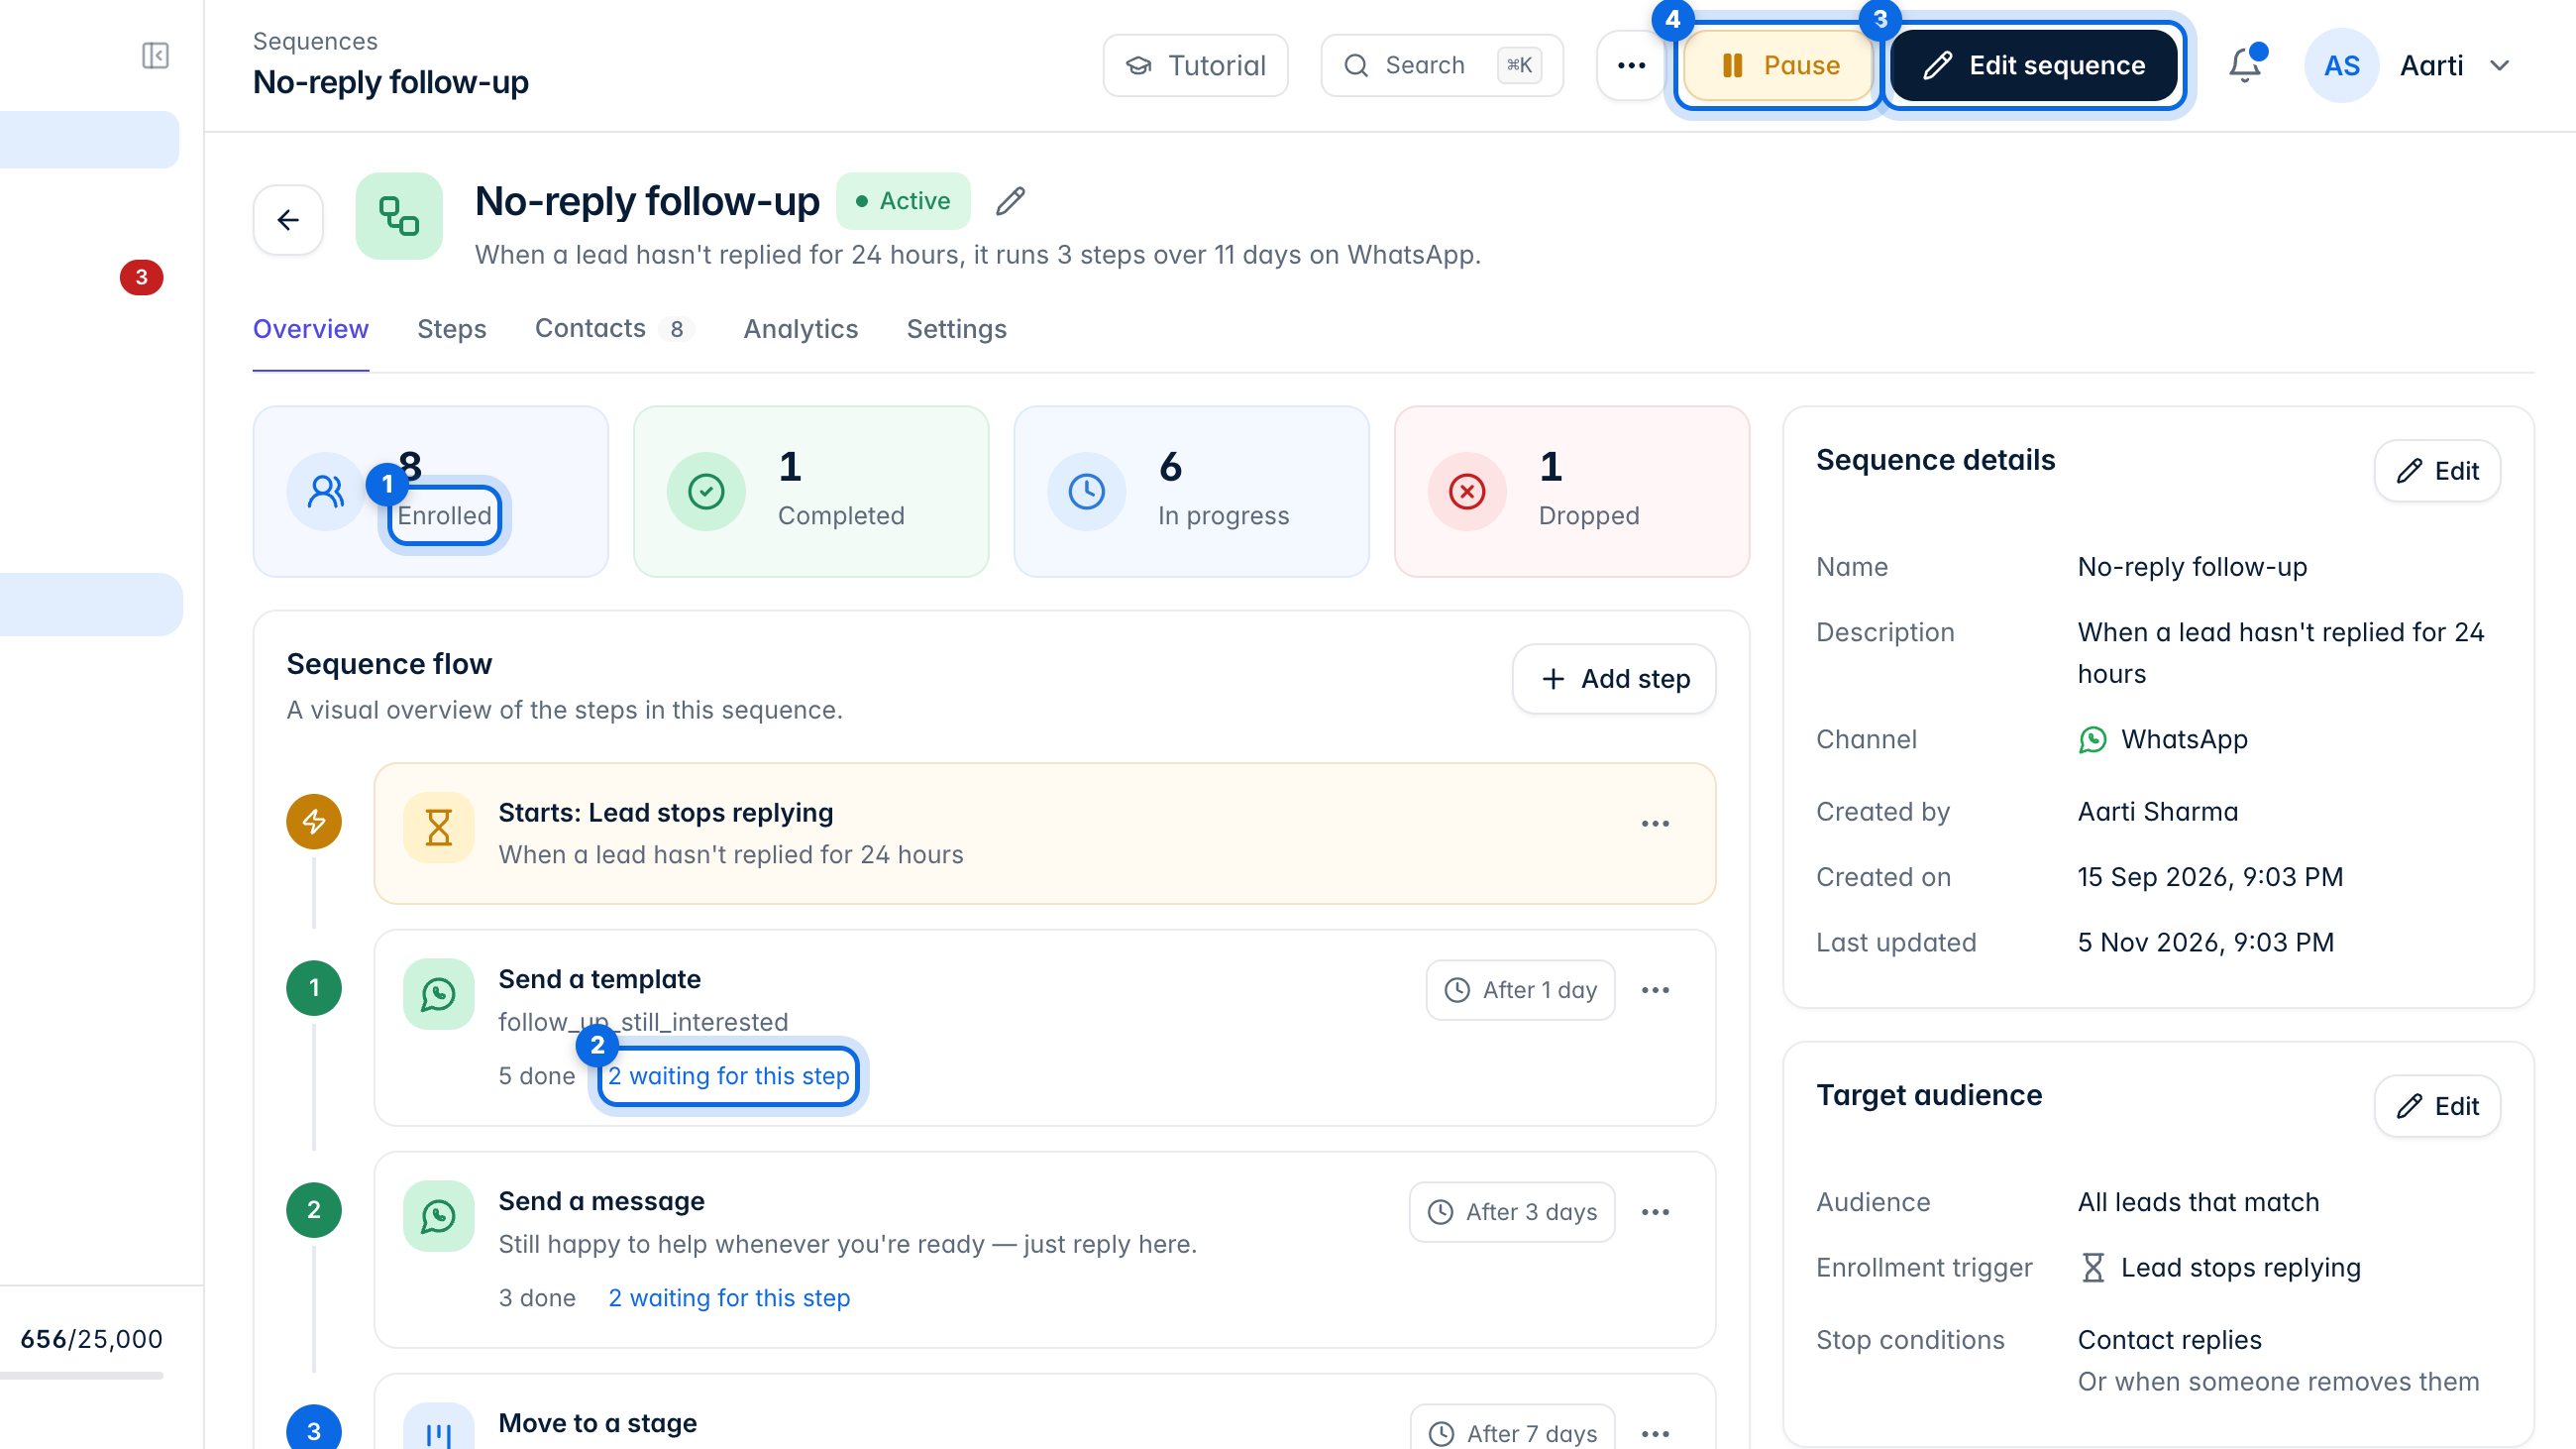
Click a sequence to see how many joined (1), and how many are waiting for each step (2). Edit sequence (3) opens the builder. Pause (4) takes nobody new and holds everyone's steps.
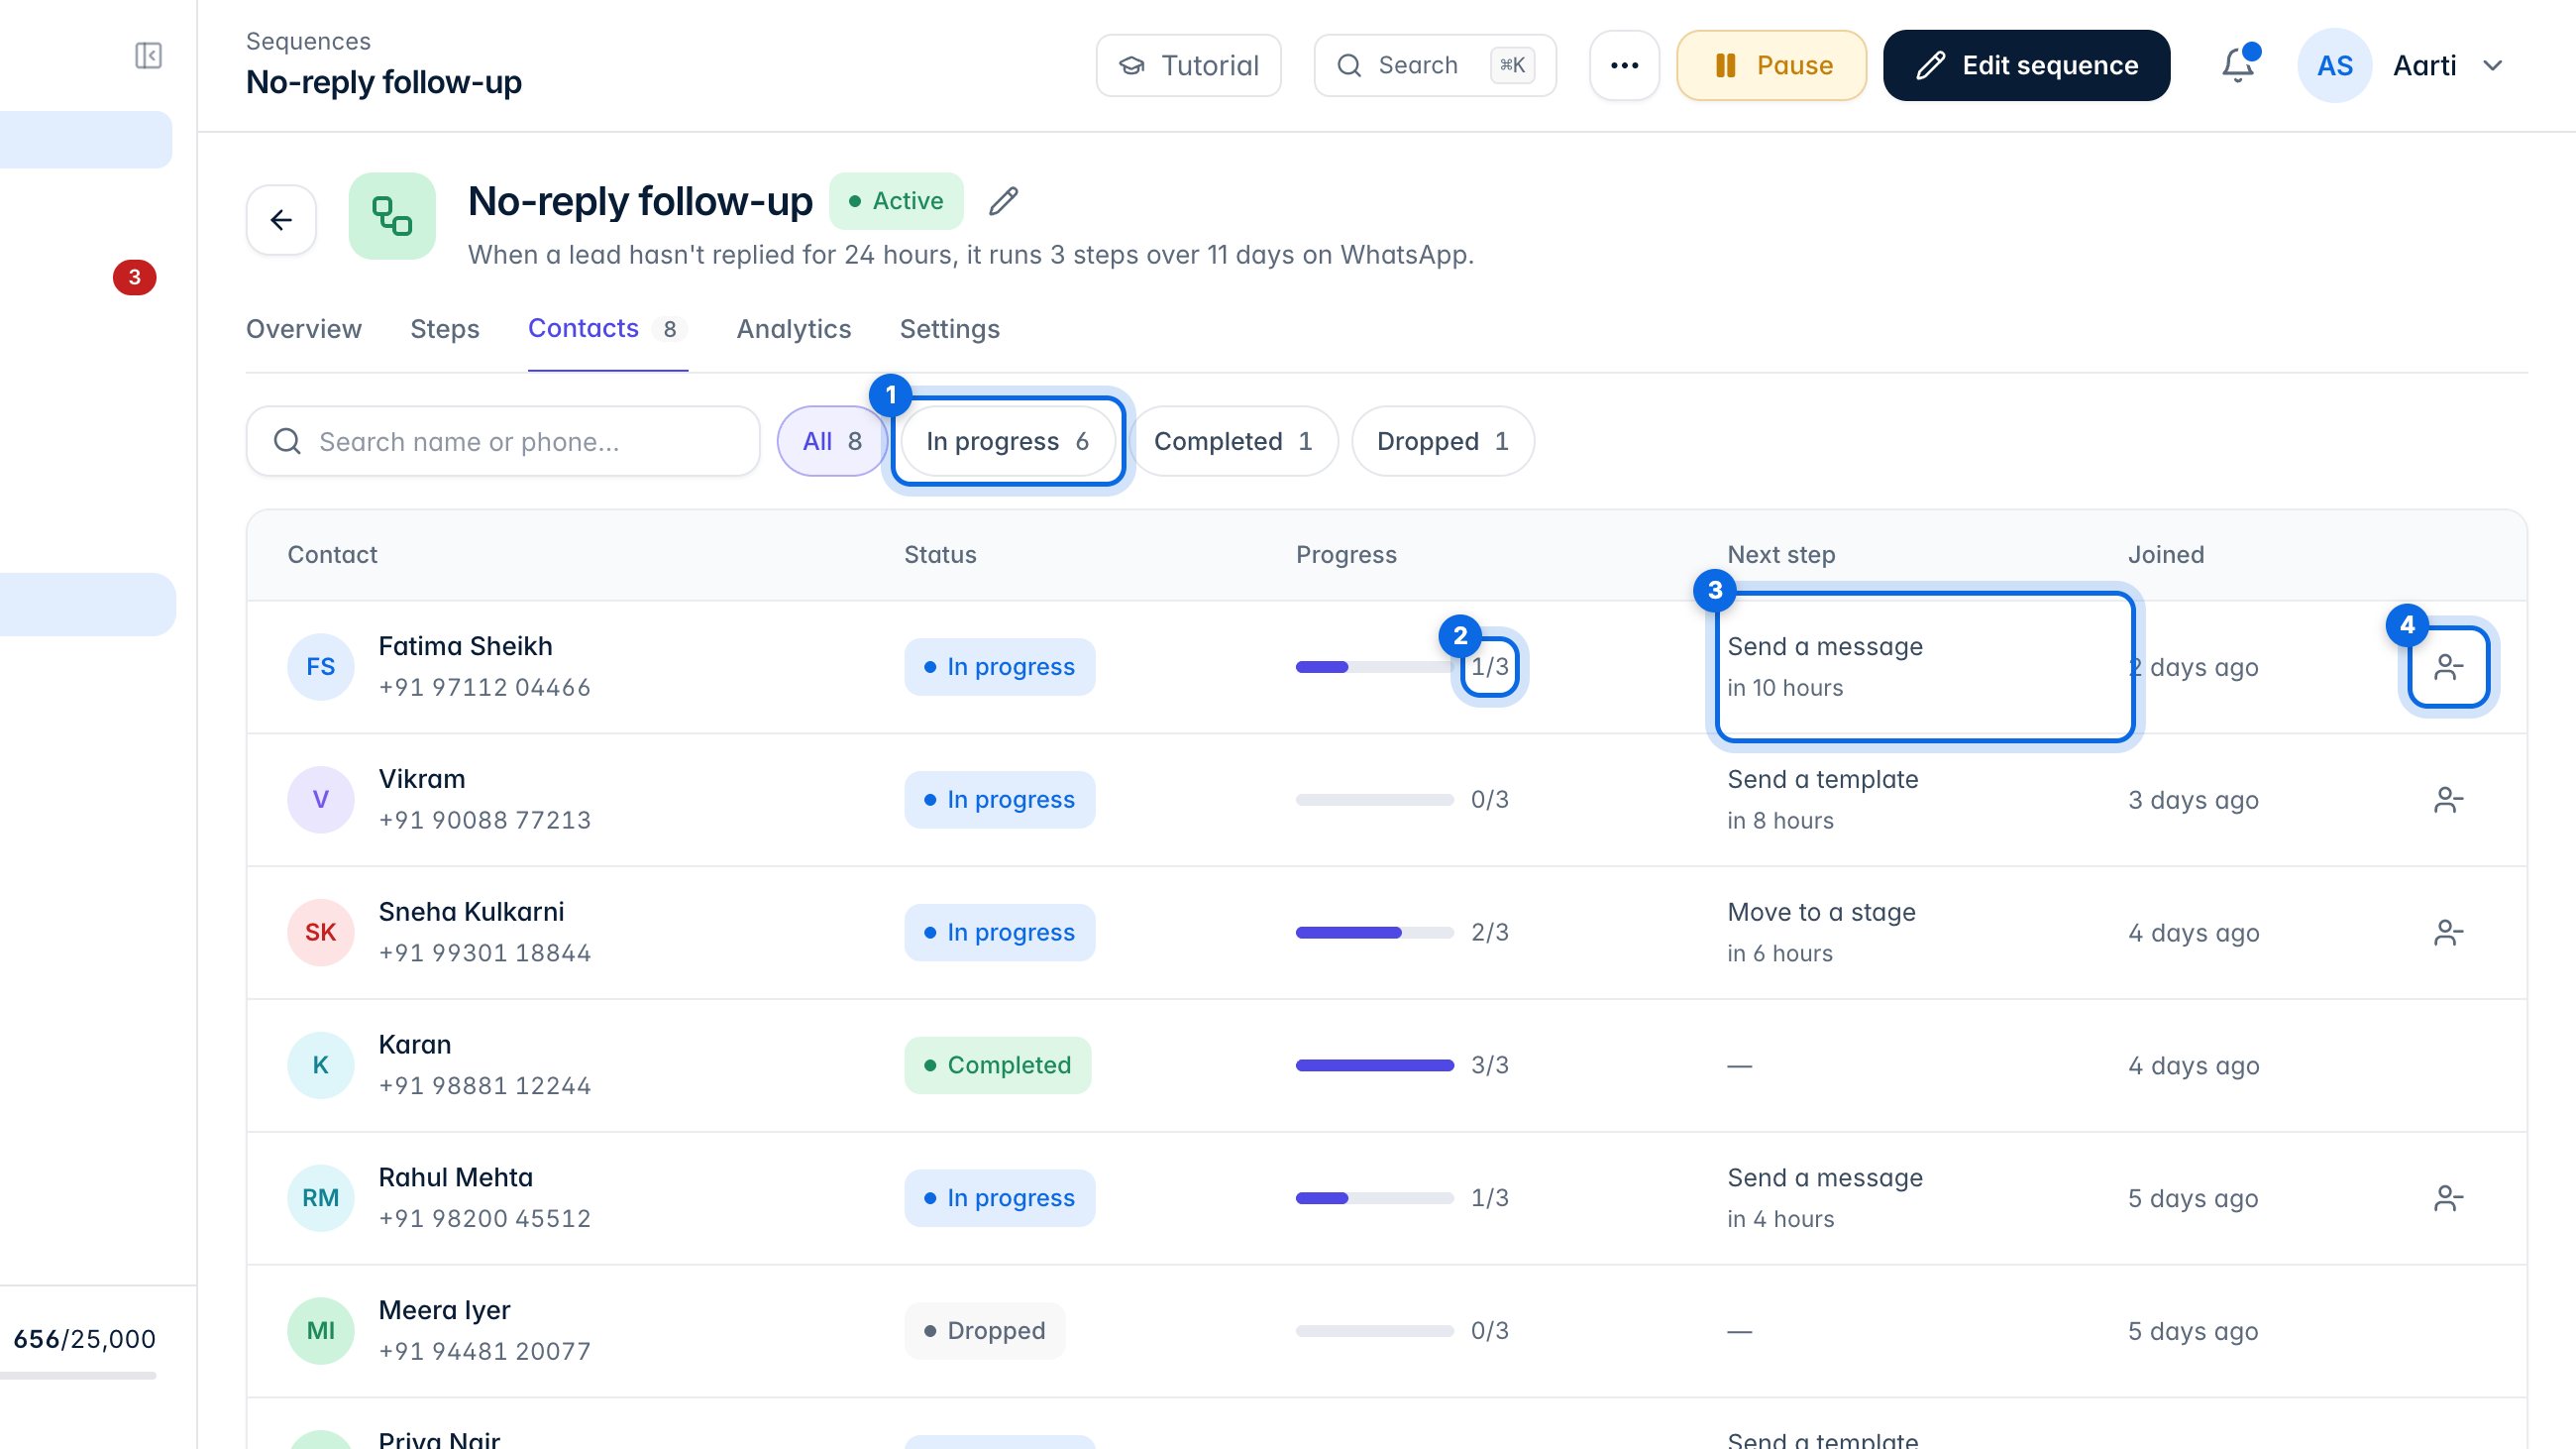
The Contacts tab lists everyone in it. Filter by status (1), see how far each person is (2) and their next step (3). The button at the end of a row (4) removes someone from the sequence.
9. Results and settings
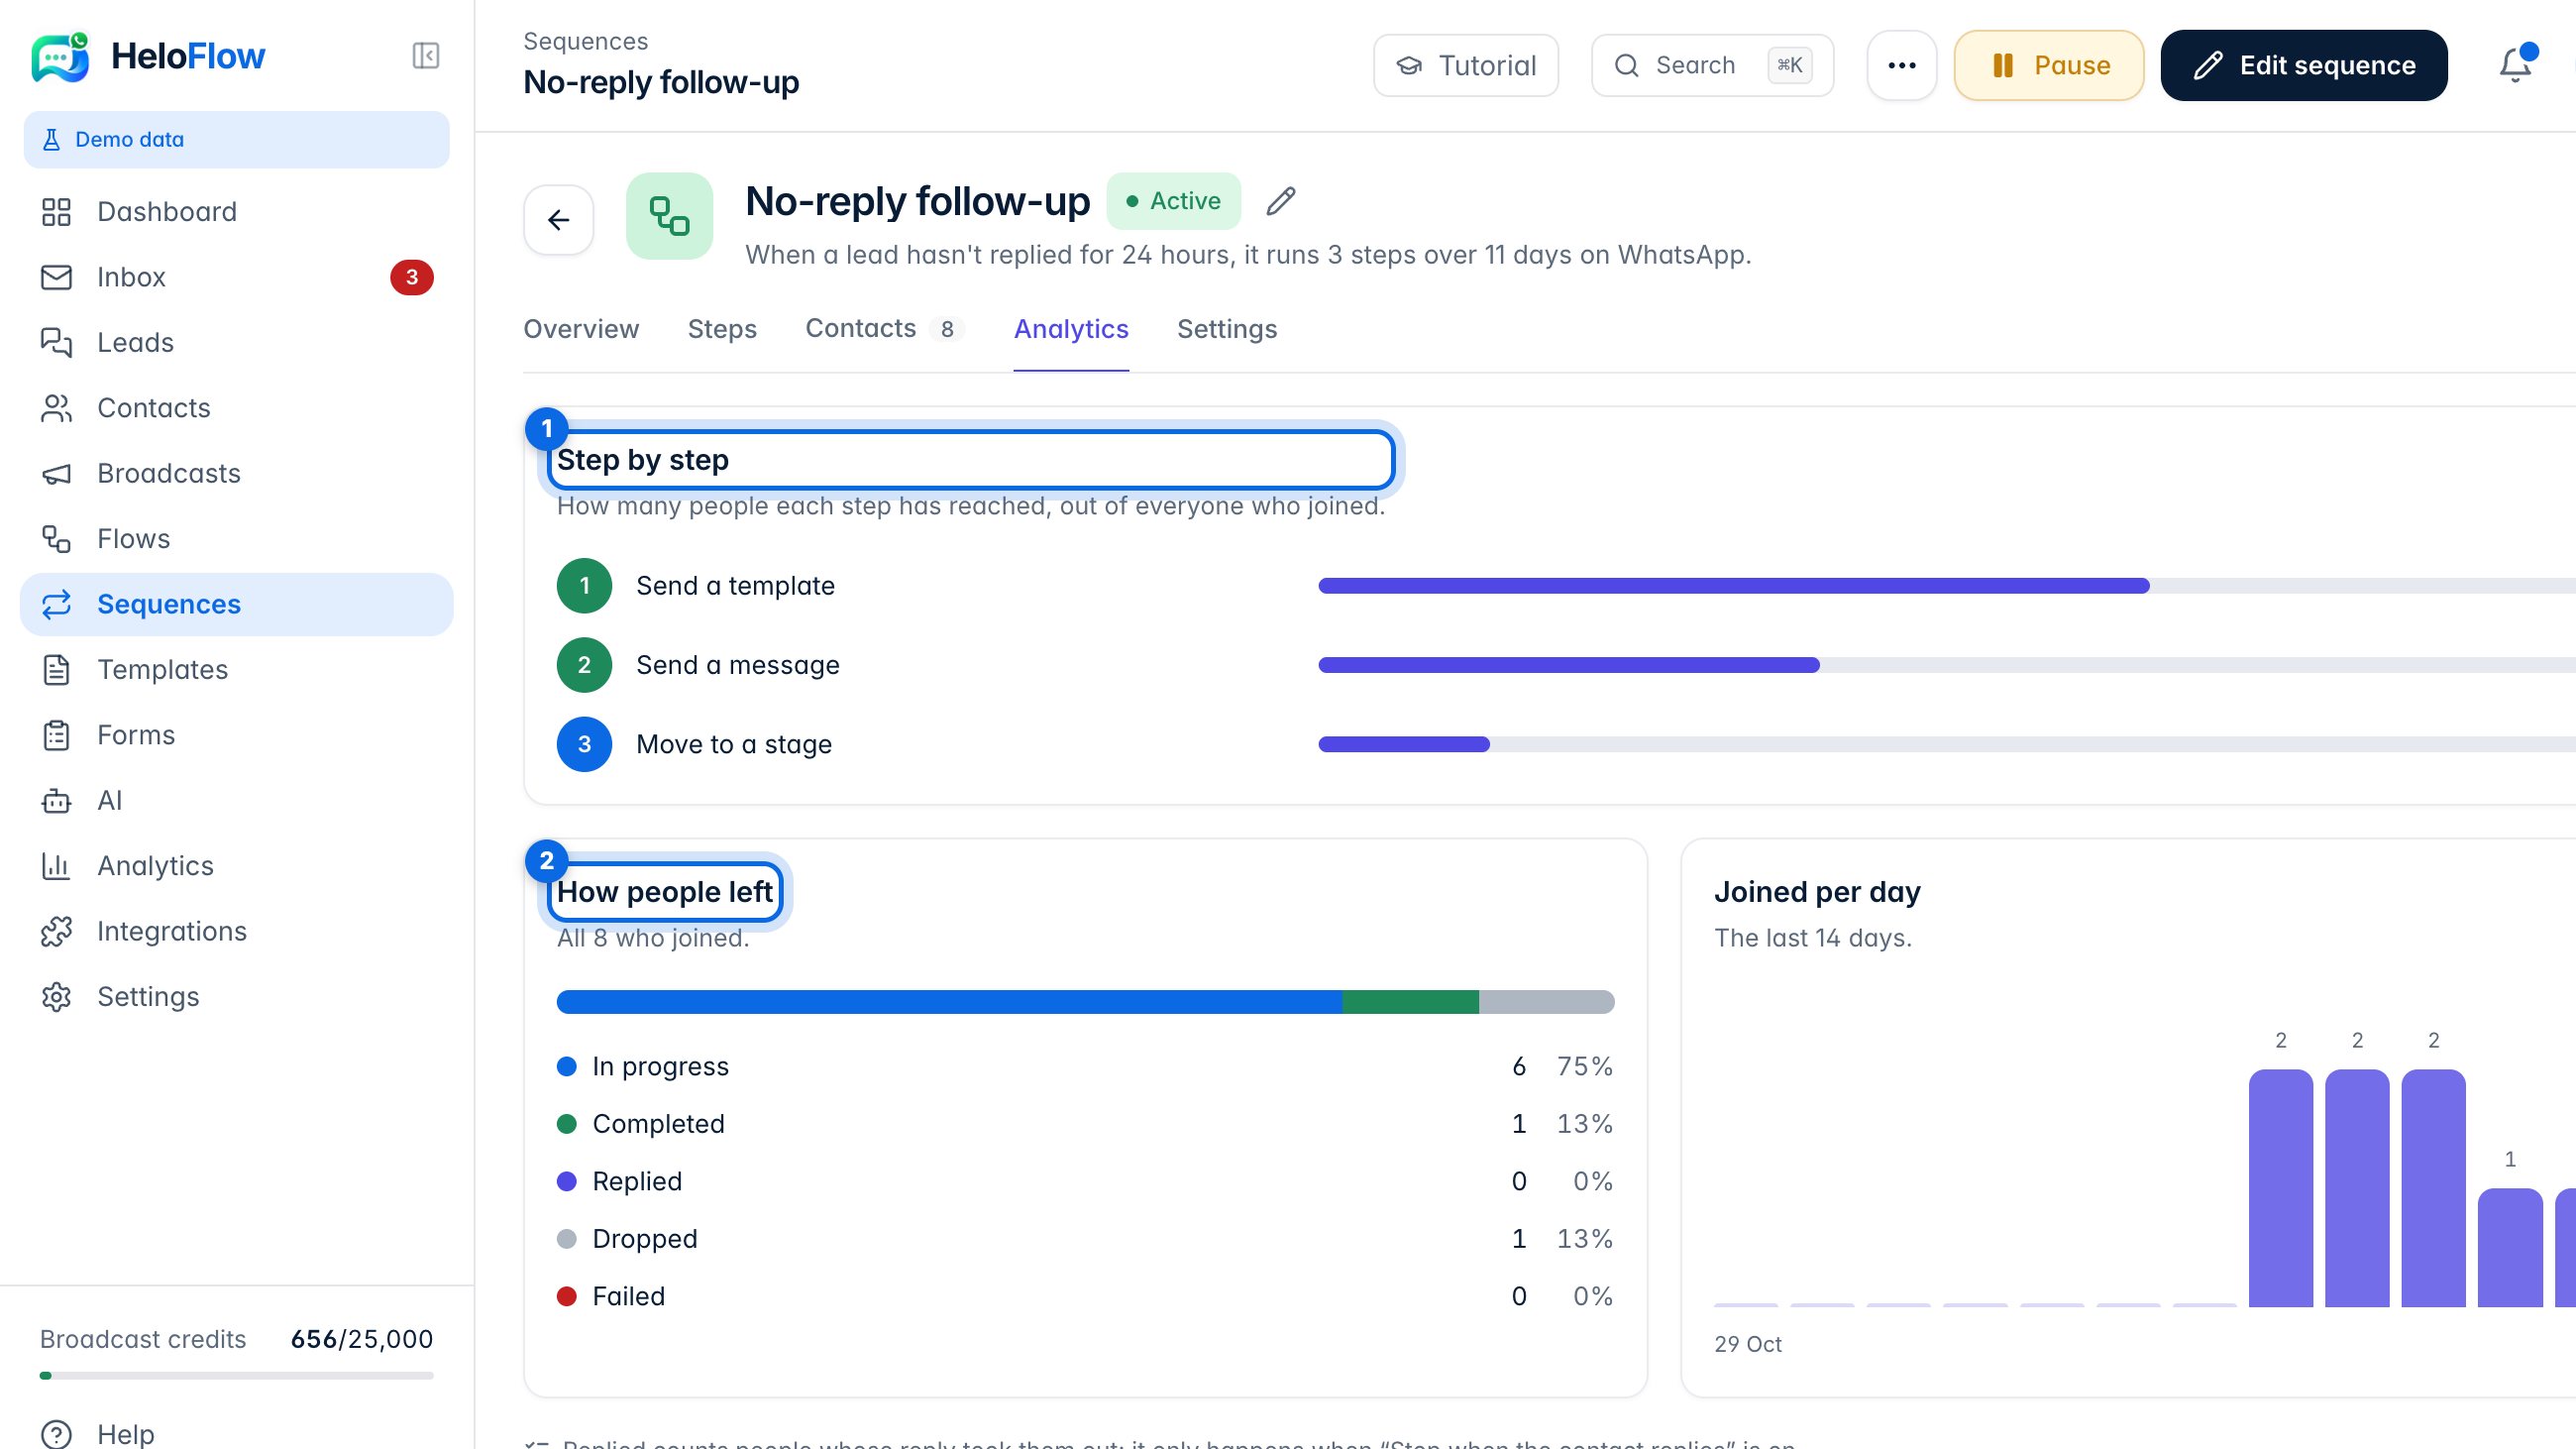
Analytics shows how many people each step reached (1) and how people left (2): completed, replied, dropped or failed.
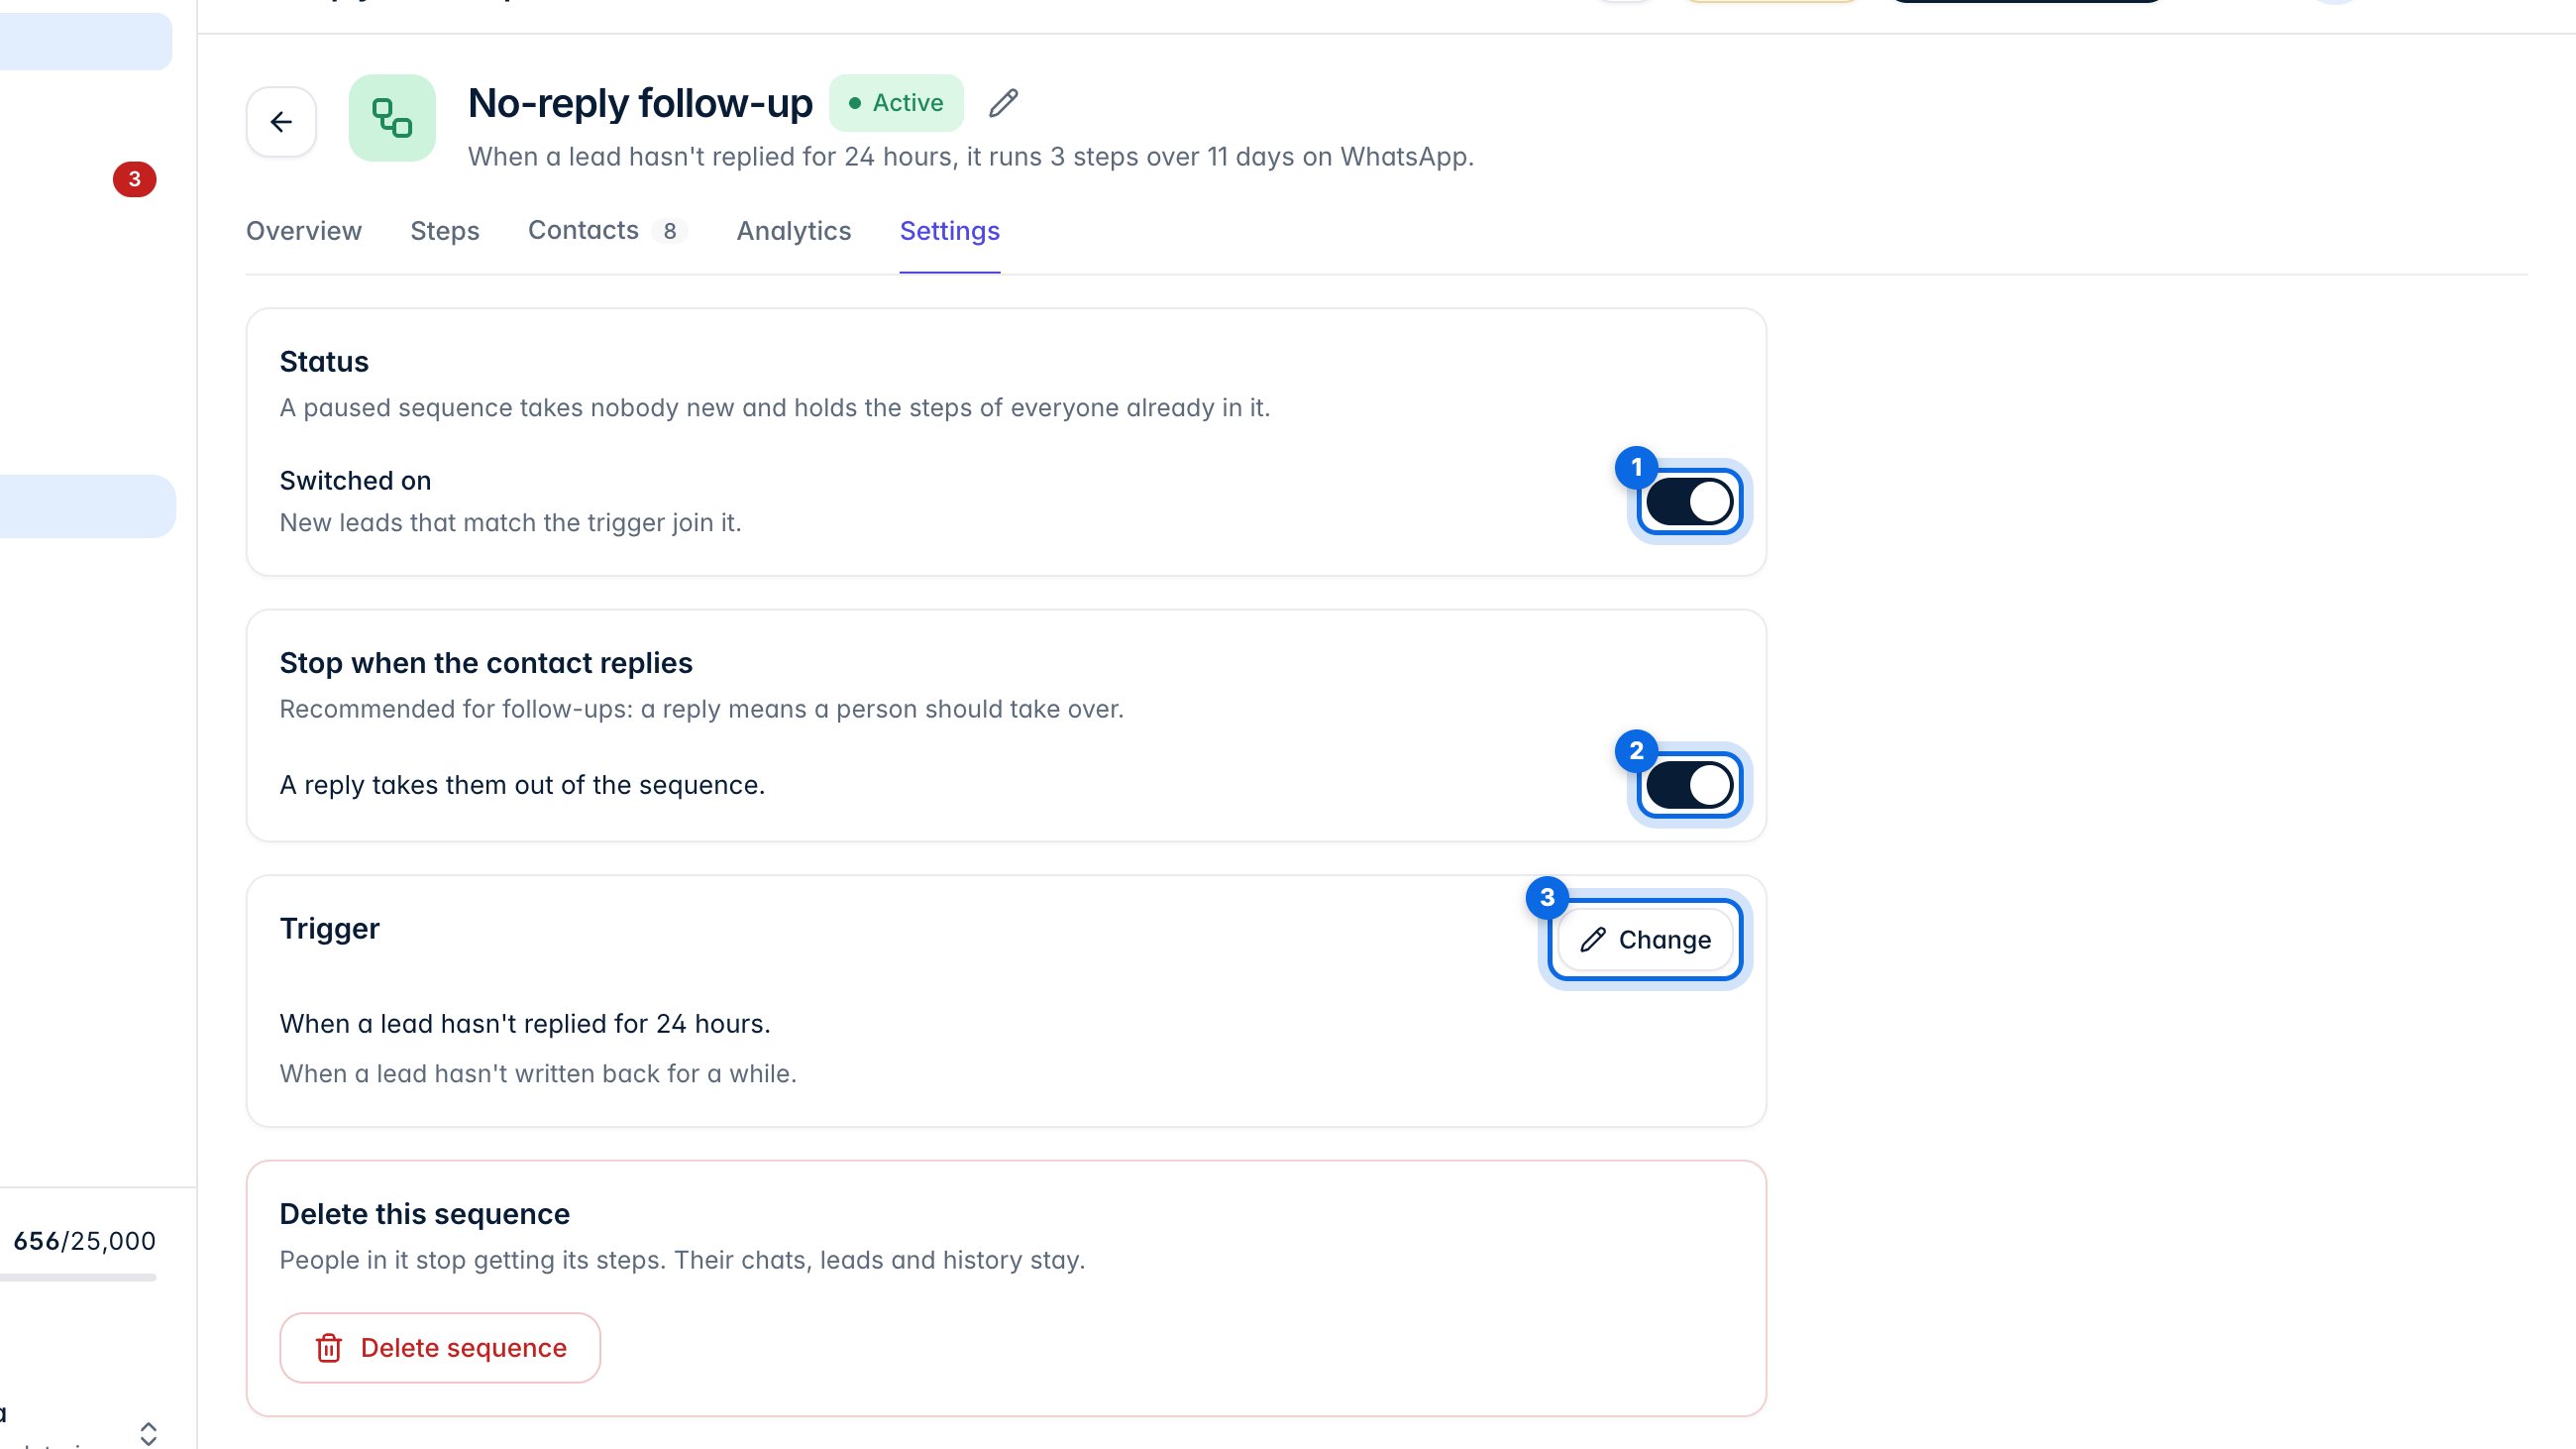
In Settings, switch the sequence on or off (1), and keep Stop when the contact replies on (2) so a person takes over when a customer answers. Change (3) picks a different trigger.