Flows
Build a flow that answers customers by itself, test it, then switch it on.
2 min video13 stepsEnglish and हिंदी
Language
Step by step
The same steps in writing, with a screenshot for each.
1. Your flows
A flow answers customers on WhatsApp by itself: it greets them, offers a menu, asks questions, tags and moves the lead, and hands over to your team when needed.
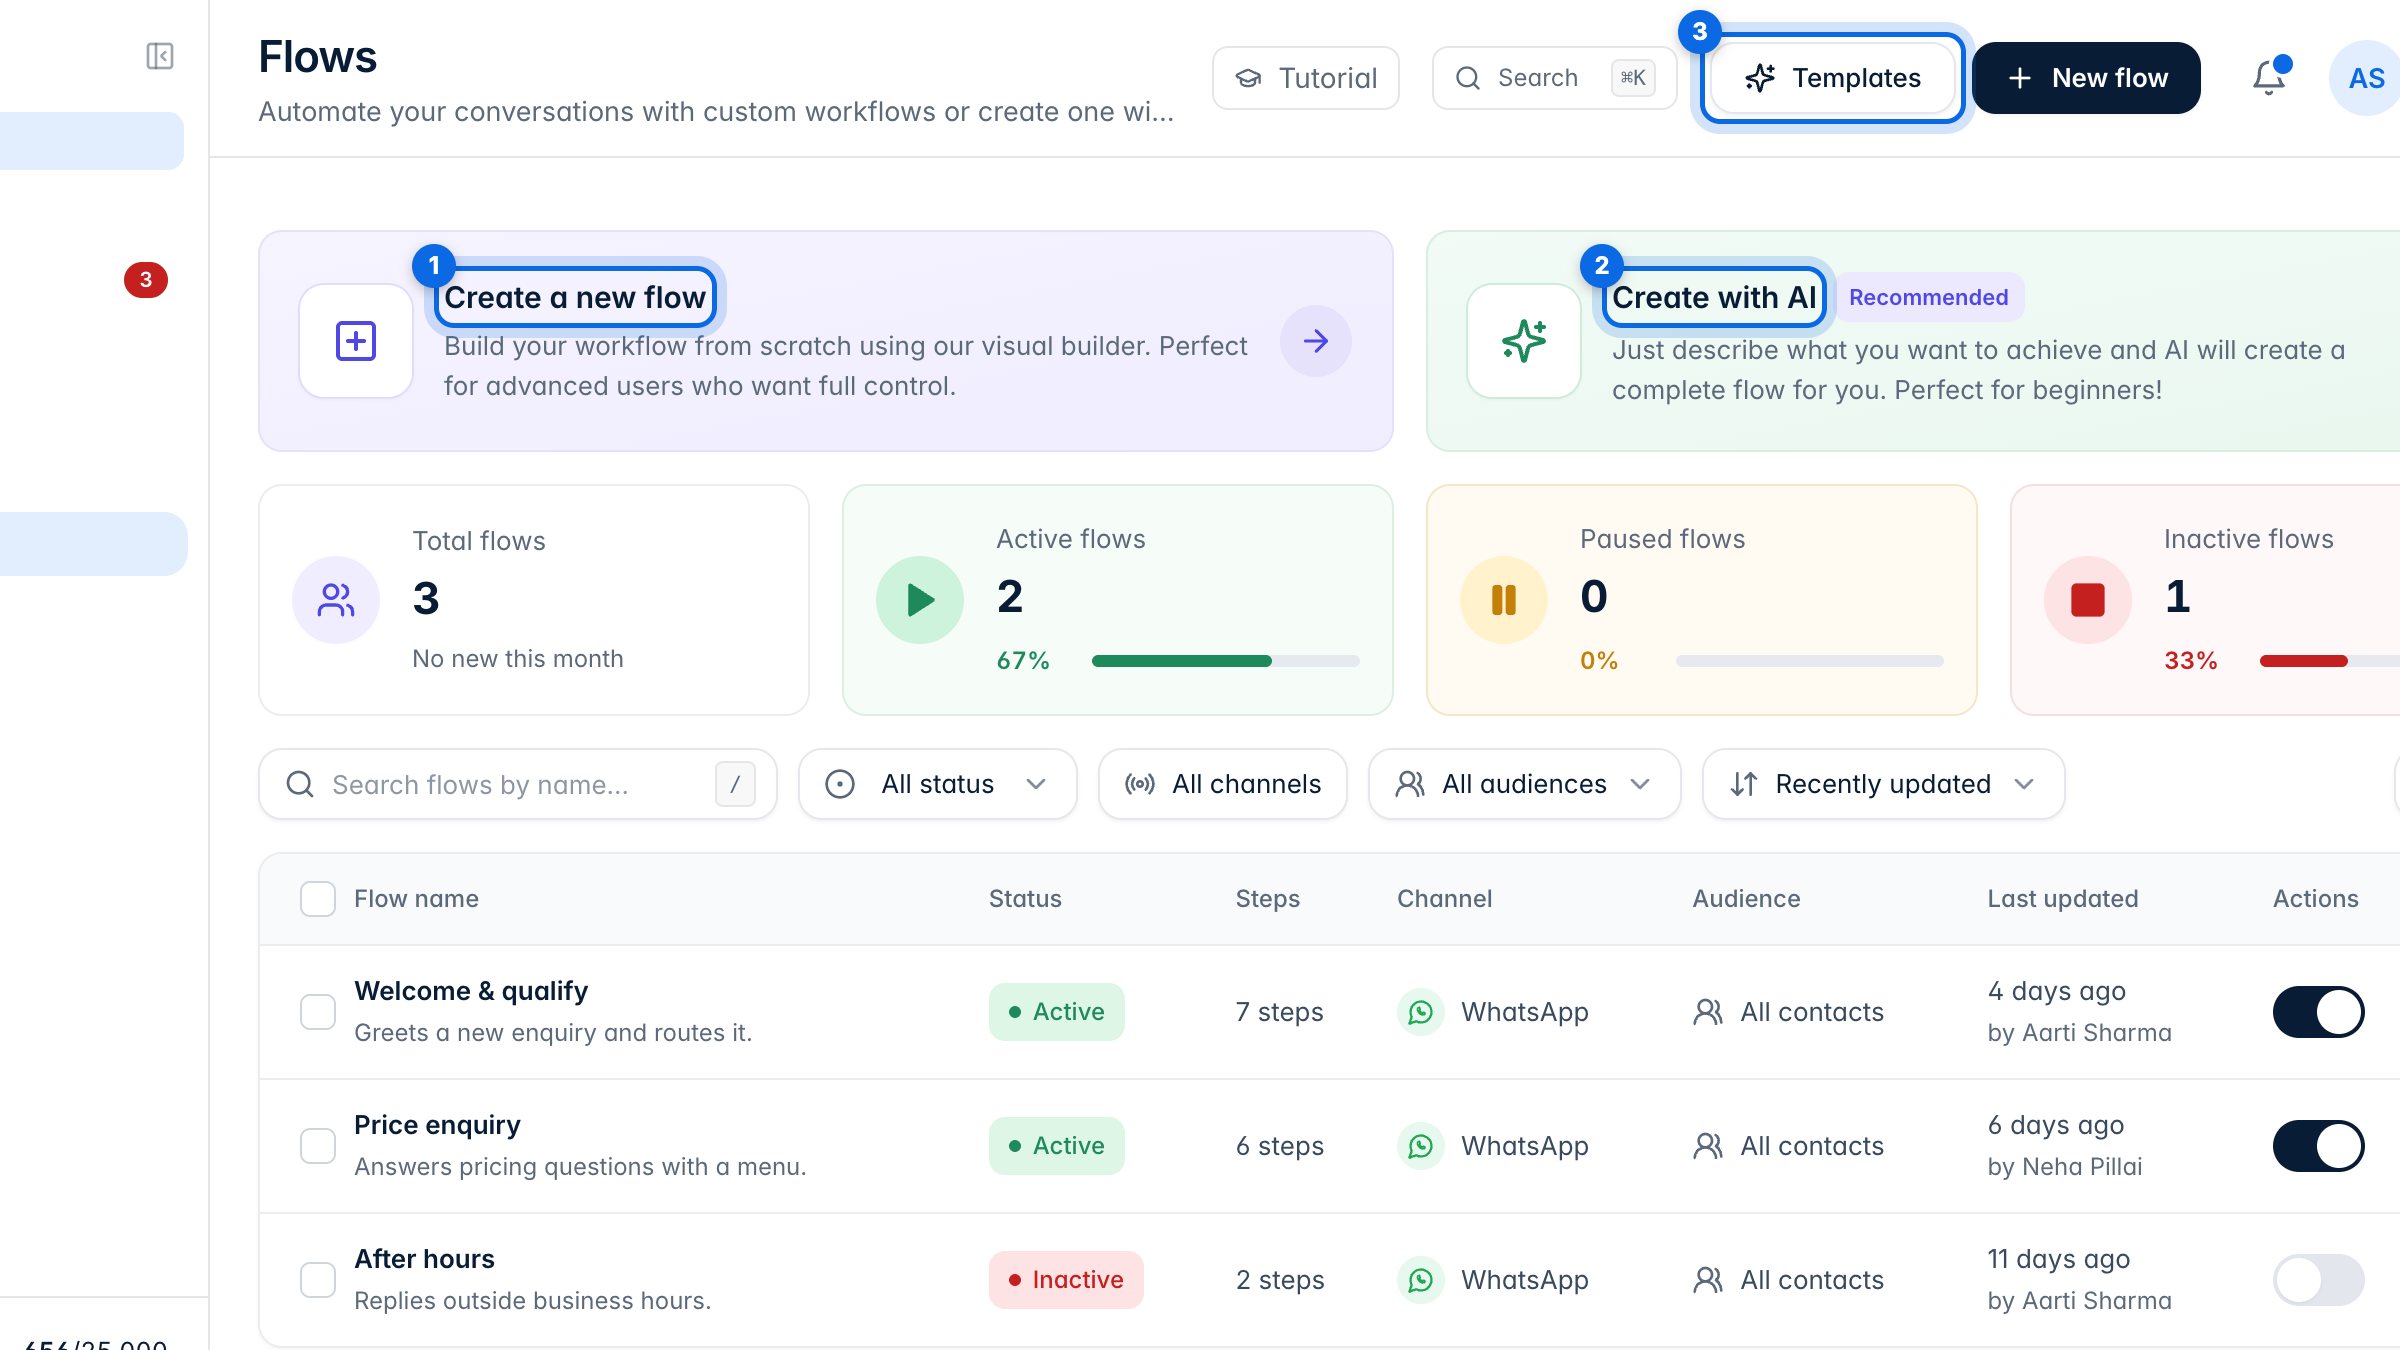
Start a flow from scratch (1), describe one to AI (2), or pick a ready-made one from Templates (3).
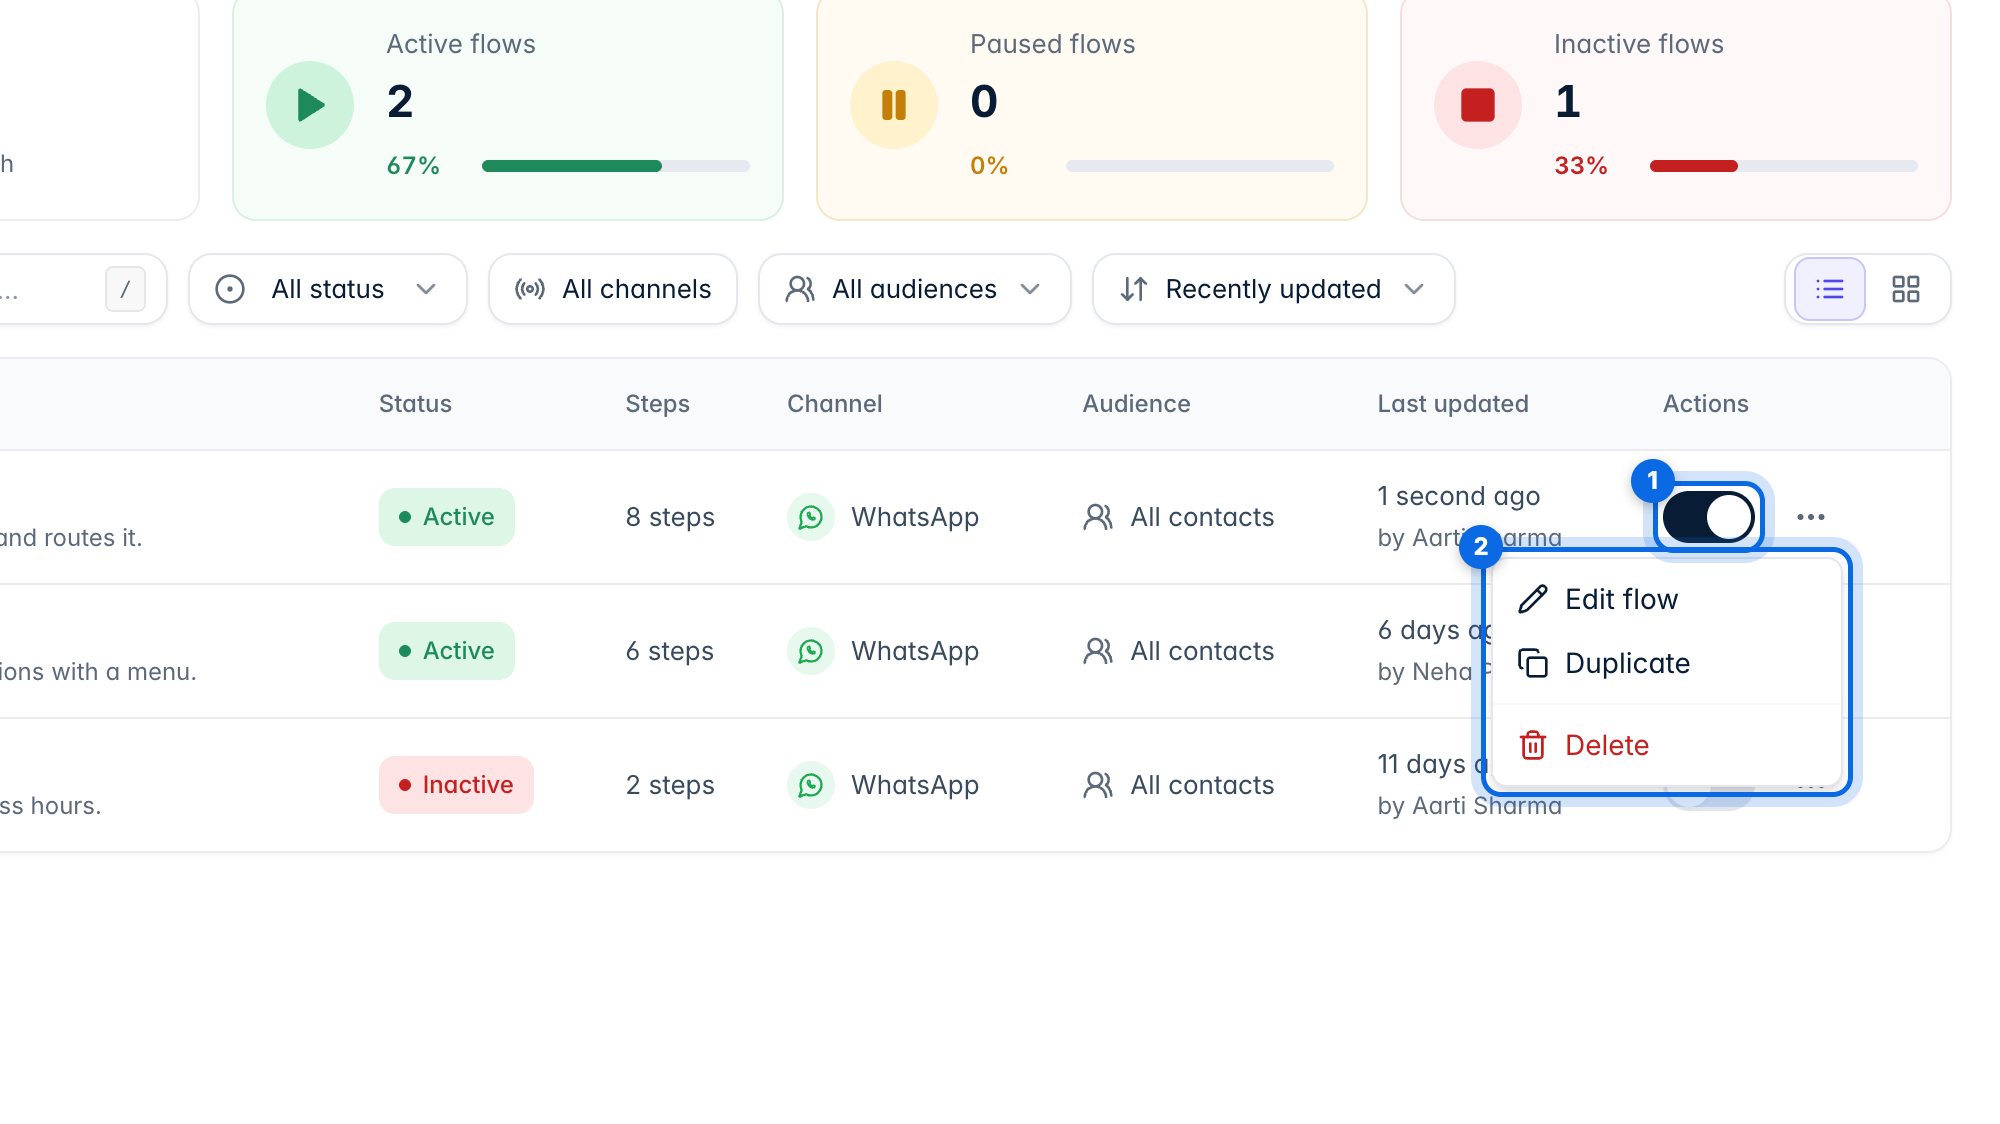
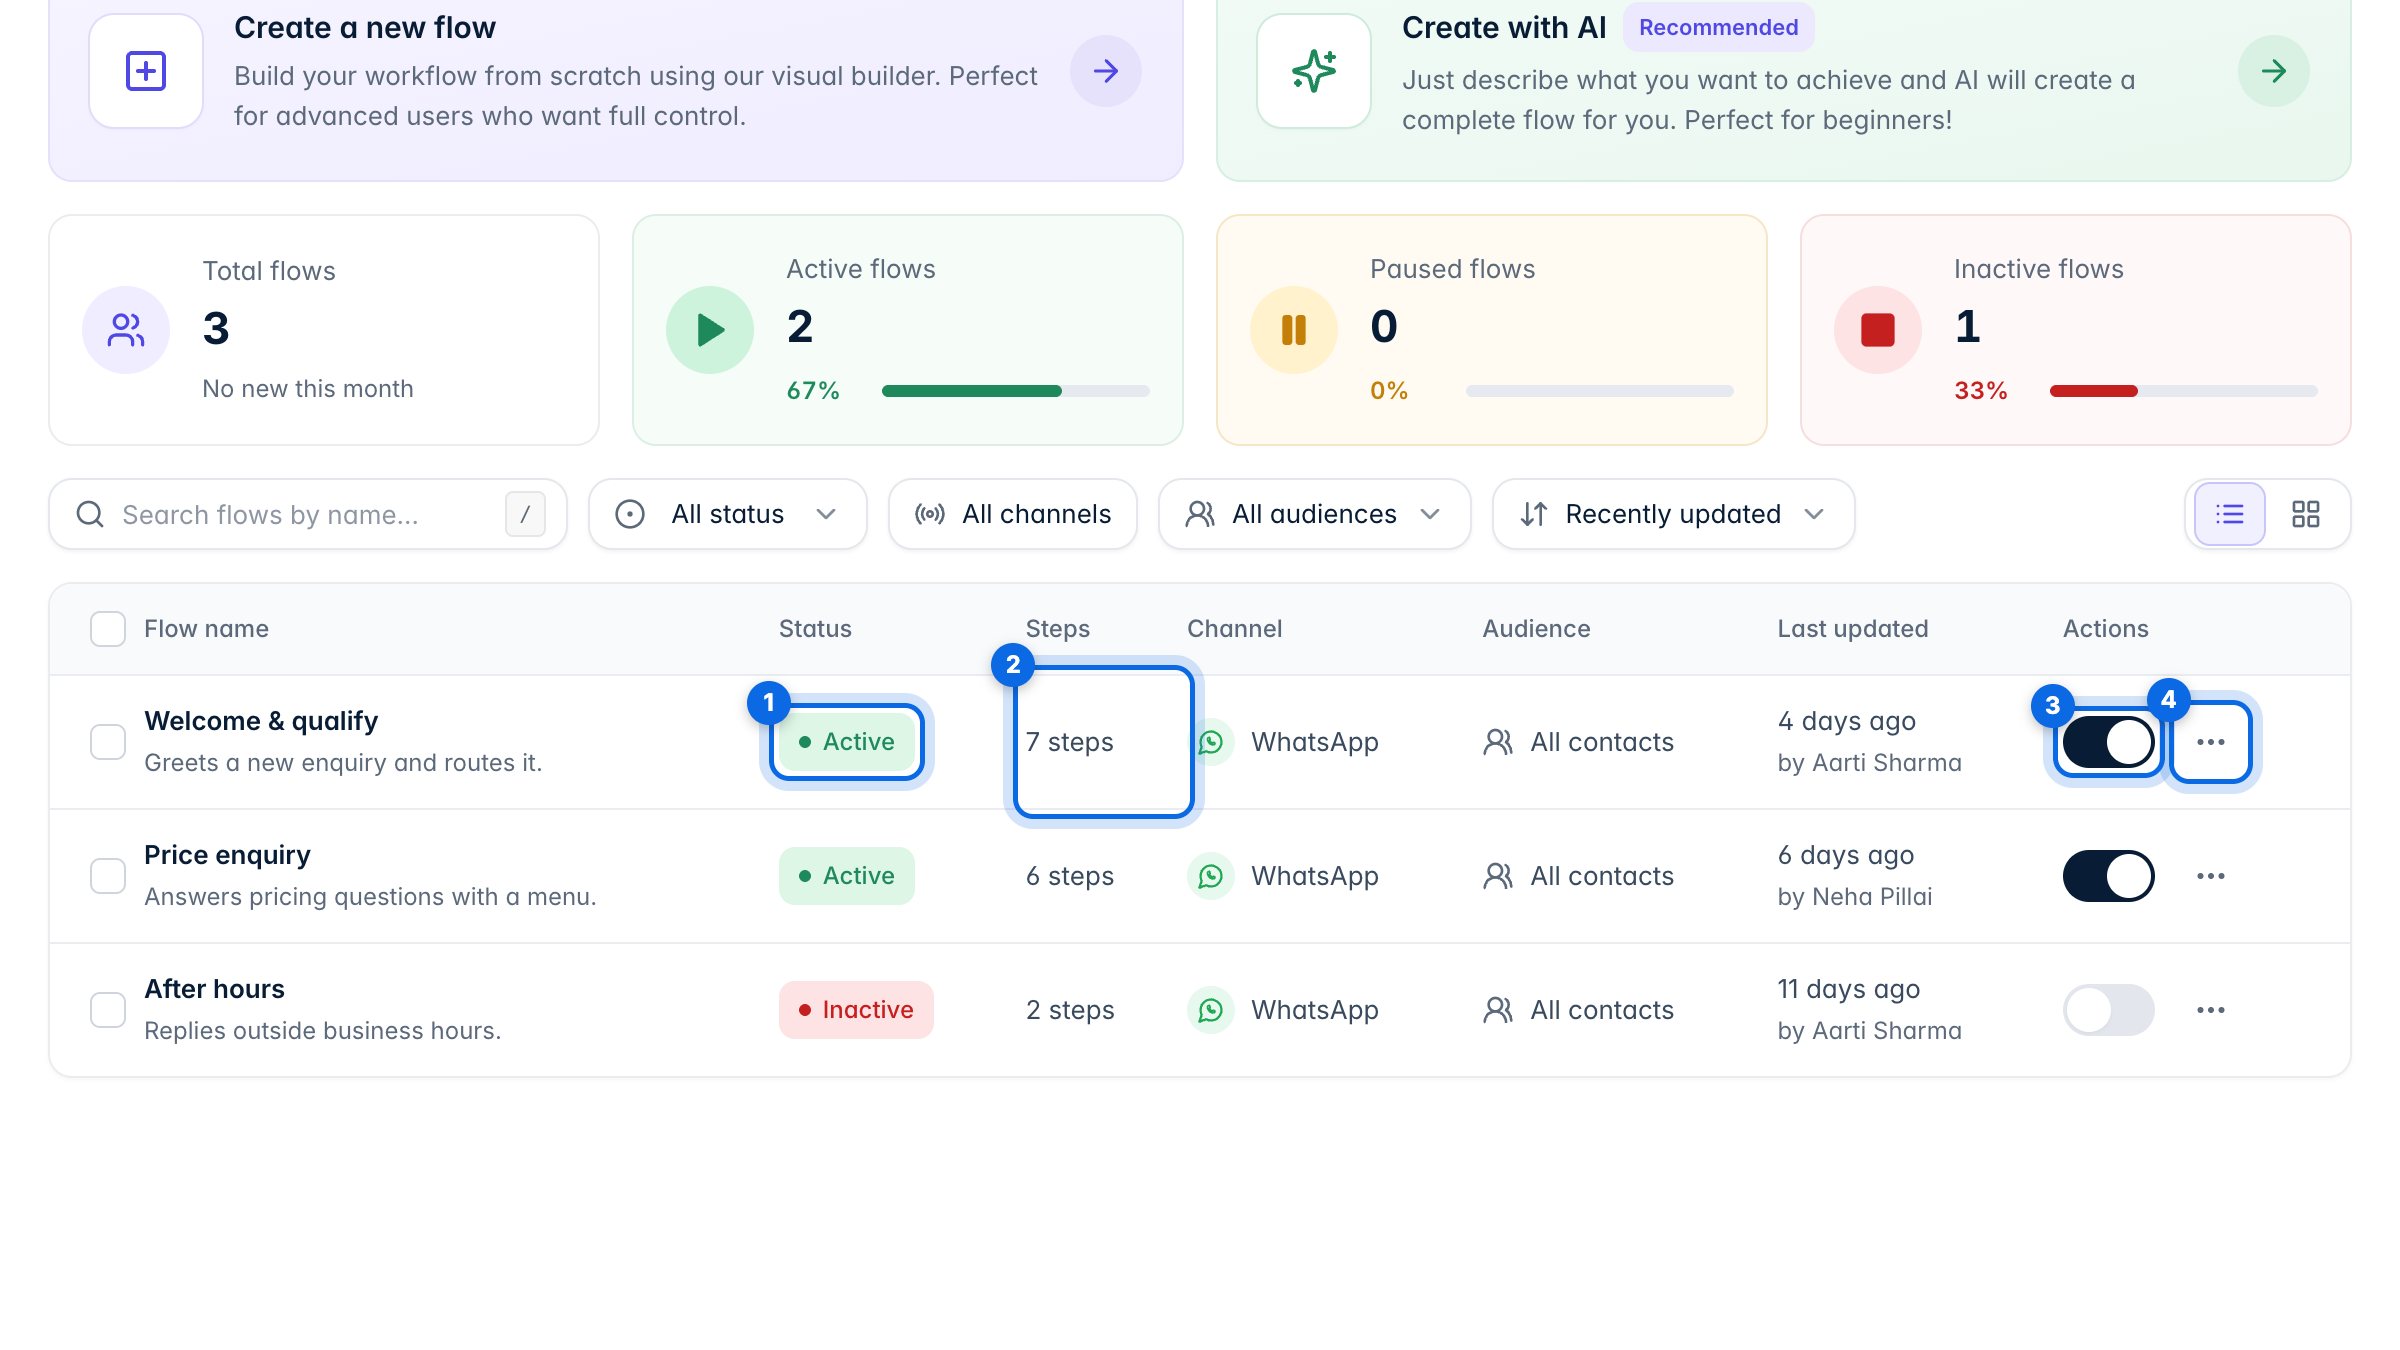
Each row shows whether the flow is active (1) and how many steps it has (2). The switch (3) pauses it or turns it on. The ⋯ menu (4) edits, duplicates or deletes it.
2. Start from a template or AI
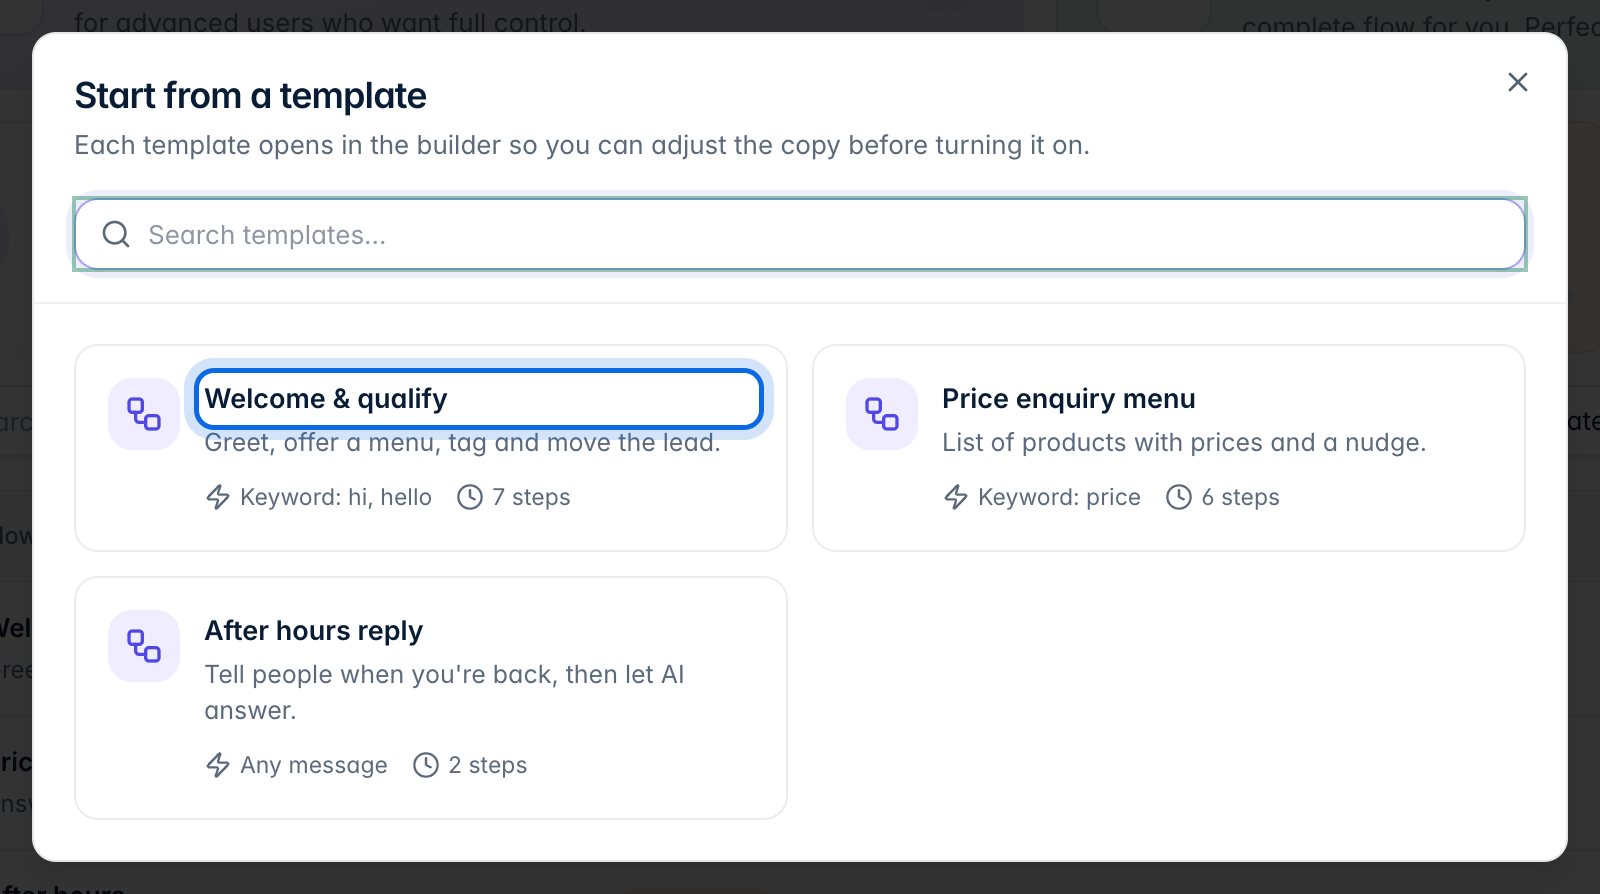
Templates opens ready-made flows. Each one opens in the builder so you can adjust the wording before turning it on.
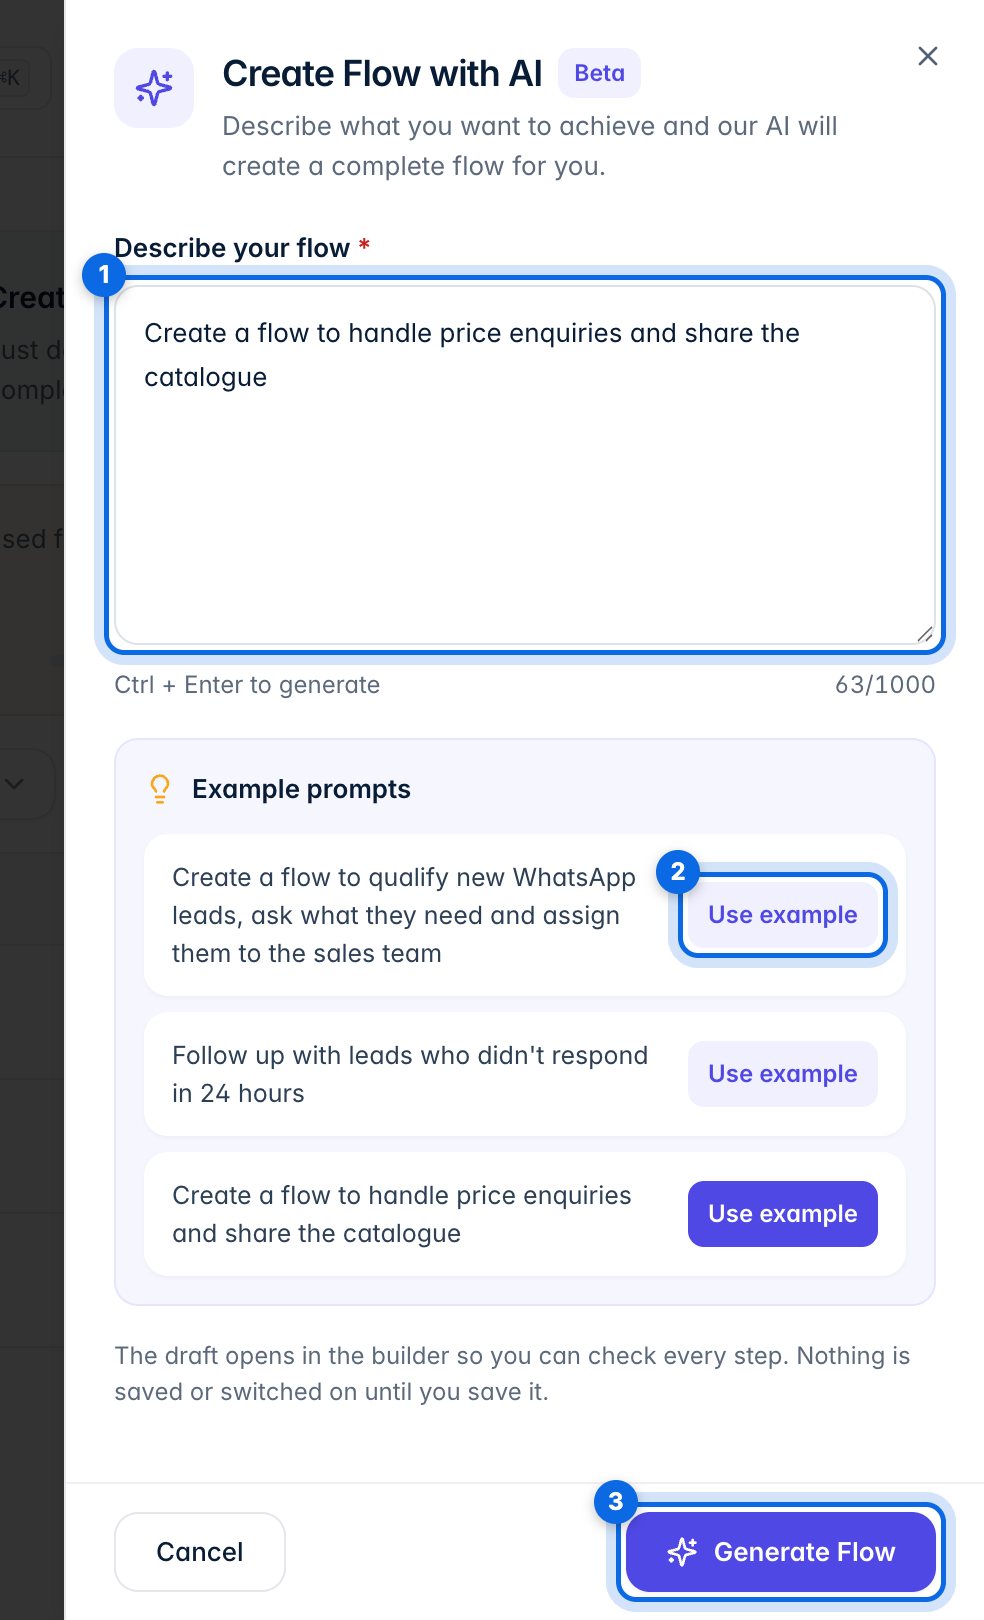
With Create with AI, describe what the flow should do (1), or use an example (2), then click Generate Flow (3). The draft opens in the builder; nothing is saved or switched on until you save it.
3. Search and filter
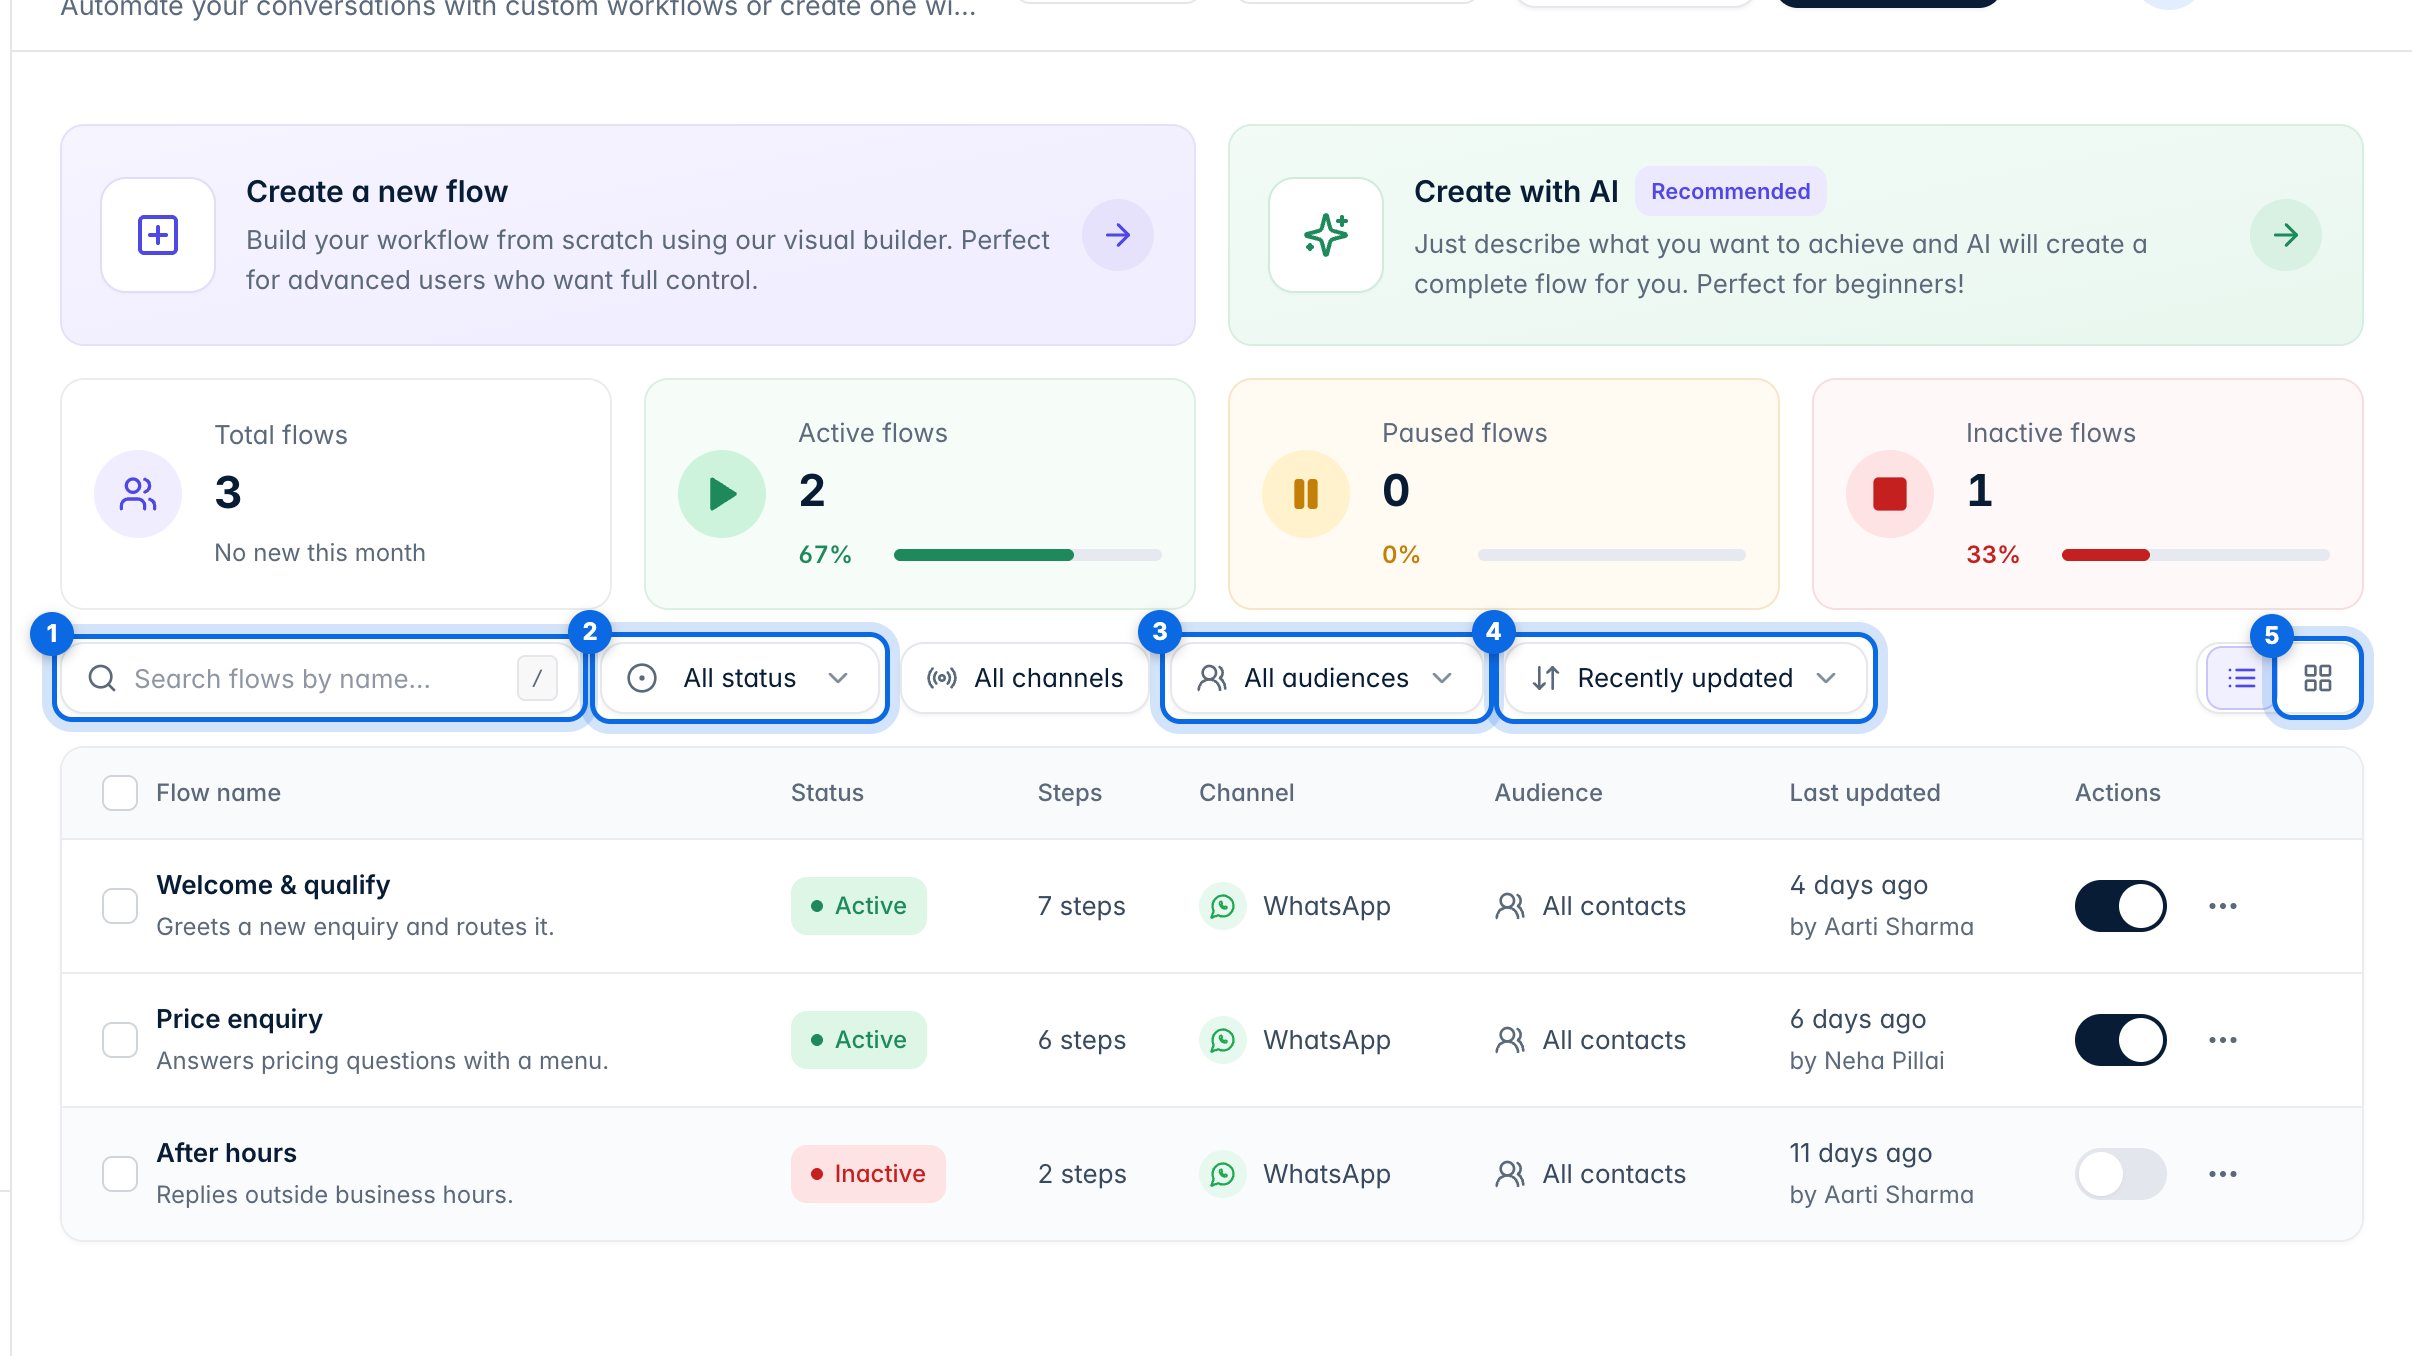
Search by name (1). Filter by status (2) or audience (3), change the order (4), or switch to the grid view (5).
4. The flow builder
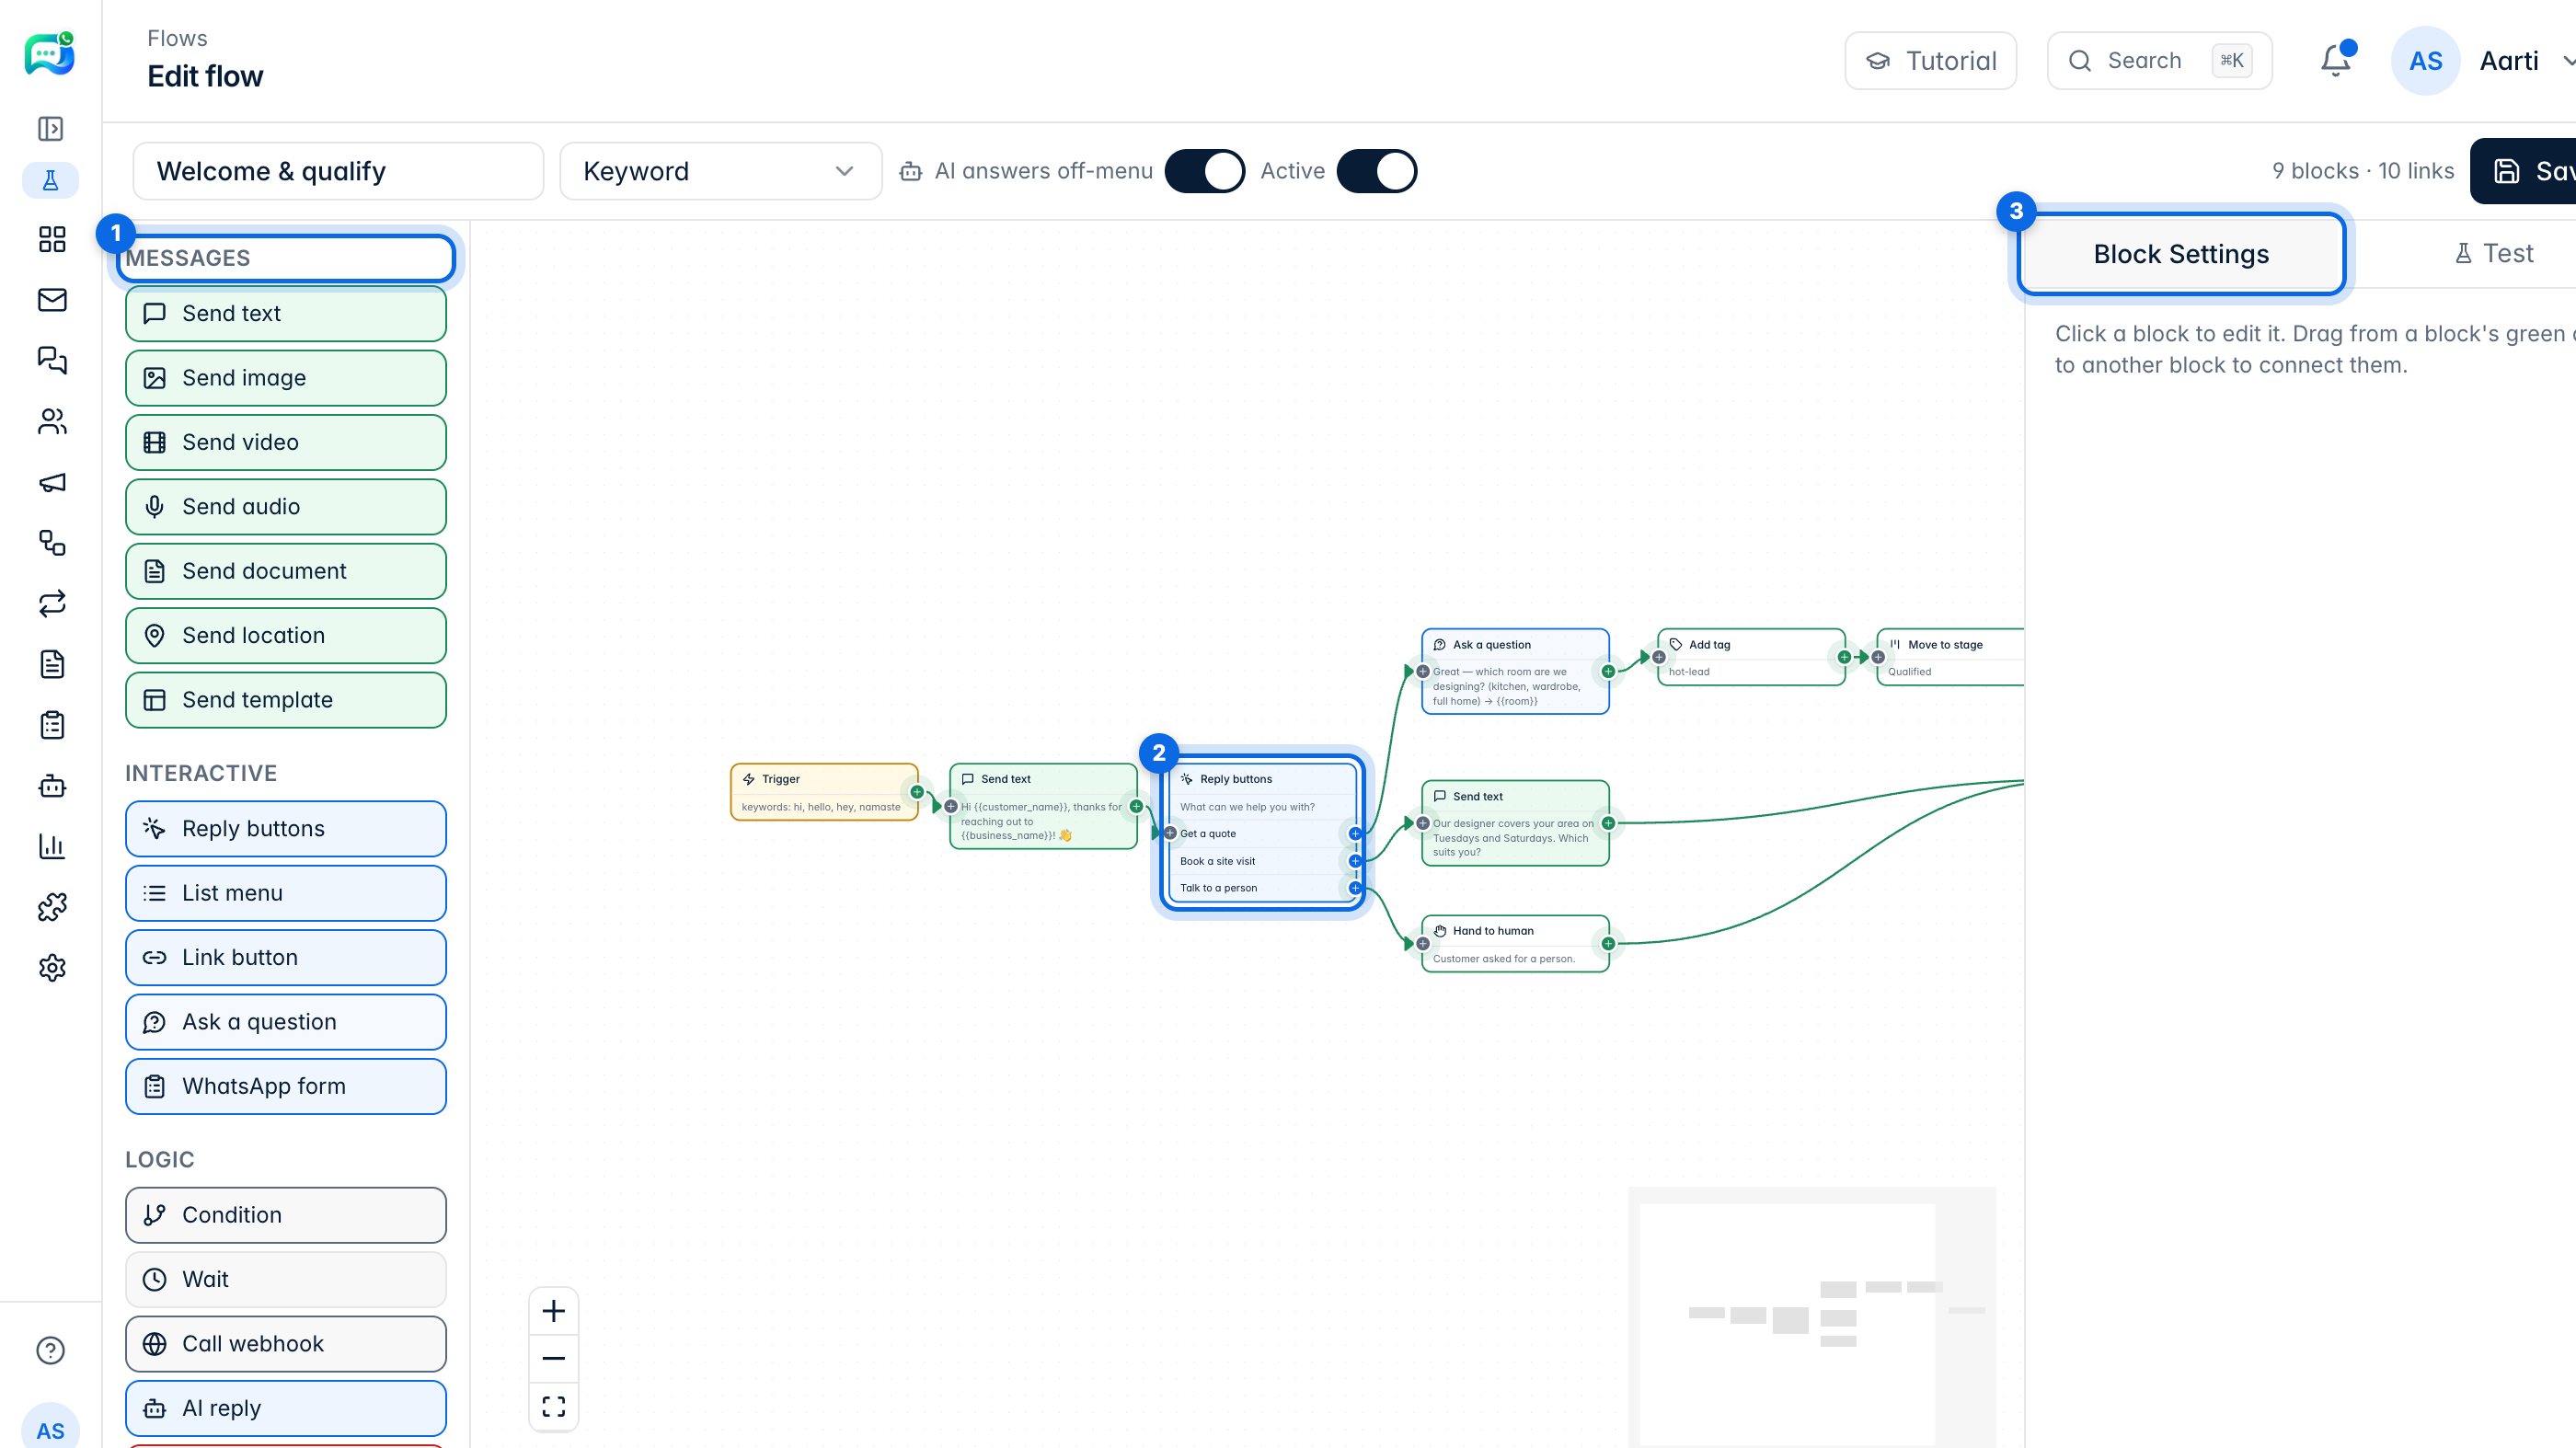
Click a flow to open the builder. On the left are the blocks you can add (1): messages, interactive menus and questions, logic, and lead actions. The flow runs from left to right on the canvas (2). The panel on the right (3) shows the settings of the block you click.
5. When a flow starts
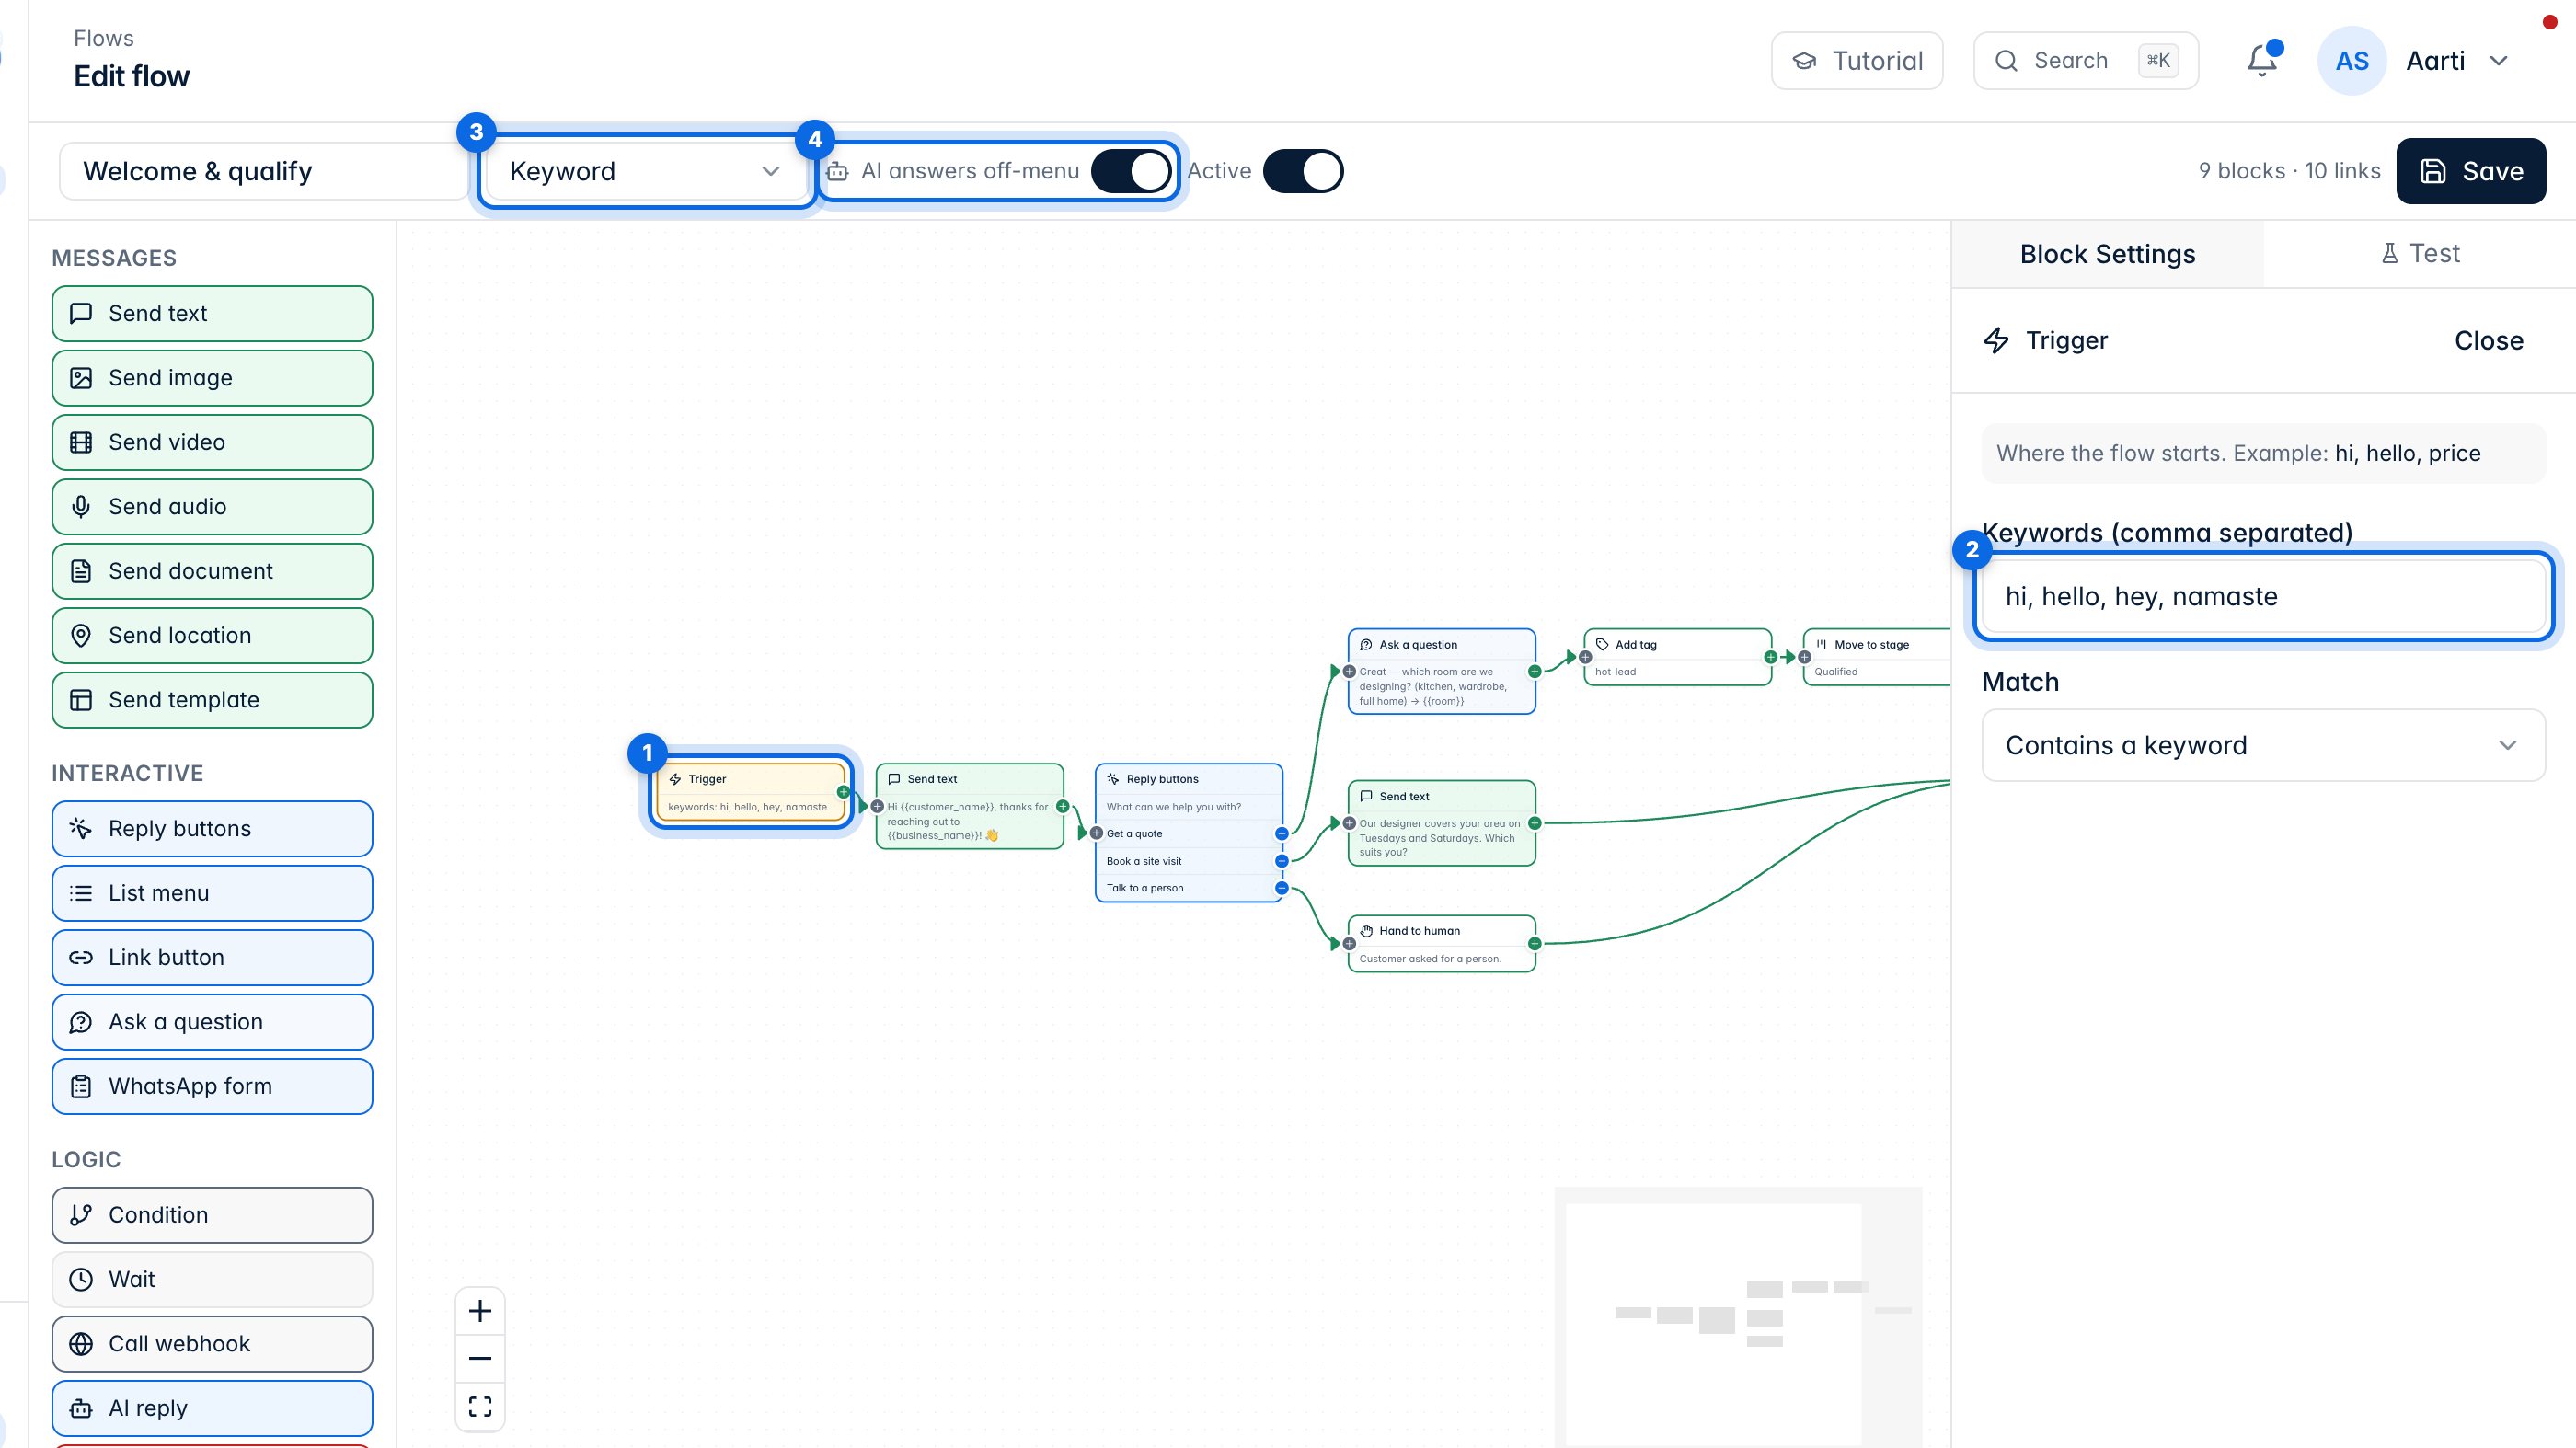
Click the Trigger block (1). With Keyword, list the words that start the flow (2), separated by commas. The dropdown (3) can instead start it on a customer's first message, on any message, or only when you start it by hand. AI answers off-menu (4) lets AI reply when a customer types something the menu doesn't cover.
6. Edit a block
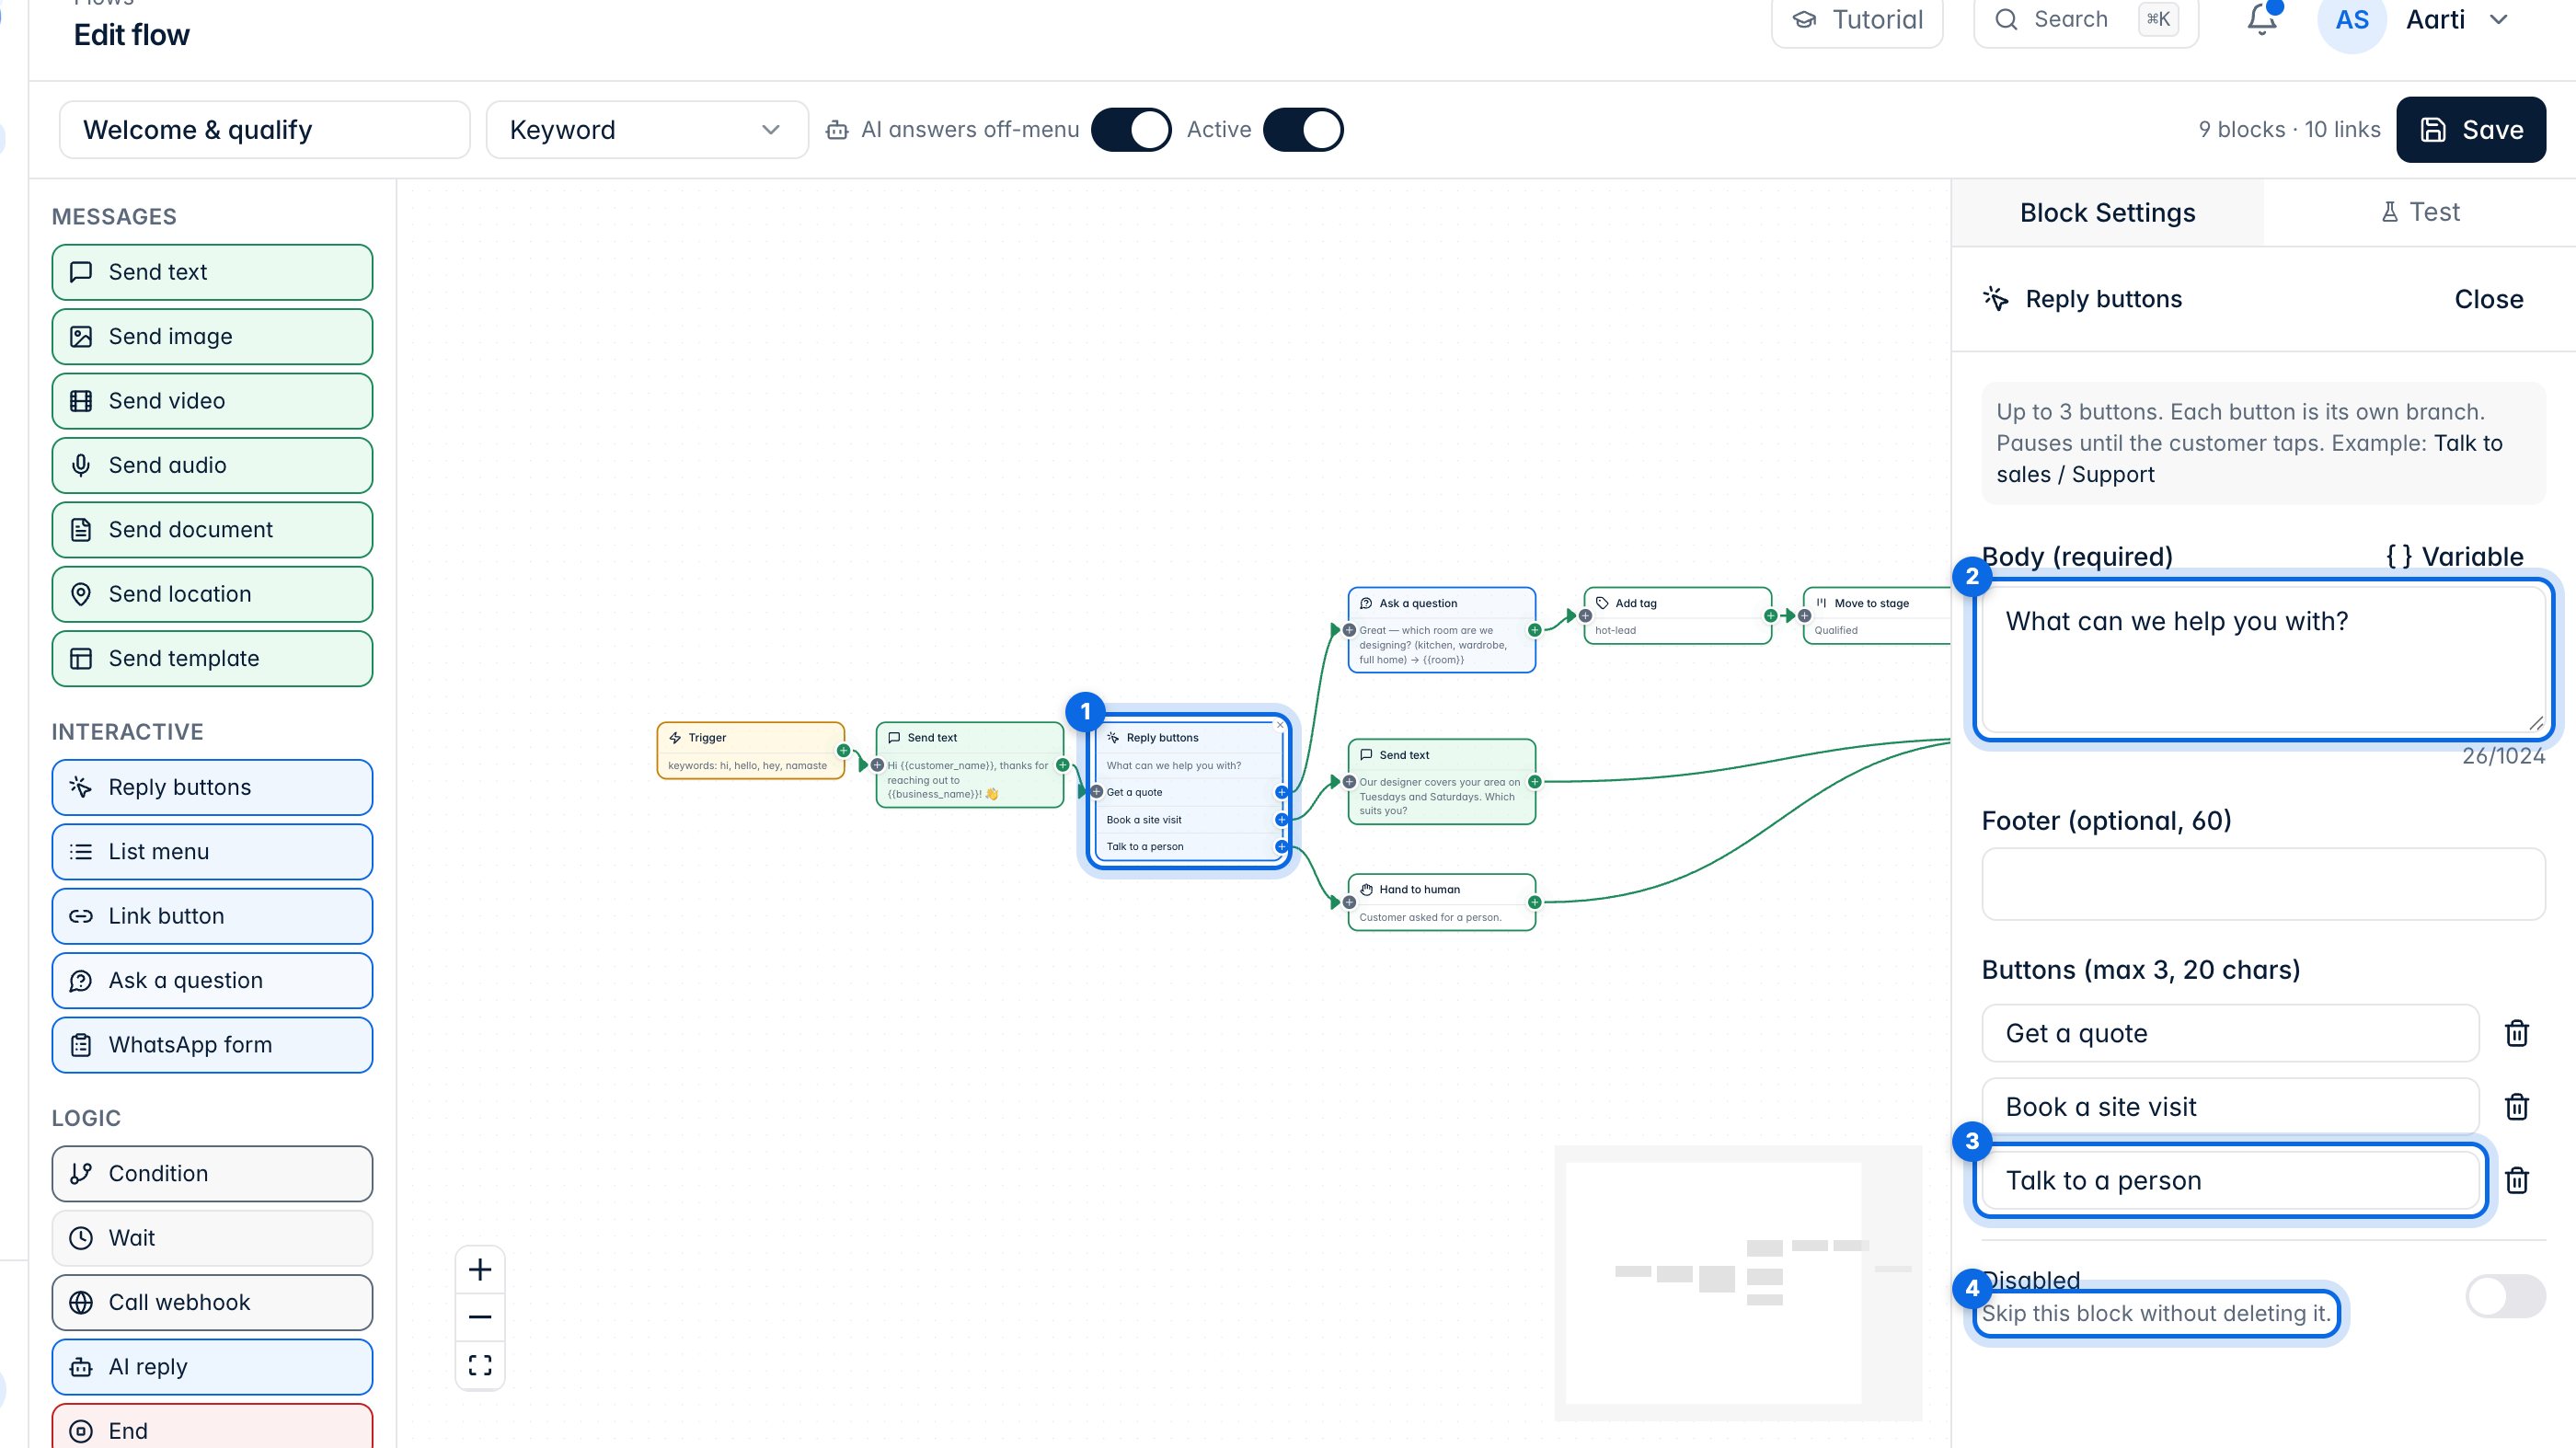
Click any block (1) to edit it on the right. For reply buttons, change the message (2) and the button labels (3); each button leads to its own branch. Disabled (4) skips a block without deleting it.
7. Add and connect blocks
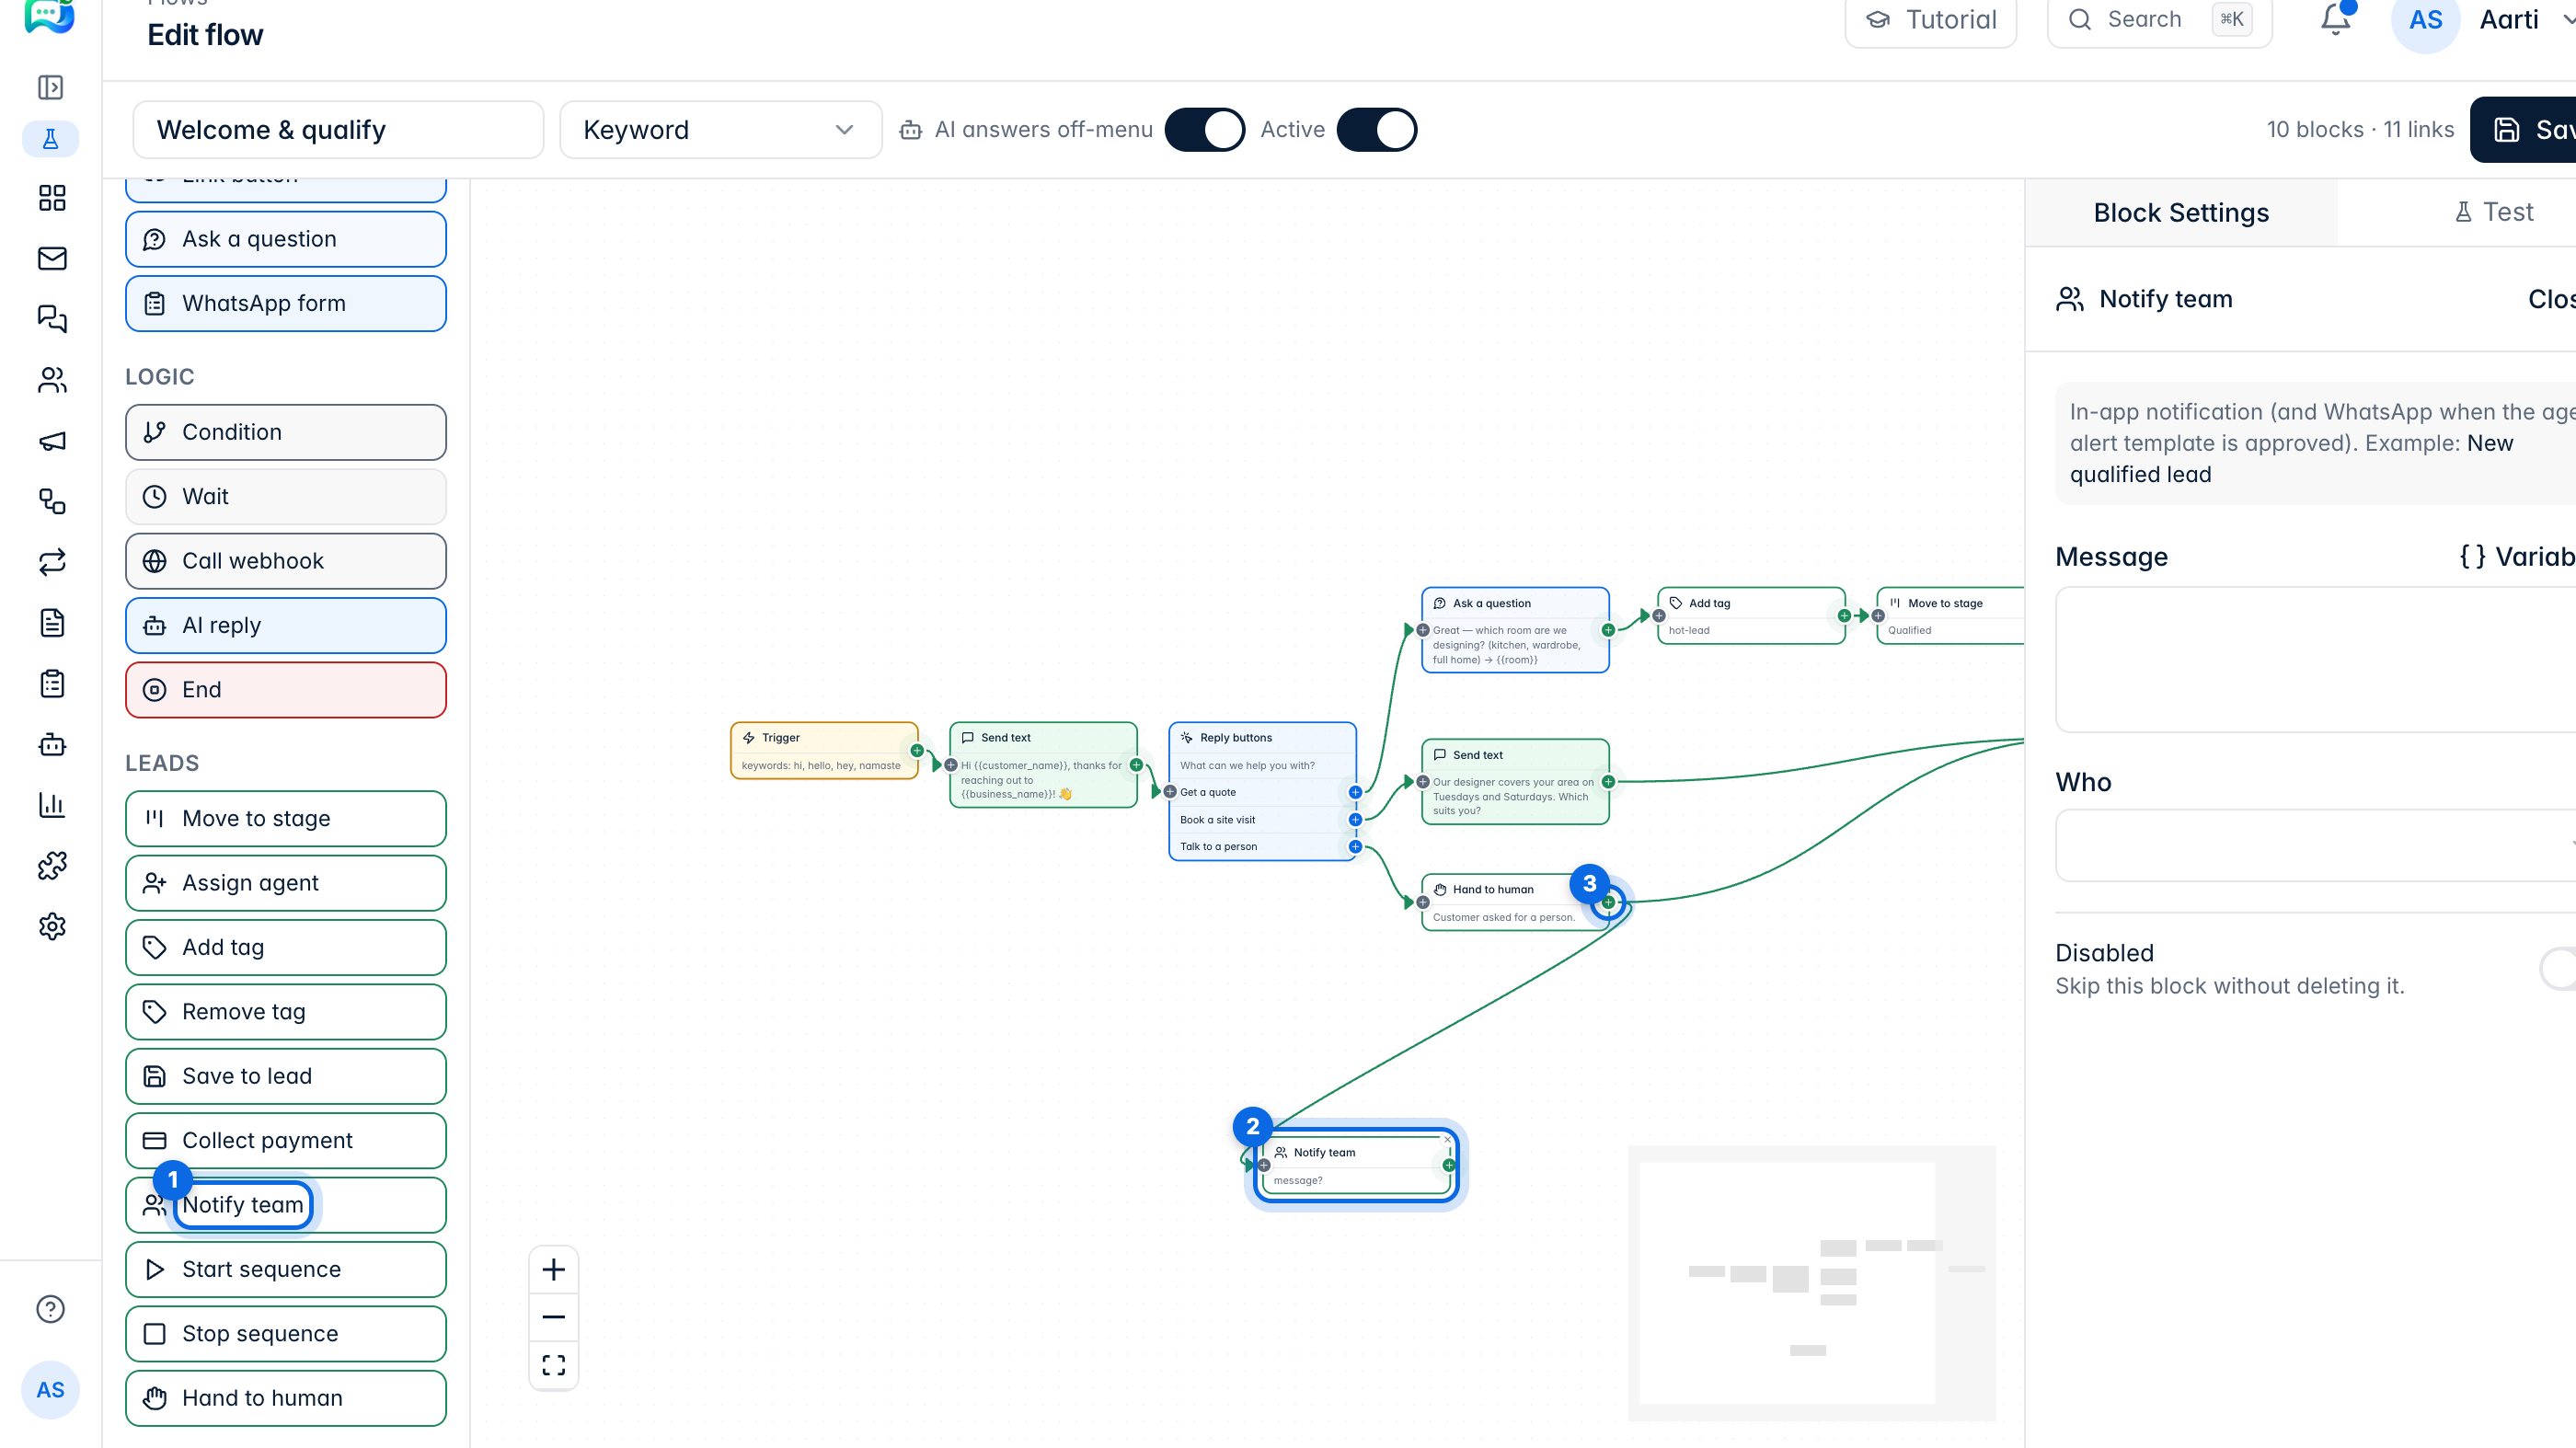
Drag a block from the left (1) onto the canvas (2). To connect it, drag from a block's green dot (3) to the new block.
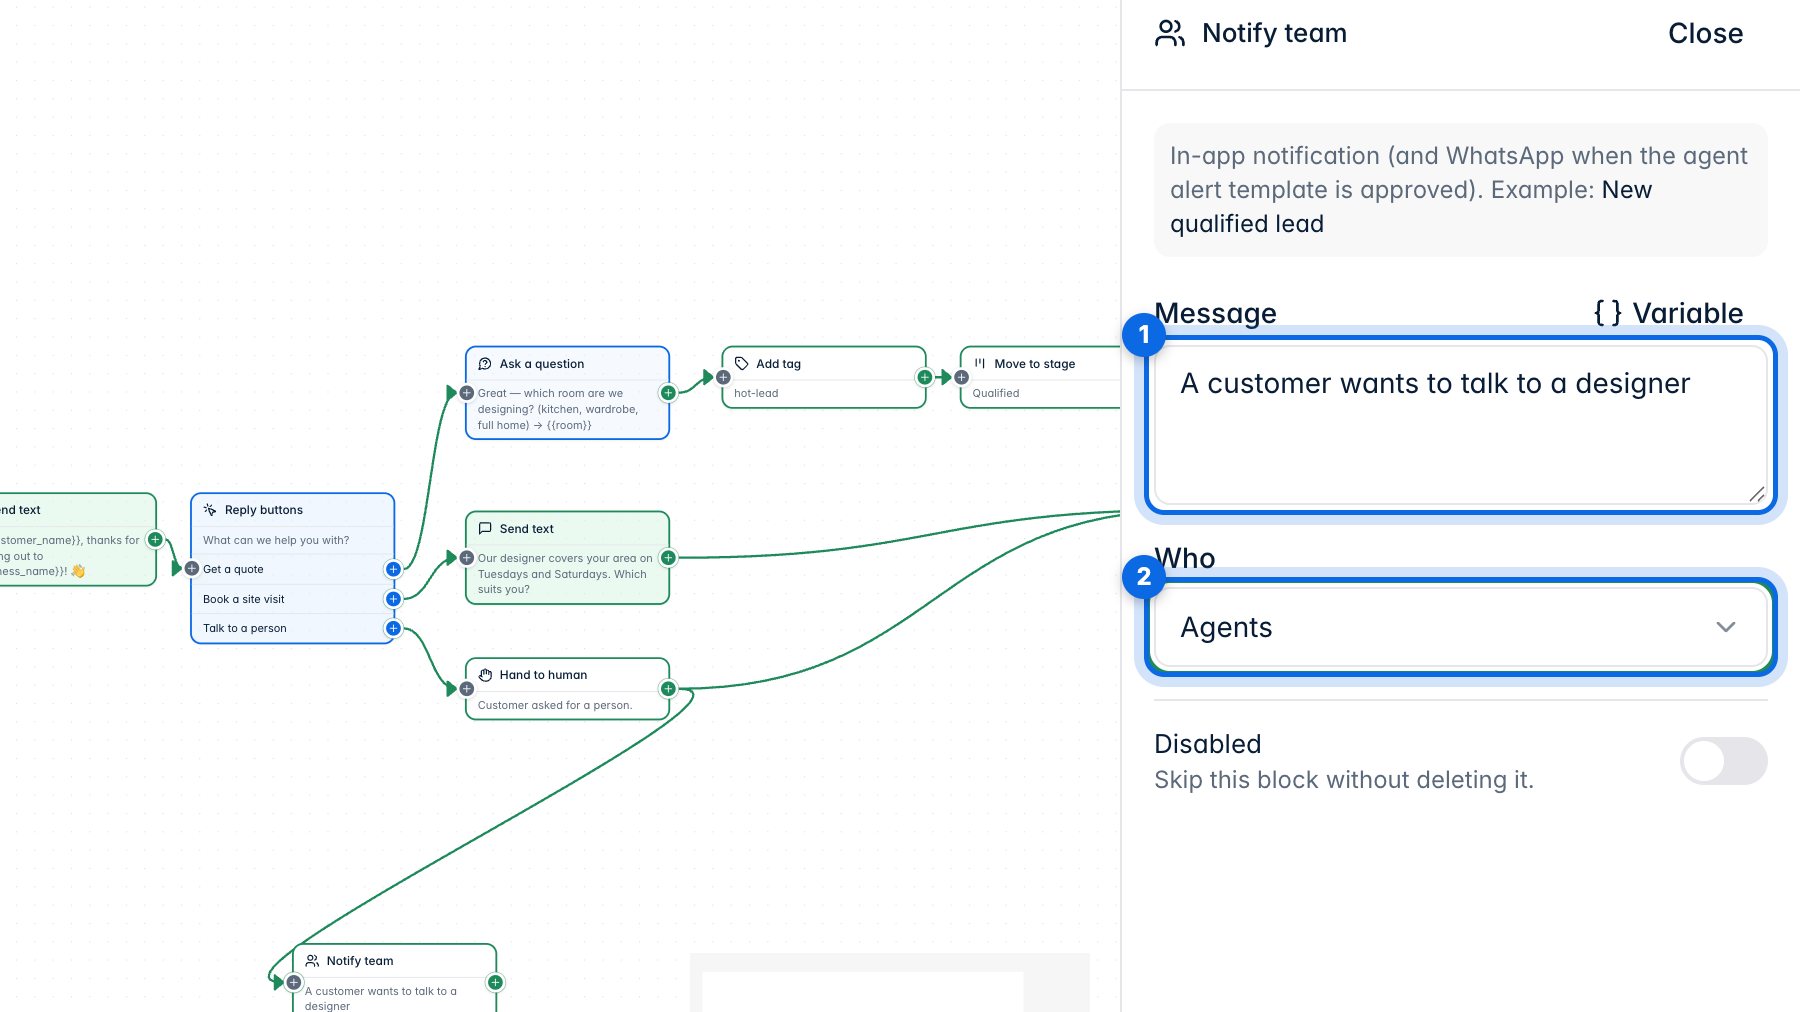
A Notify team block sends your team an in-app alert. Write the message (1) and choose who gets it (2).
8. Test before it goes live
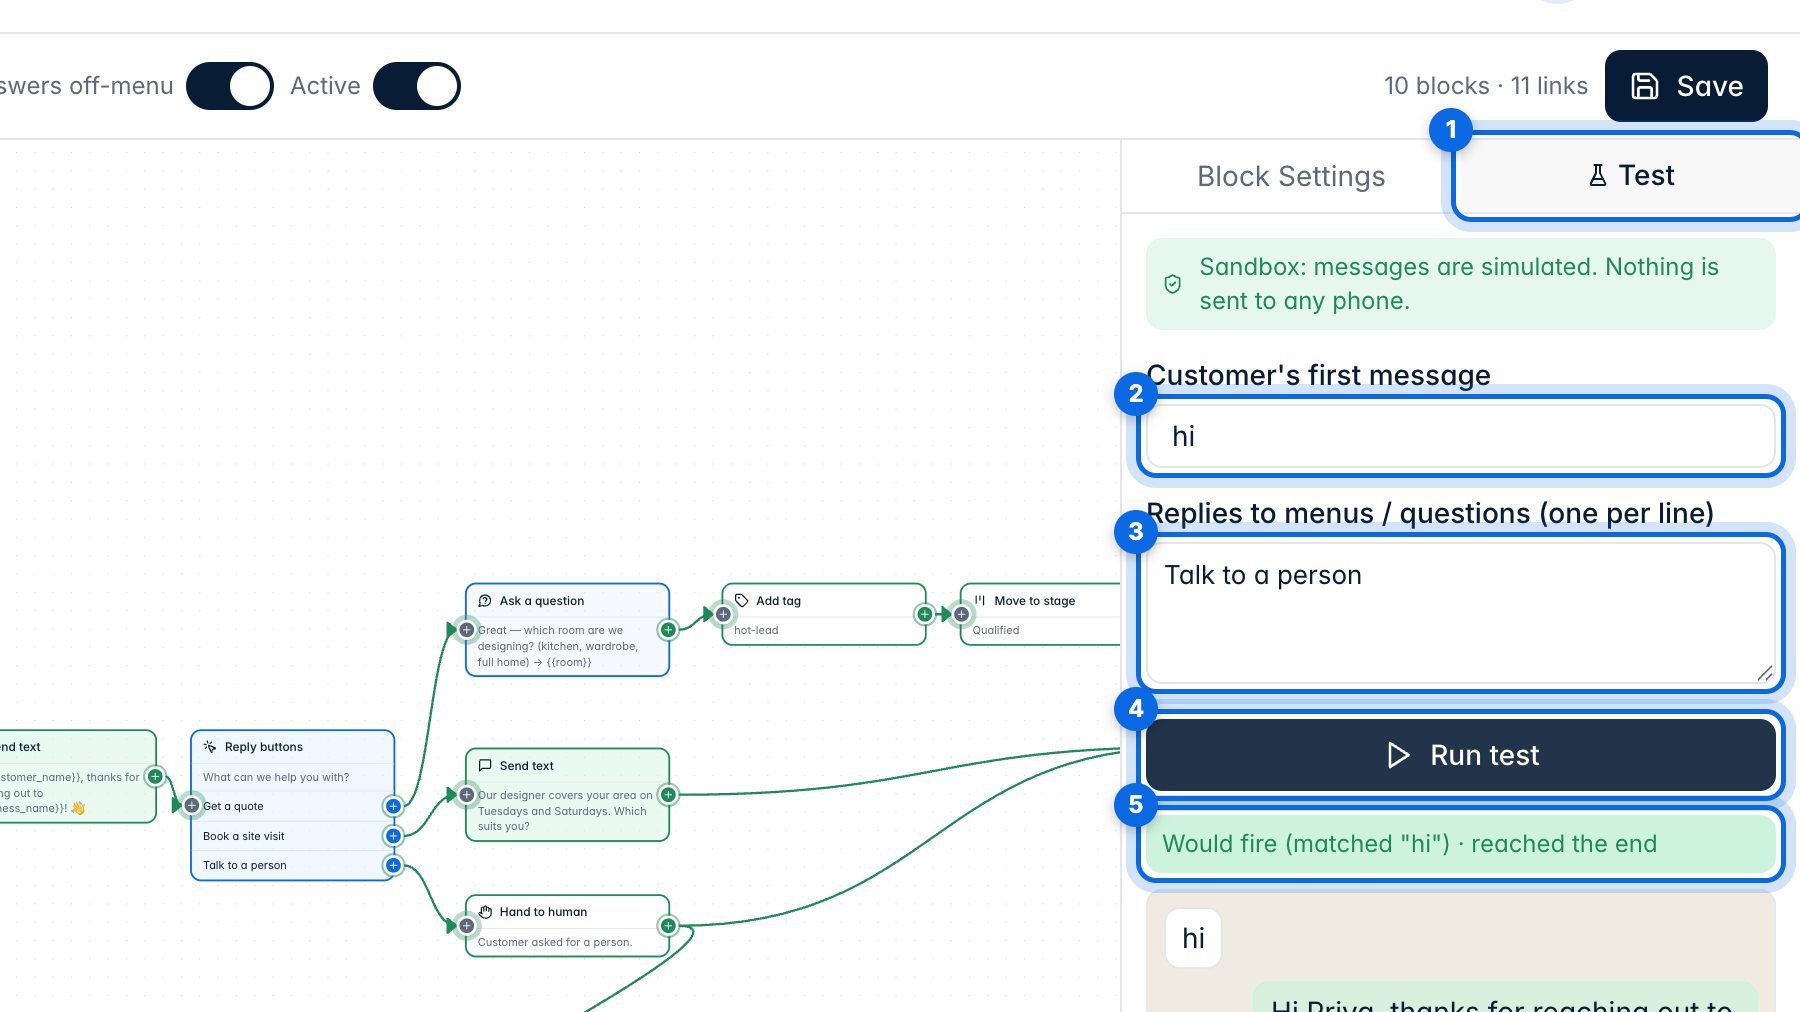
Open Test (1). Nothing is sent to any phone. Type the customer's first message (2) and their replies, one per line (3), then click Run test (4). You'll see the whole conversation and what the flow would do (5).
9. Save, switch on, pause
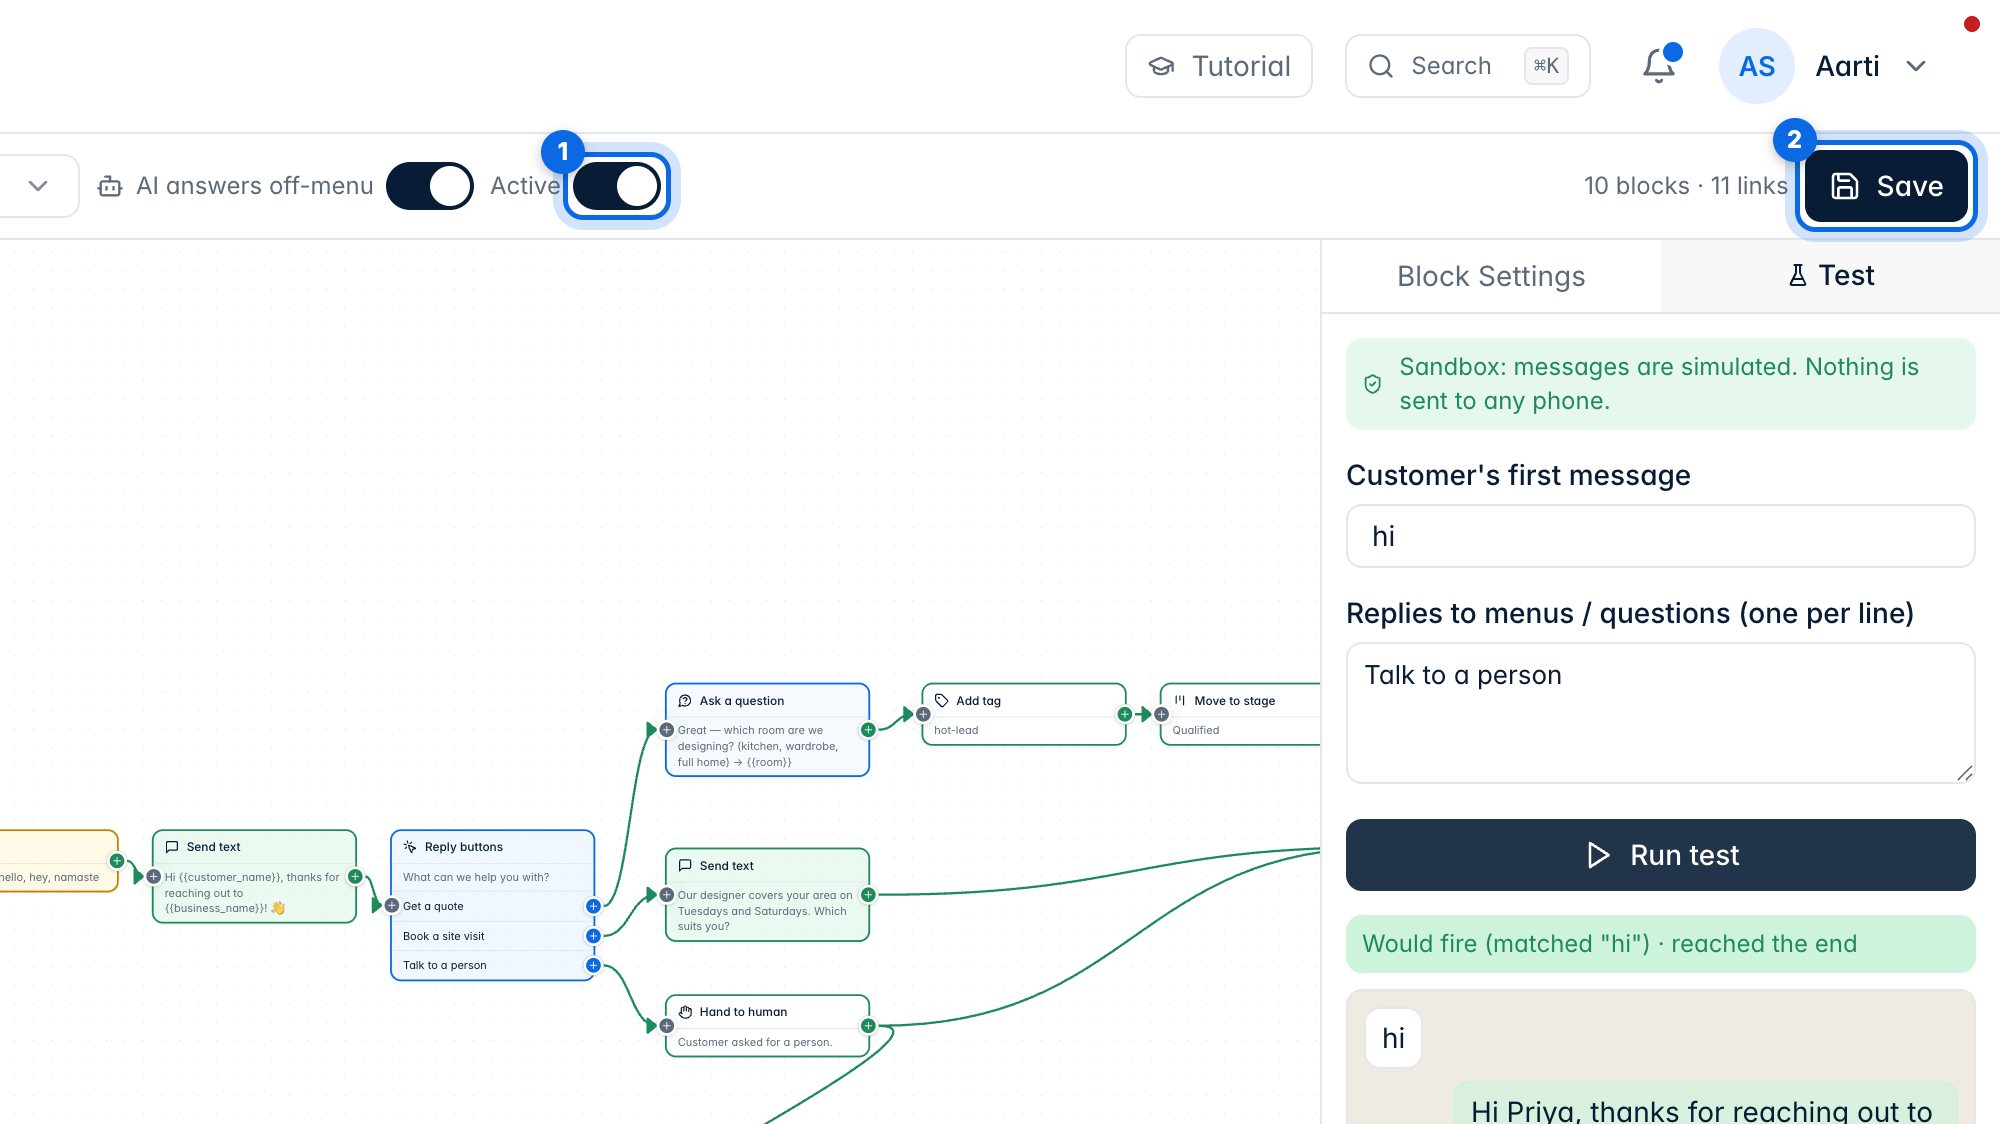
Turn on Active (1) and click Save (2). The flow starts answering customers.
Back in the list, the switch (1) pauses a flow at any time. The menu (2) edits, duplicates or deletes it.