Leads
Work your leads on a board: move stages, book meetings, mark them won or lost.
2 min video18 stepsEnglish and हिंदी
Language
Step by step
The same steps in writing, with a screenshot for each.
1. The leads board
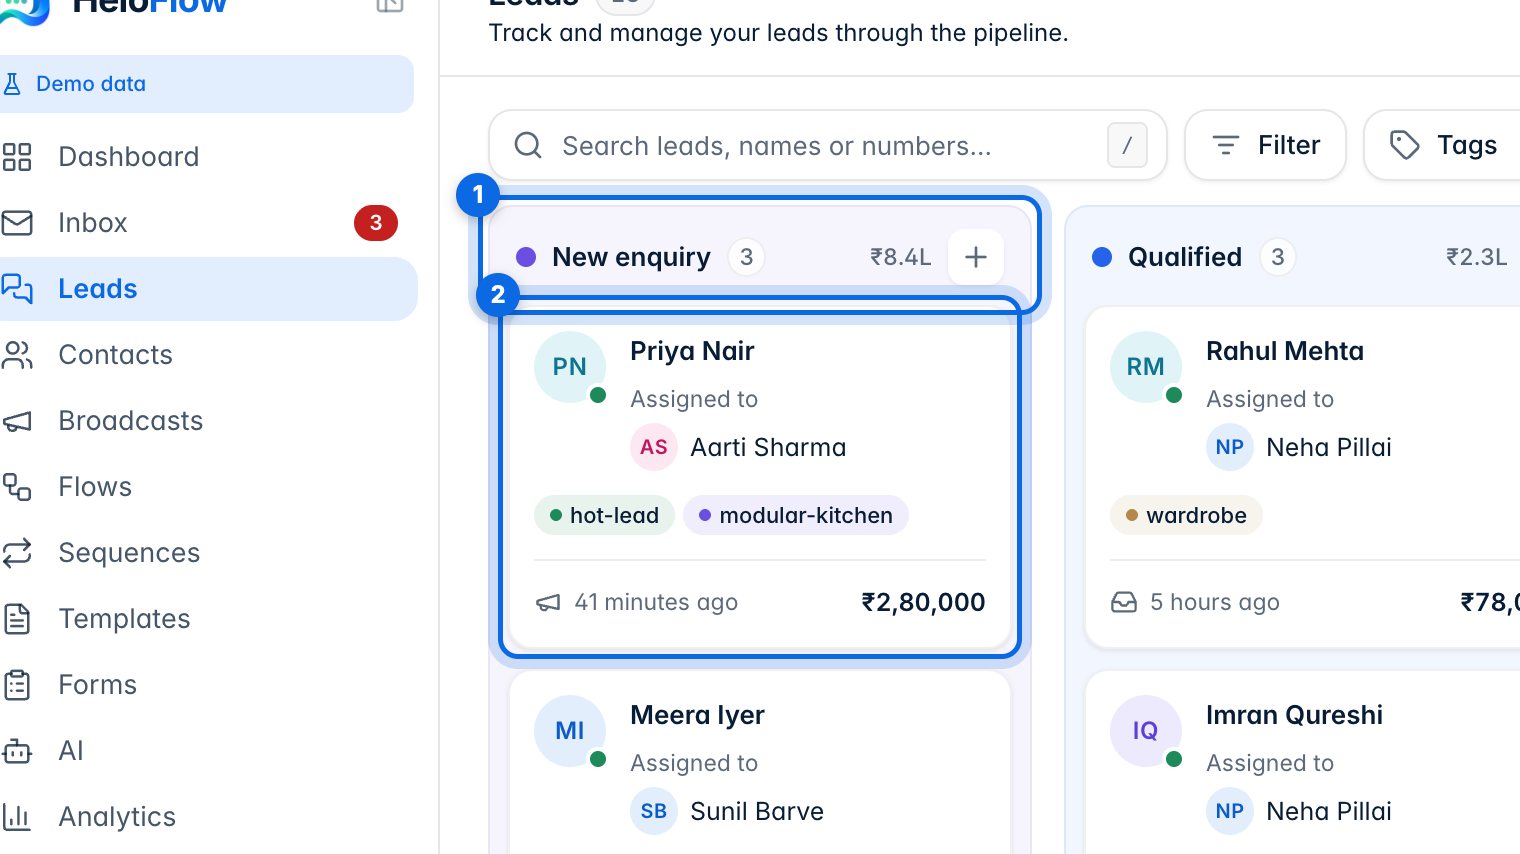
Every column is a stage of your sales pipeline. The column header shows how many leads are in it and their total deal value (1). Each card (2) shows the customer, who owns the lead, its tags, the deal value and when it was last active.
2. Add a lead
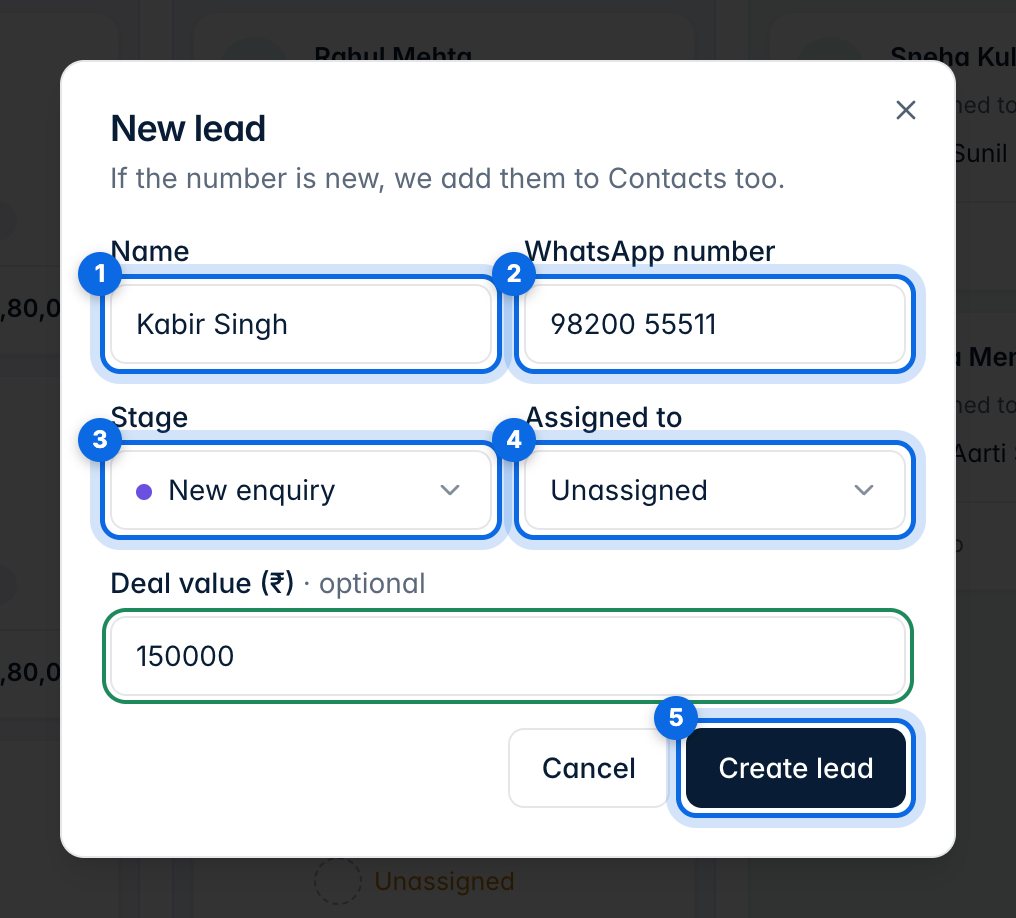
Click New lead at the top (or + on a column). Enter the name (1) and WhatsApp number (2), pick the stage (3) and who owns it (4), add a deal value if you know it, then click Create lead (5). If the number is new, it's added to Contacts too.
3. Move a lead to another stage
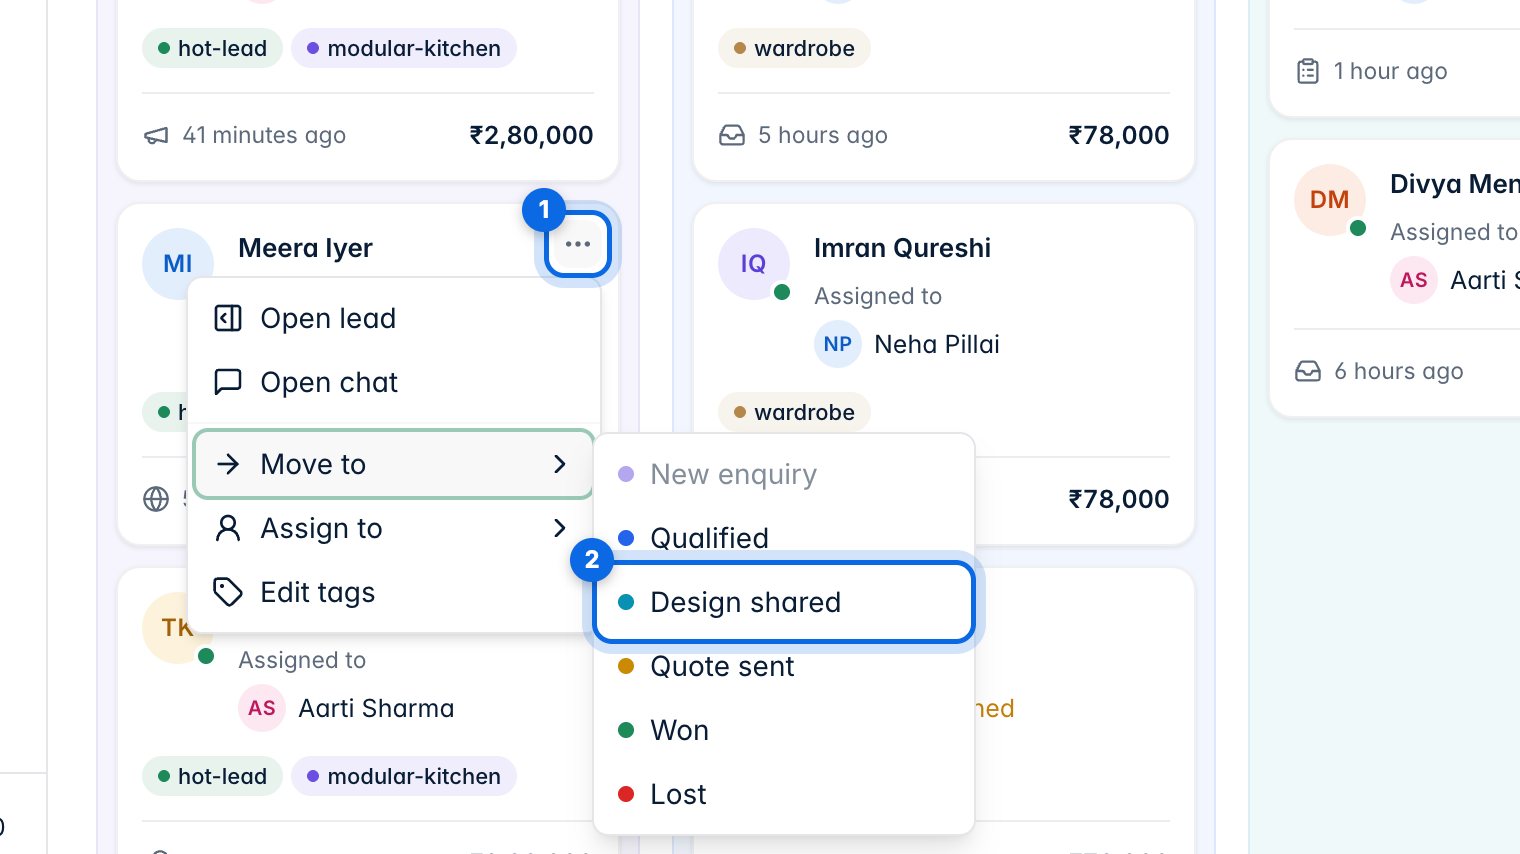
Drag a card into another column to change its stage. Or open the card's ⋯ menu (1), choose Move to, and pick the stage (2).
4. Search and filter
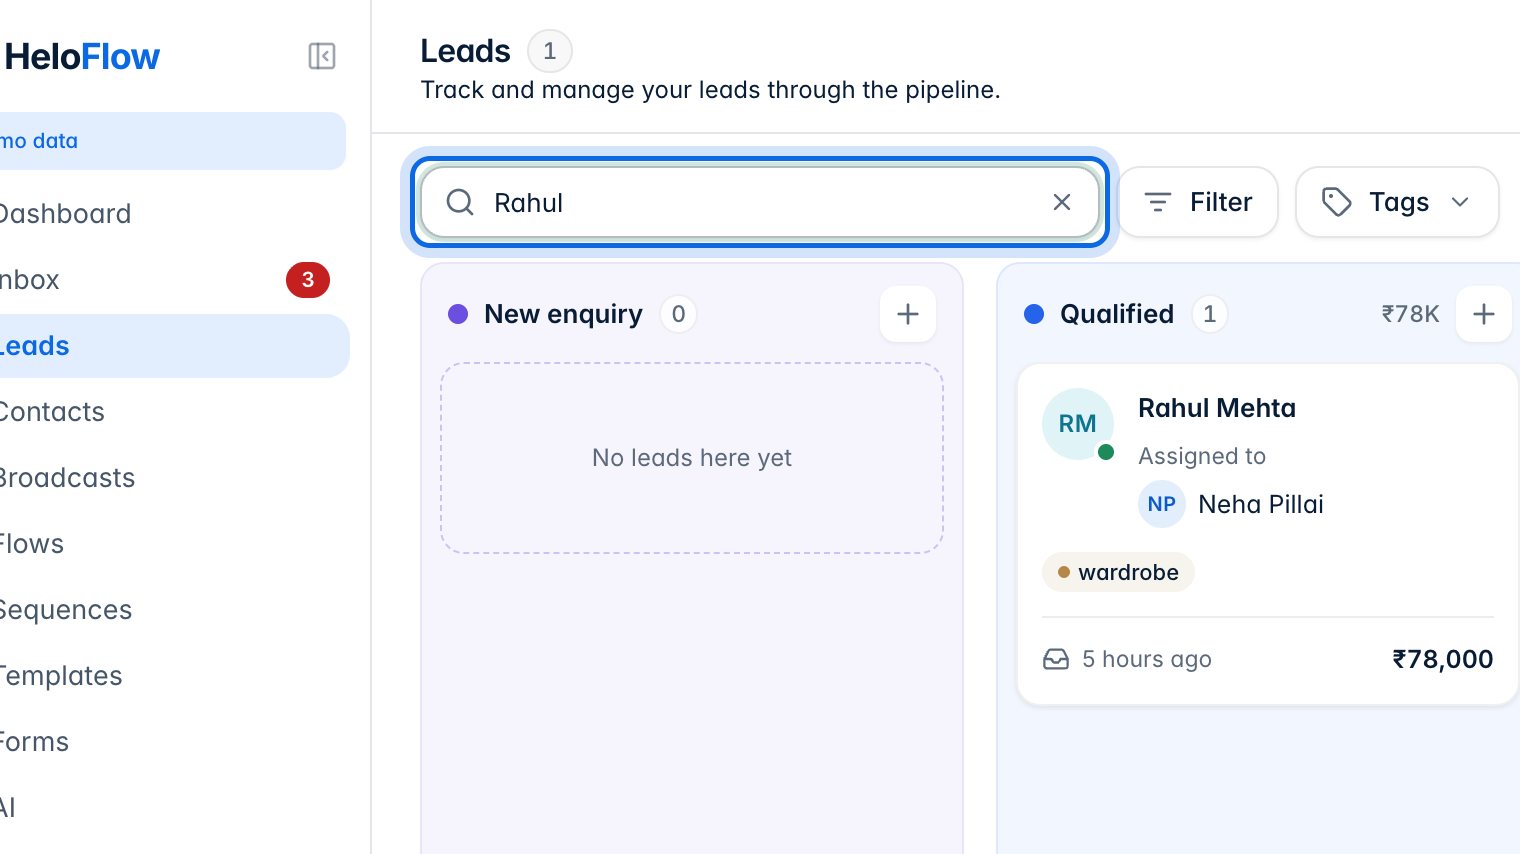
Type a name or number in the search box to find a lead. Press / to jump straight to it.
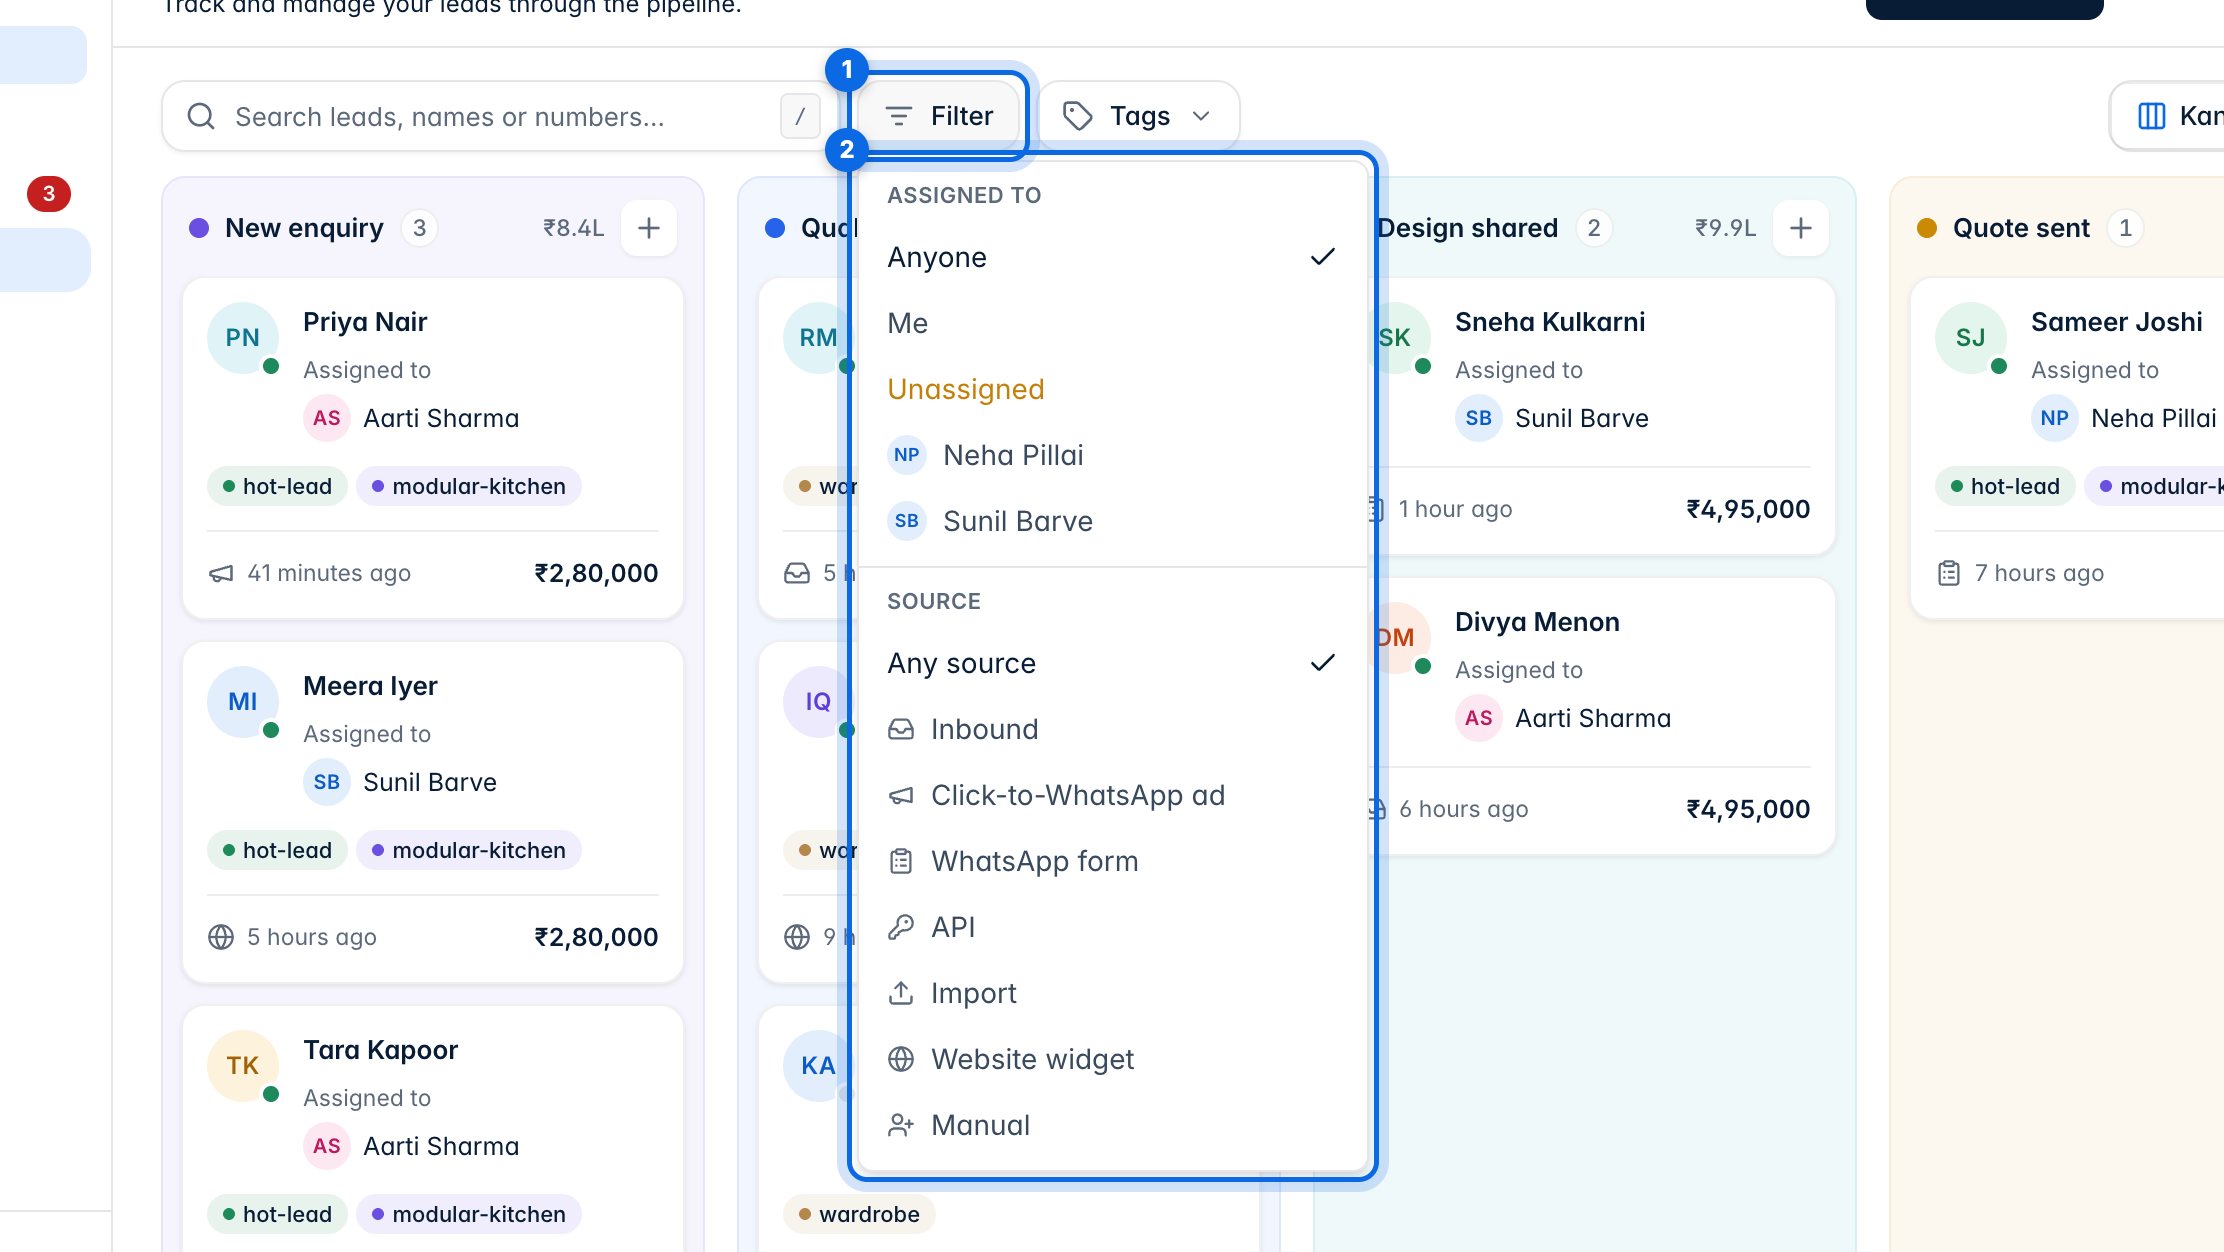
Filter (1) narrows the board to one owner or one source, like Click-to-WhatsApp ads (2).
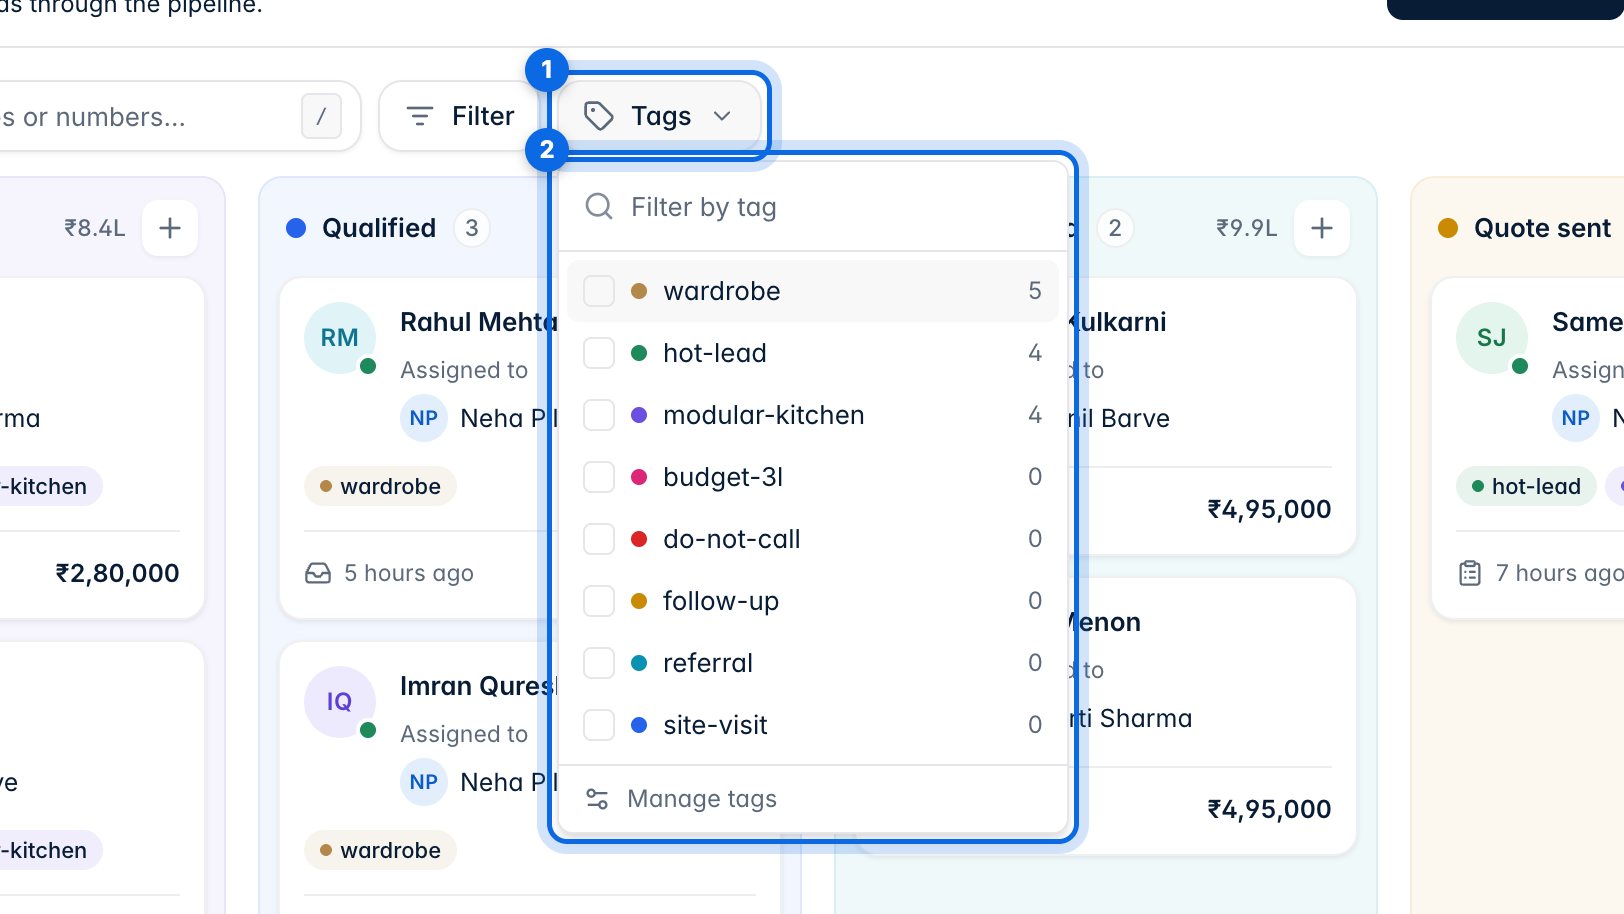
Tags (1) shows only leads with the tags you tick (2). Clear filters brings everything back.
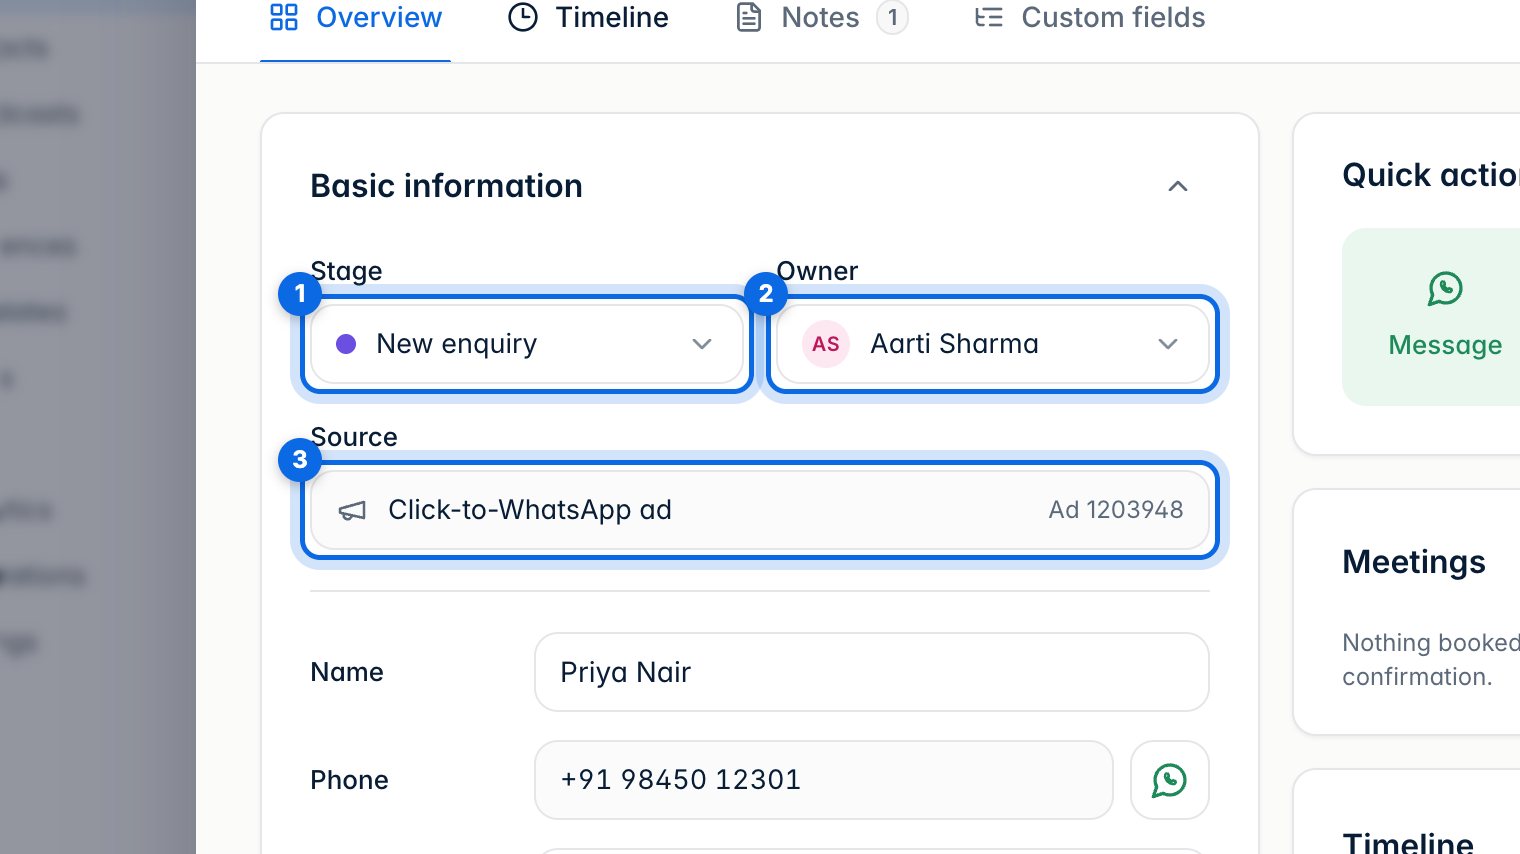
5. Open a lead
Click a card to open the lead. Basic information shows its stage (1), owner (2) and where it came from (3).
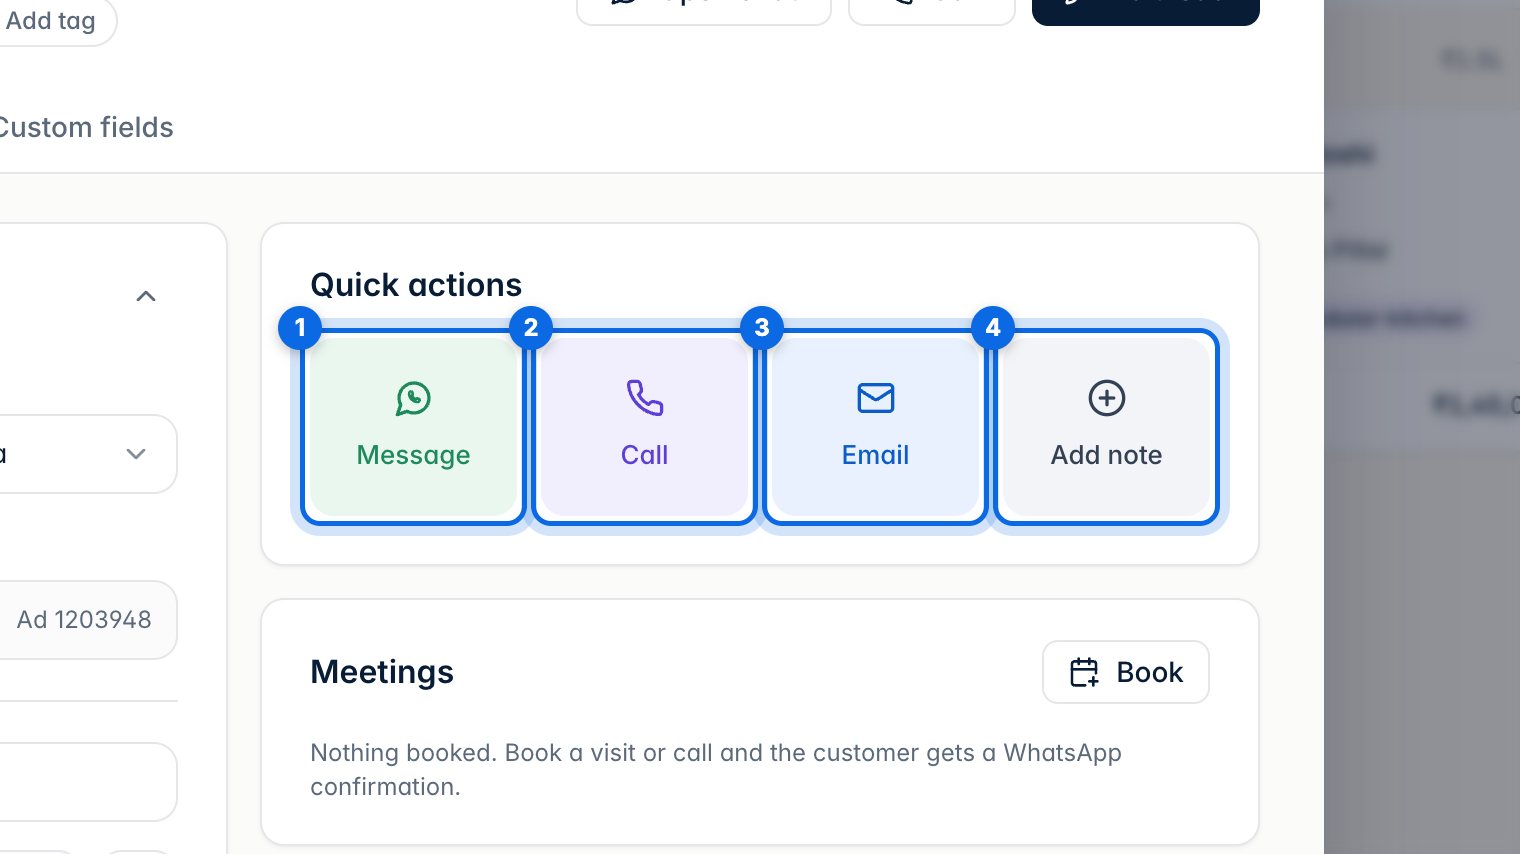
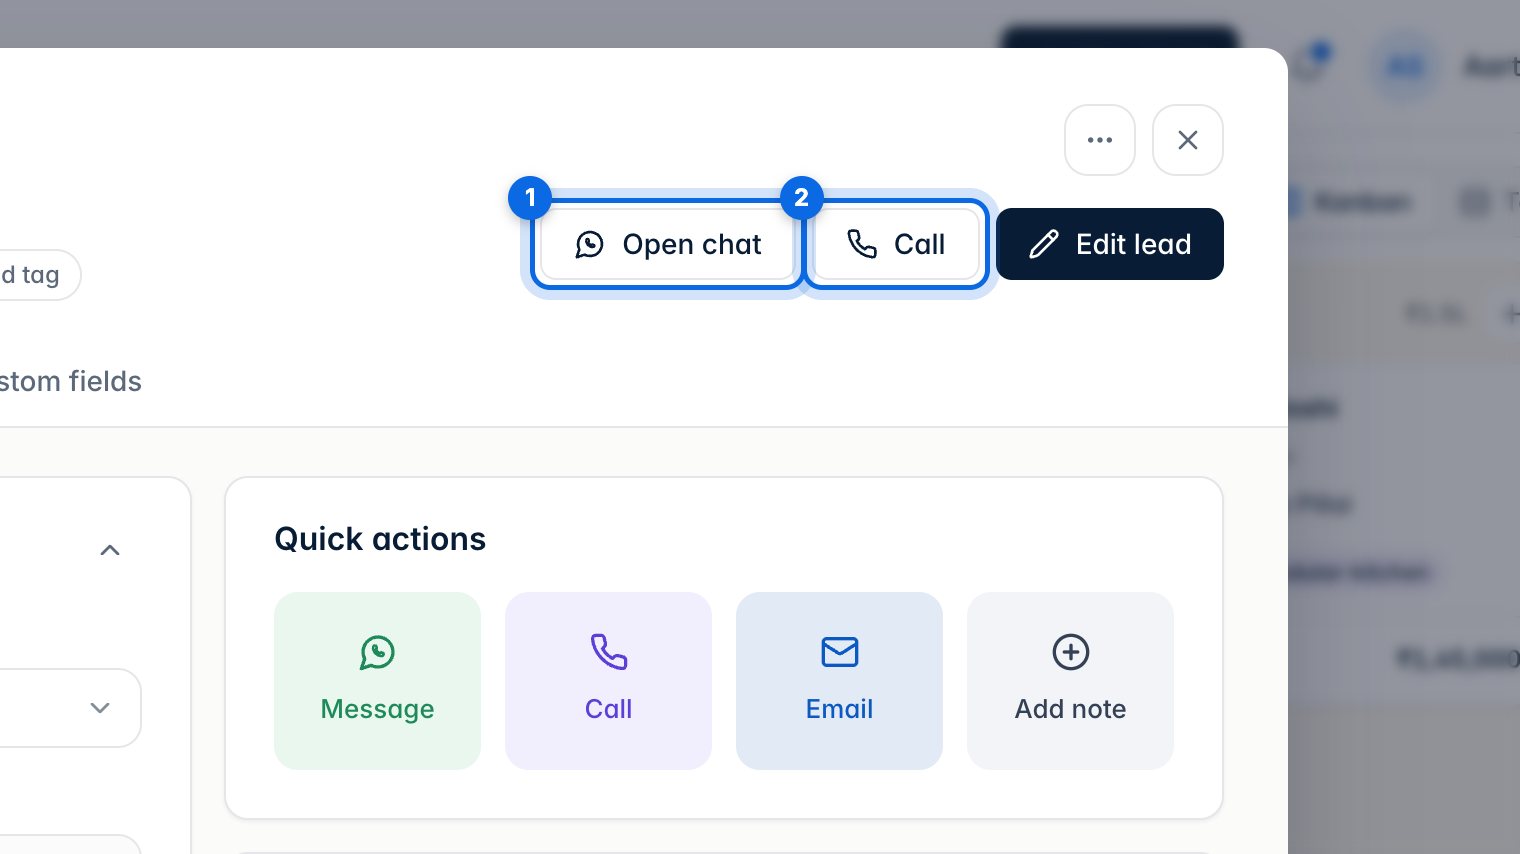
Quick actions let you message on WhatsApp (1), call (2), email (3) or add a note (4) in one click.
6. Edit lead details
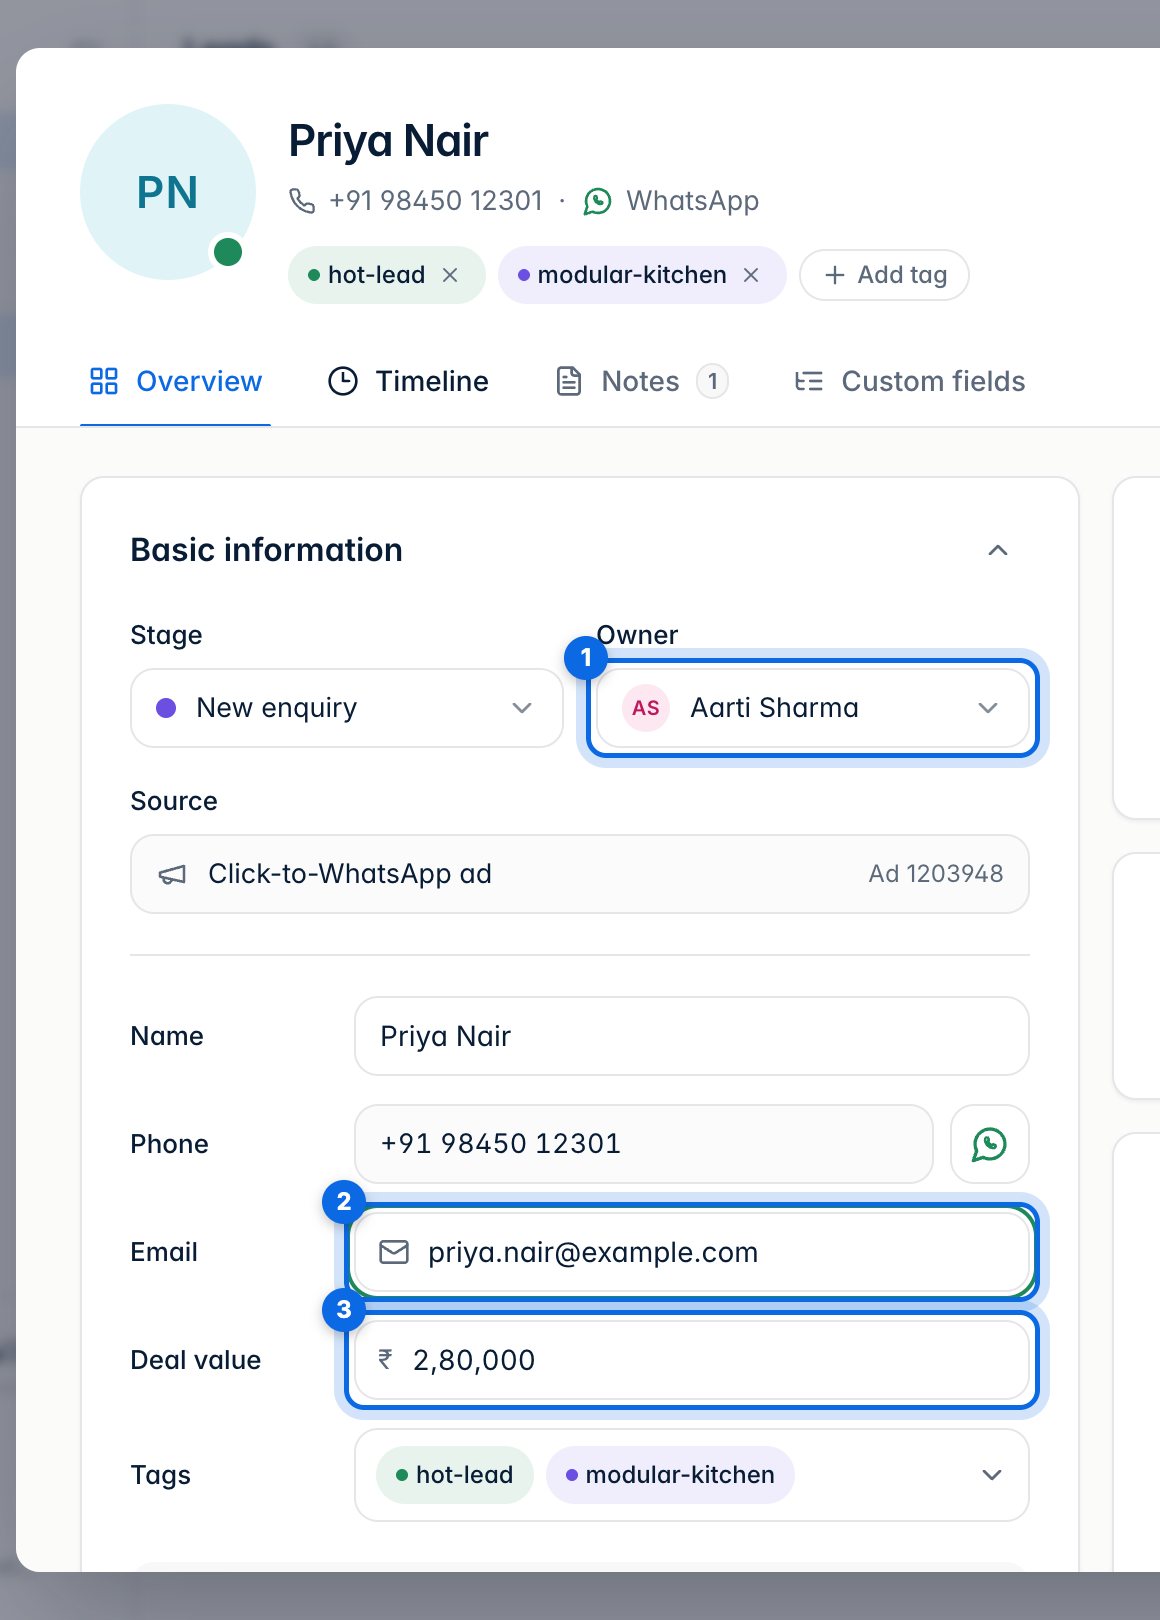
Change the owner (1), add an email (2) or update the deal value (3) right in the panel. Changes save on their own. Custom fields, in their own tab, hold anything else you want to track.
7. Notes and timeline
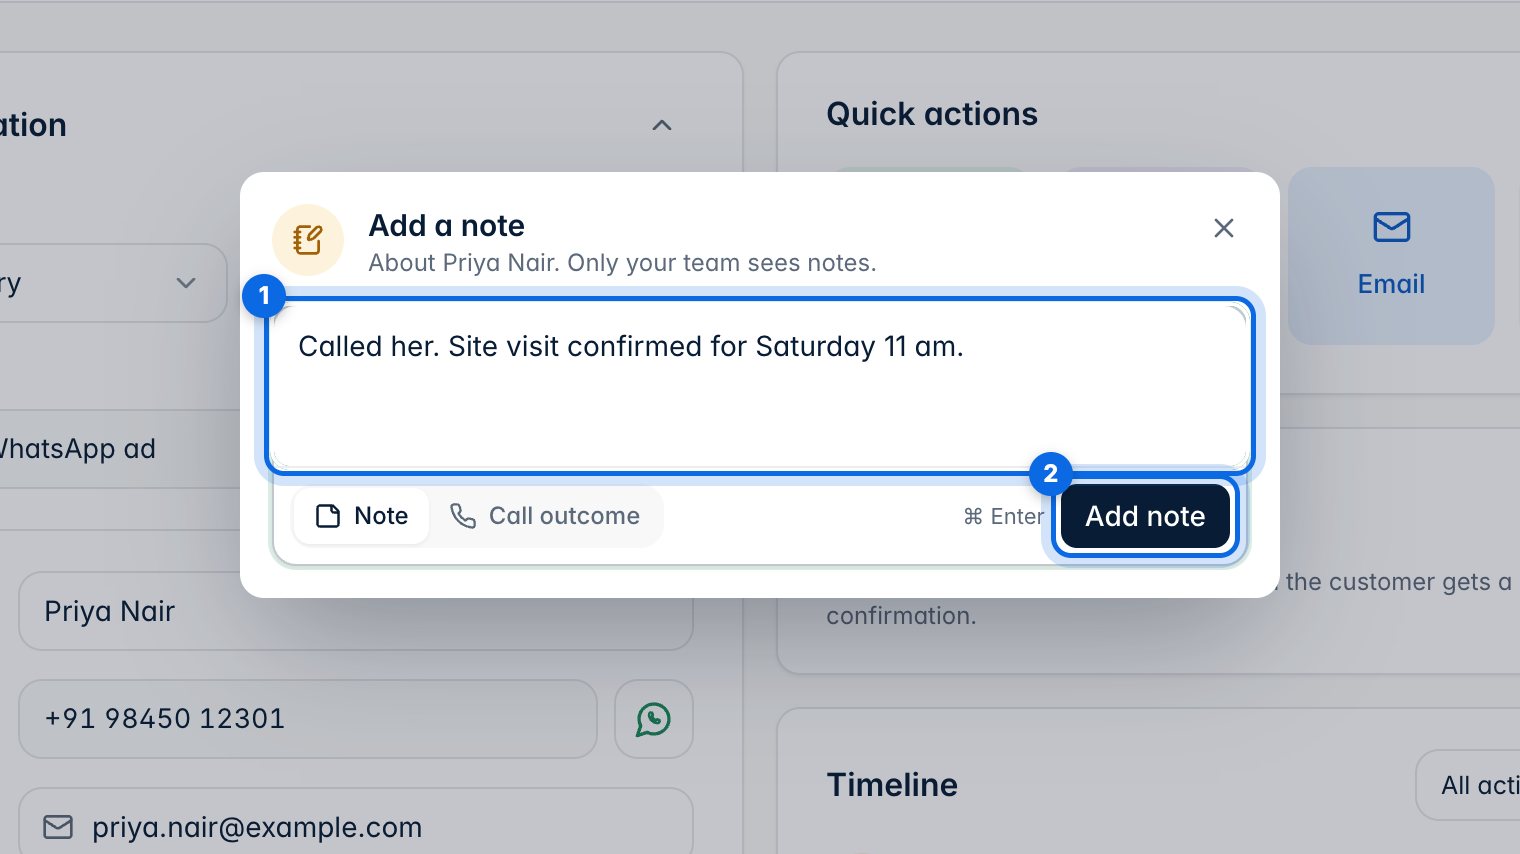
Click Add note, write it (1) and click Add note (2). Only your team sees notes.
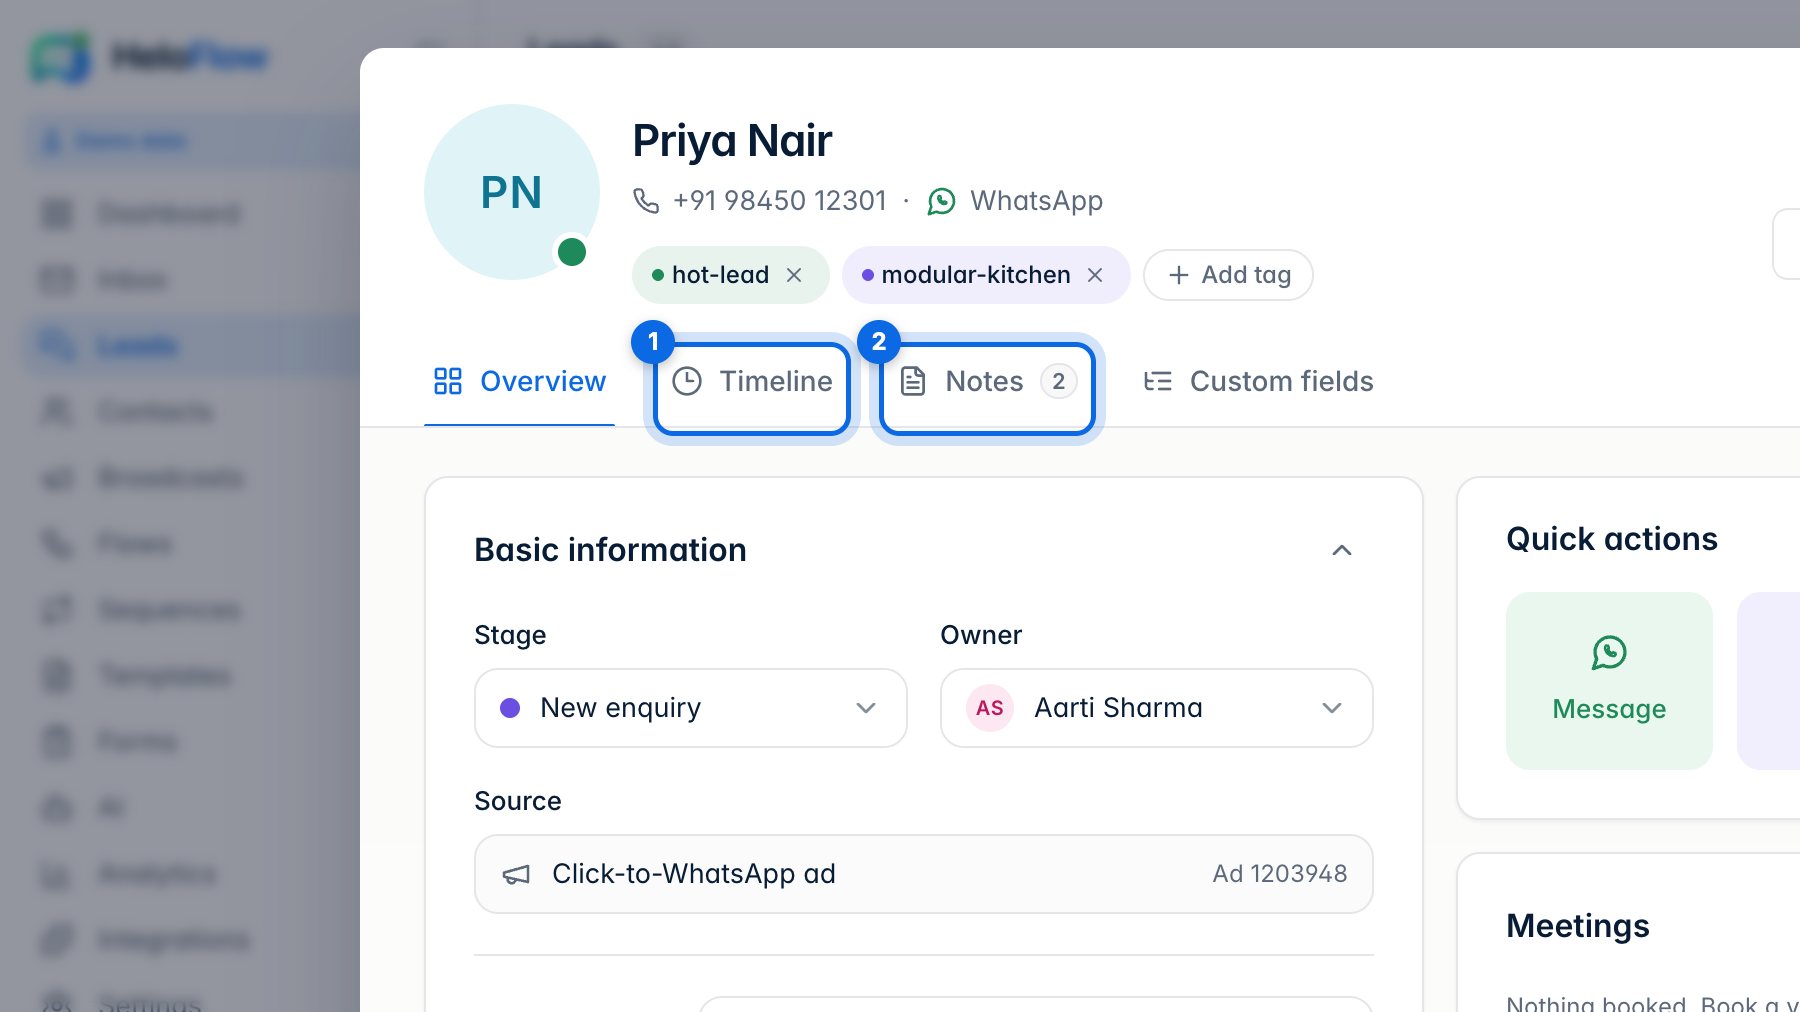
Timeline (1) lists everything that happened to the lead, and Notes (2) collects every note in one place.
8. Book a meeting
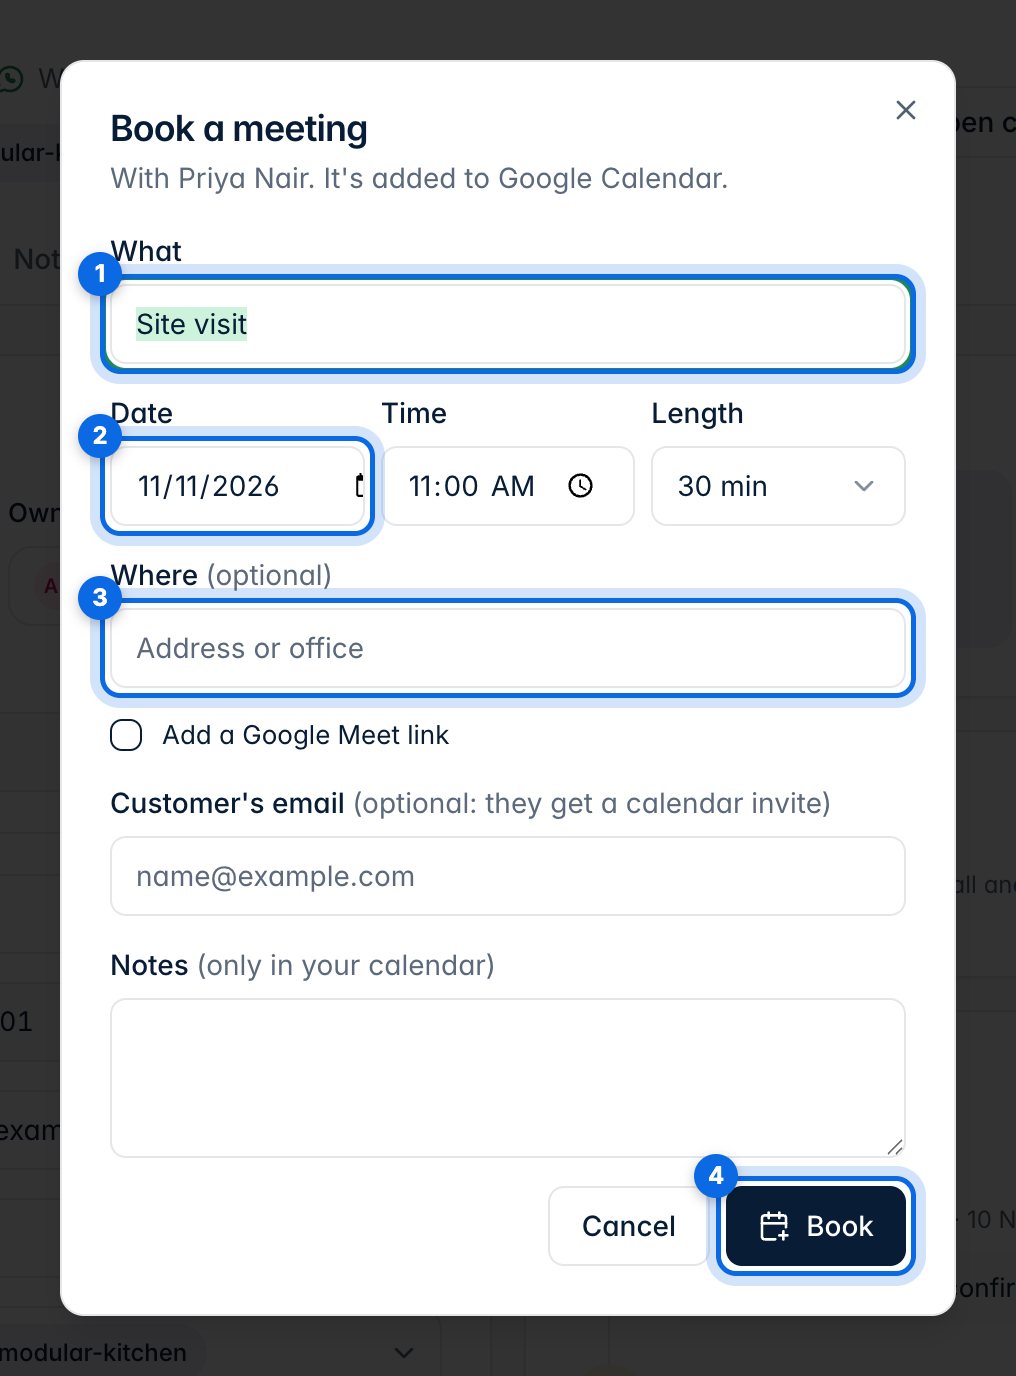
Under Meetings, click Book. Say what it is (1), pick the date, time and length (2), add where (3), then click Book (4). It goes into Google Calendar and the customer gets a WhatsApp confirmation.
9. Email and WhatsApp
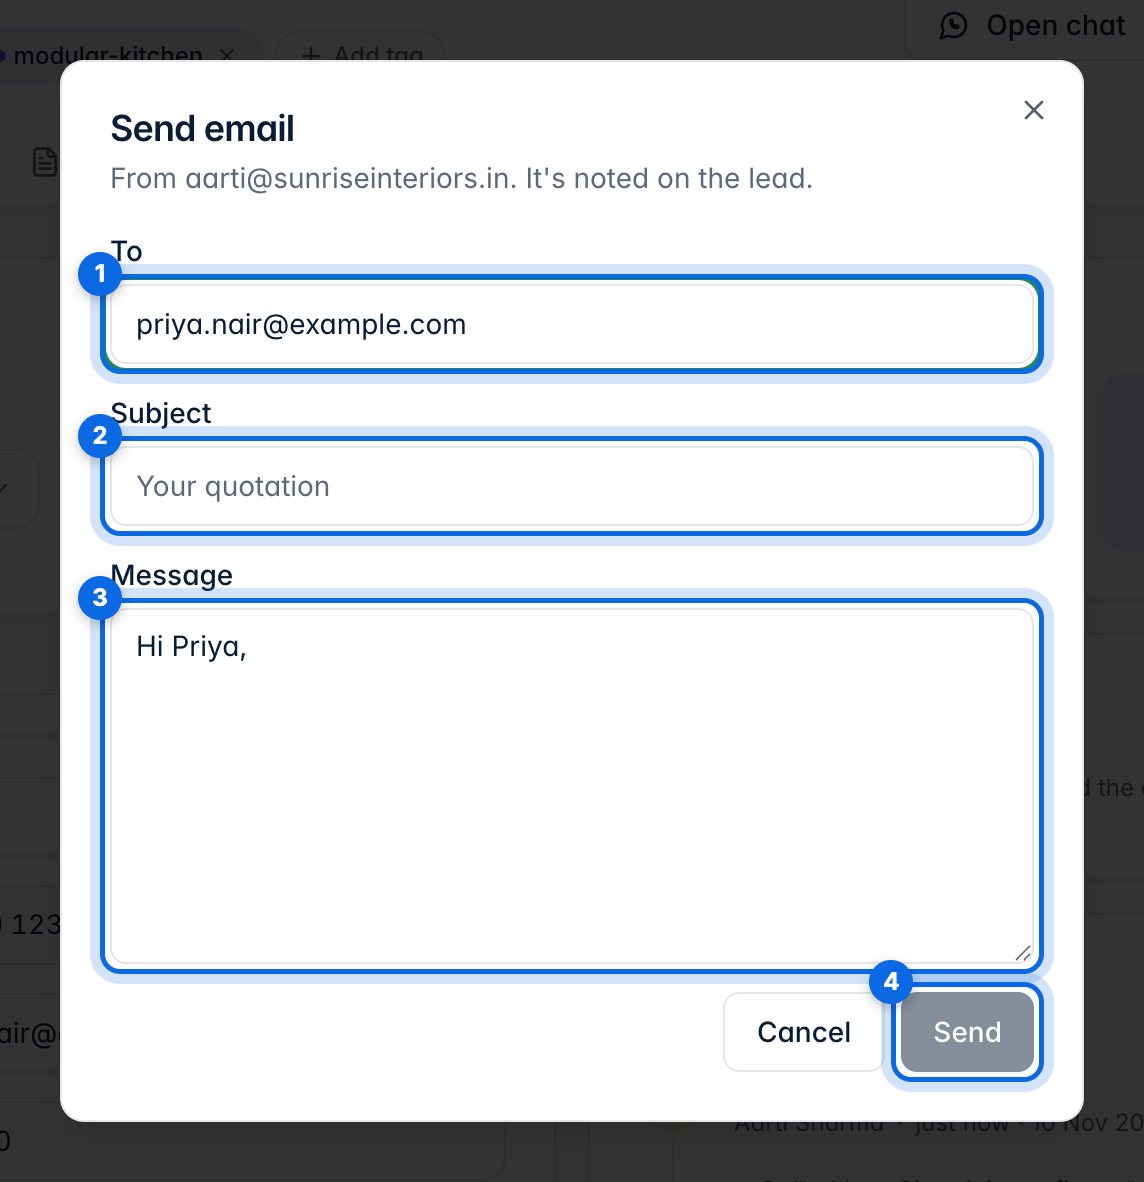
Click Email, fill in To (1), Subject (2) and Message (3), then Send (4). It's sent from the address shown at the top and noted on the lead.
Open chat (1) takes you to this customer's WhatsApp conversation in the Inbox, and Call (2) dials them.
10. Mark won or lost
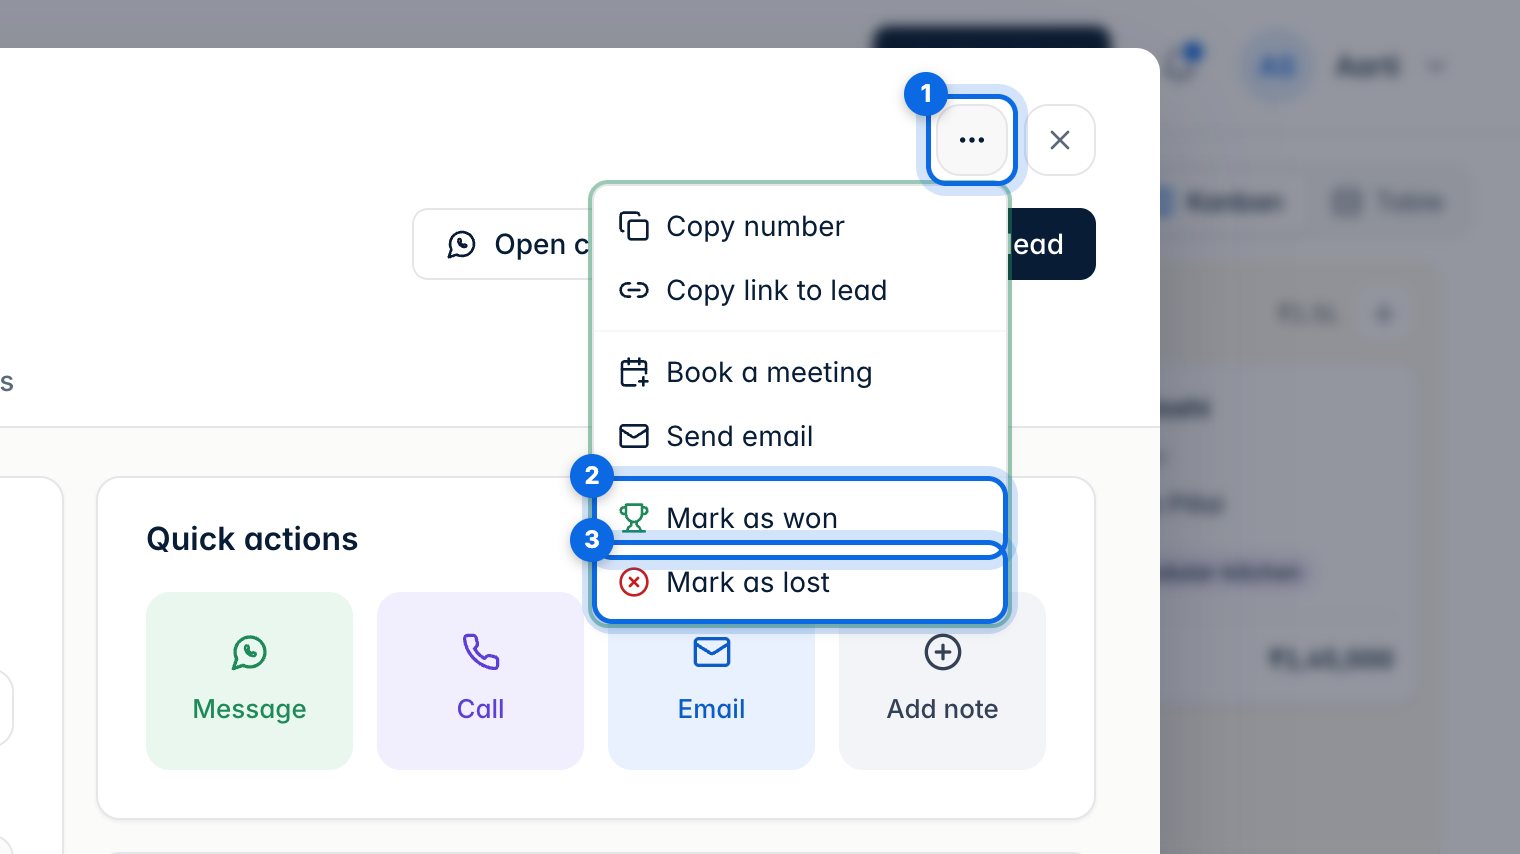
Open the ⋯ menu on the lead (1) and choose Mark as won (2) or Mark as lost (3).
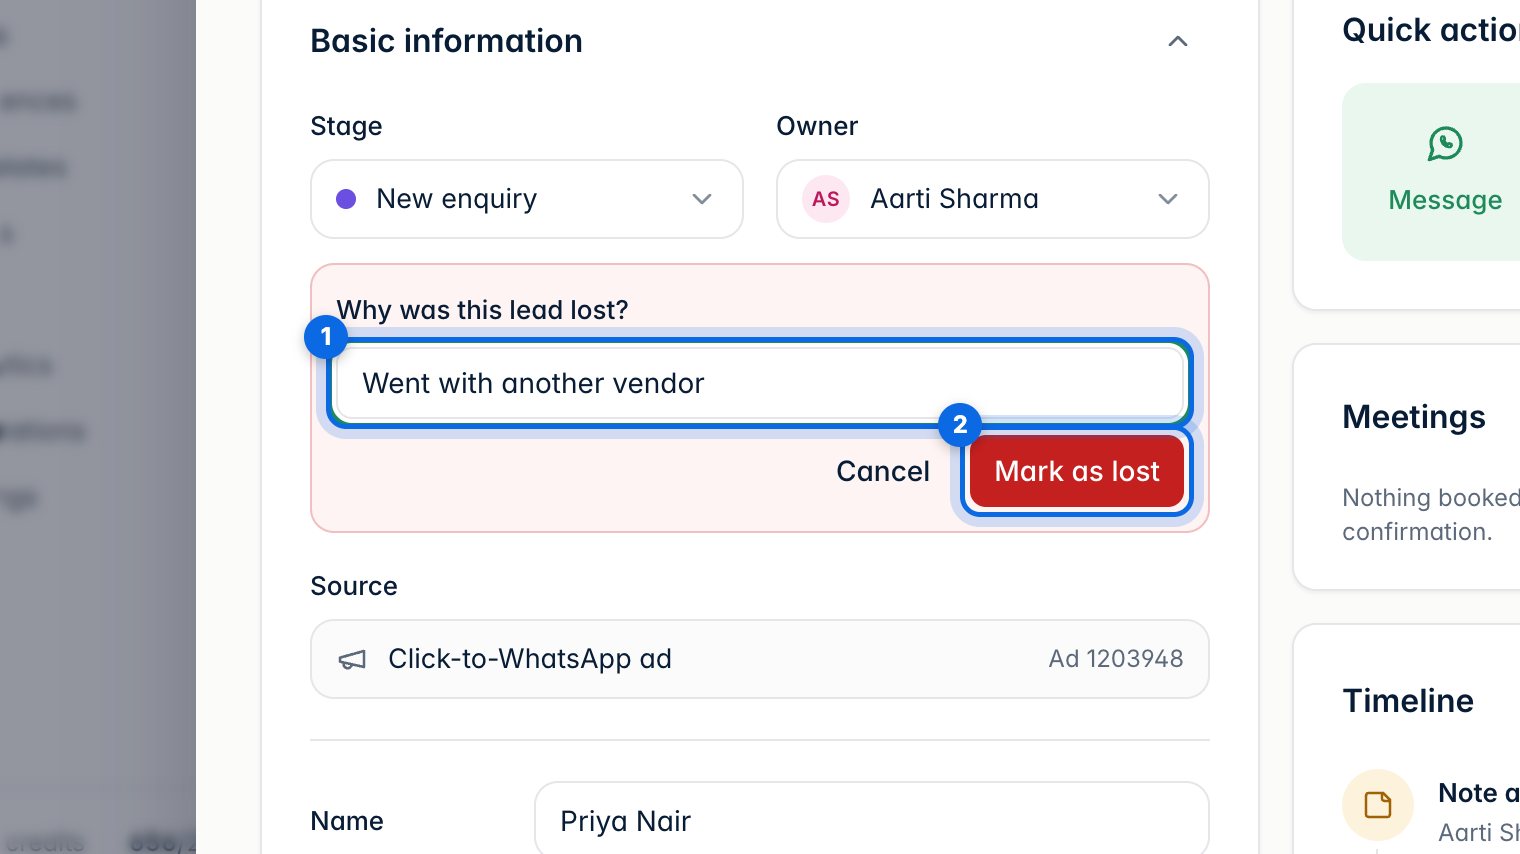
For a lost lead, write why (1) and click Mark as lost (2).
11. Table view and bulk actions
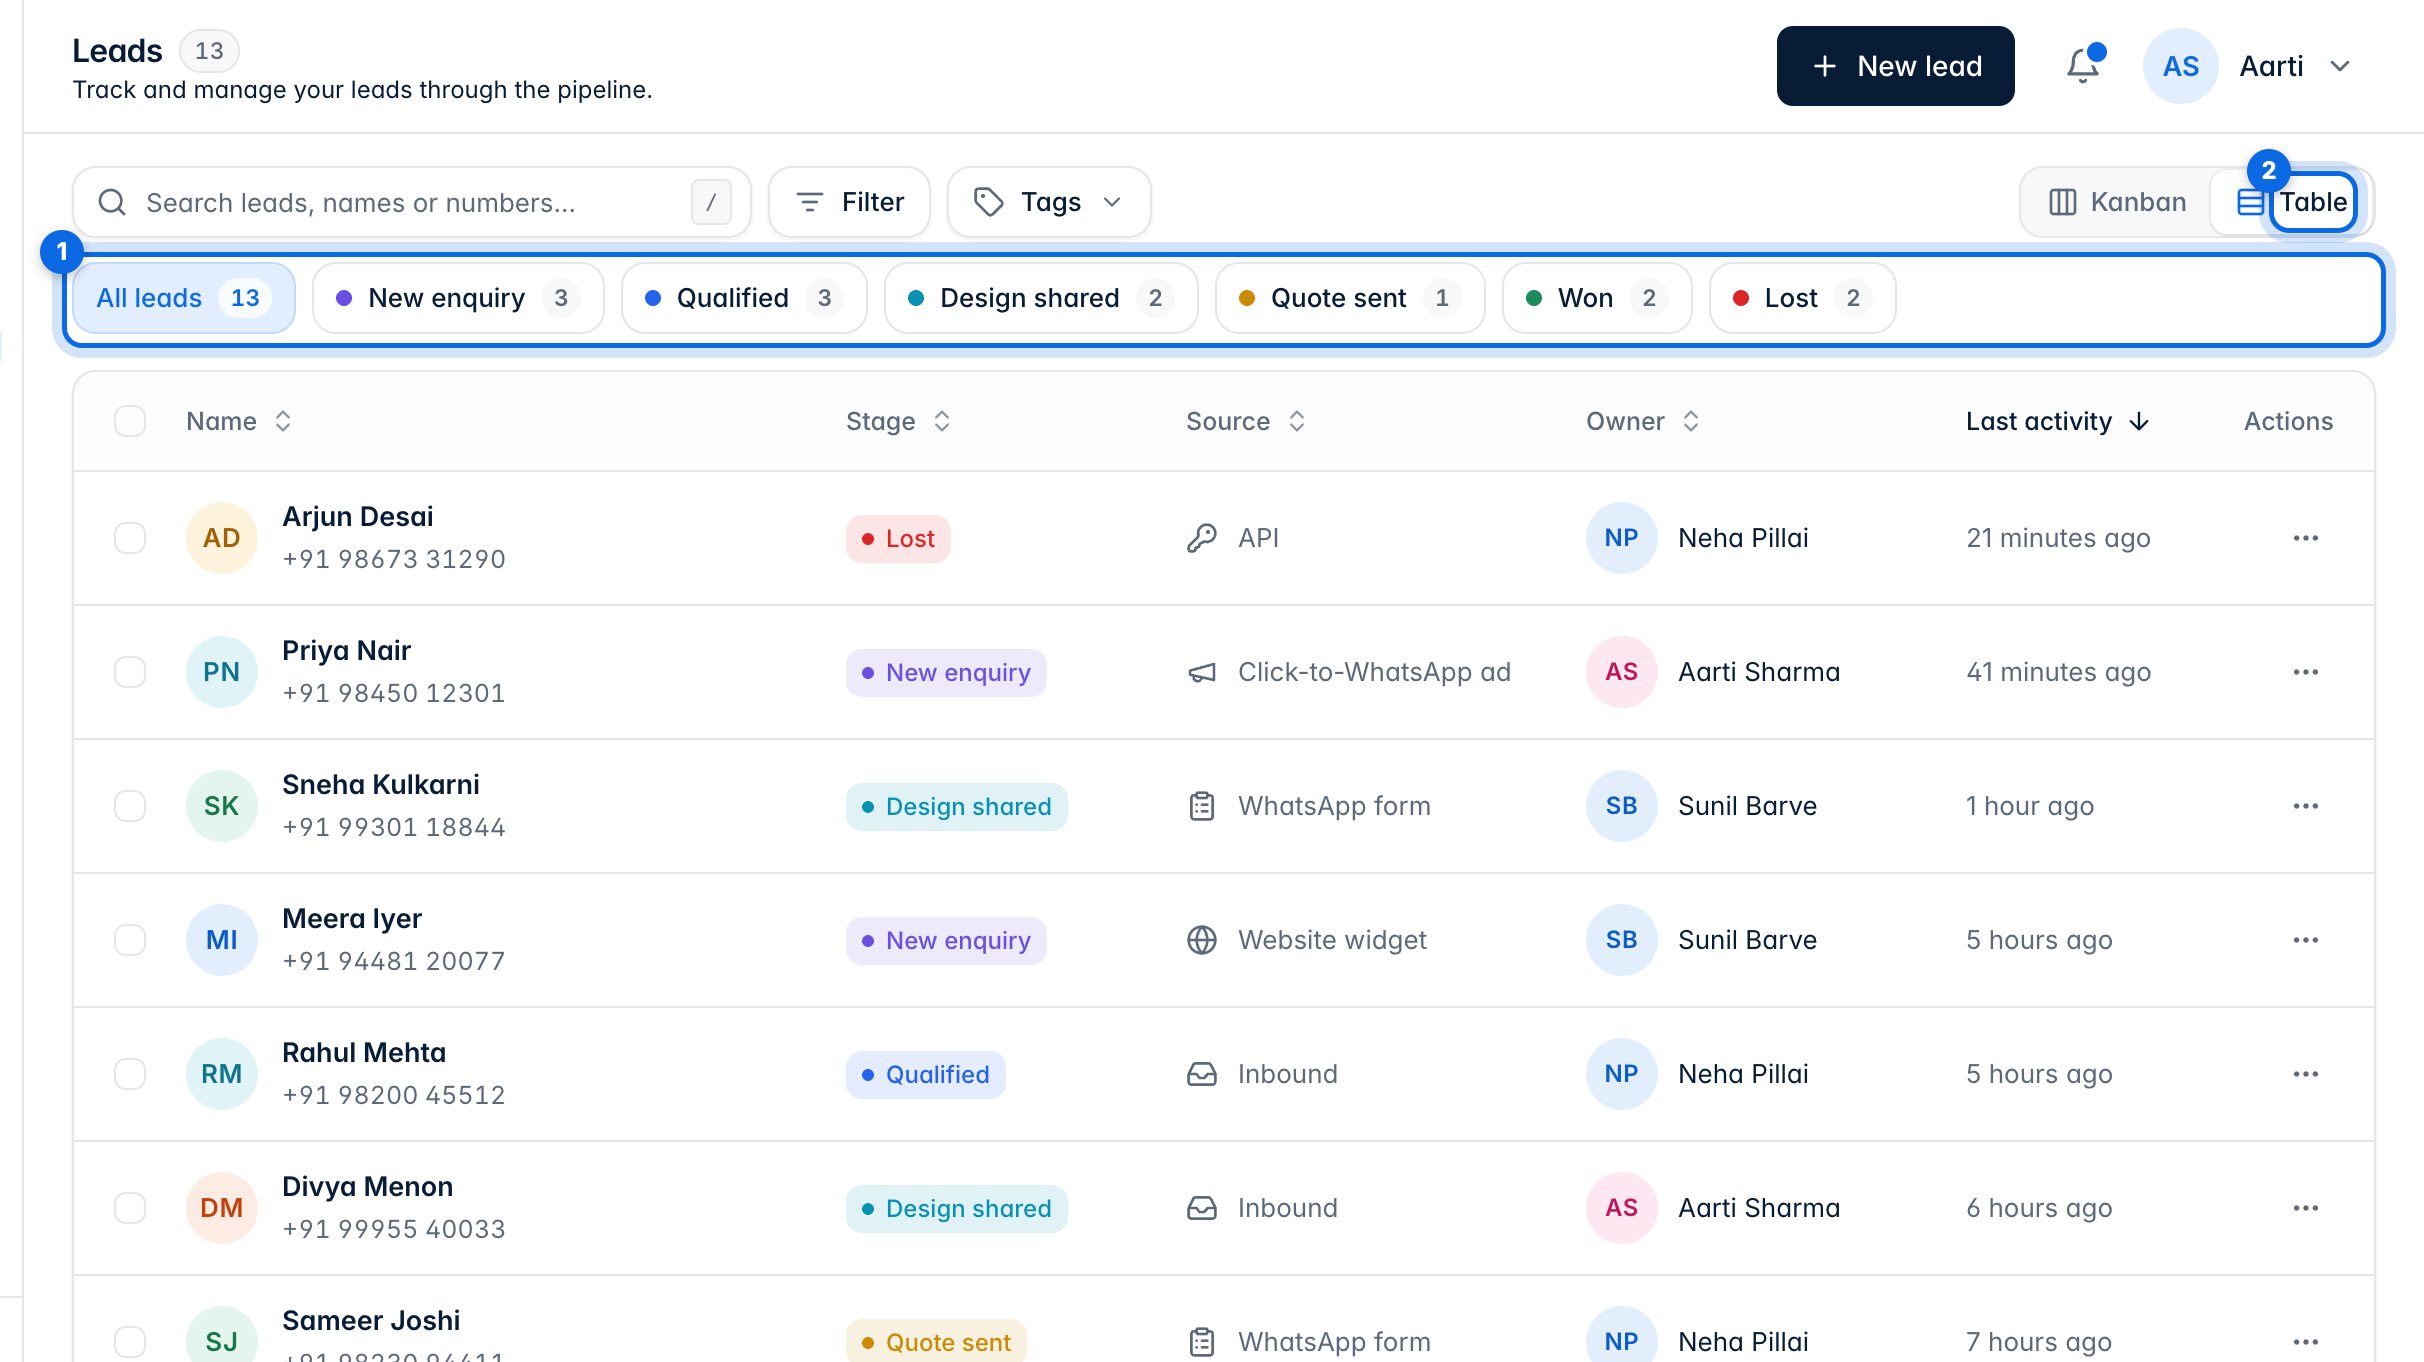
Click Table (2) to see leads as a list. The tabs on top (1) show one stage at a time.
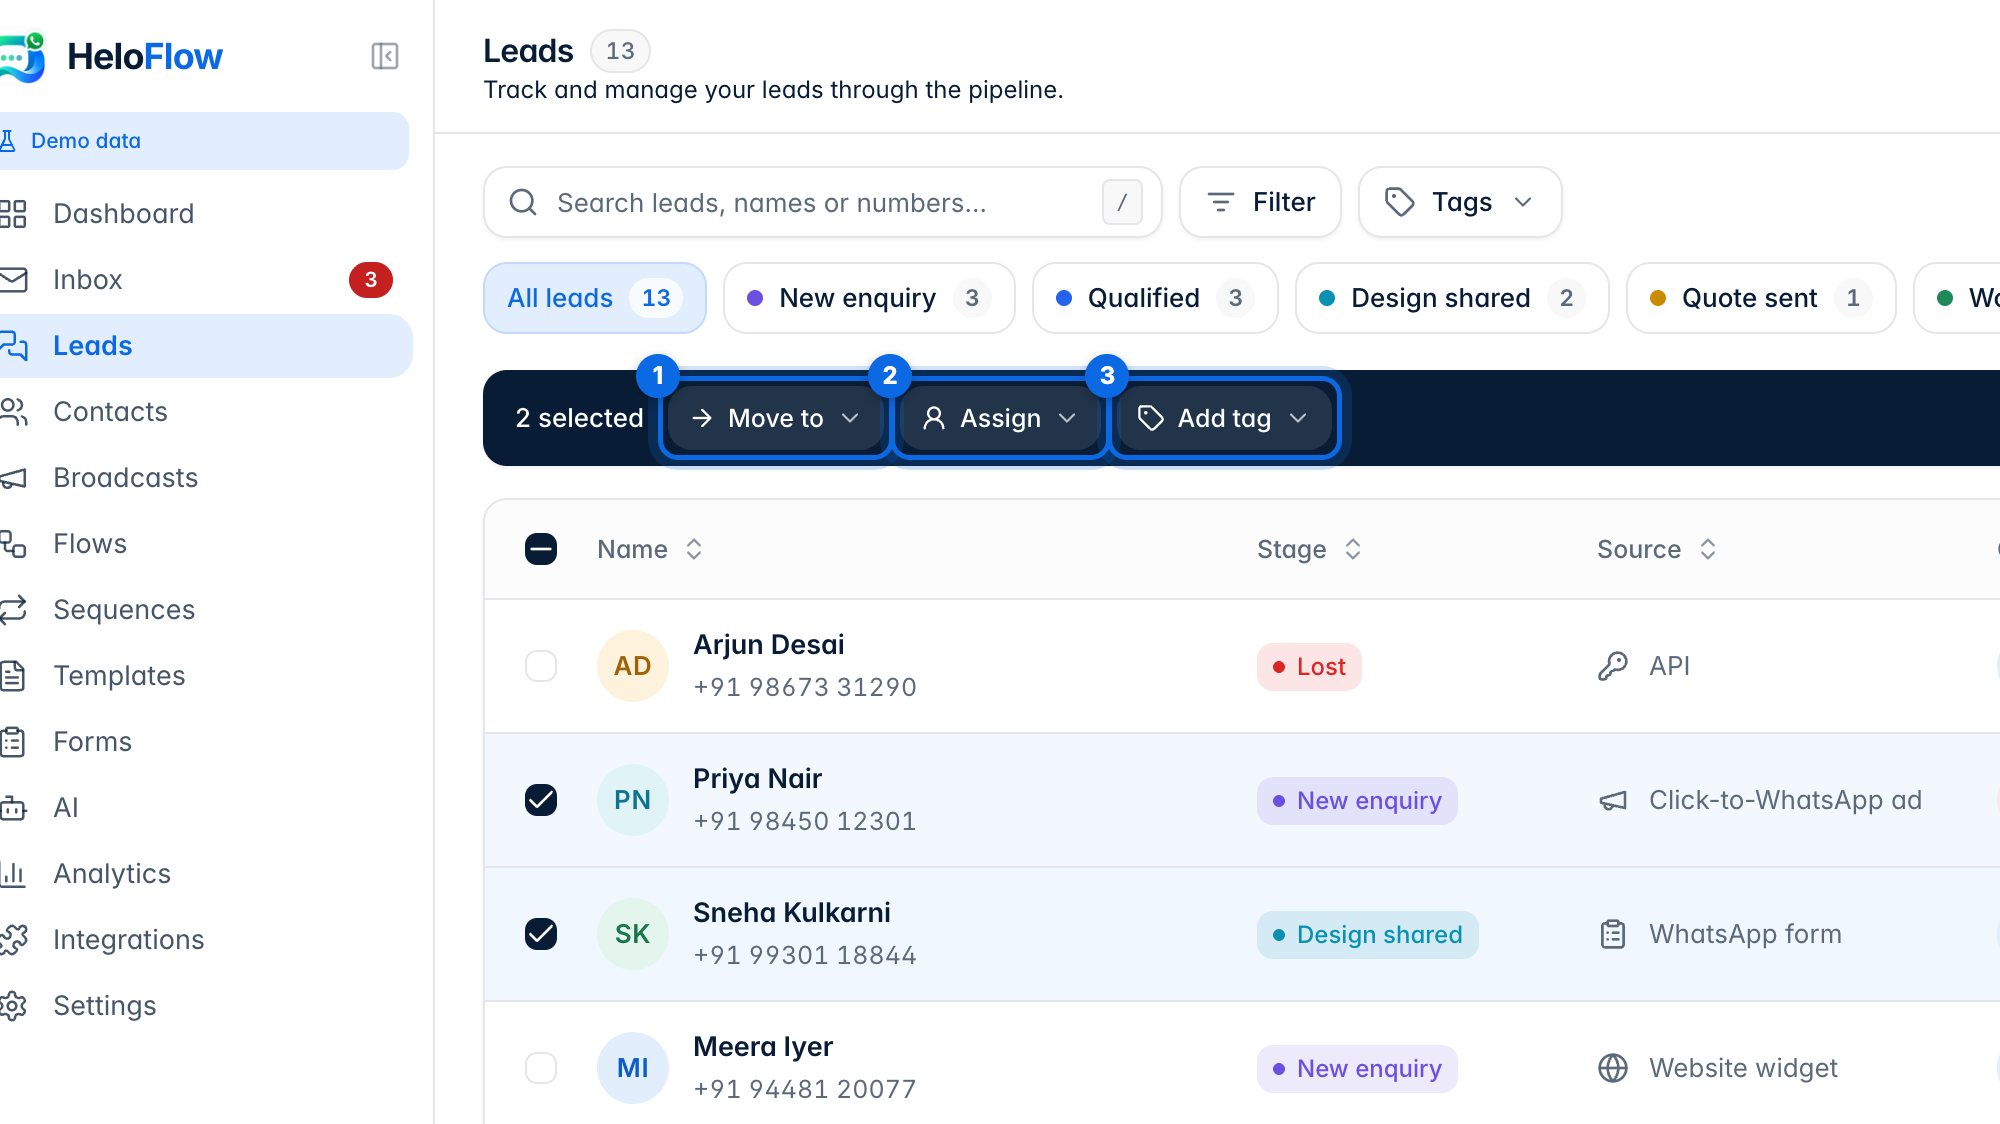
Tick several leads to Move them to a stage (1), Assign them to a teammate (2) or Add a tag (3) in one go.