Integrations
Connect your apps, choose what they send, and set up automations.
1 min video8 stepsEnglish and हिंदी
Language
Step by step
The same steps in writing, with a screenshot for each.
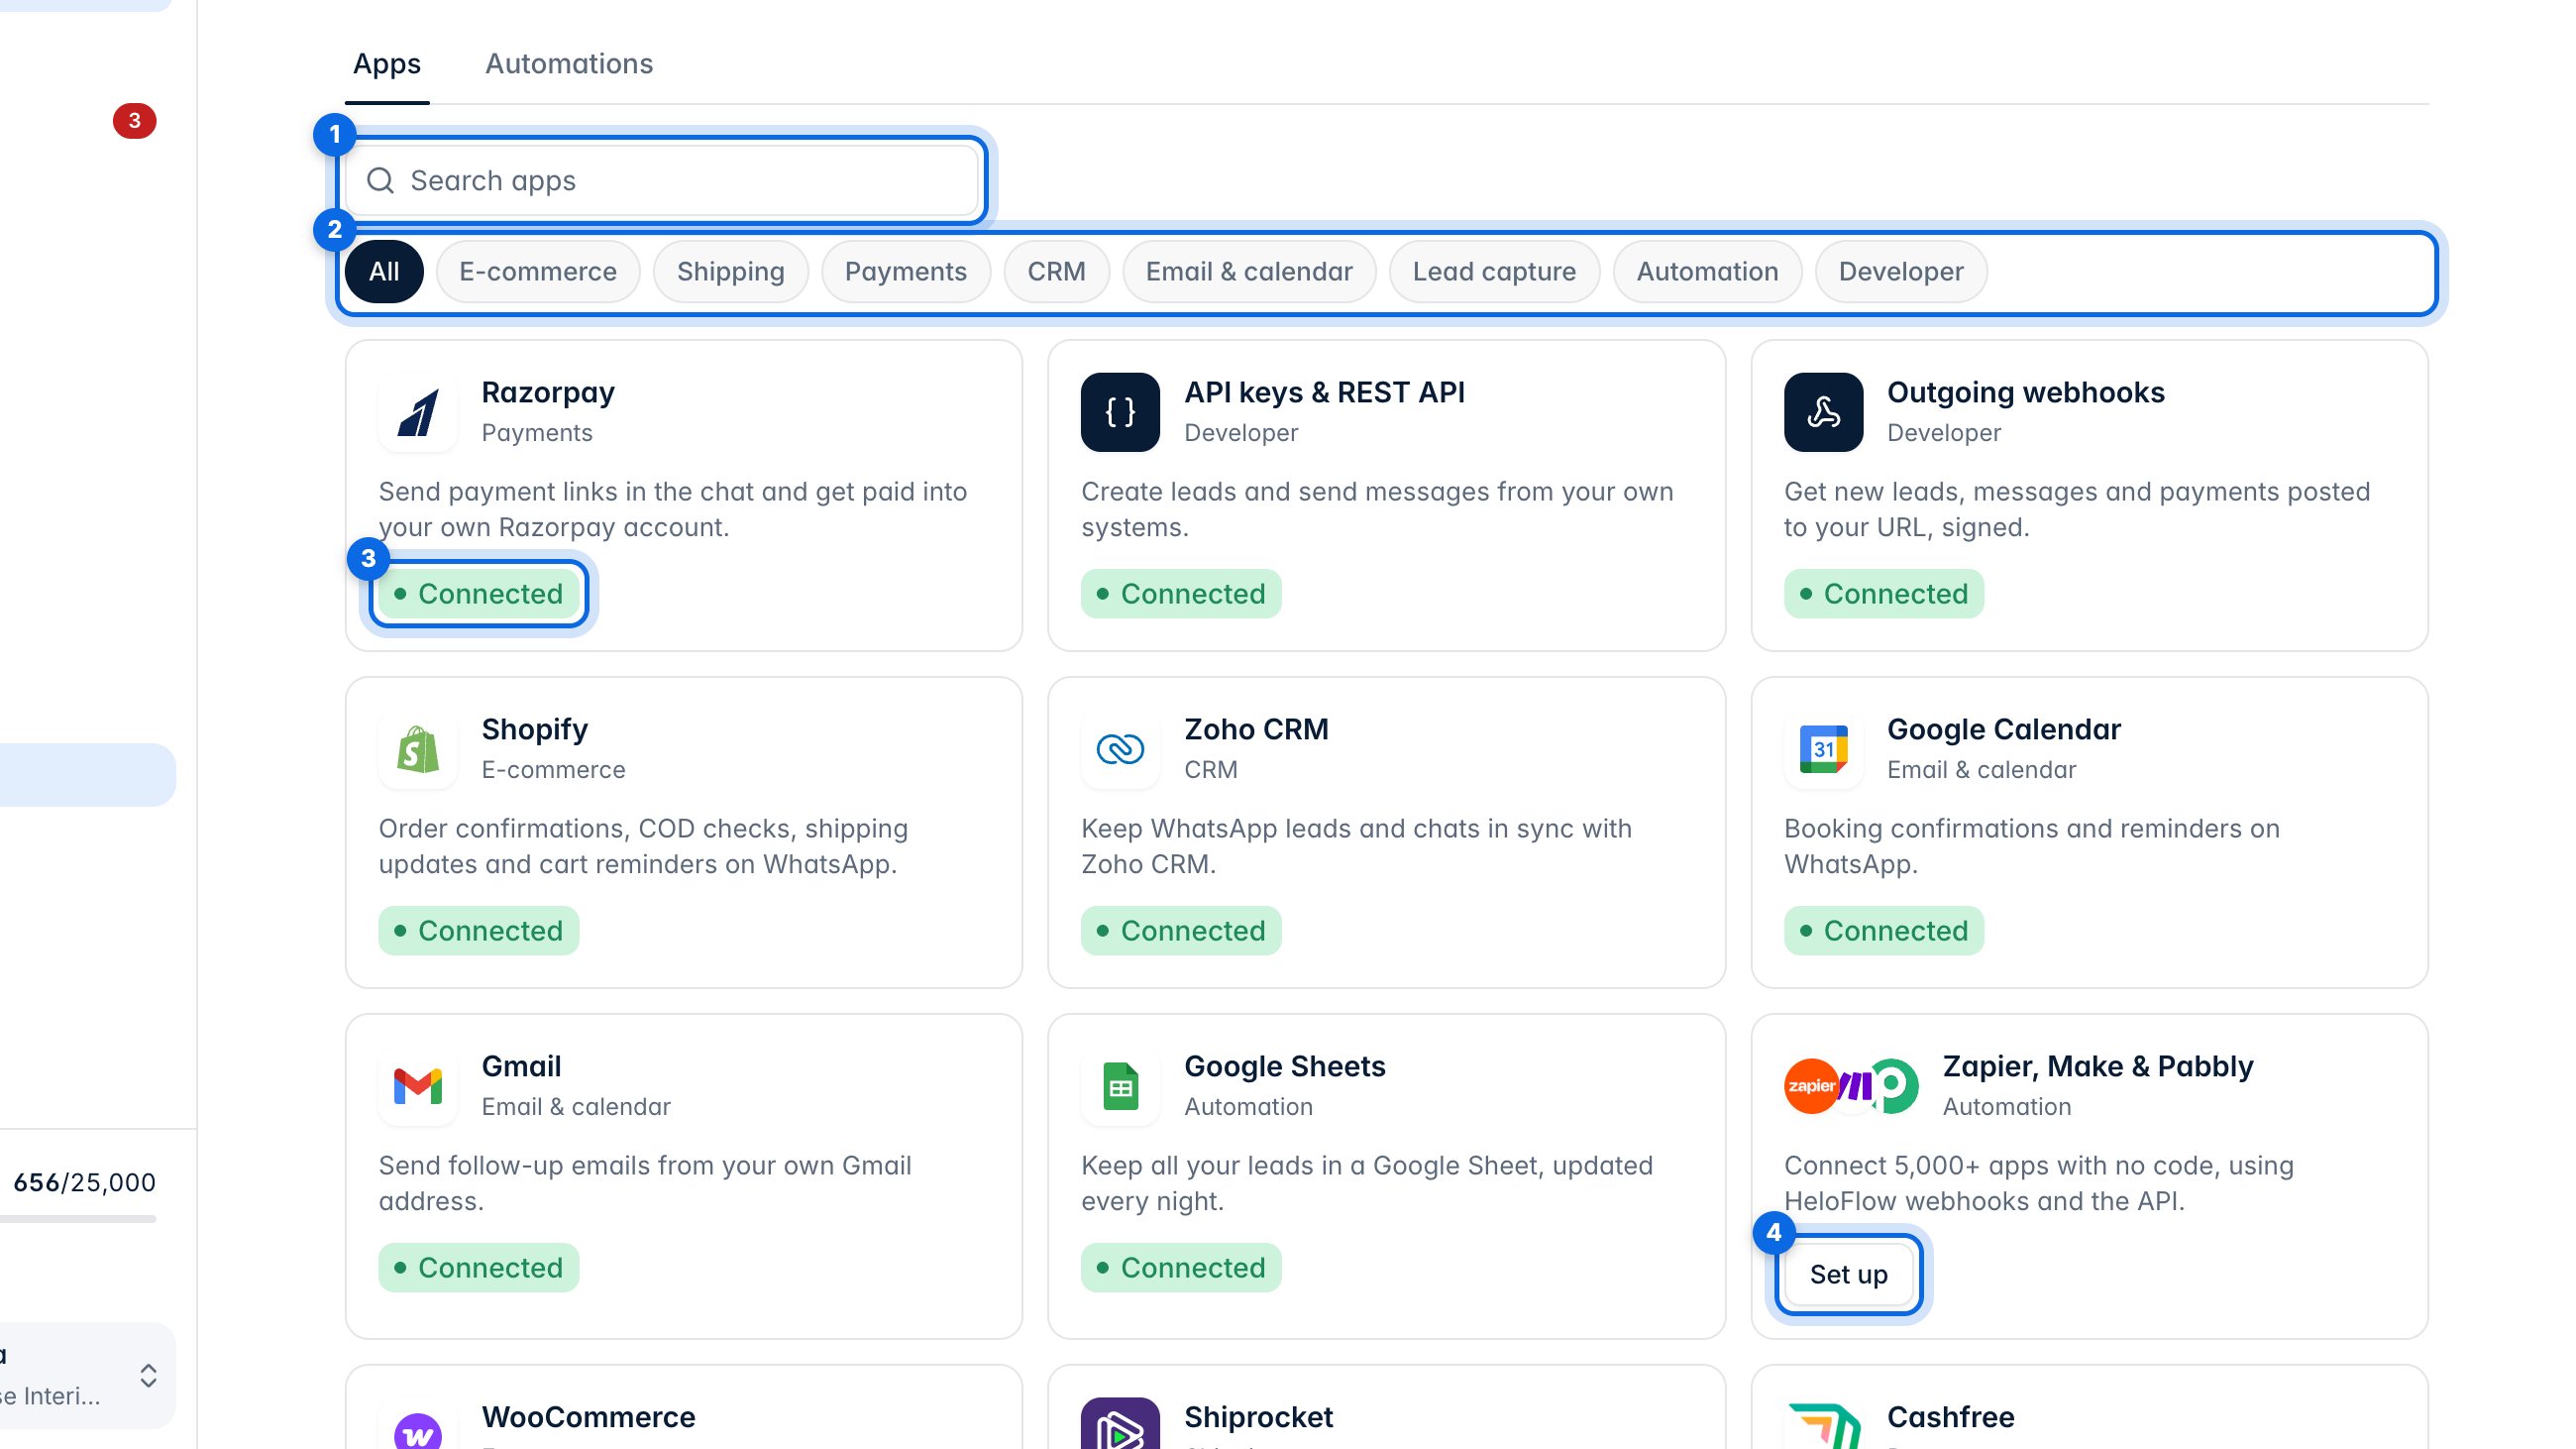
1. Find your apps
Search for an app (1) or pick a category (2), like payments, stores or shipping. Apps you've connected say Connected (3); others offer Connect or Set up (4), and some are marked Coming soon.
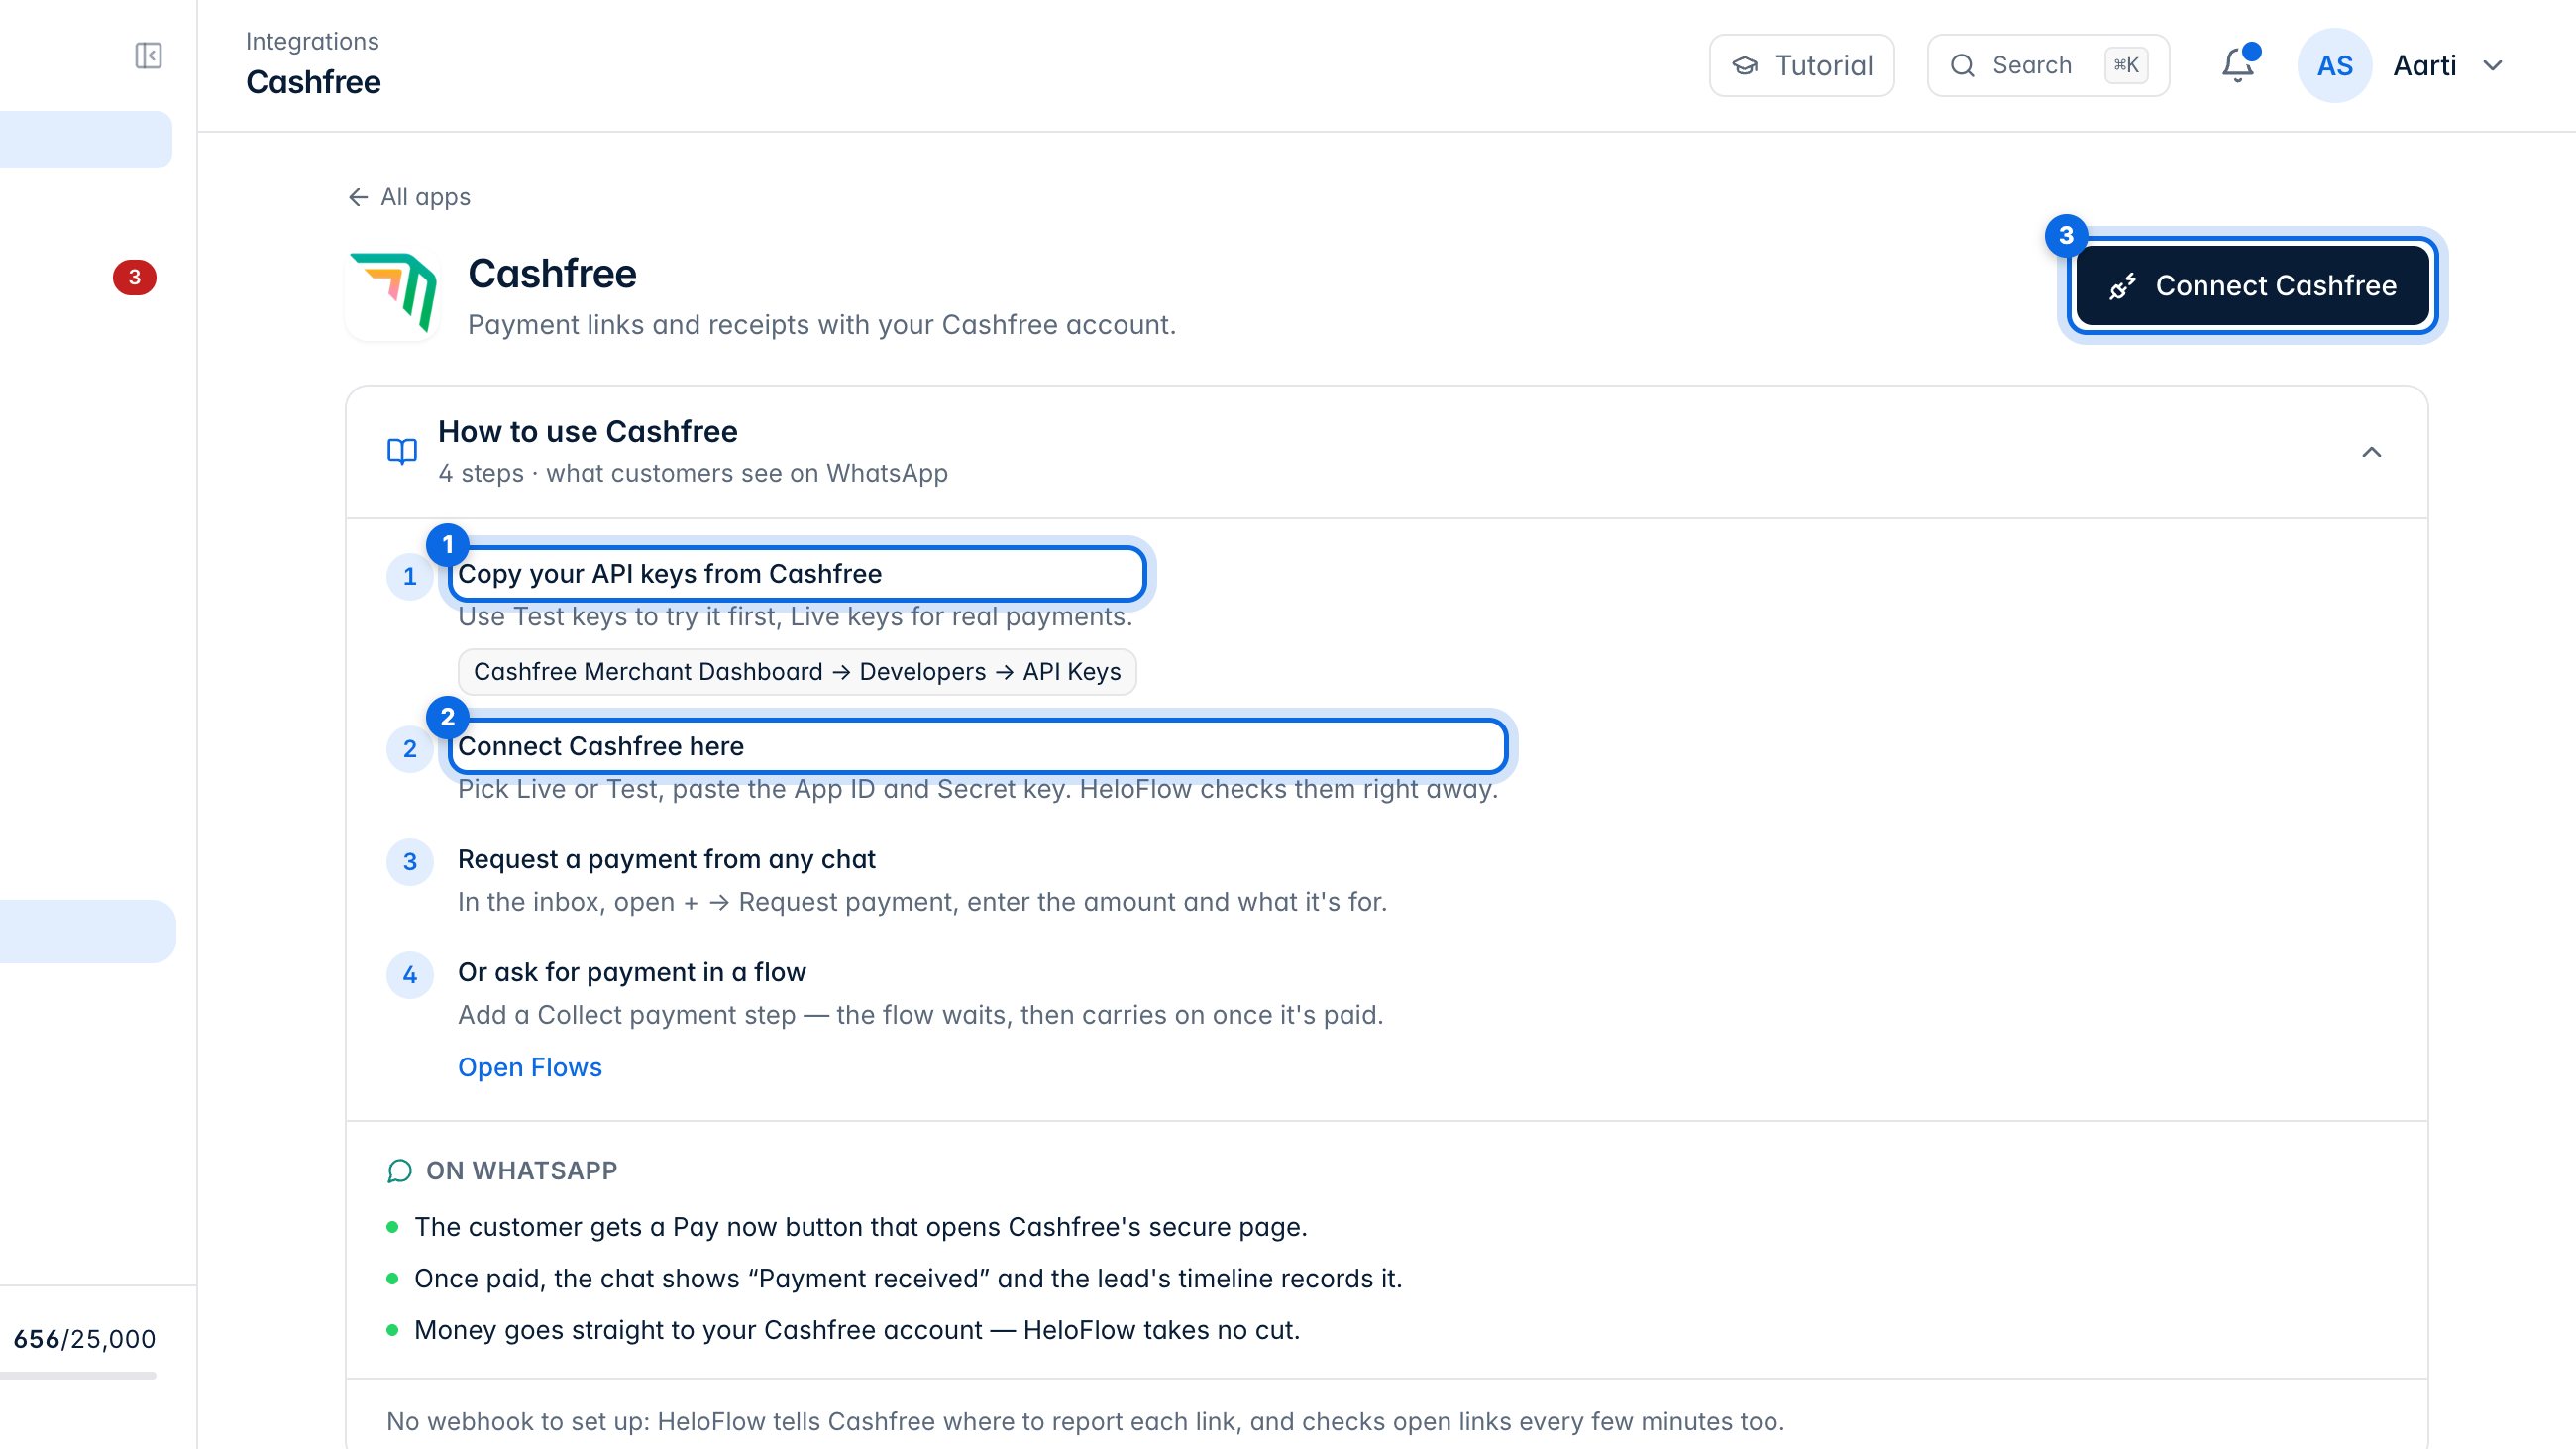
2. Connect an app
Open an app to see How to use it, step by step (1, 2). Then click Connect (3).
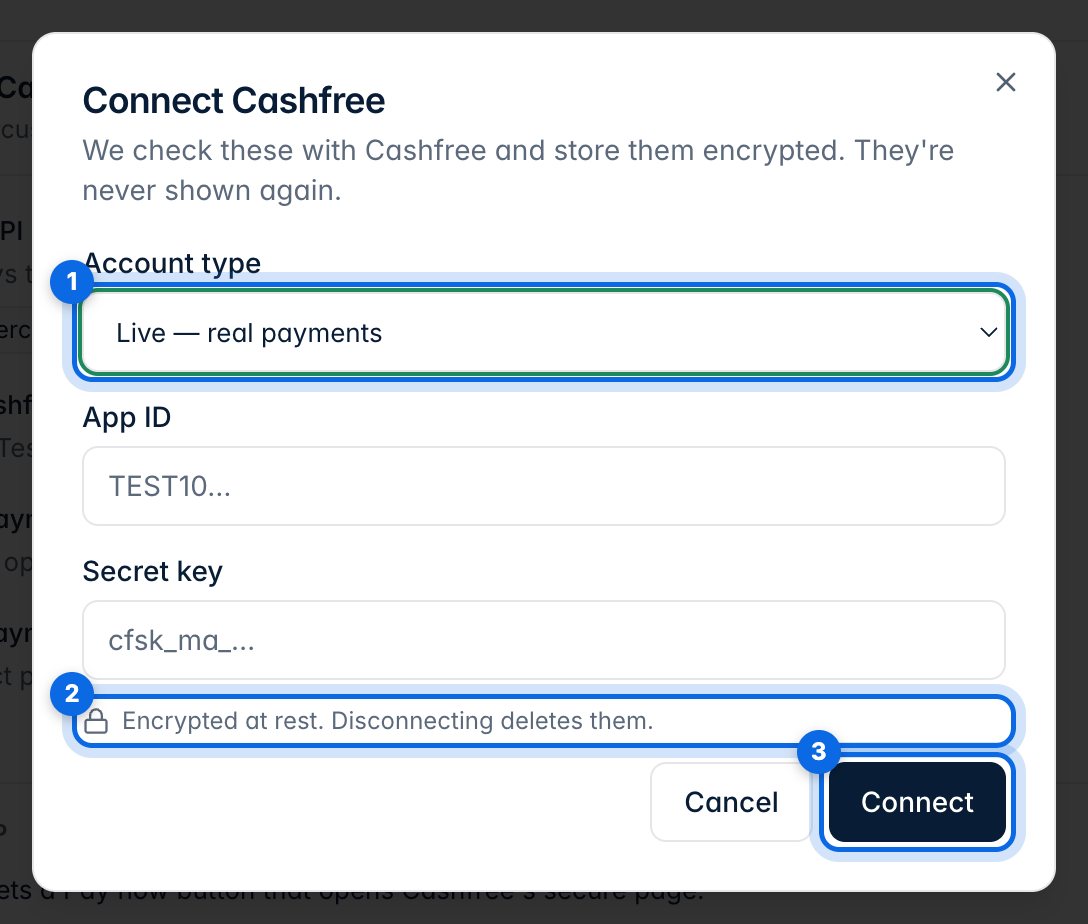
For a payment app, choose a live or test account (1) and paste the keys from that app. HeloFlow checks them and stores them encrypted (2); they're never shown again, and disconnecting deletes them. Click Connect (3).
3. Choose what it sends
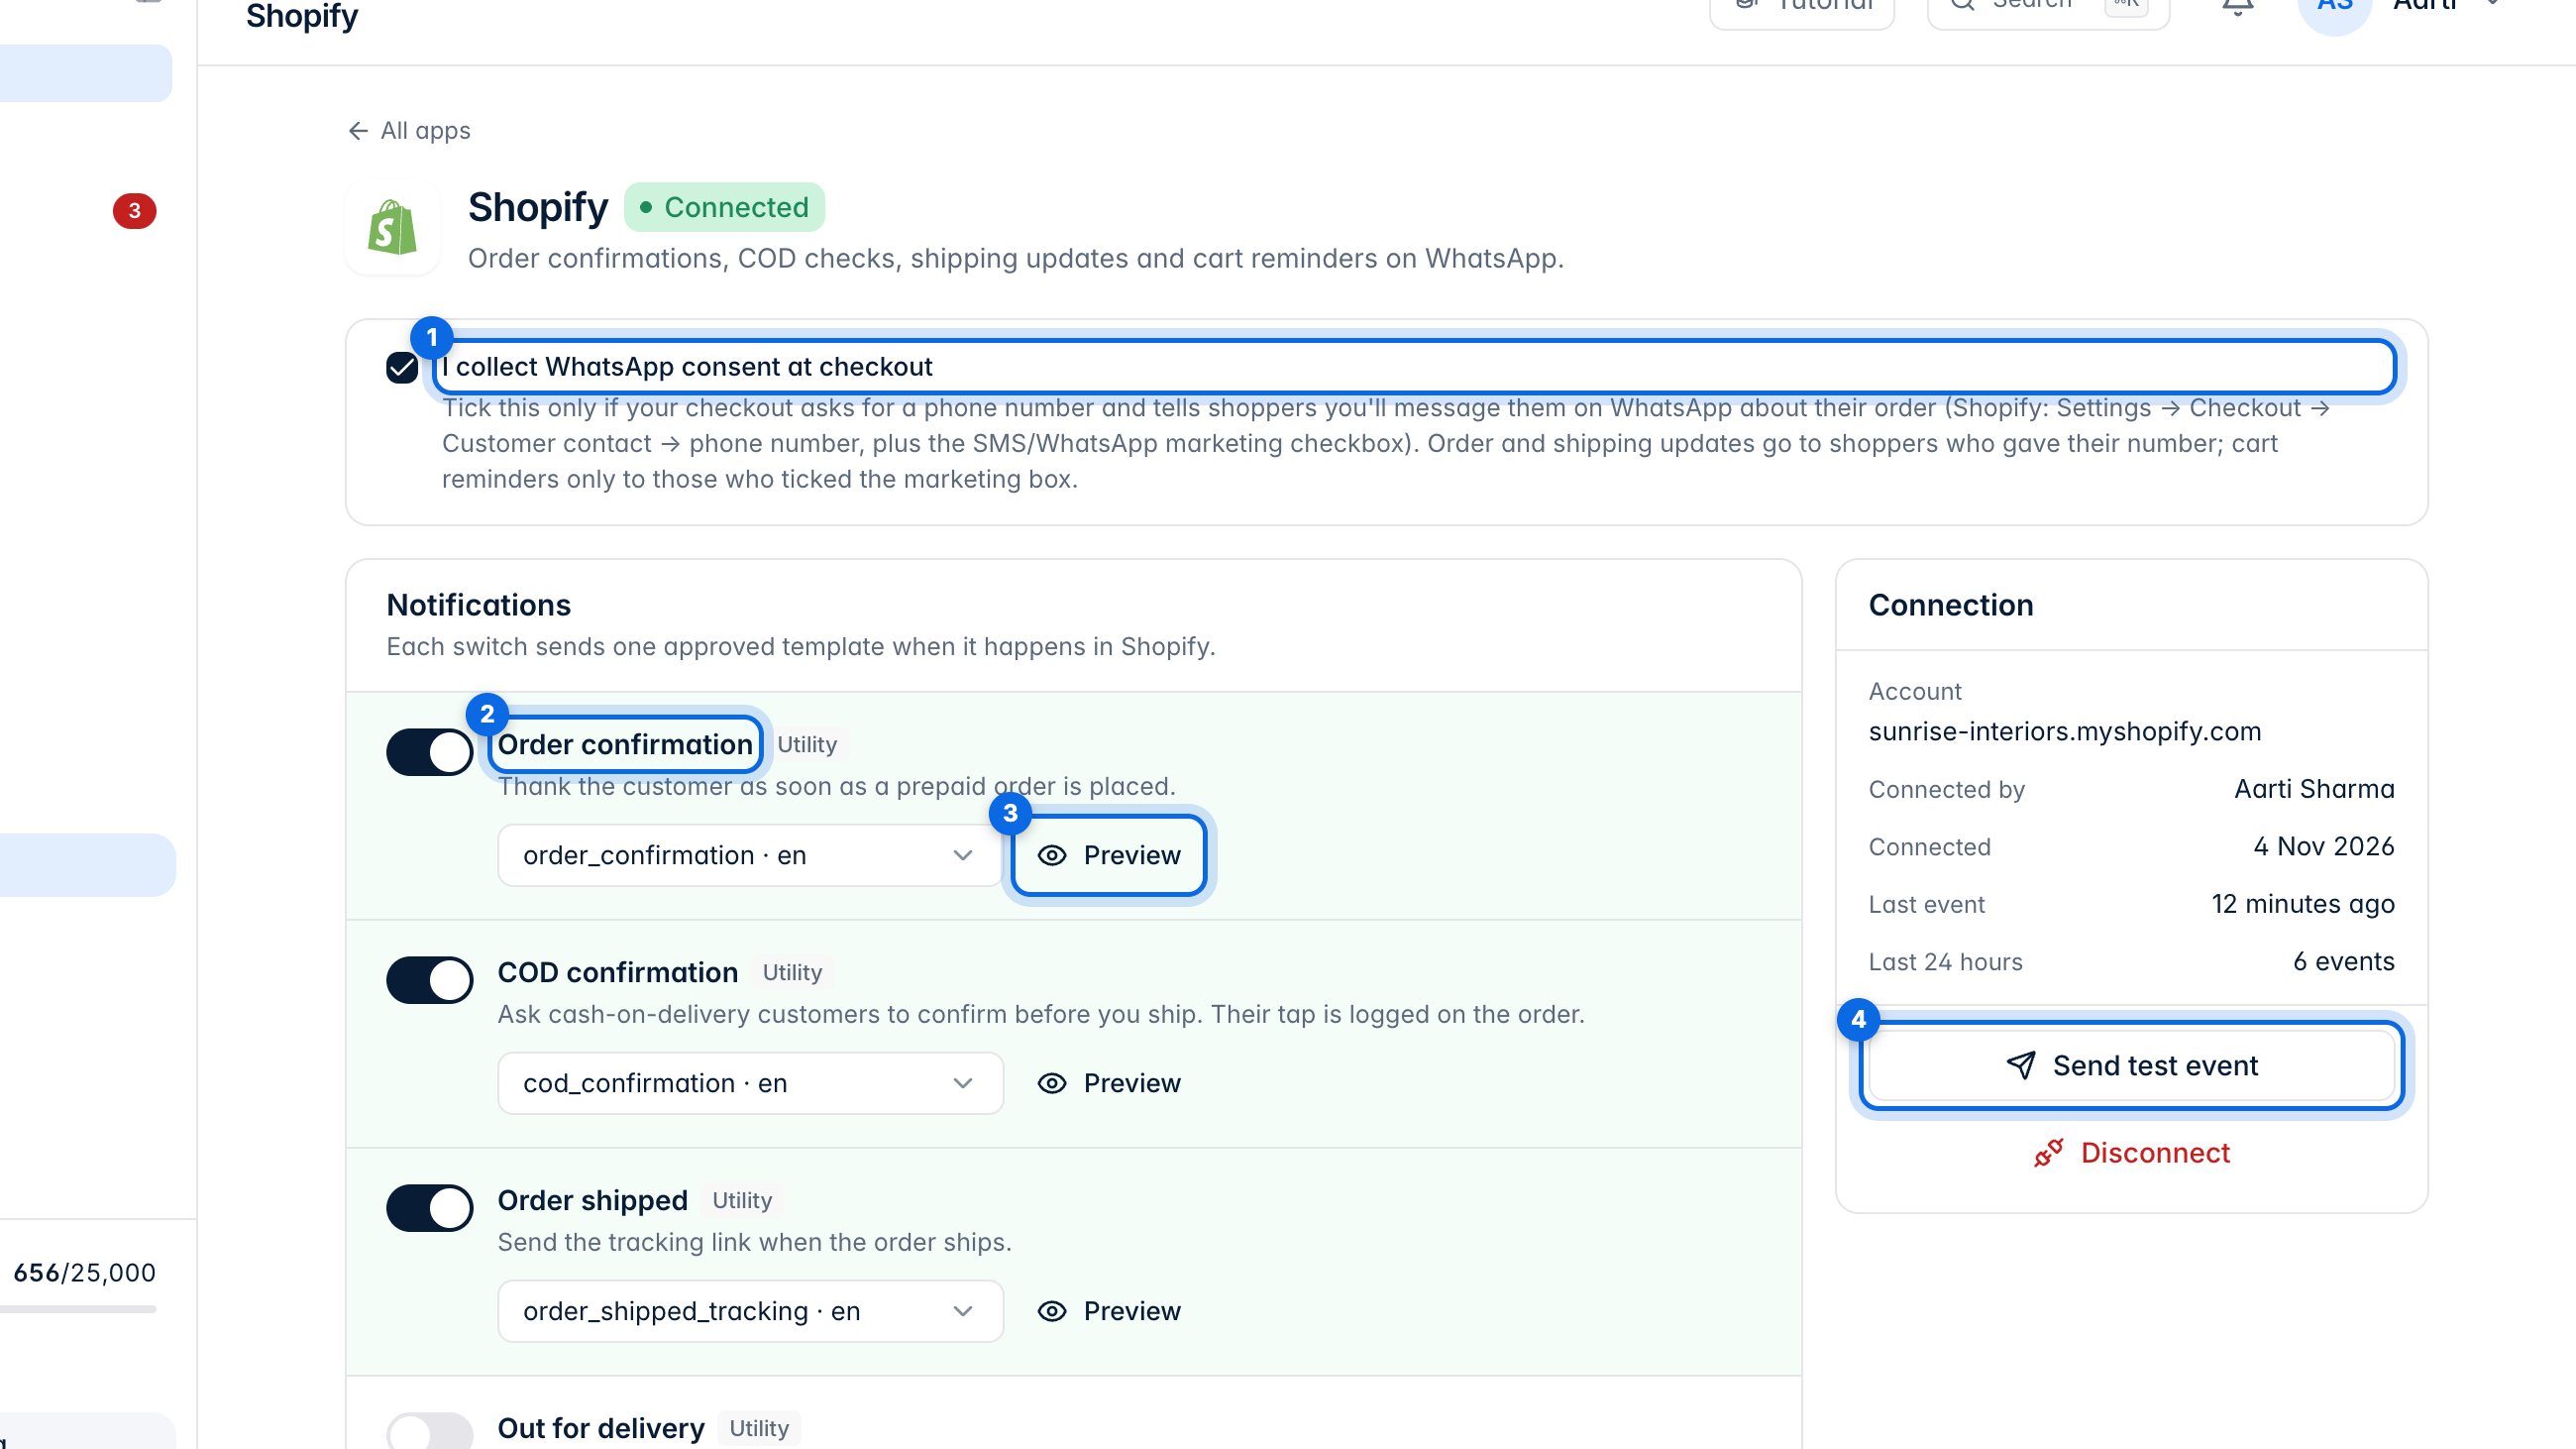
On a connected store, confirm that your checkout collects WhatsApp consent (1). Each switch (2) sends one approved template when that event happens, like an order confirmation; Preview (3) shows the message. Send test event (4) checks the connection.
4. Automations
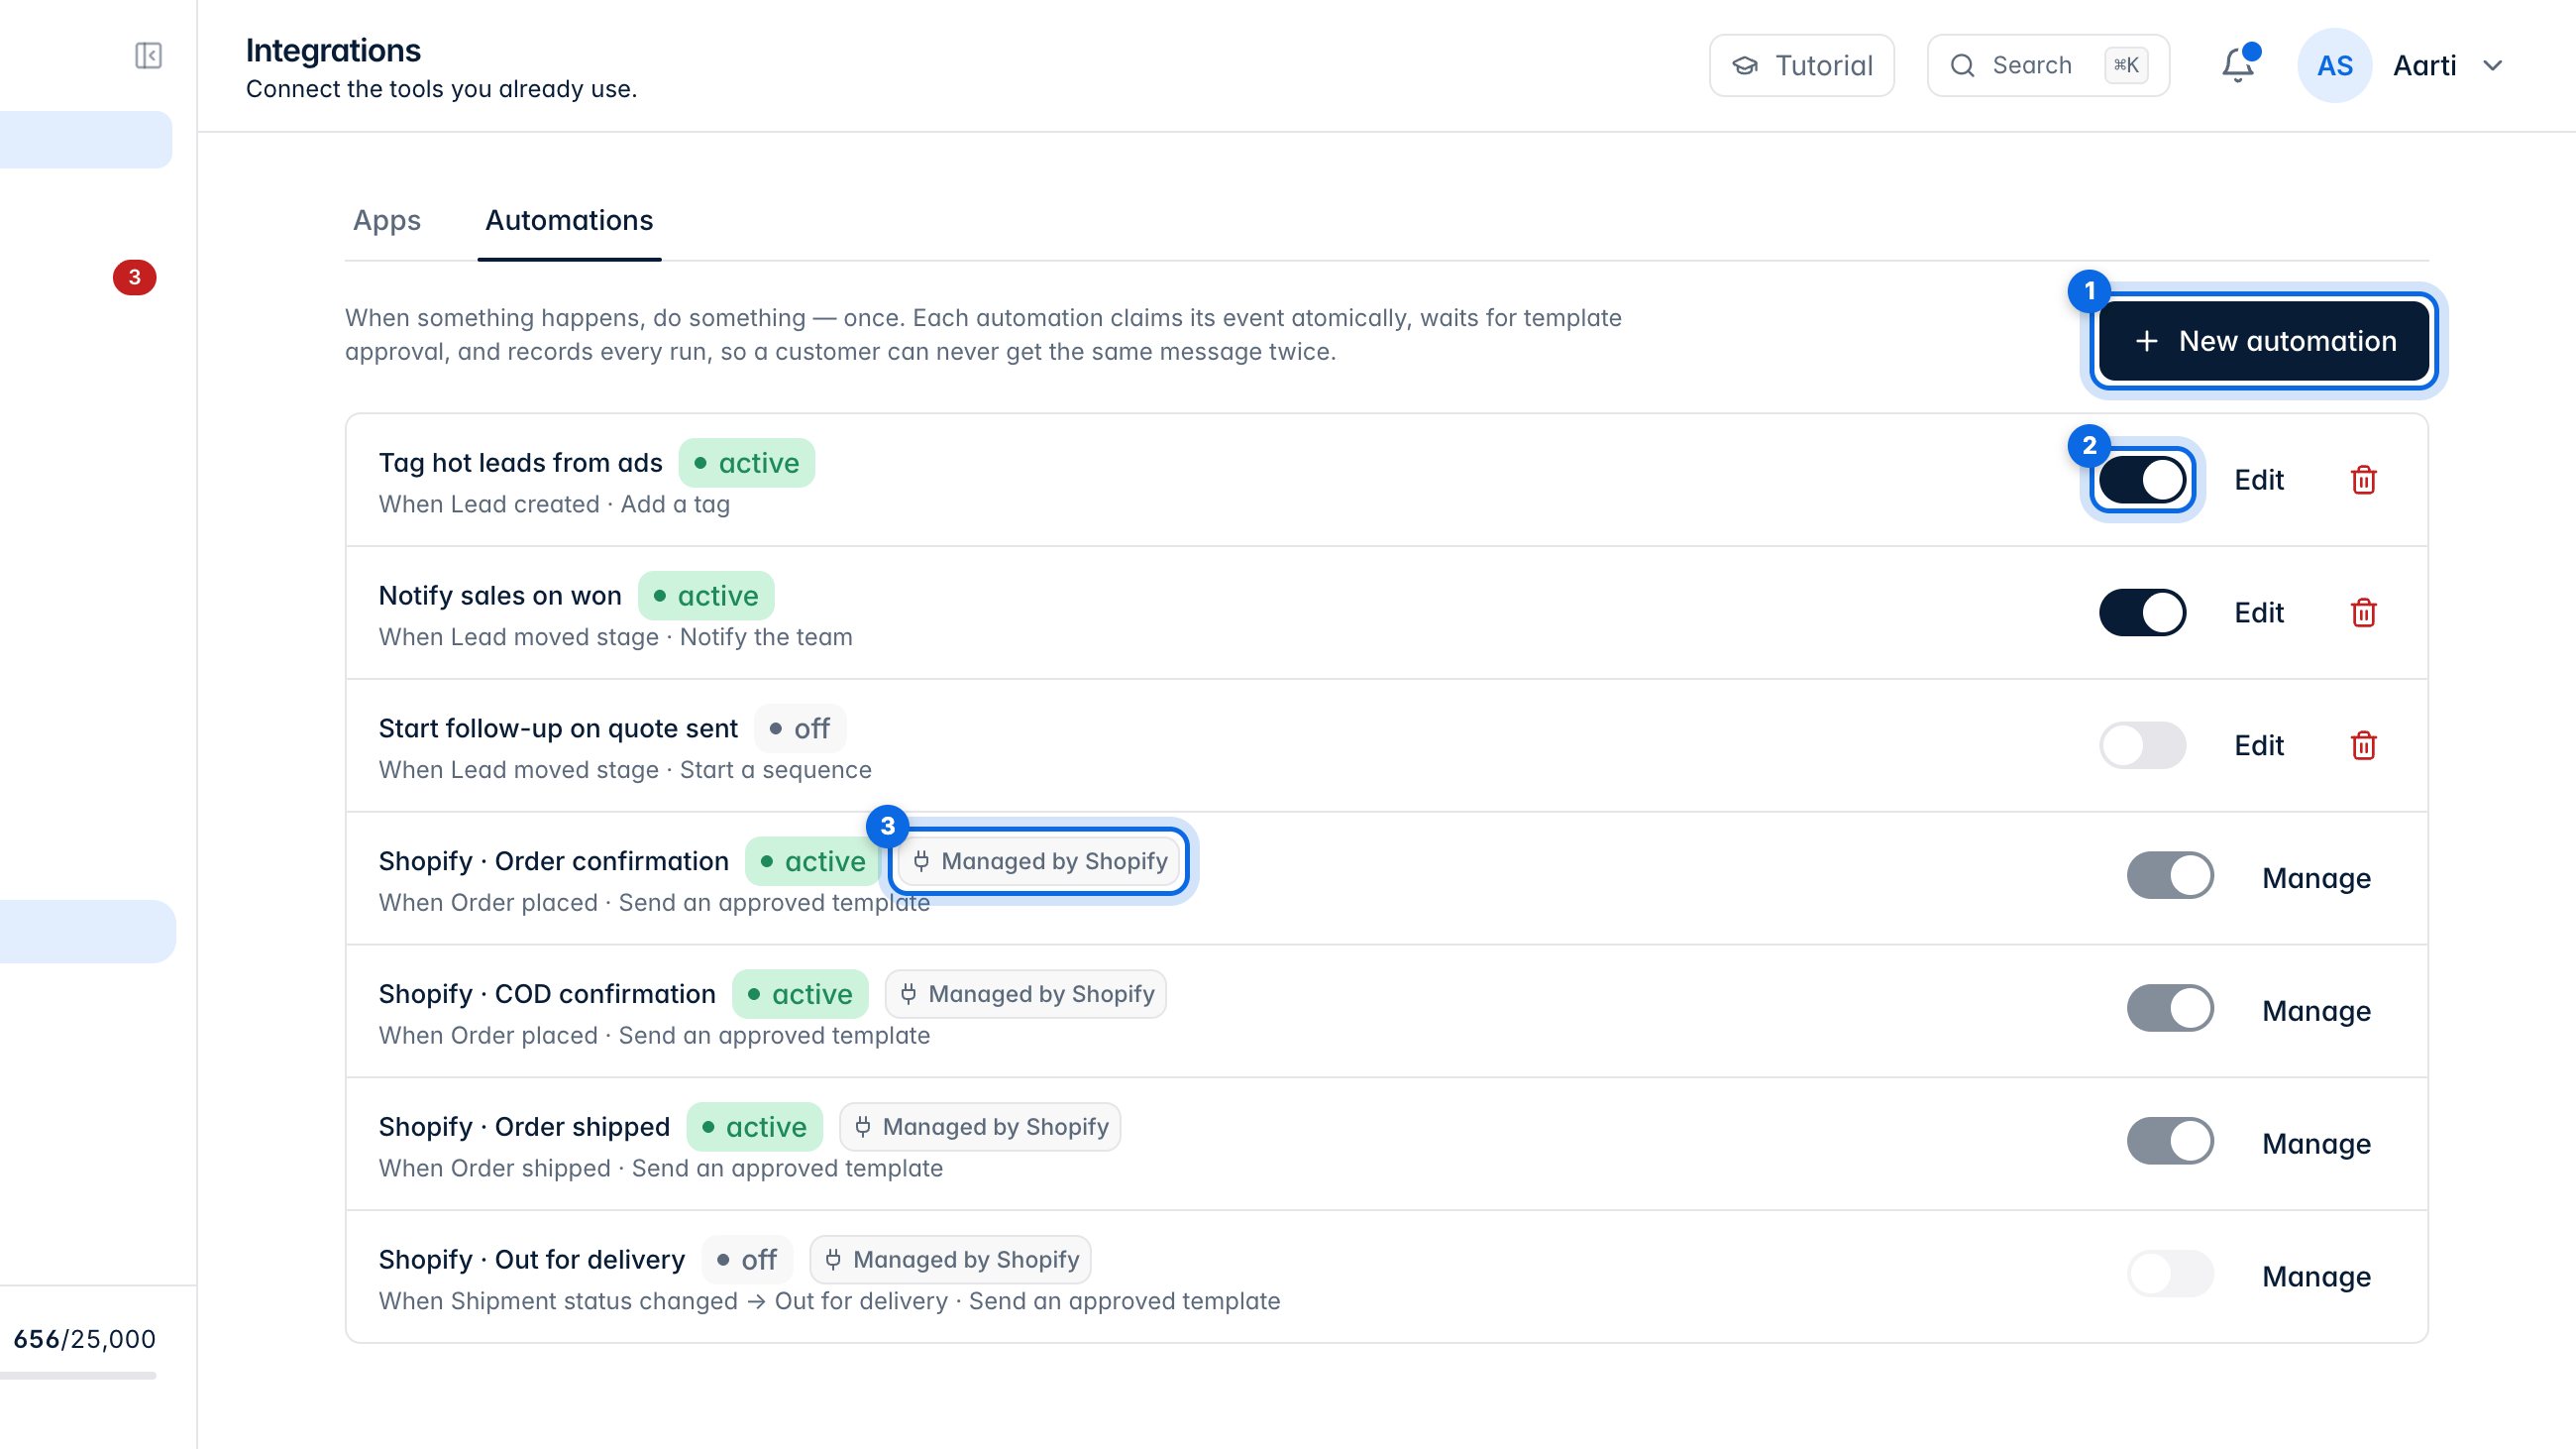
An automation does one thing when something happens, and never sends the same message twice. Create one with New automation (1), switch any on or off (2). Rows marked Managed by Shopify (3) are set from that app's page.
5. Create an automation
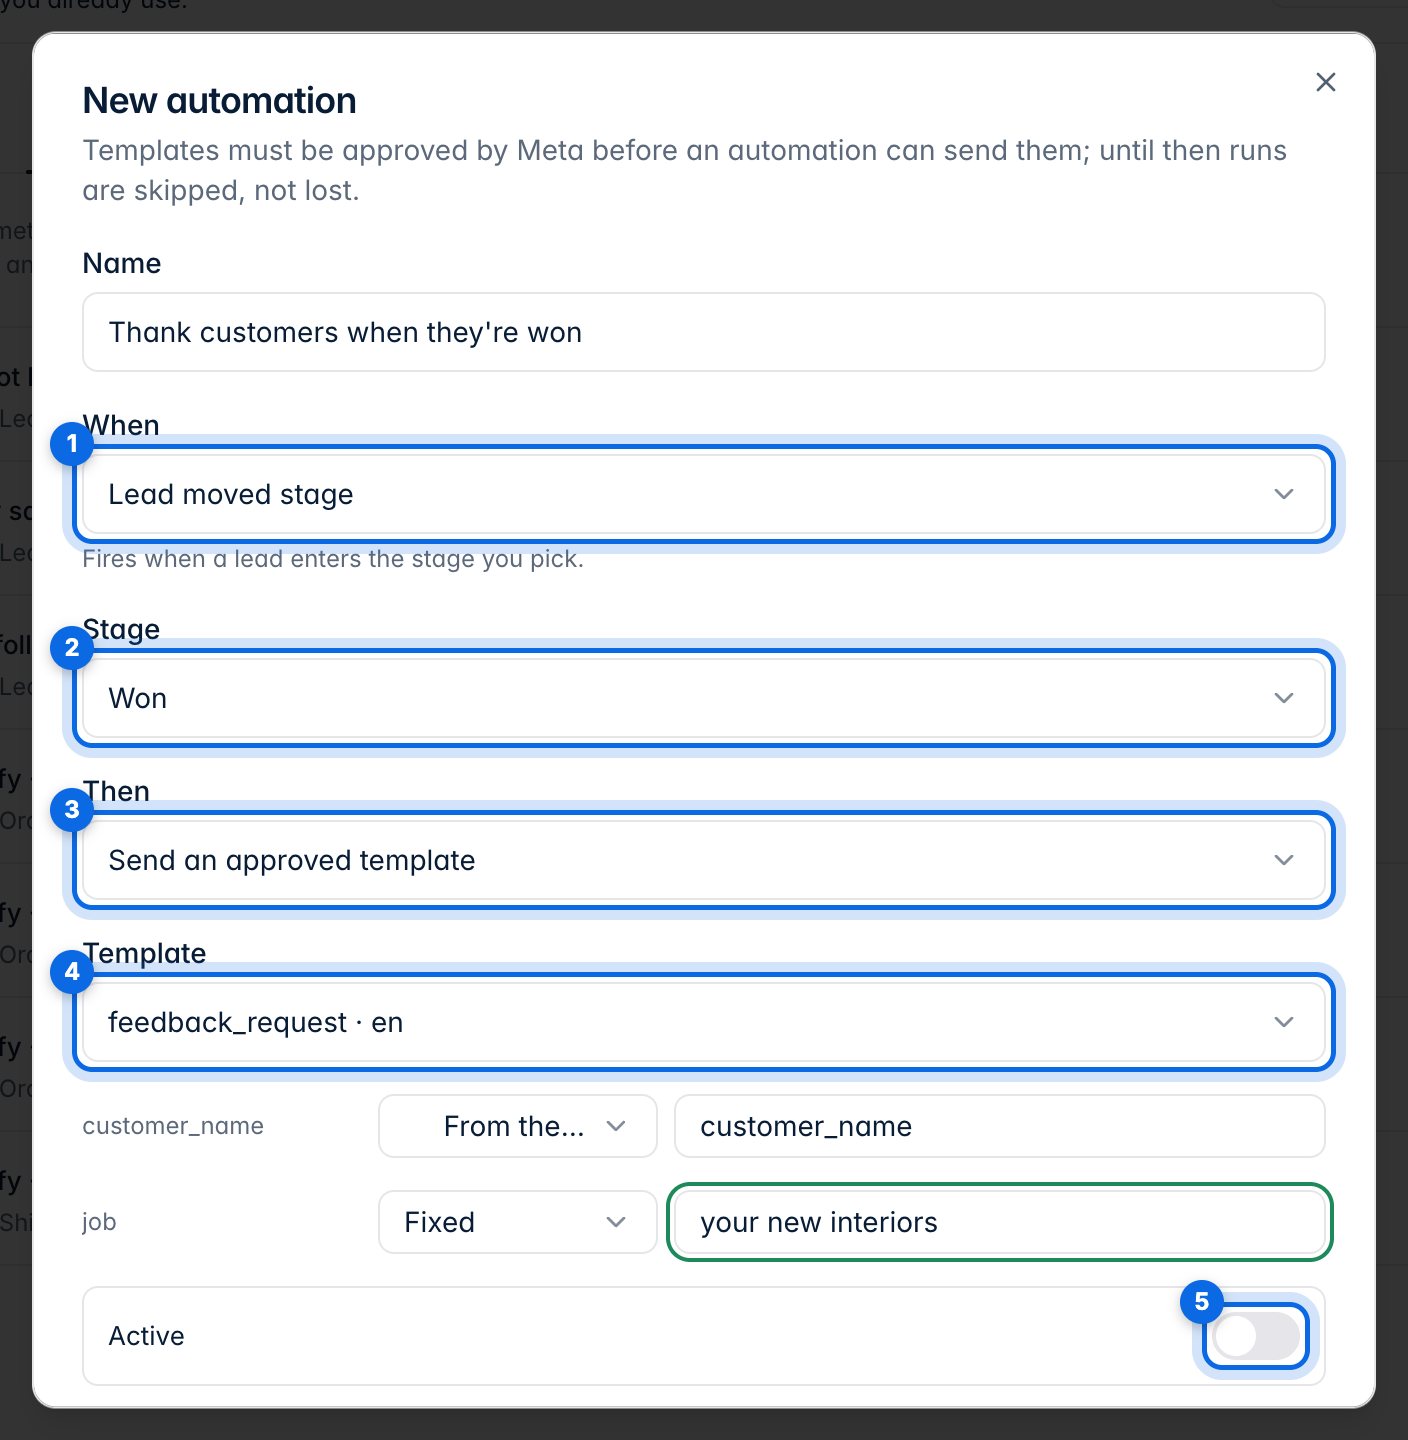
Name it, then choose when it runs (1), for example a lead moving to a stage (2). Choose what it does (3), like sending an approved template (4), and fill the template's blanks. Turn on Active (5) and save. Until Meta approves the template, runs are skipped, not lost.
6. API and webhooks
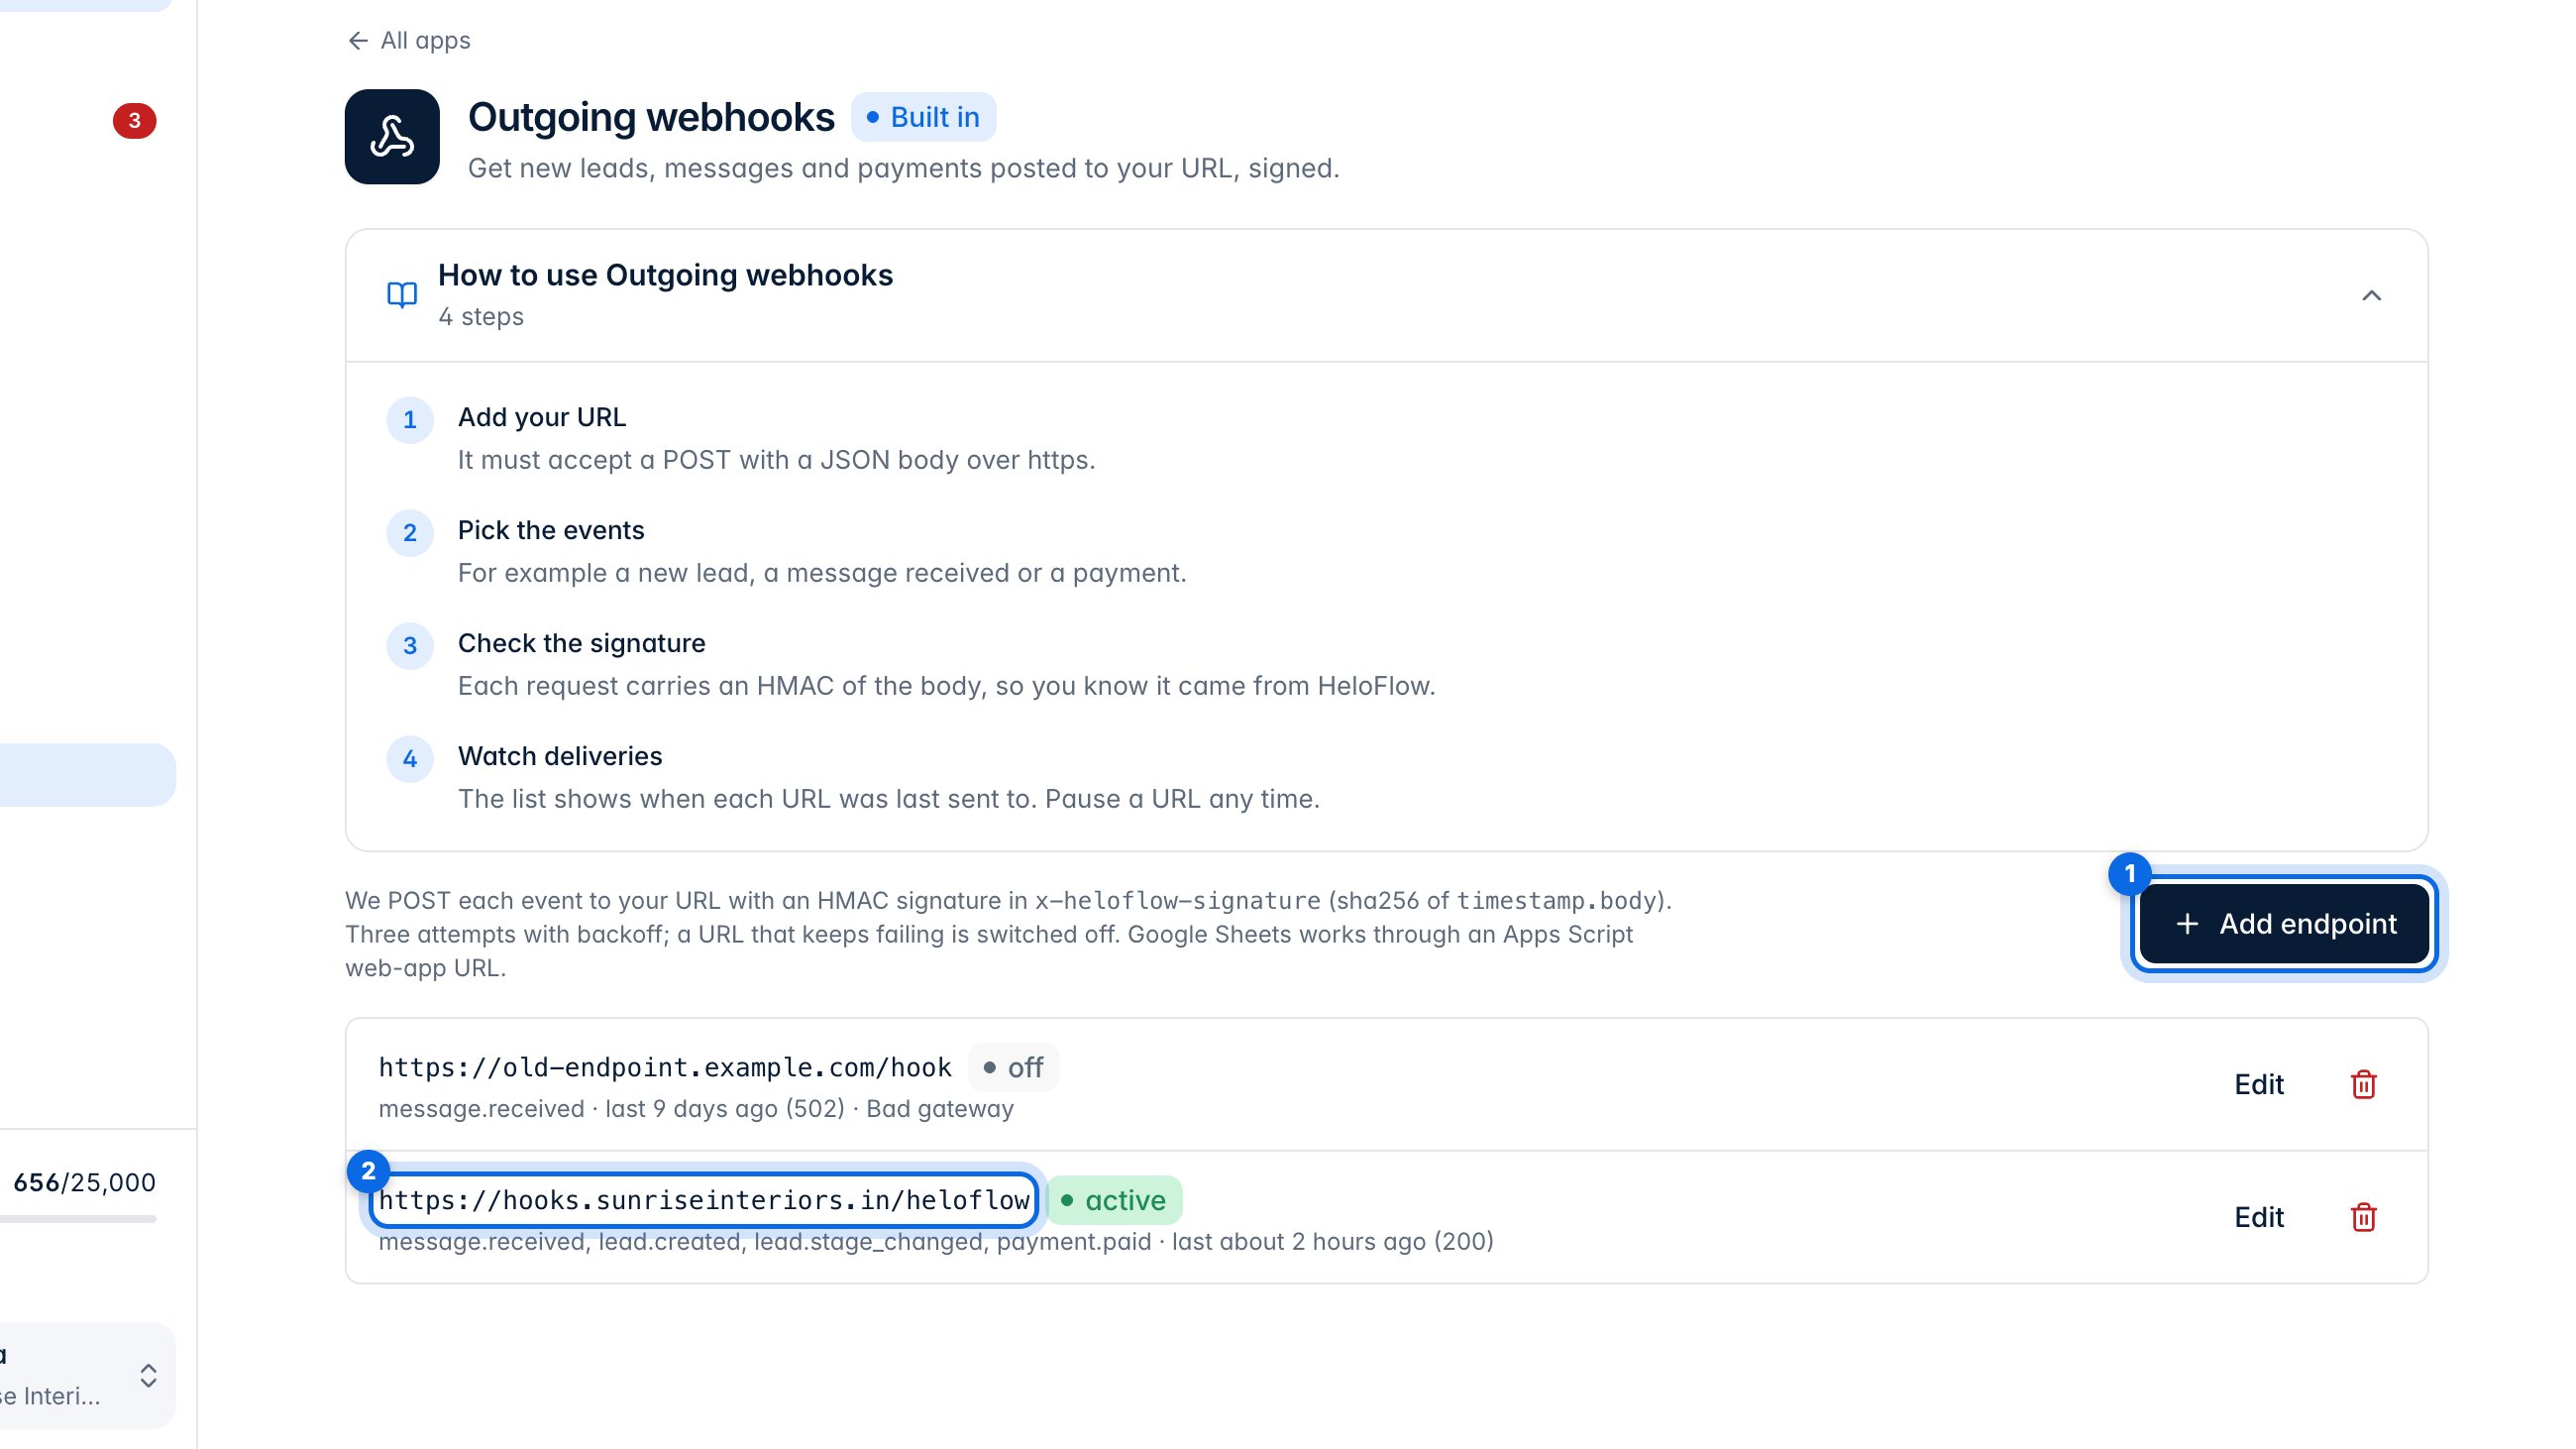
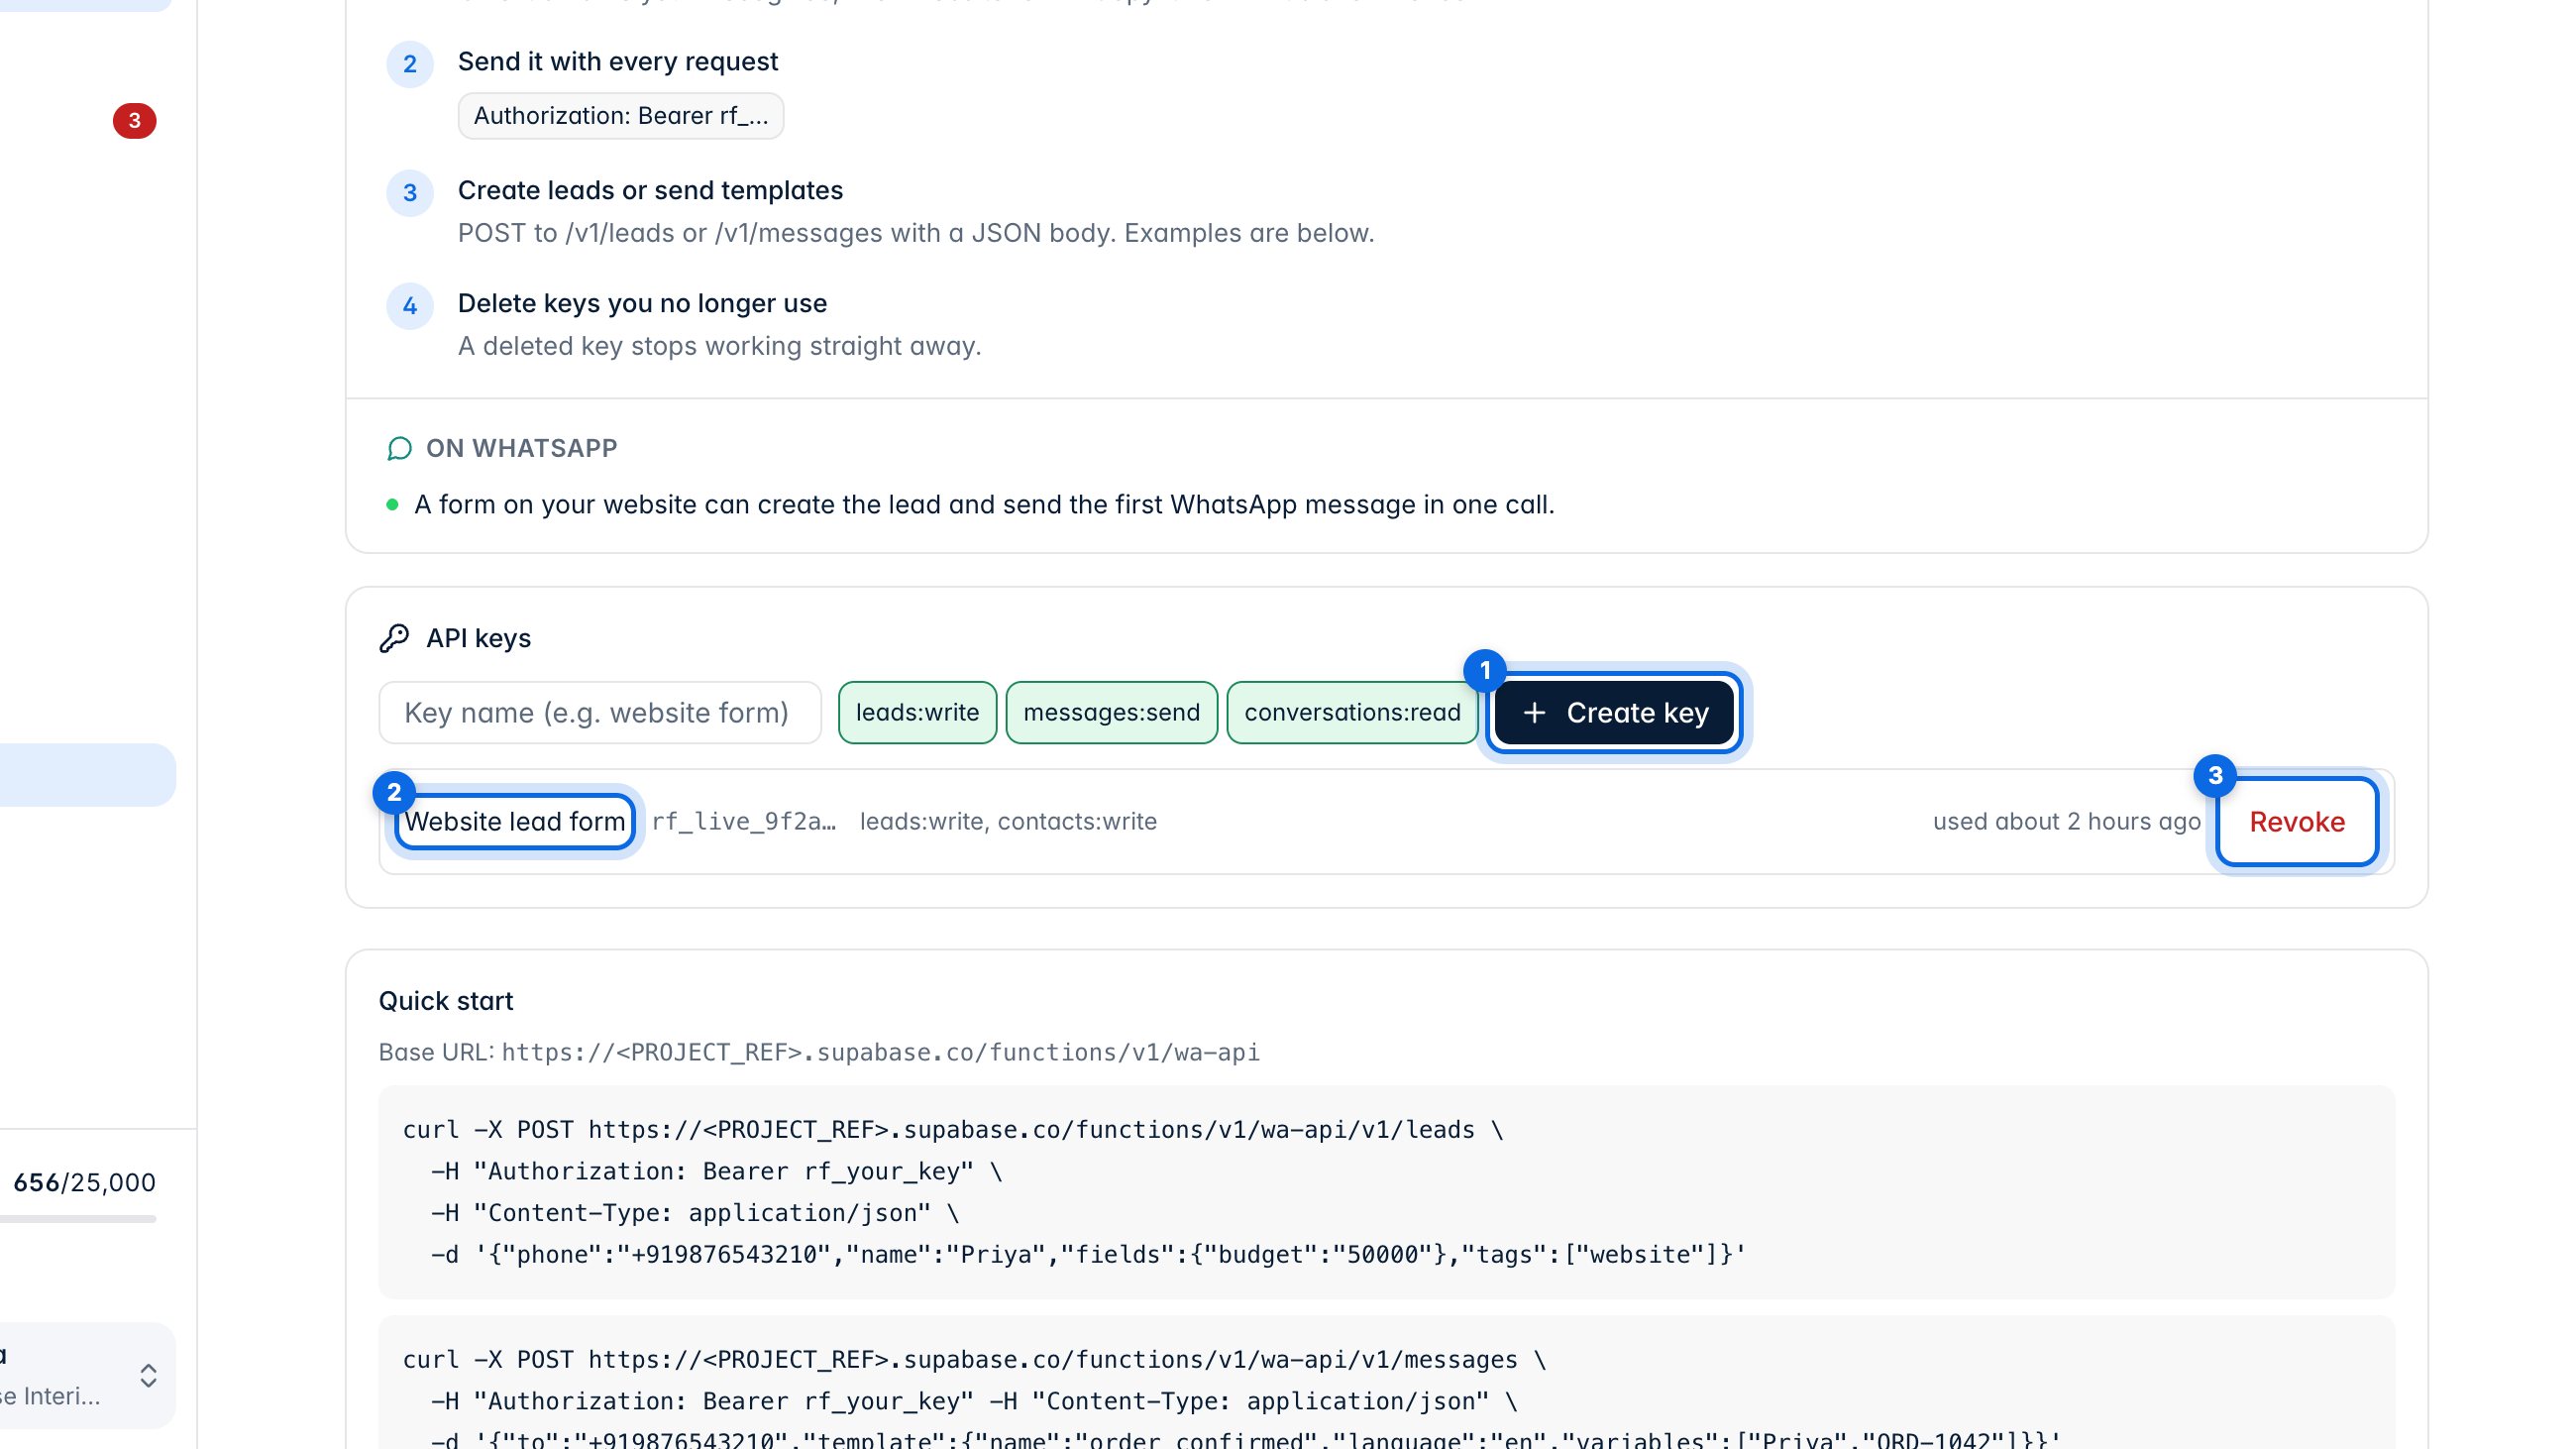
API keys let your own systems create leads and send messages. Create key (1) shows a new key once. Each key (2) can be revoked (3) and stops working straight away.
Outgoing webhooks post new leads, messages and payments to your own URL, signed so you know they came from HeloFlow. Add endpoint (1) adds a URL; each one (2) shows its events and when it was last sent to.