Contacts
Search, add and import contacts, then tag and export them in bulk.
2 min video11 stepsEnglish and हिंदी
Language
Step by step
The same steps in writing, with a screenshot for each.
1. Your contacts list
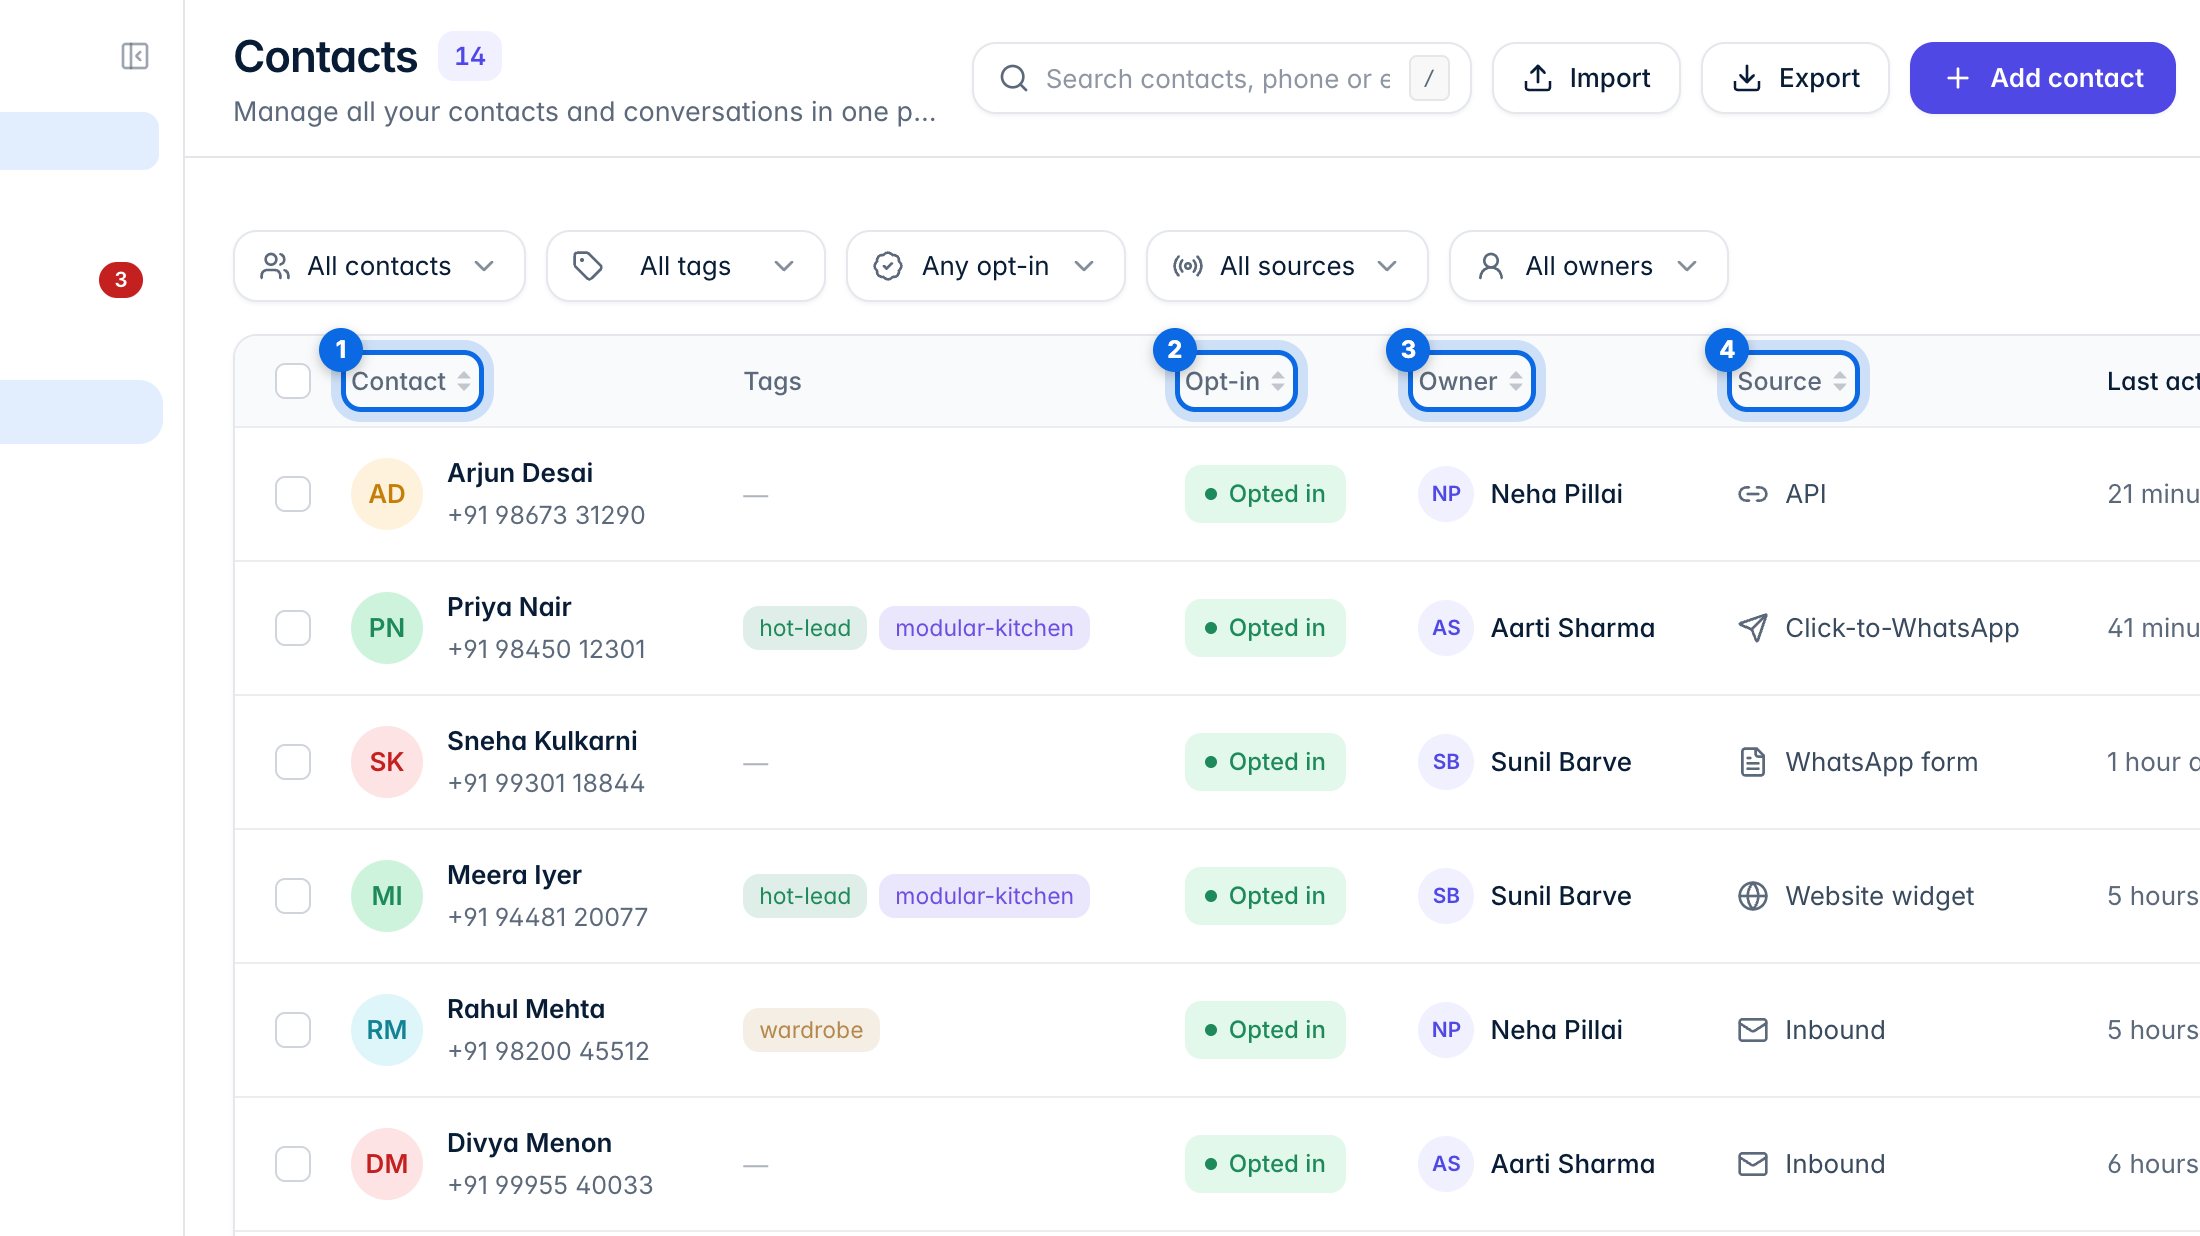
Every customer who has messaged you, or that you've added, is here. Each row shows their tags, whether they agreed to marketing (opt-in), who owns them, where they came from and when they were last active. Click a column name (1–4) to sort by it.
2. Search and filter
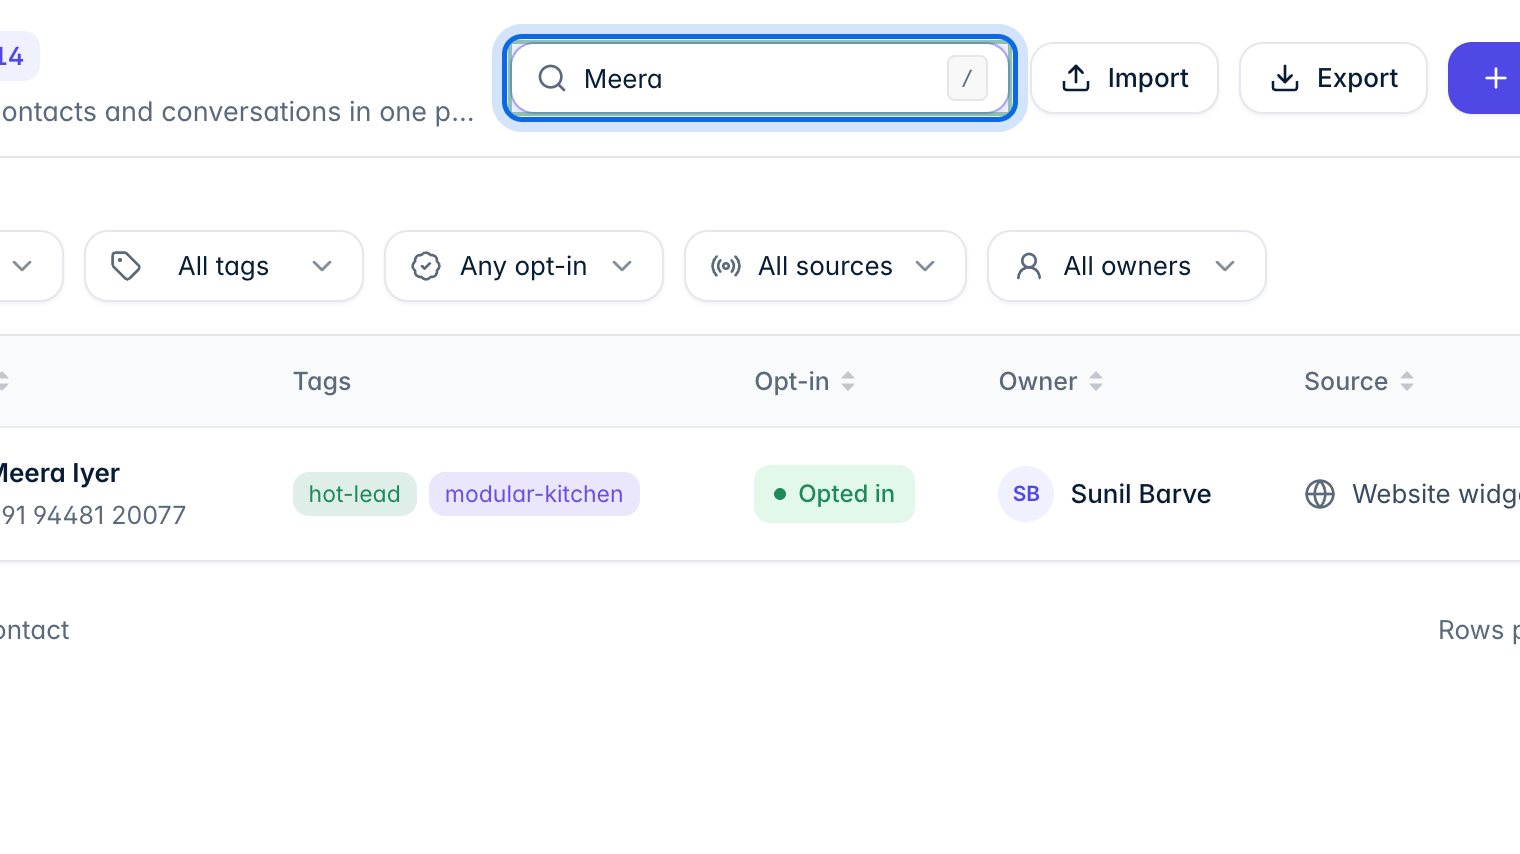
Type a name, number or email in the search box to find a contact. Press / to jump straight to it.
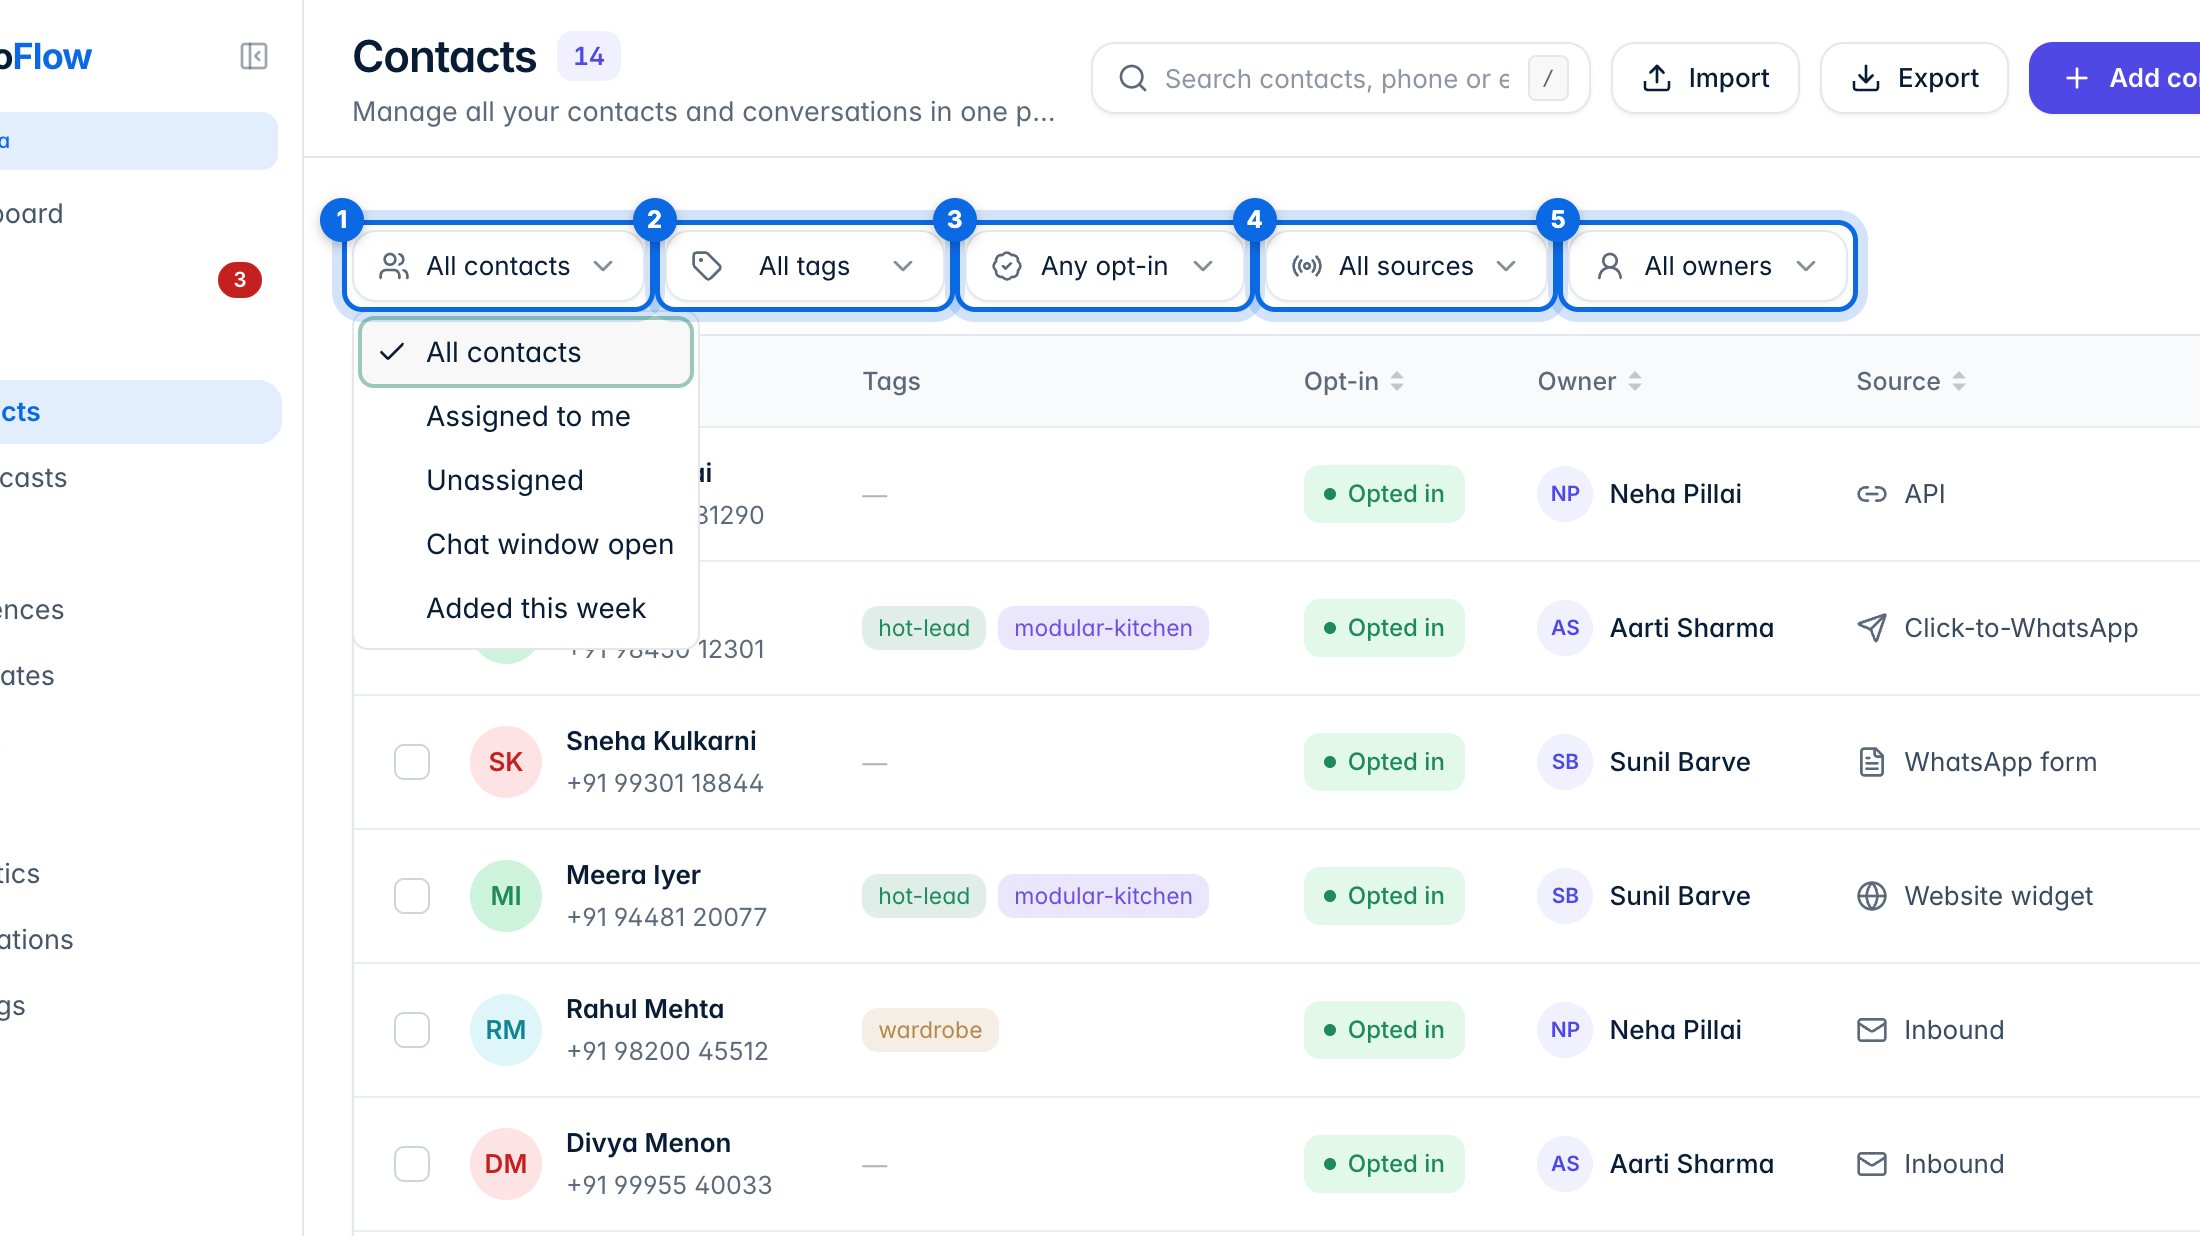
Narrow the list with the filters: Segment (1), for example chats with an open window or contacts added this week; Tag (2); Opt-in (3); Source (4); and Owner (5). Clear filters brings everything back.
3. Add a contact
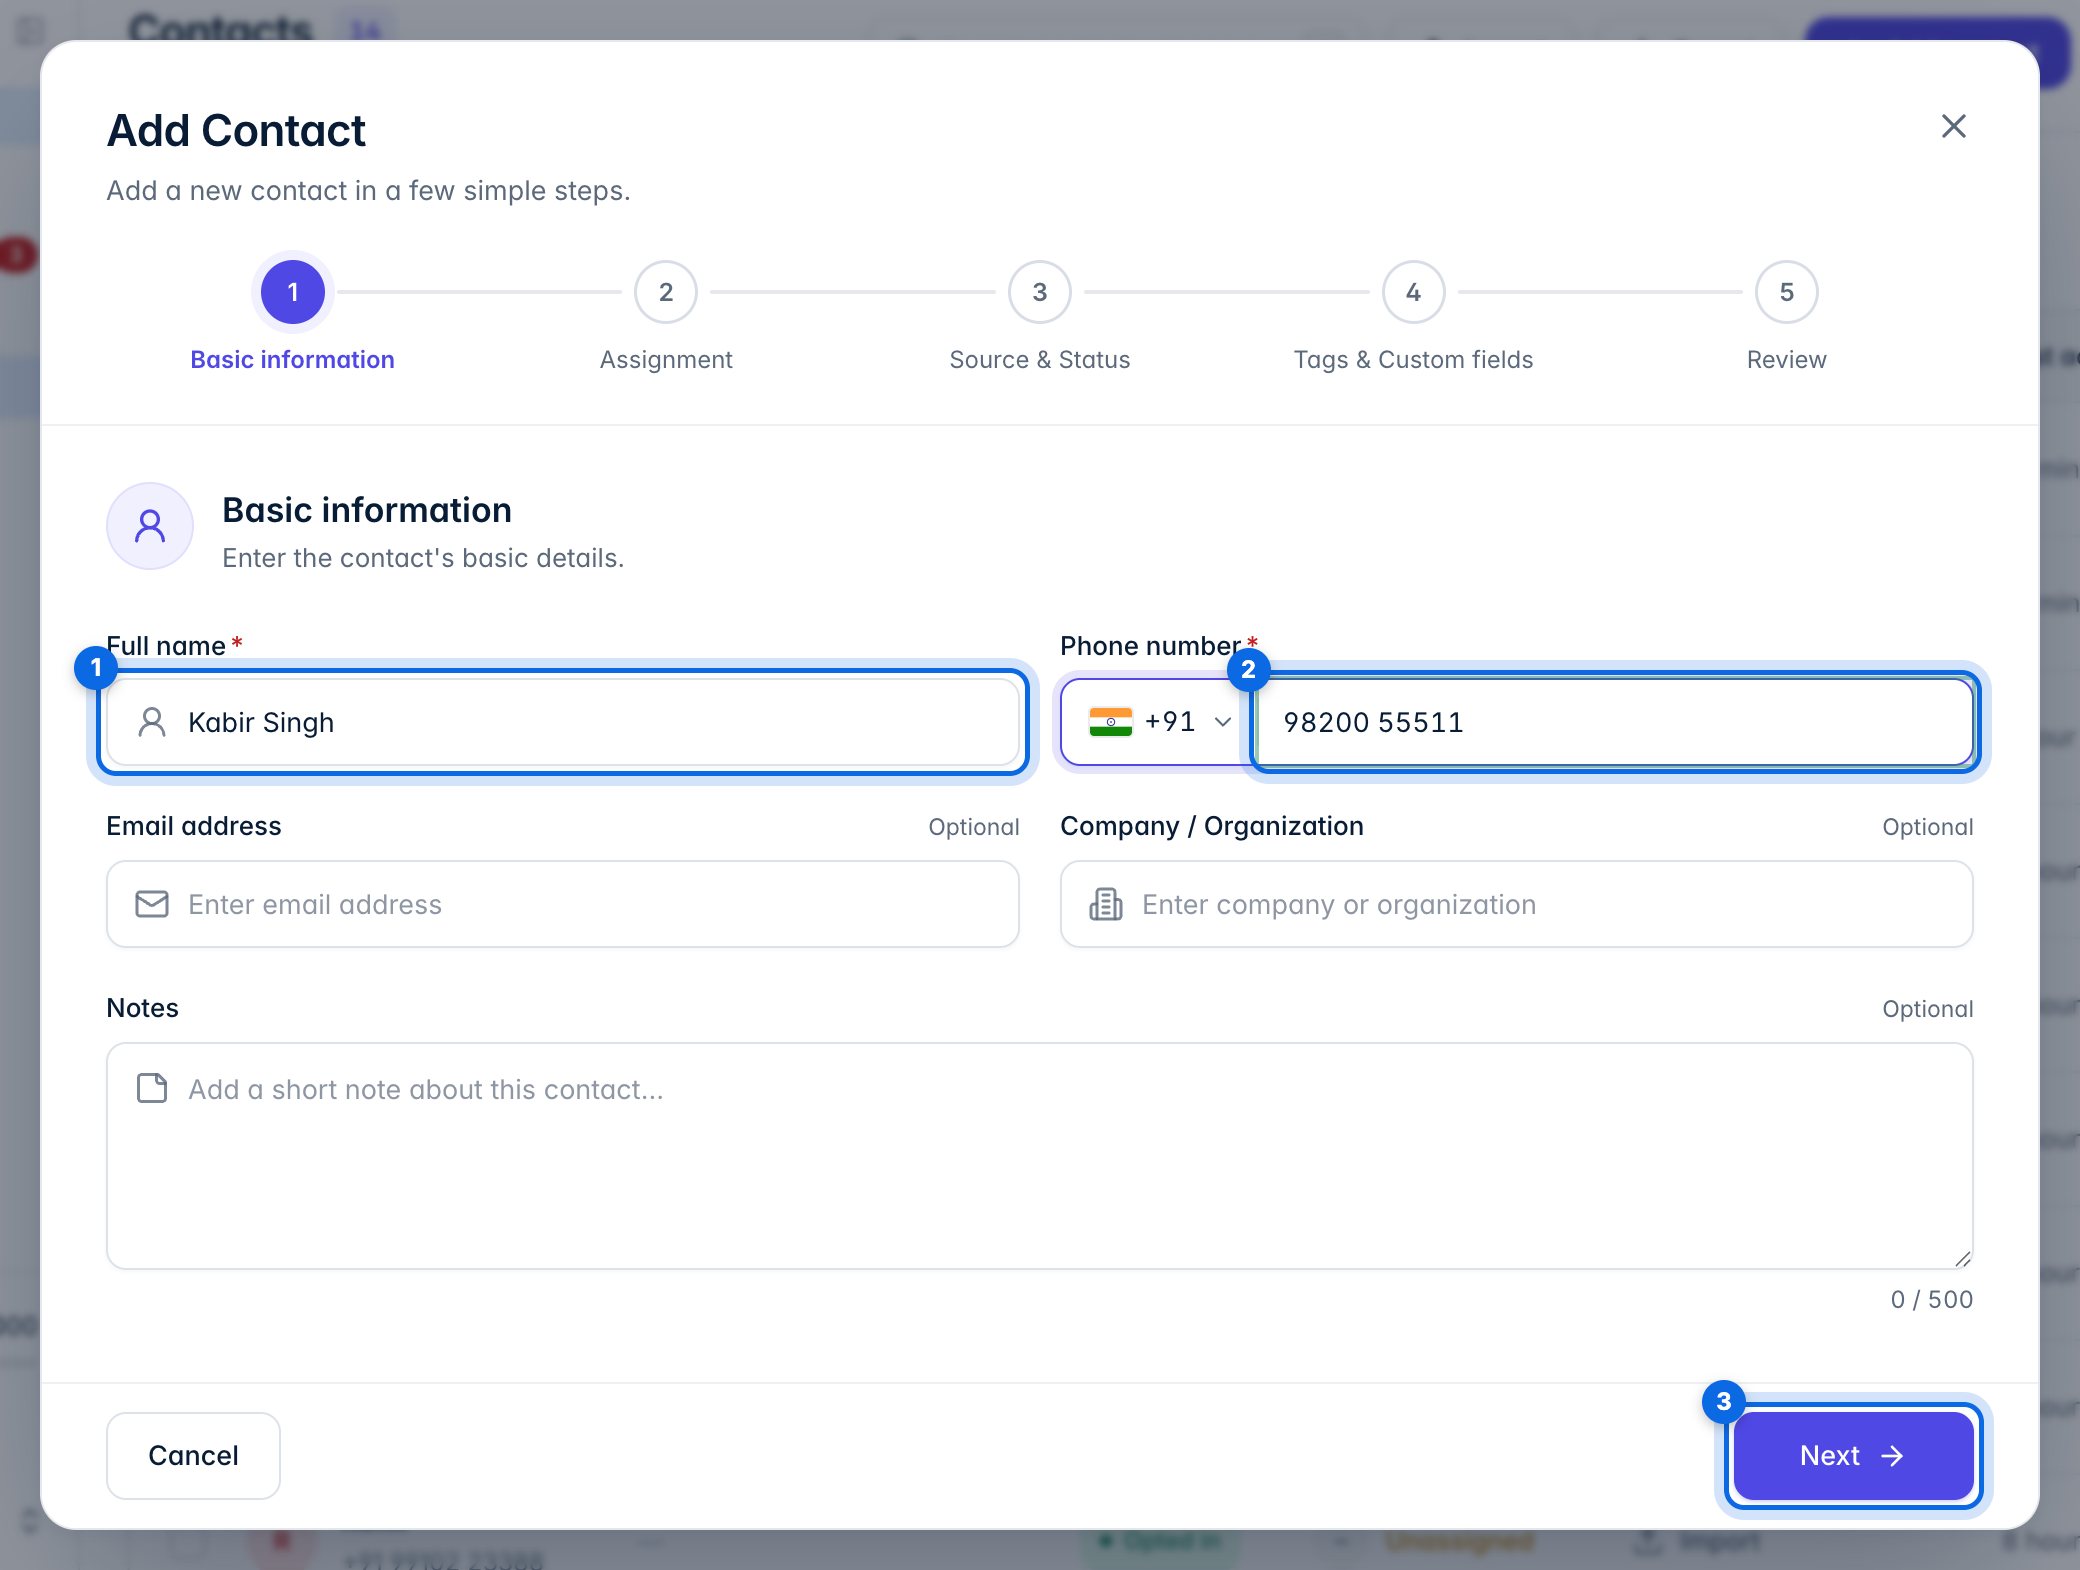
Click Add contact. Enter the full name (1) and phone number (2), then Next (3).
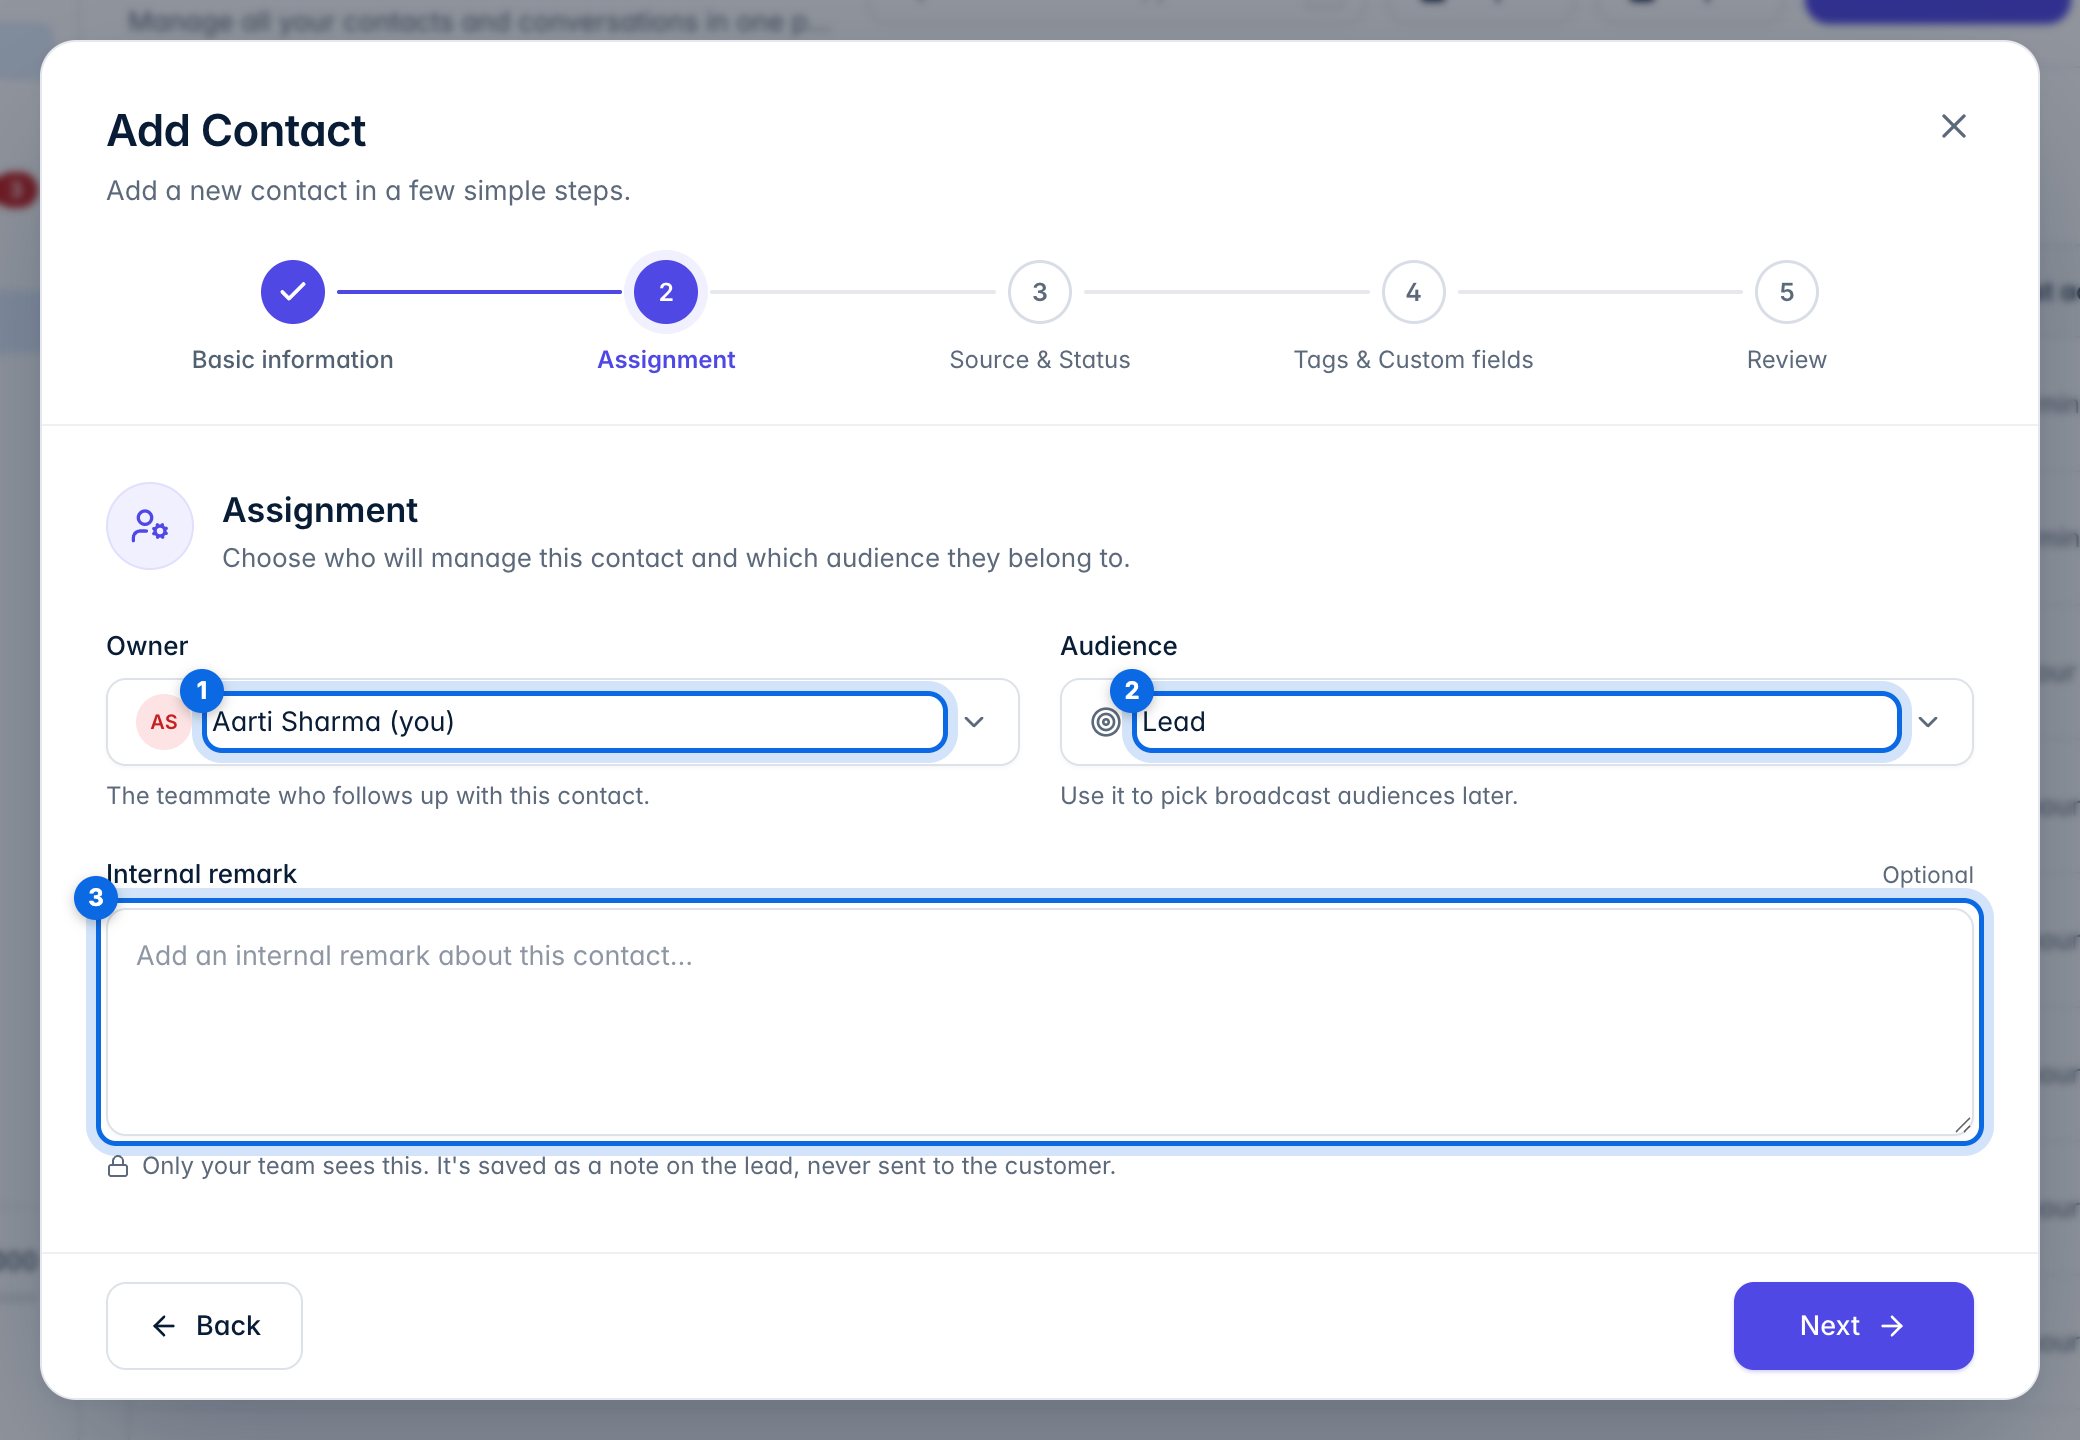
Choose who owns the contact (1) and their audience (2), and add an internal remark if you like (3). Only your team sees the remark.
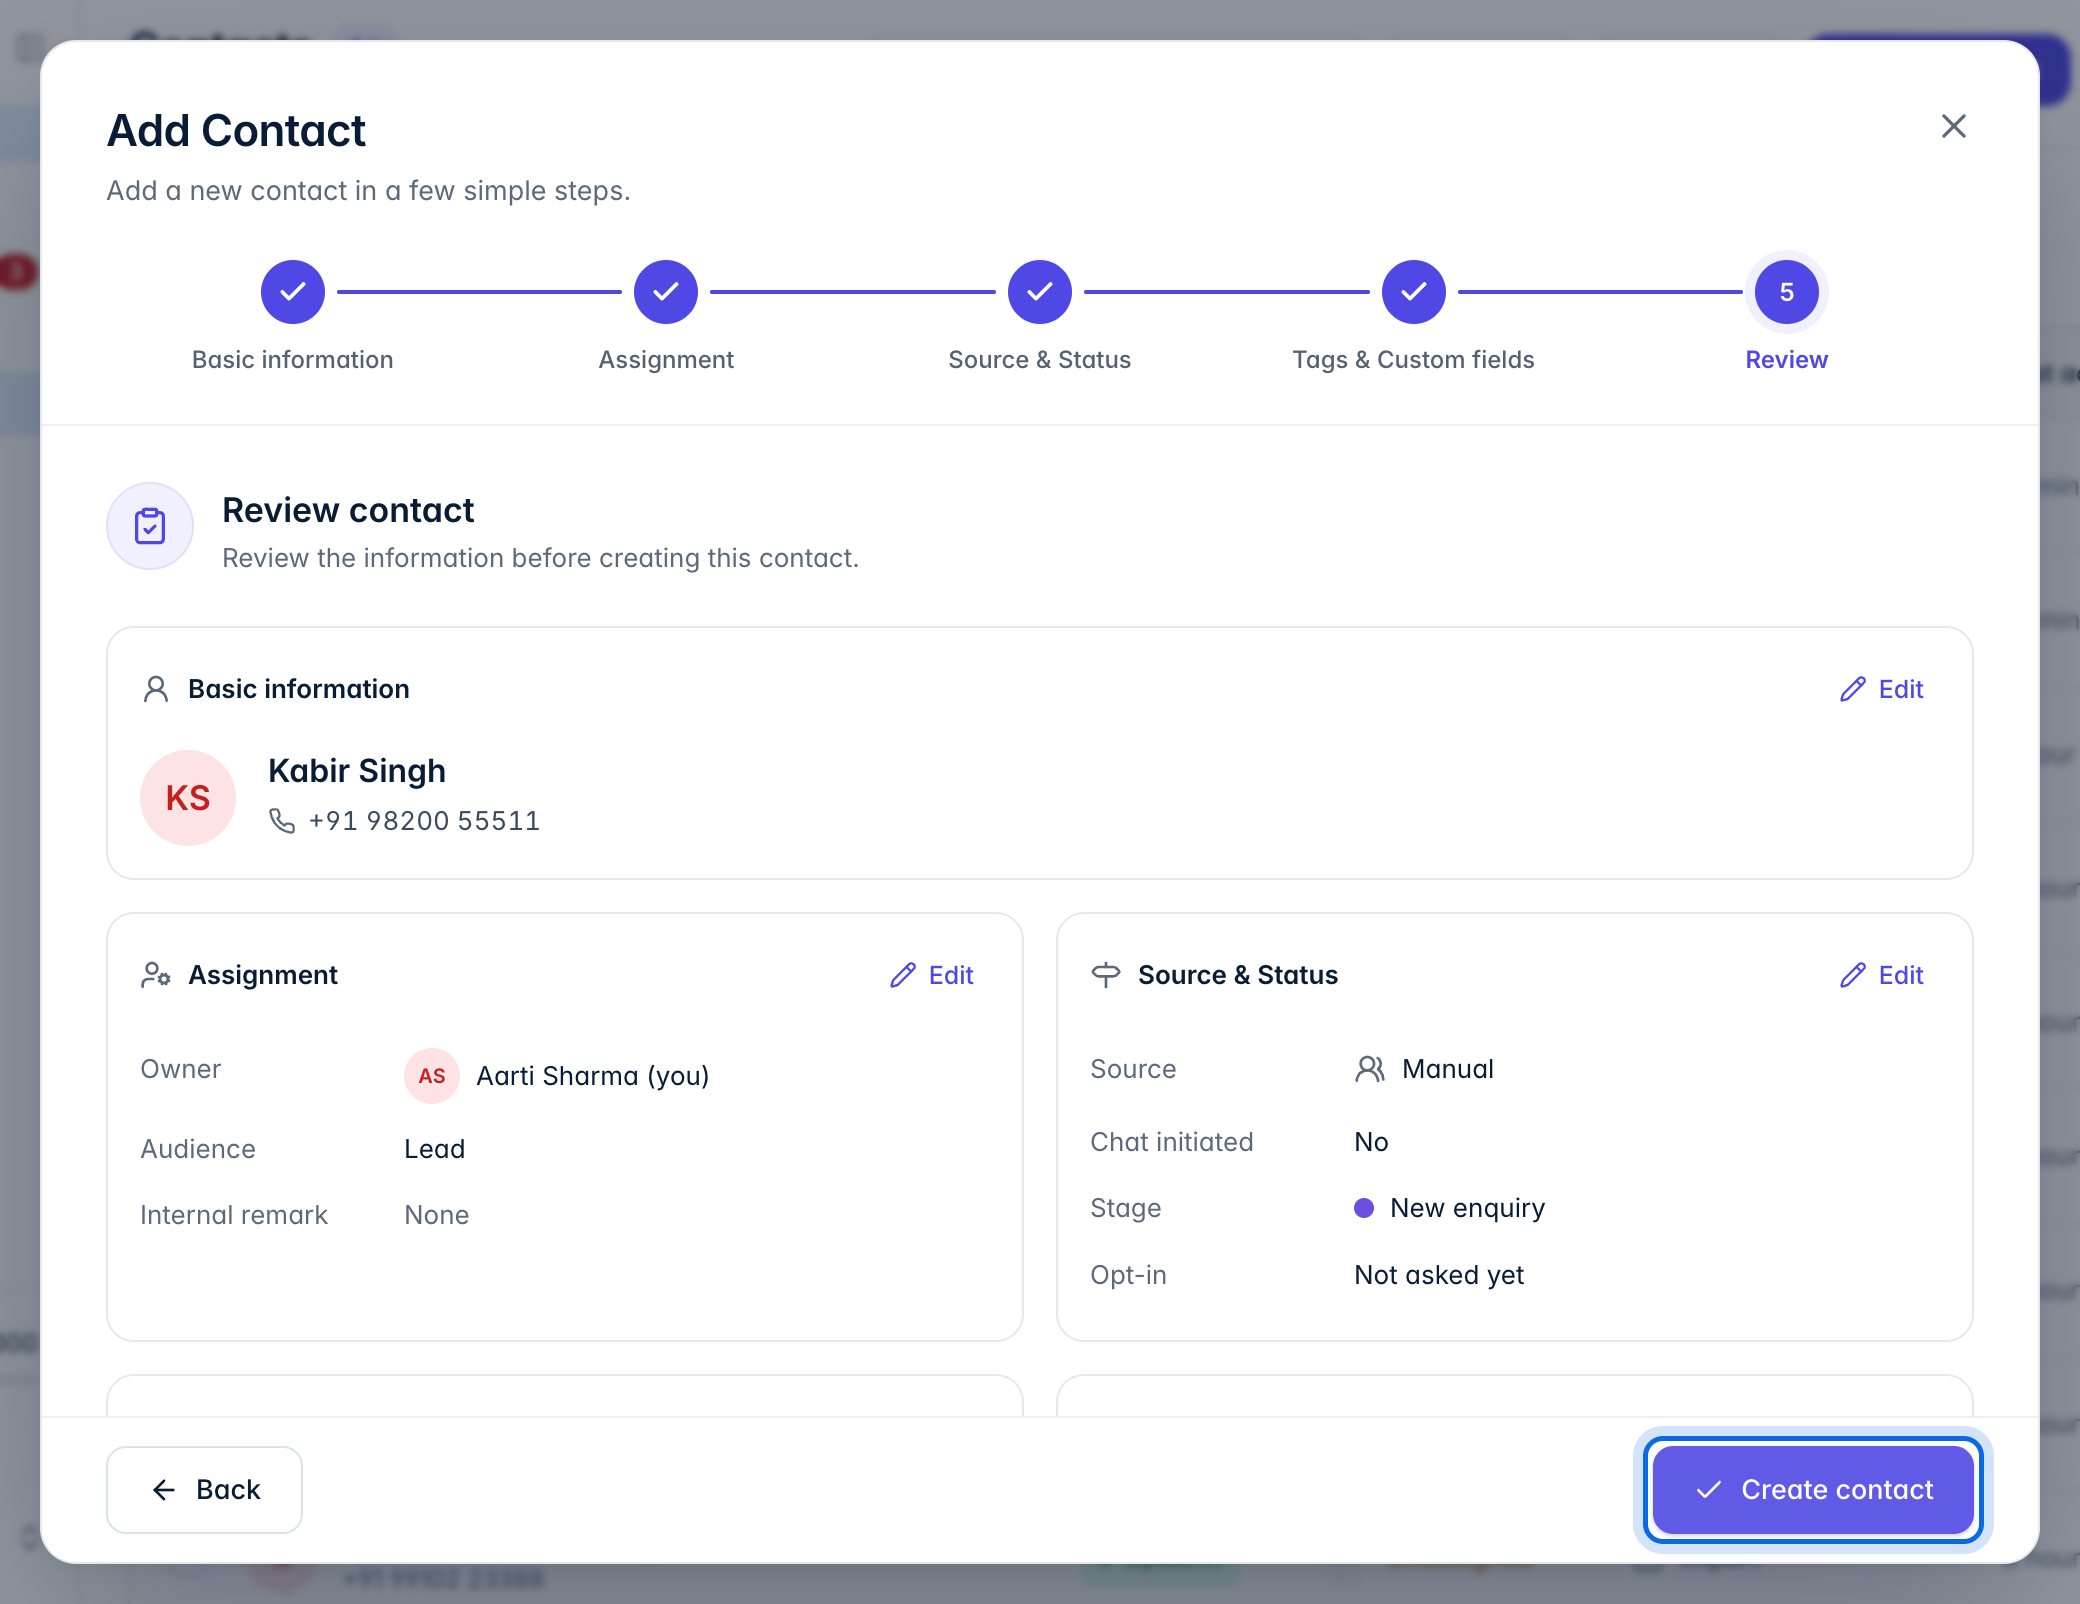
Source and status, then tags and custom fields, are optional. Check everything on the last step and click Create contact.
4. Import from a CSV
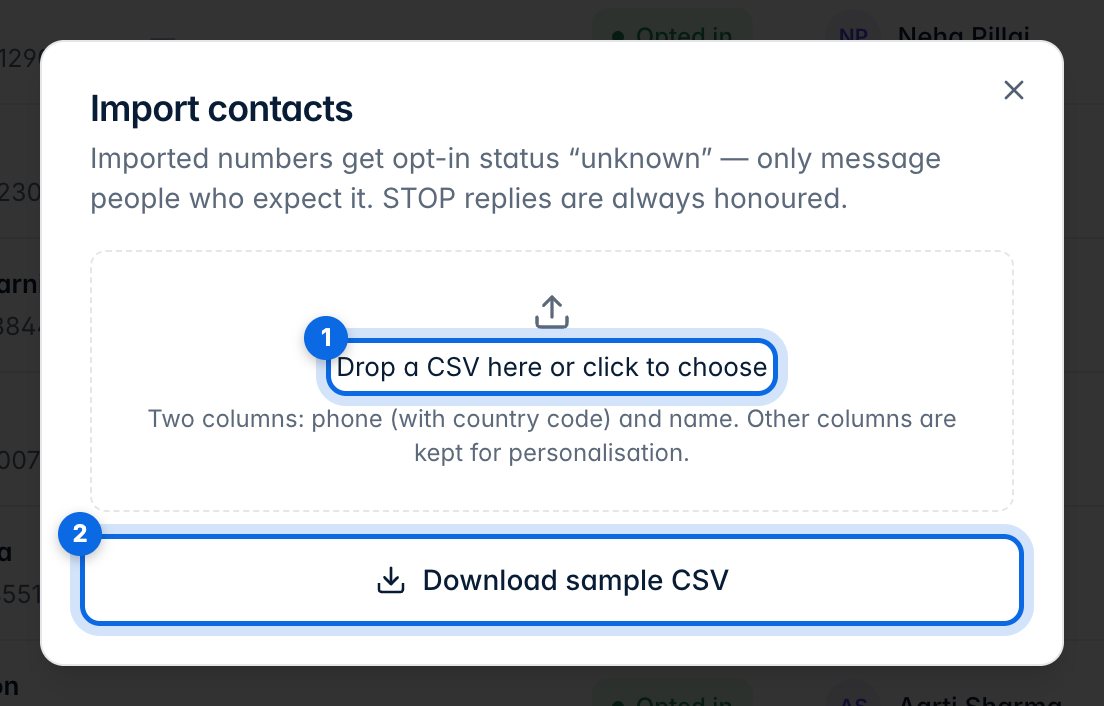
Click Import, then drop a CSV file or click to choose one (1). It needs a phone column (with country code) and a name column. Download sample CSV (2) shows the format.
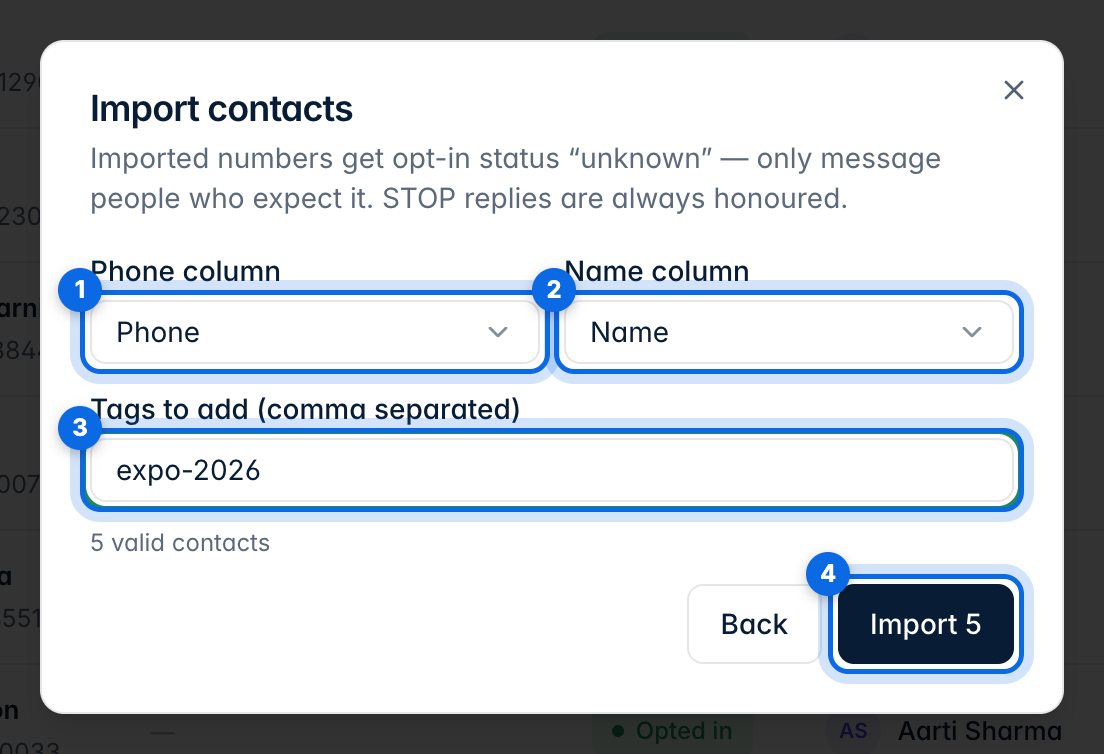
Check the phone (1) and name (2) columns, add tags for everyone in the file (3), then click Import (4). Imported contacts start as opt-in “unknown”, so only message people who expect it.
5. Manage tags
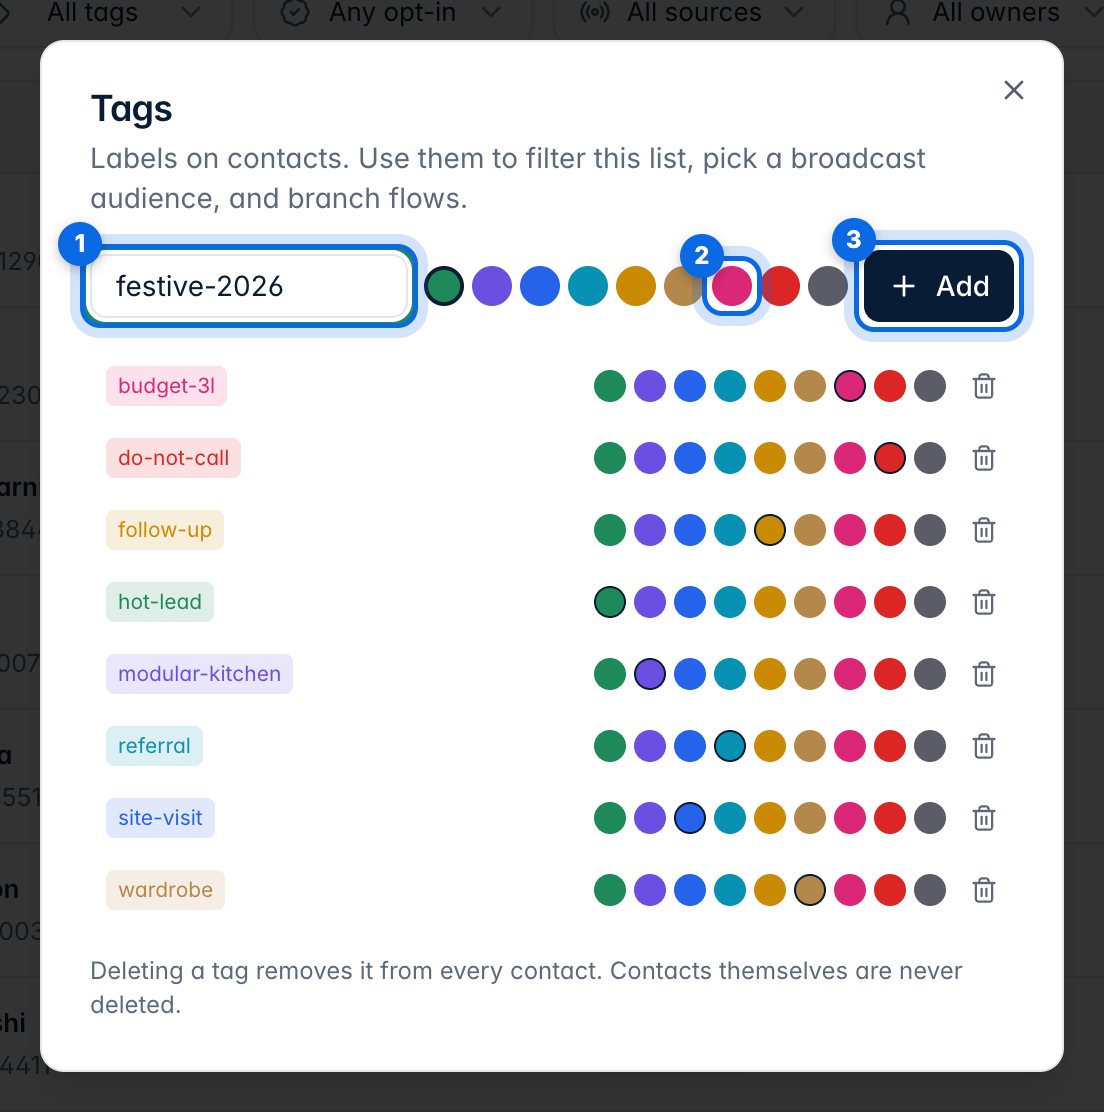
Open the Tag filter and choose Manage tags. Type a new tag (1), pick a colour (2) and click Add (3). You can recolour or delete any tag; deleting a tag never deletes contacts.
6. Tag and export in bulk
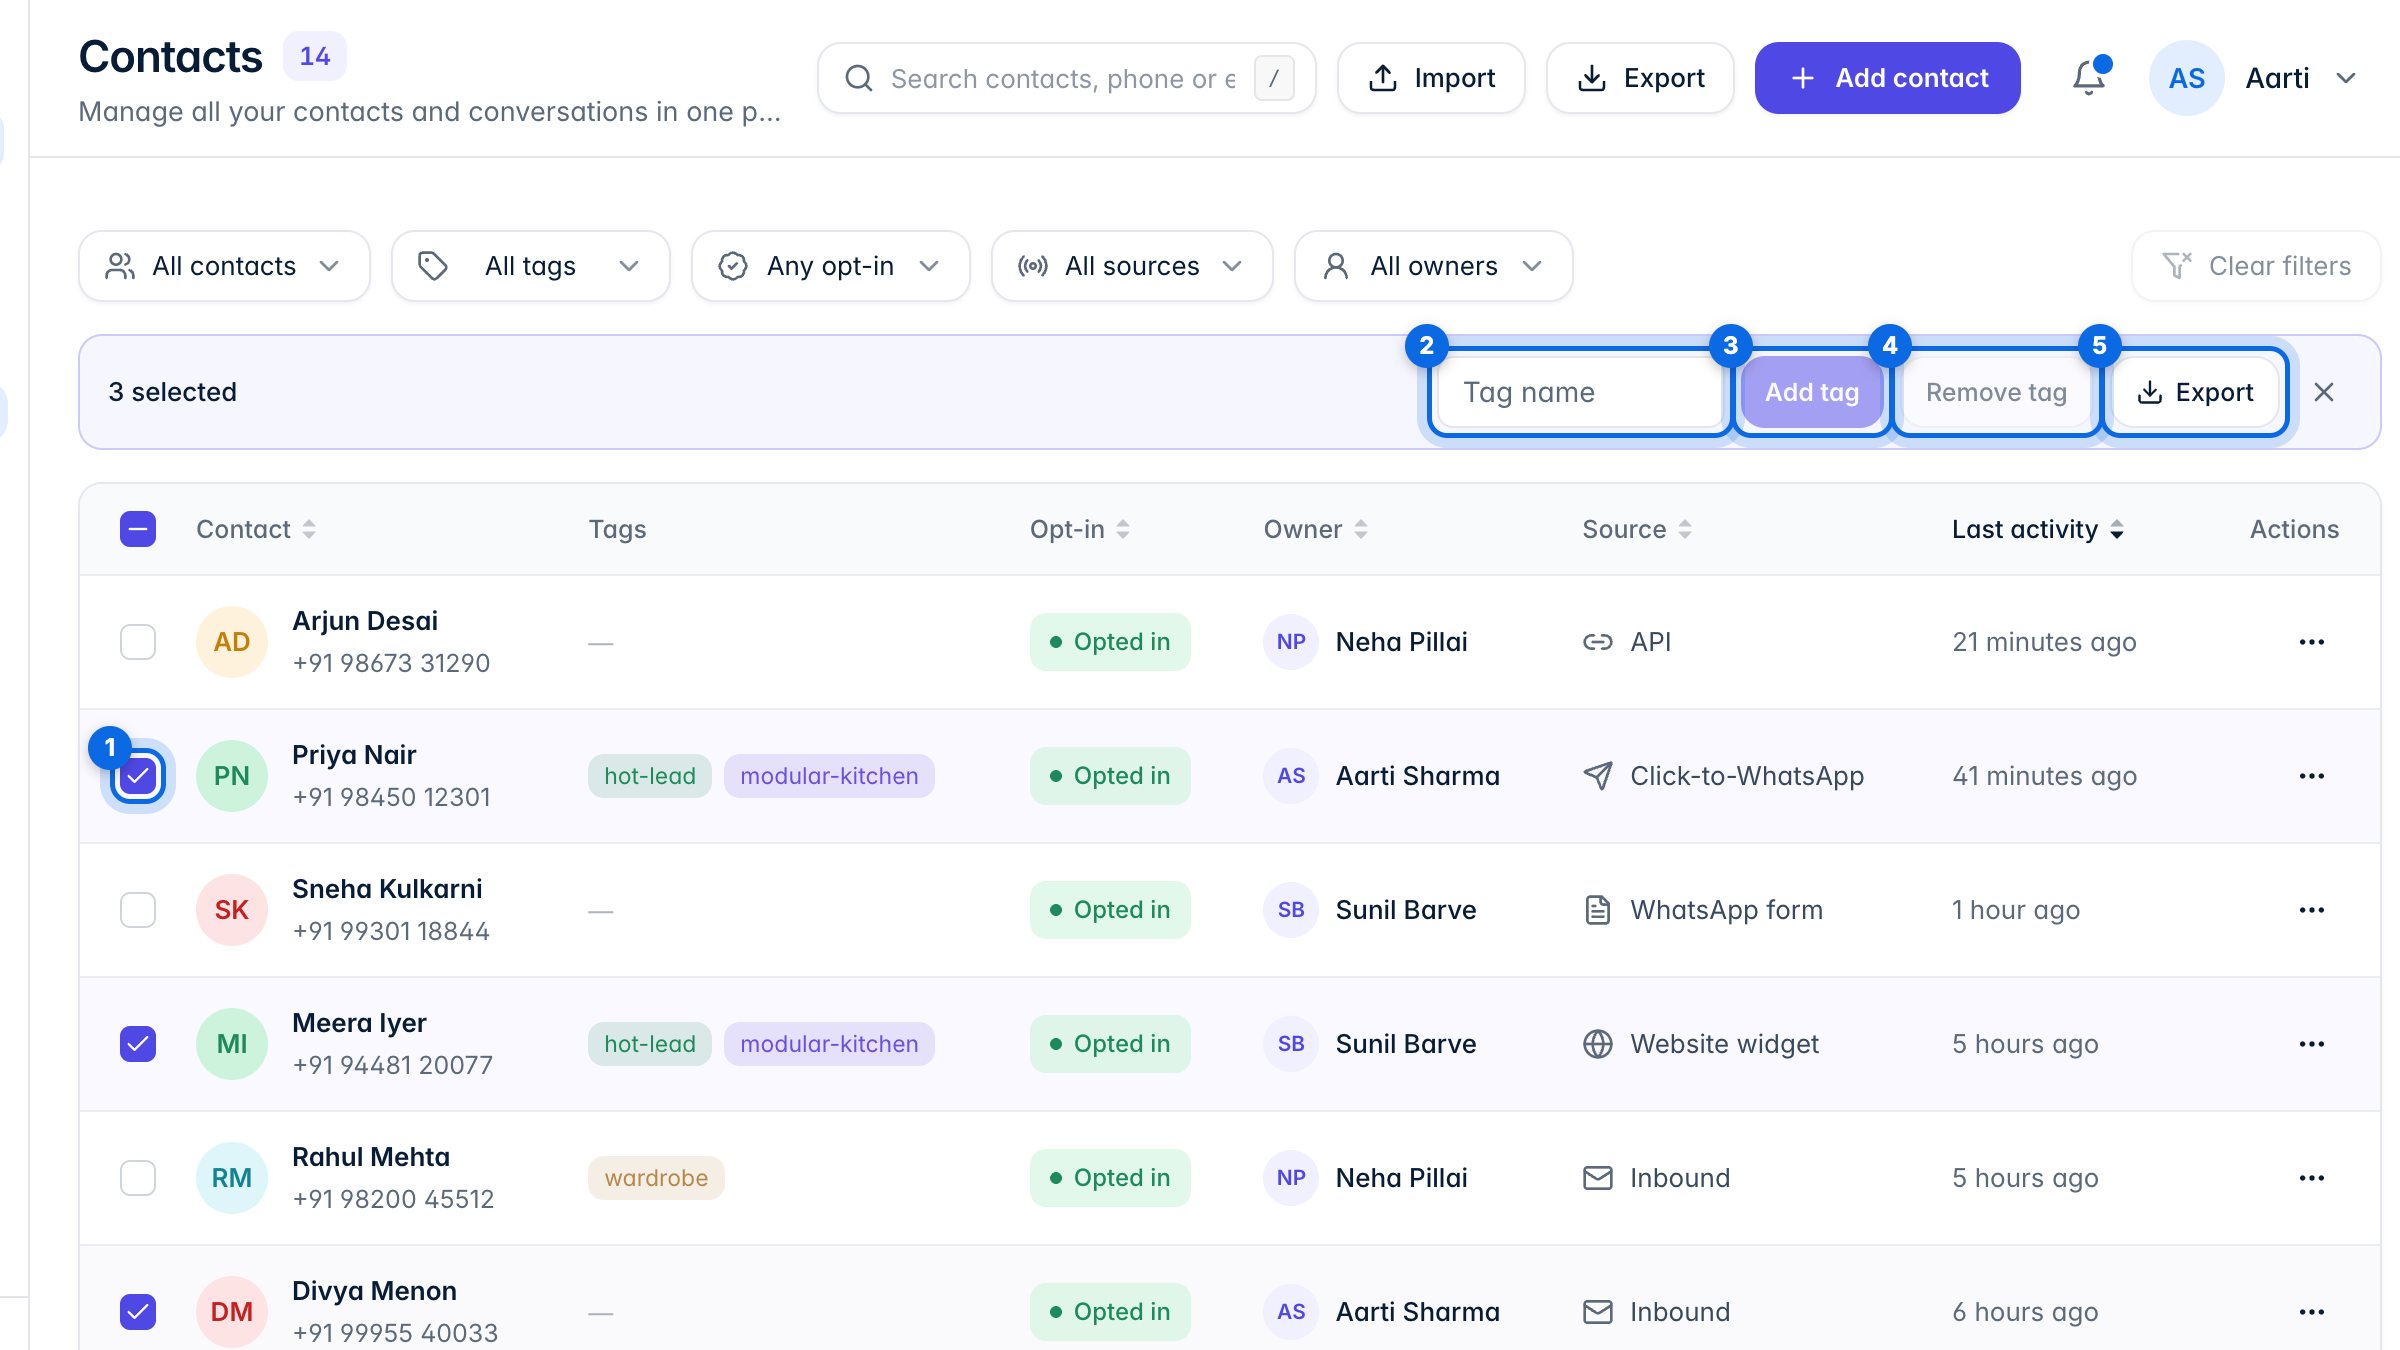
Tick the contacts you want (1). Type a tag name (2) and click Add tag (3), or Remove tag (4). Export (5) downloads the selected contacts as a CSV; the Export button at the top downloads the whole filtered list.
7. Actions on a contact
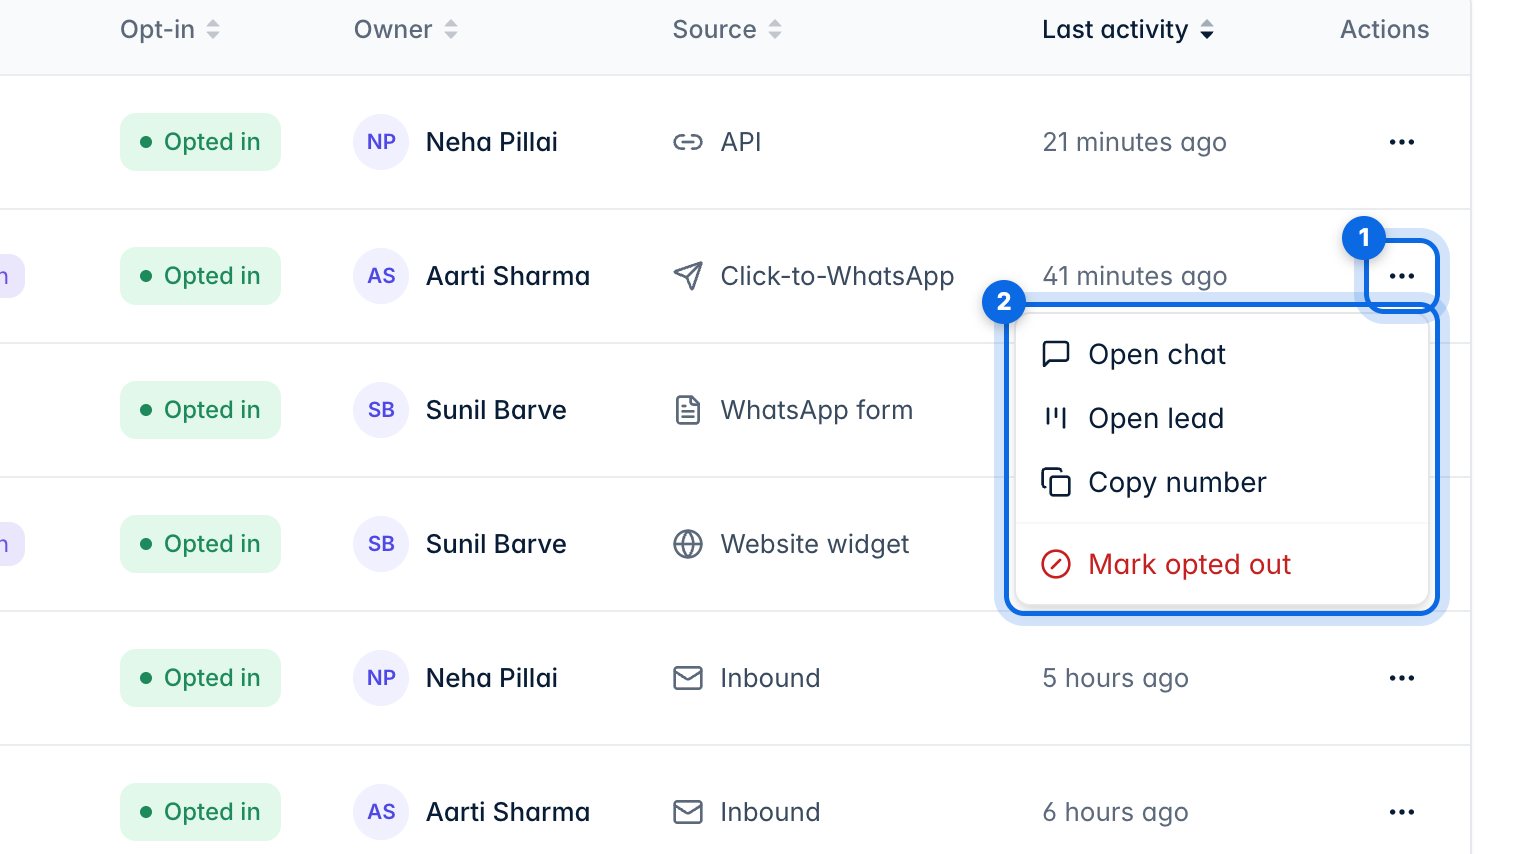
The ⋯ button on a row (1) opens the chat or the lead, copies the number, or marks the contact as opted out (2). Opted-out contacts never get broadcasts.