Broadcasts
Pick an audience and a template, test and schedule the send, then read the report.
2 min video15 stepsEnglish and हिंदी
Language
Step by step
The same steps in writing, with a screenshot for each.
1. Your broadcasts
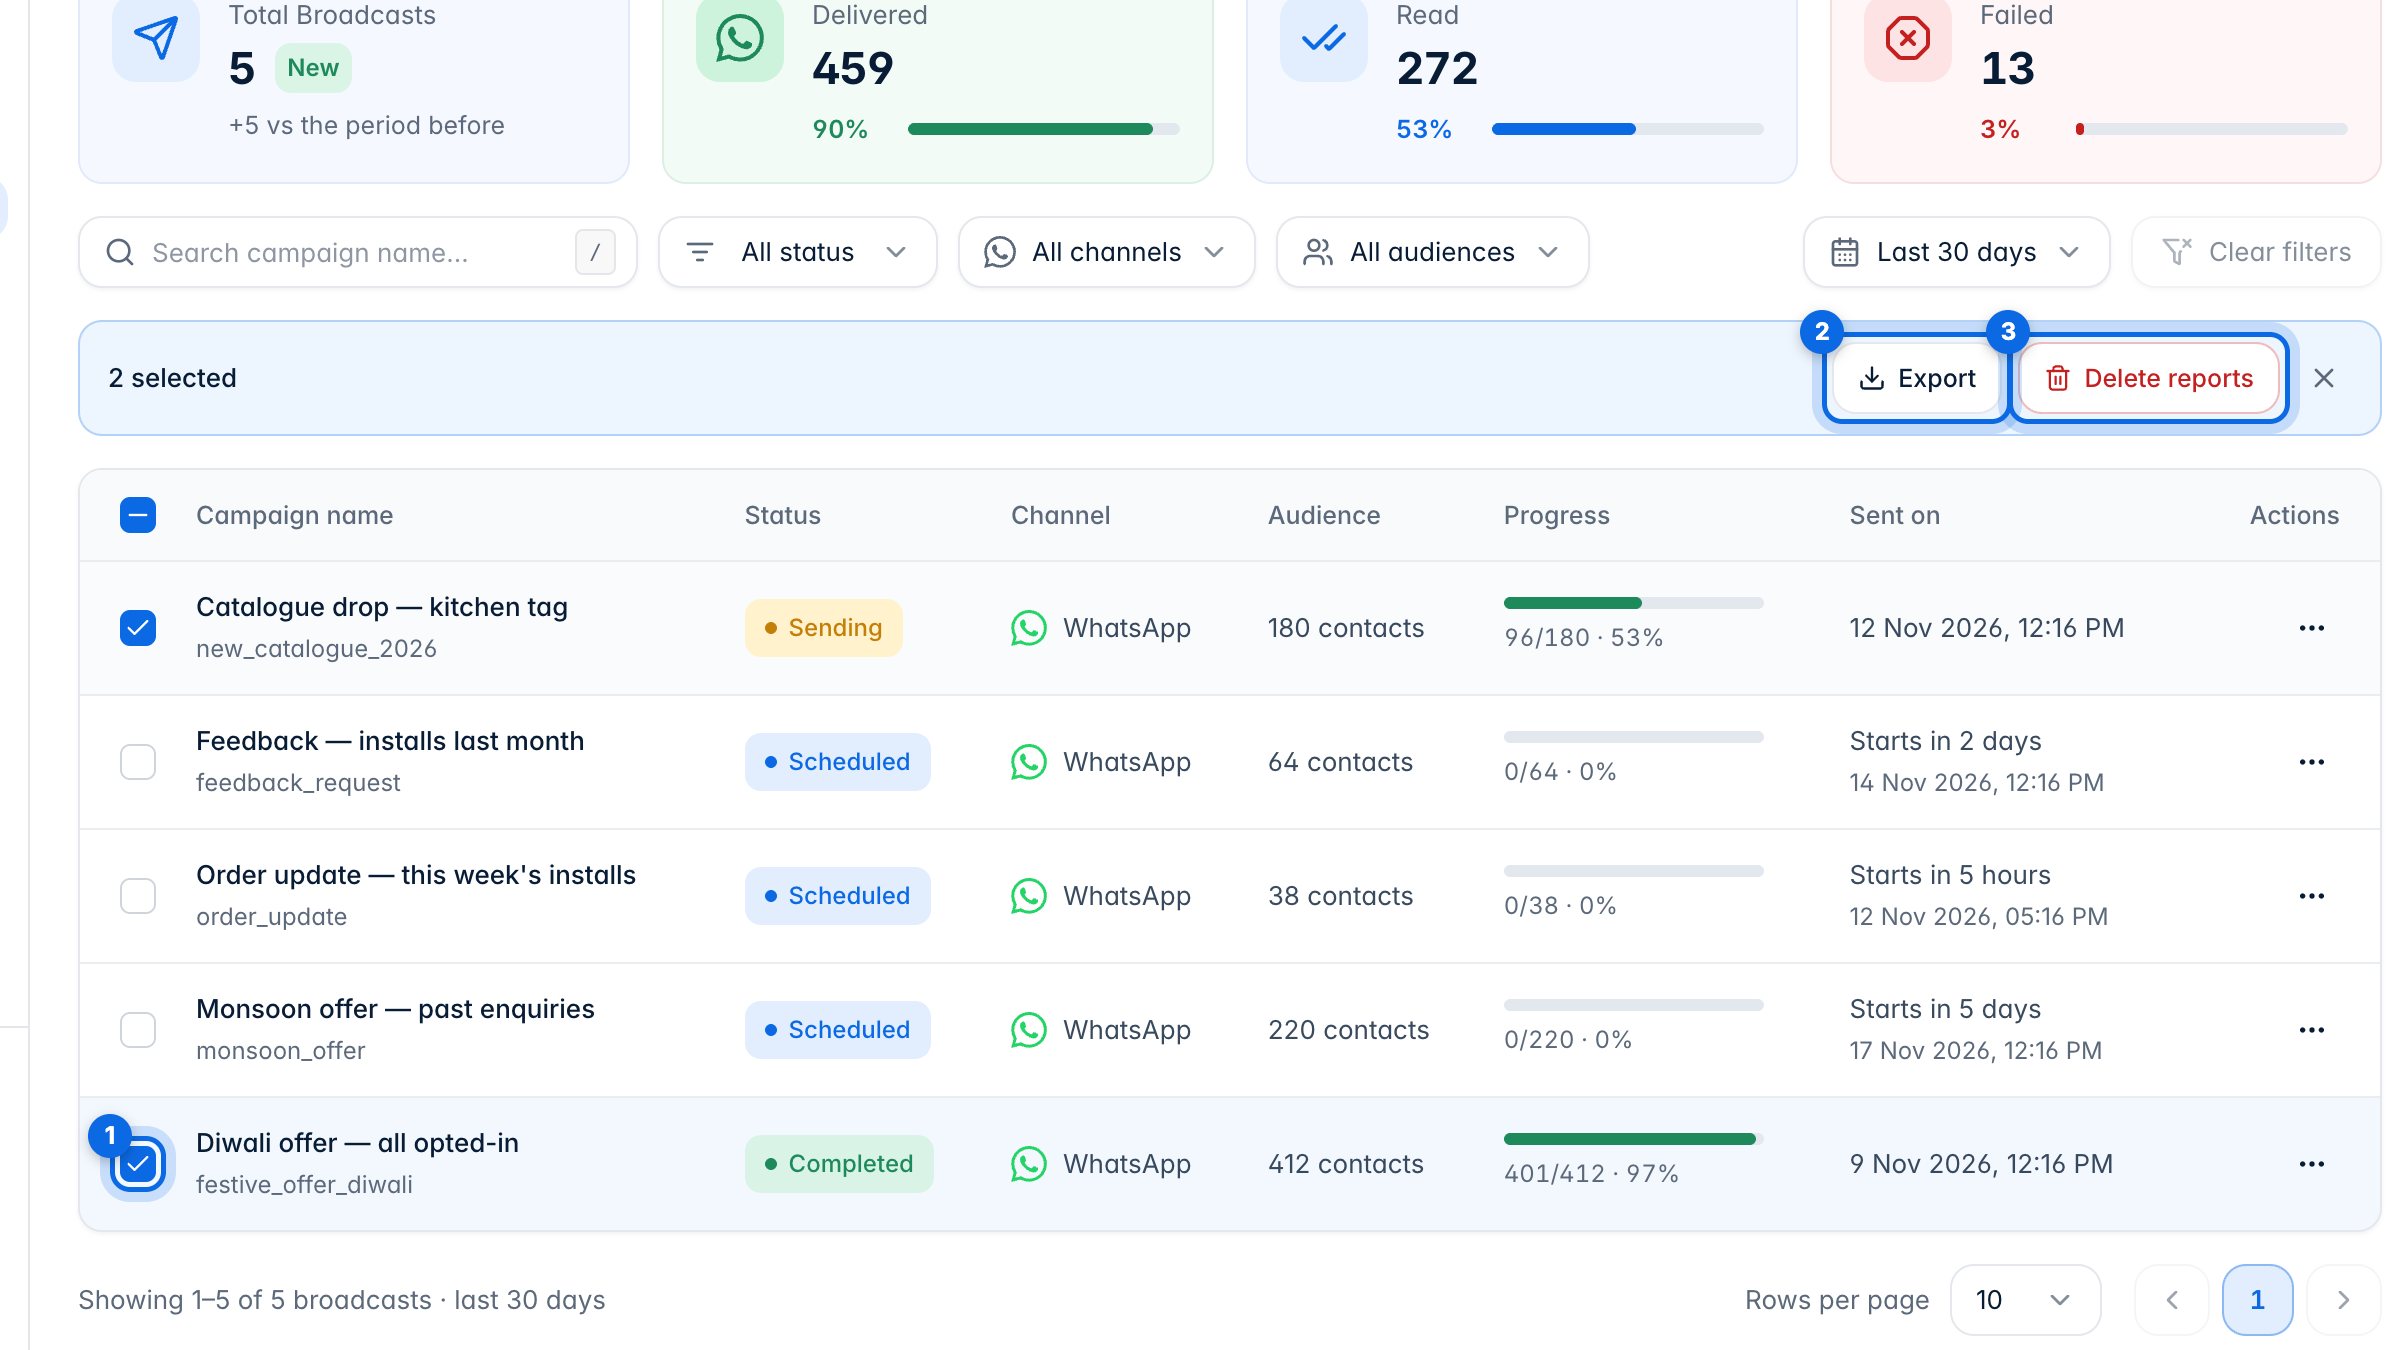
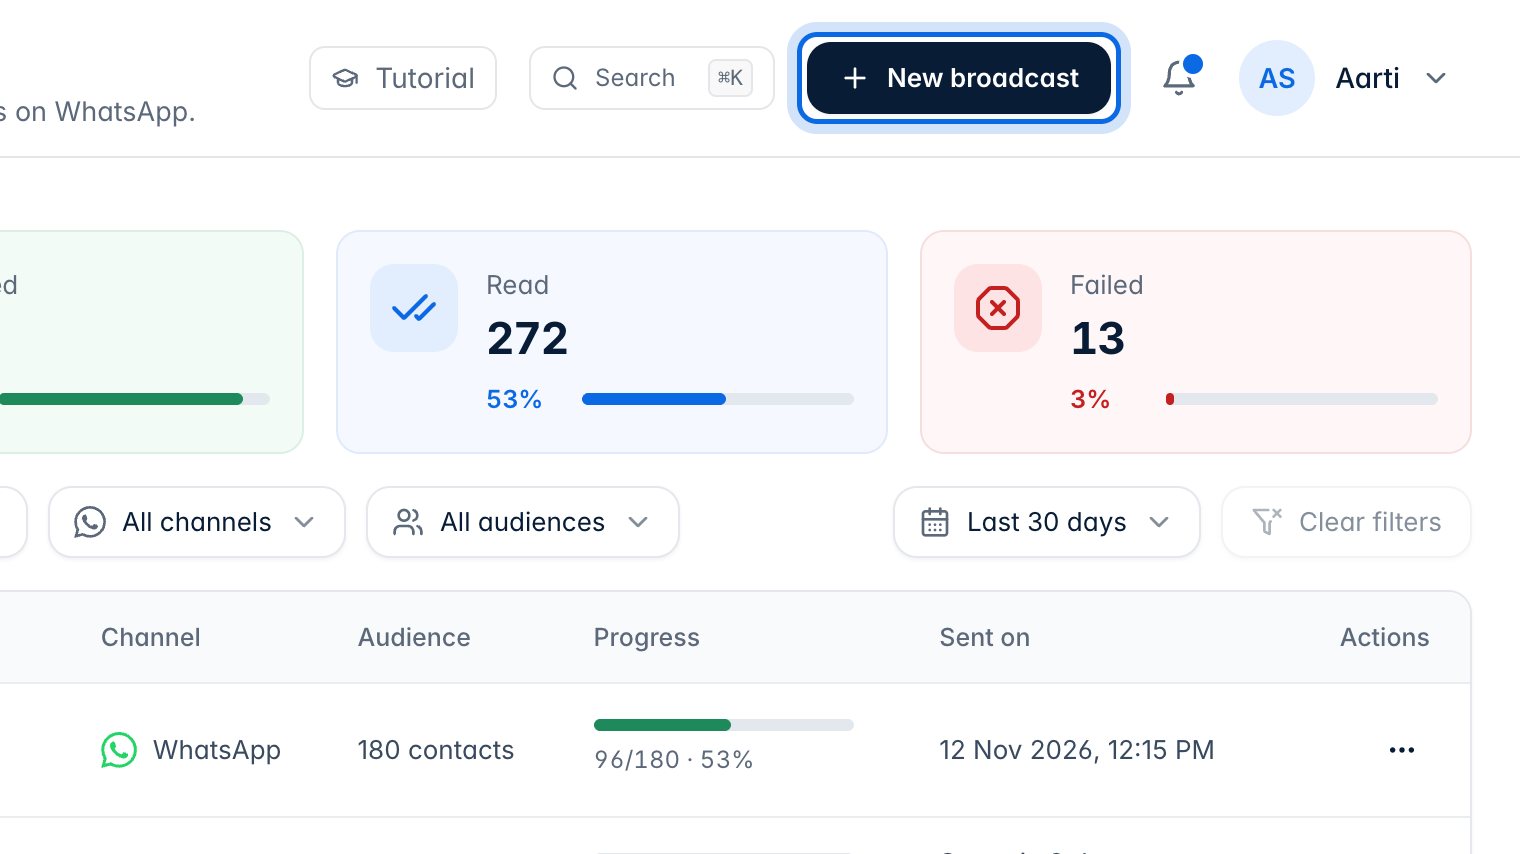
The four cards at the top add up your broadcasts for the chosen period: how many you sent (1), and how many messages were delivered (2), read (3) and failed (4).
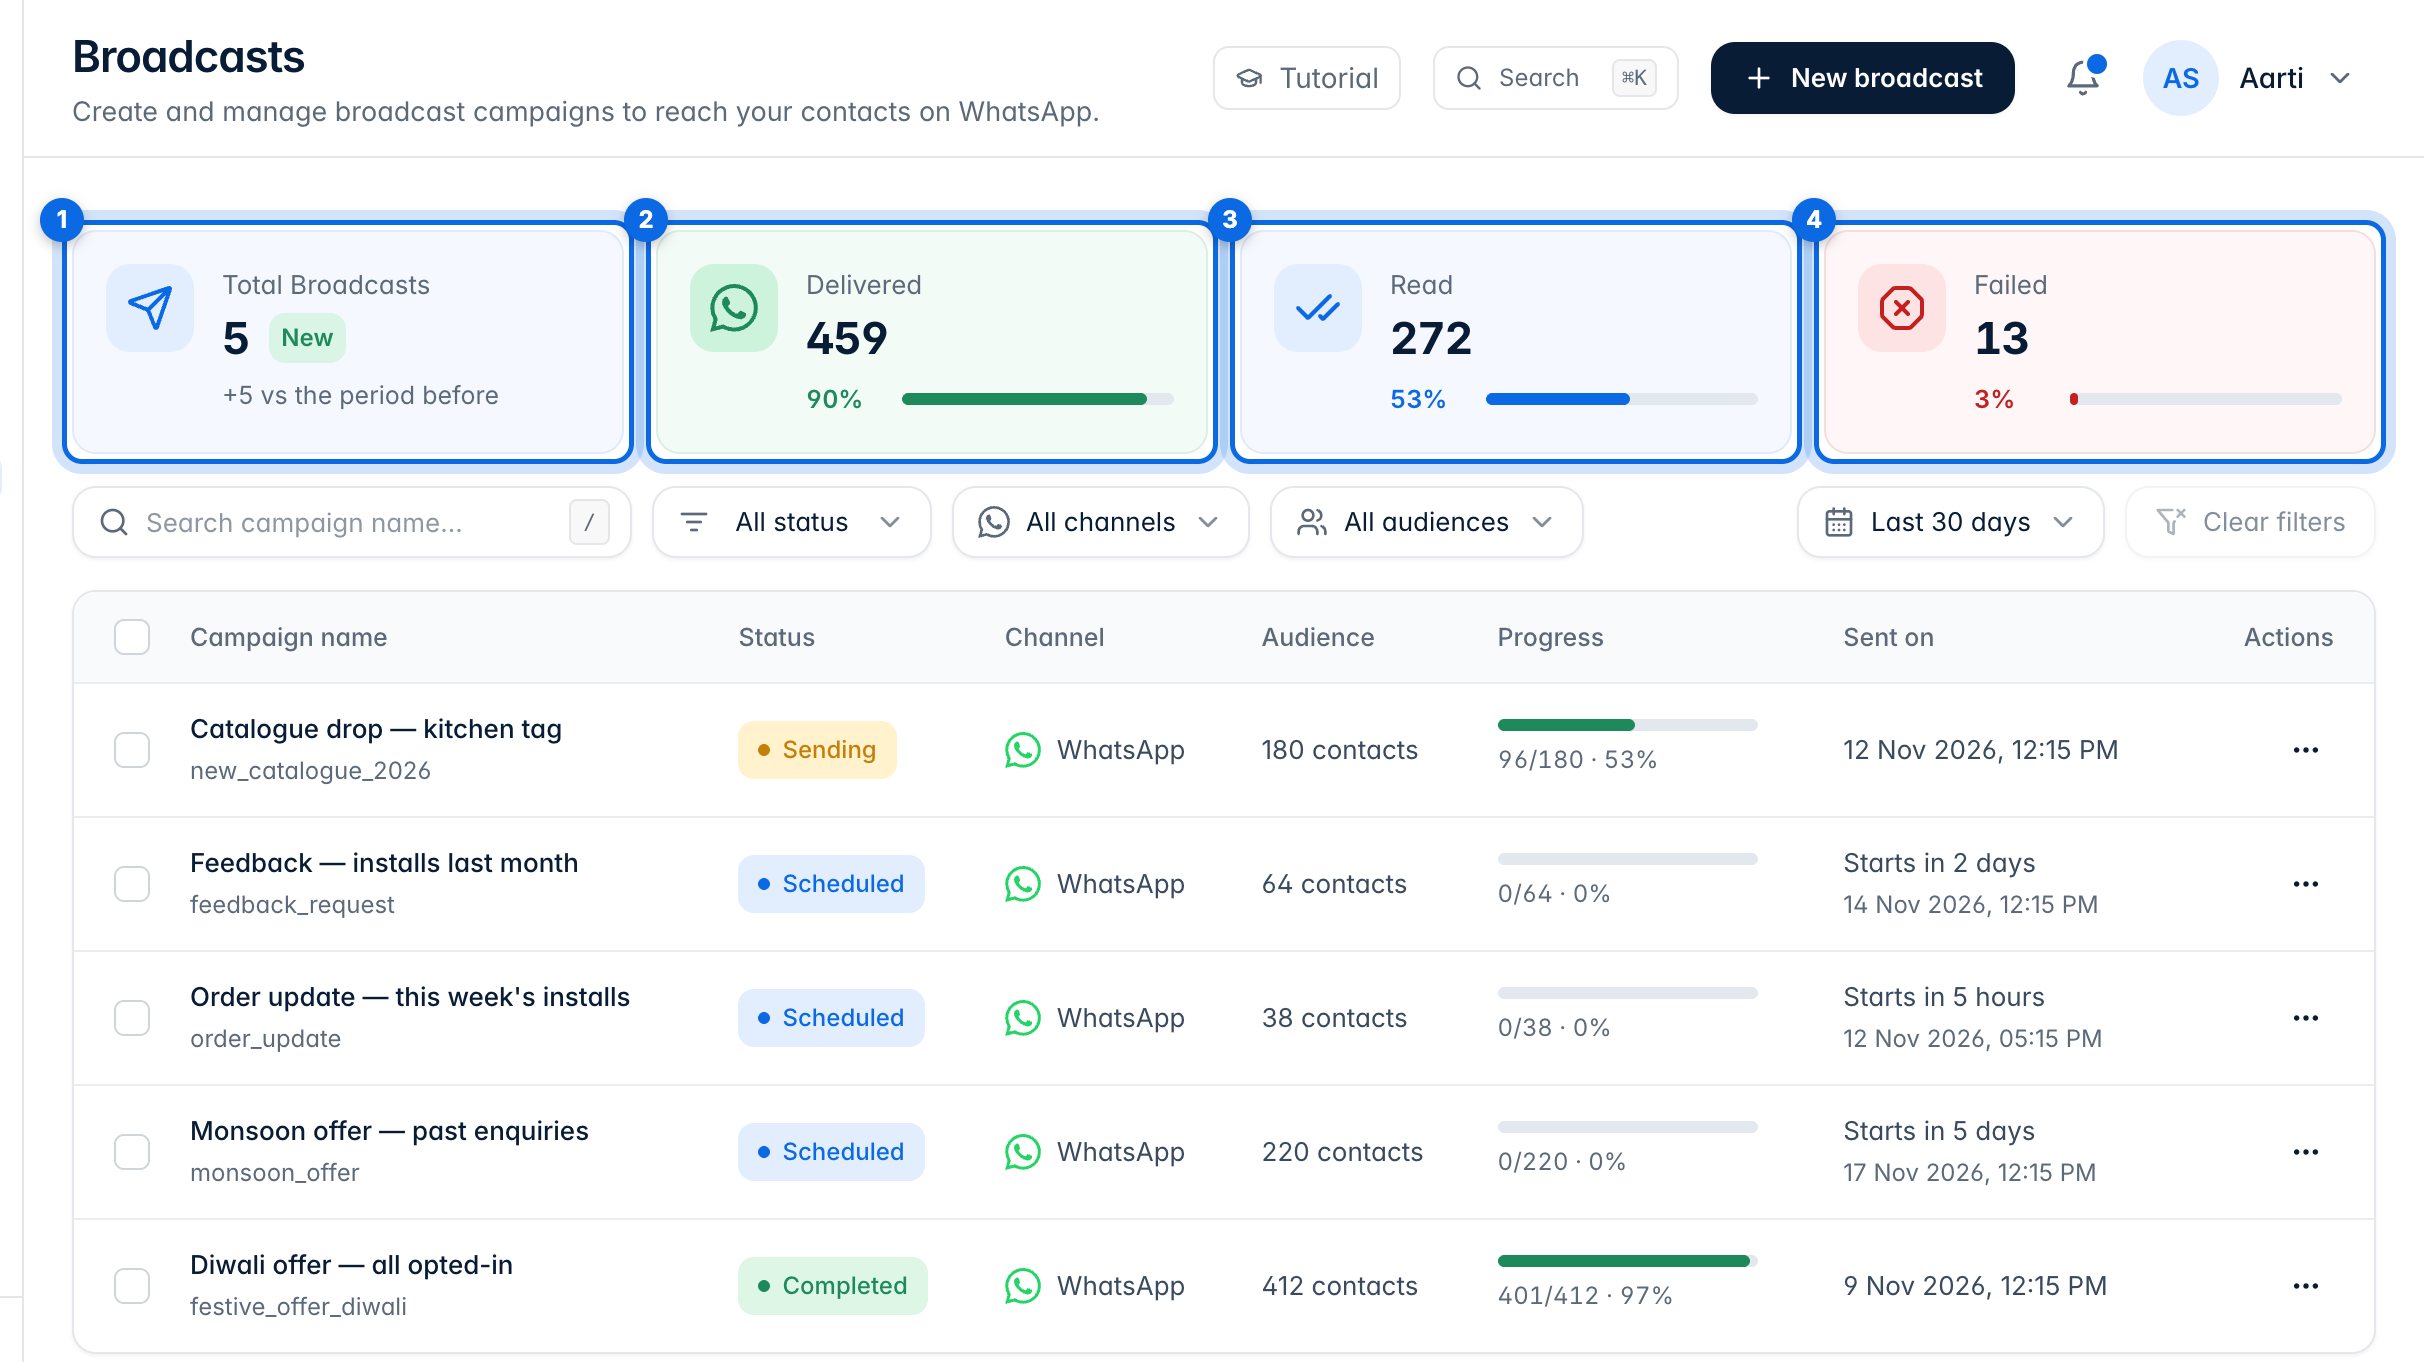
Each row is one broadcast. Status (1) shows whether it's a draft, scheduled, sending or completed. Progress (2) shows how many have been sent so far, and Sent on (3) shows when it went out or when it's due to start.
2. Search and filter
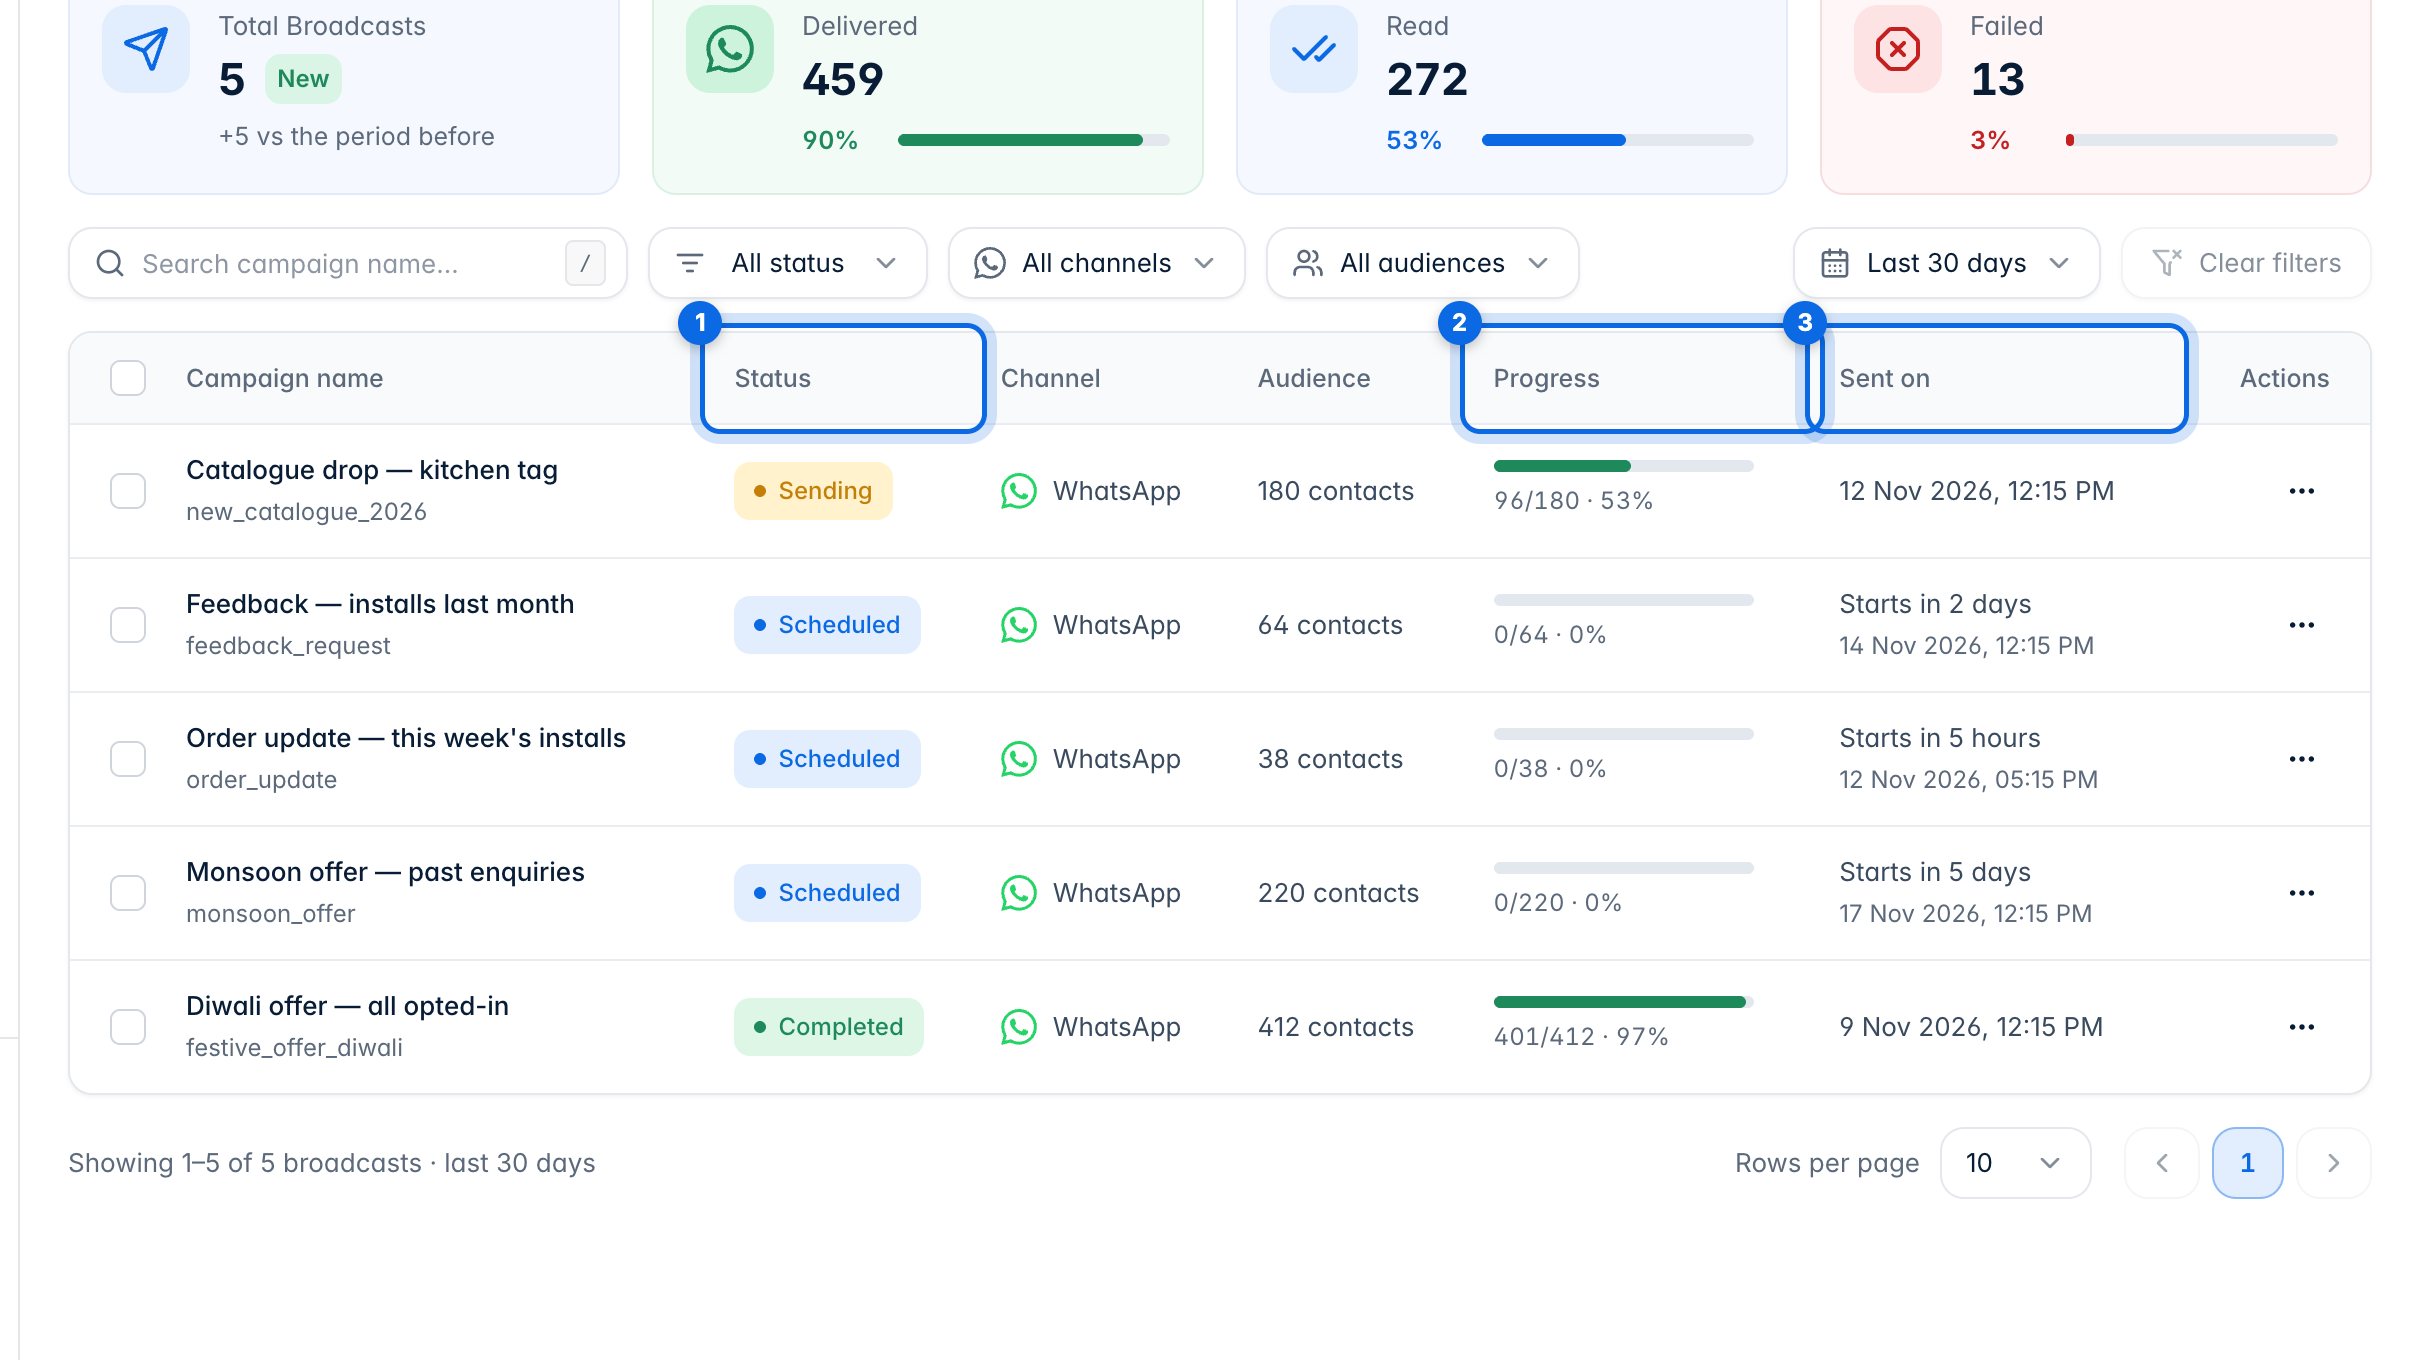
Type a campaign name to find it (1). Narrow the list by status (2), WhatsApp number (3), audience (4) or period (5). Clear filters (6) brings everything back.
3. Start a broadcast
Click New broadcast at the top of the page.
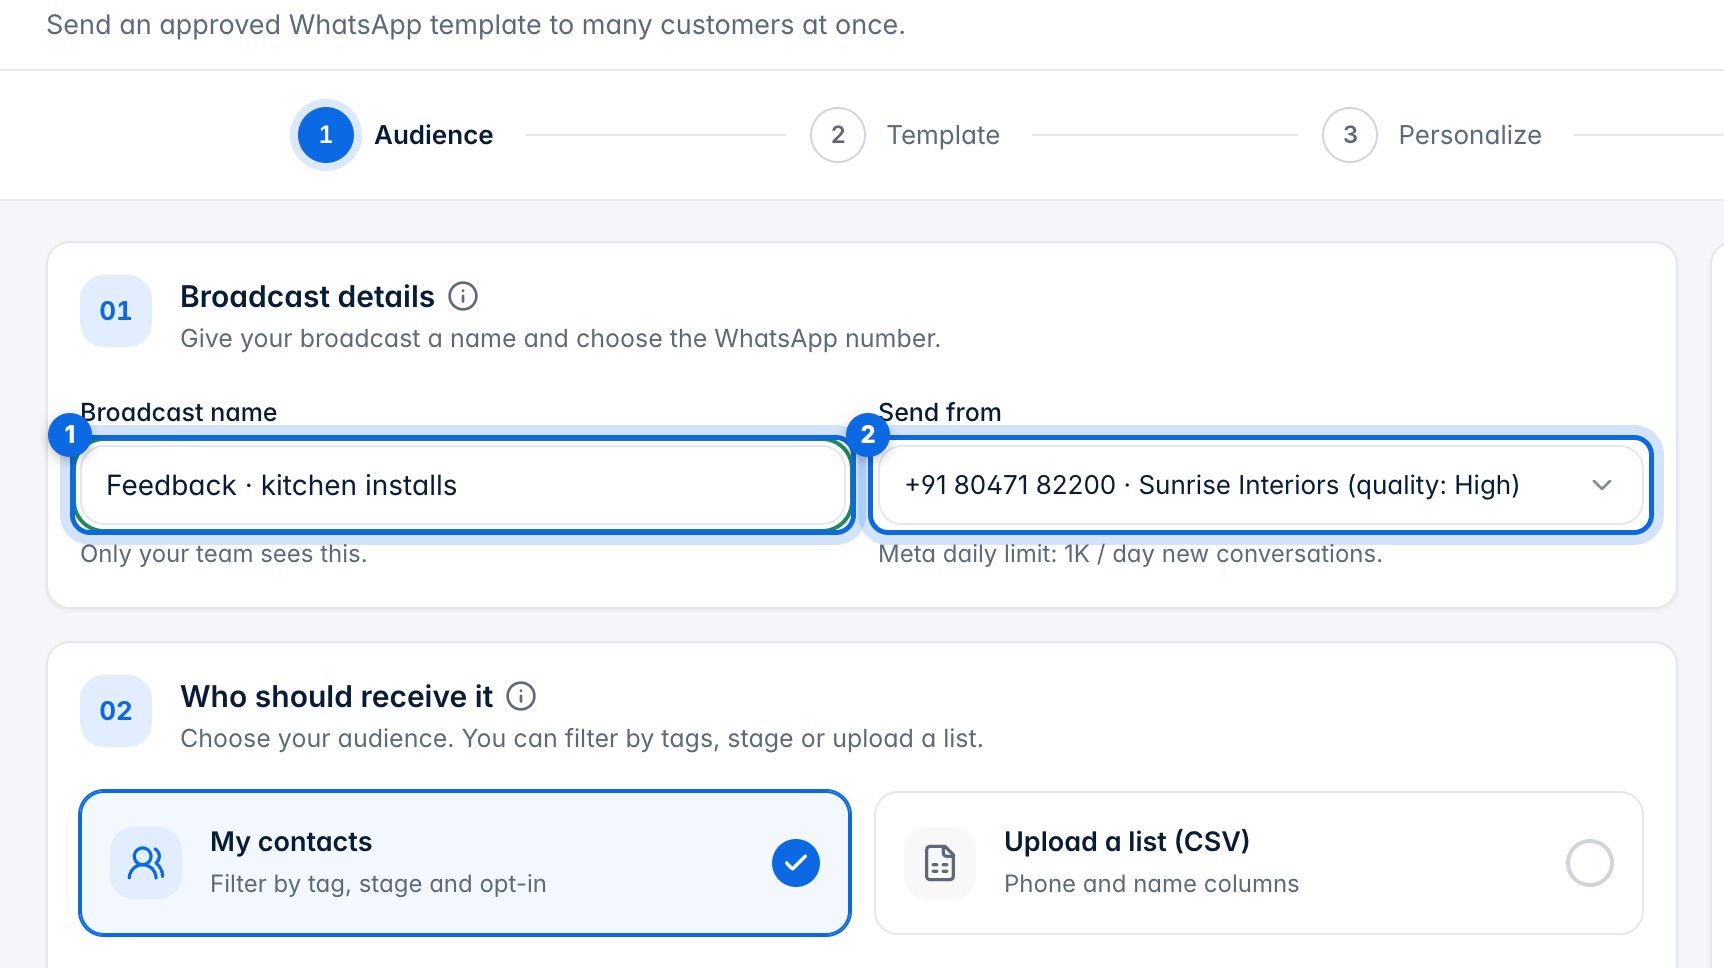
Give the broadcast a name (1); only your team sees it. Choose the WhatsApp number it goes from (2). Meta's daily limit for that number is shown underneath.
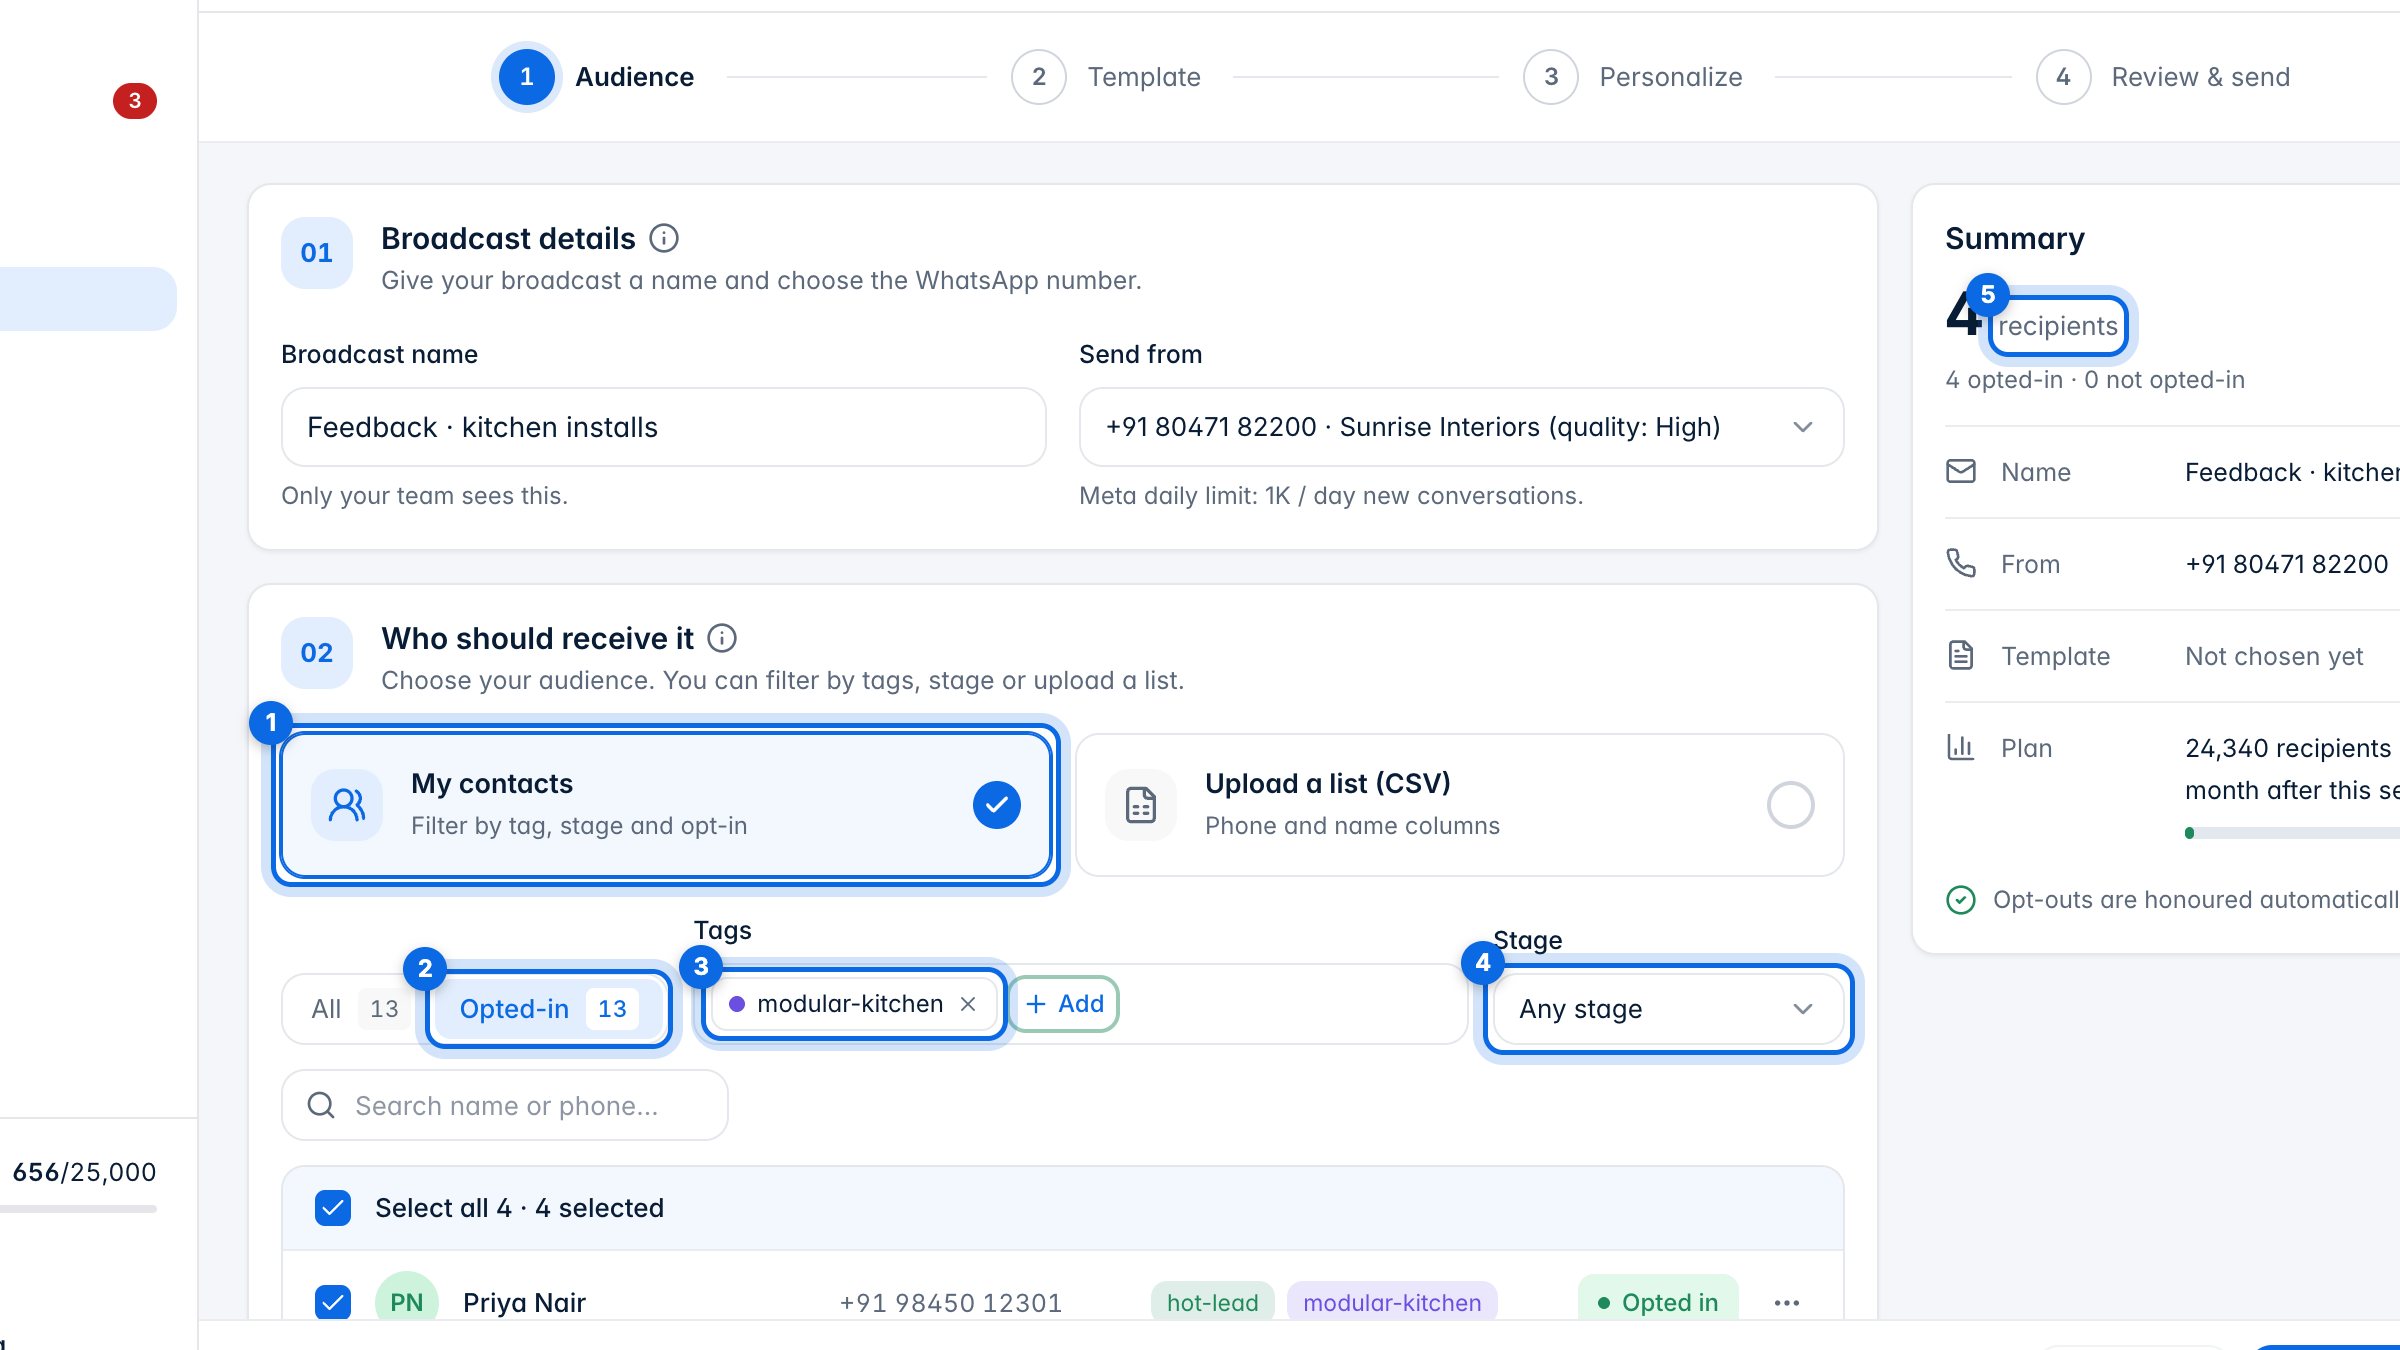
Keep My contacts selected (1). Choose Opted-in or All (2), then narrow it by tag (3) or pipeline stage (4). You can untick anyone in the list. The summary shows how many people will get it (5).
4. Send to an uploaded list
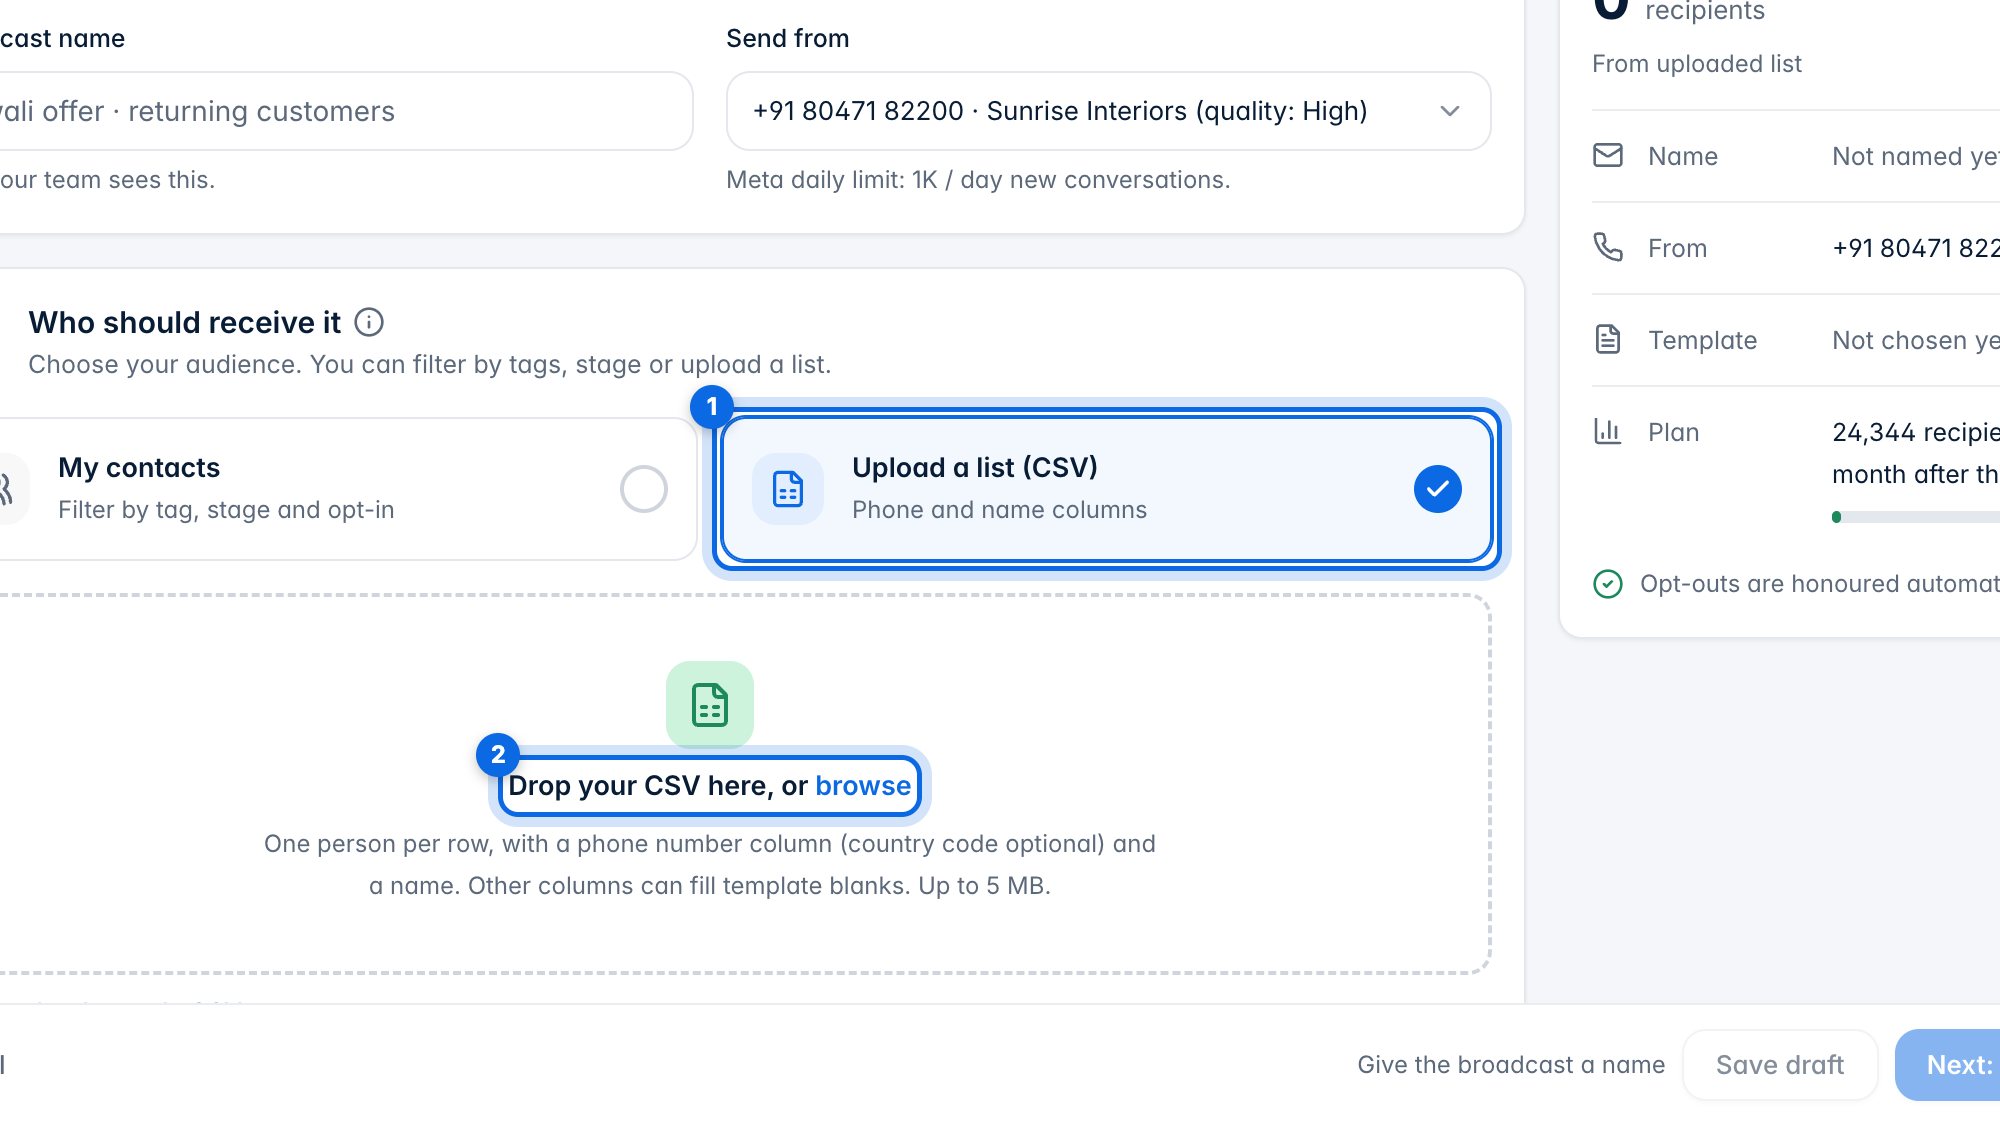
To send to a list from a file, choose Upload a list (CSV) (1), then drop the file or click browse (2). It needs a phone column and a name column; other columns can fill template blanks.
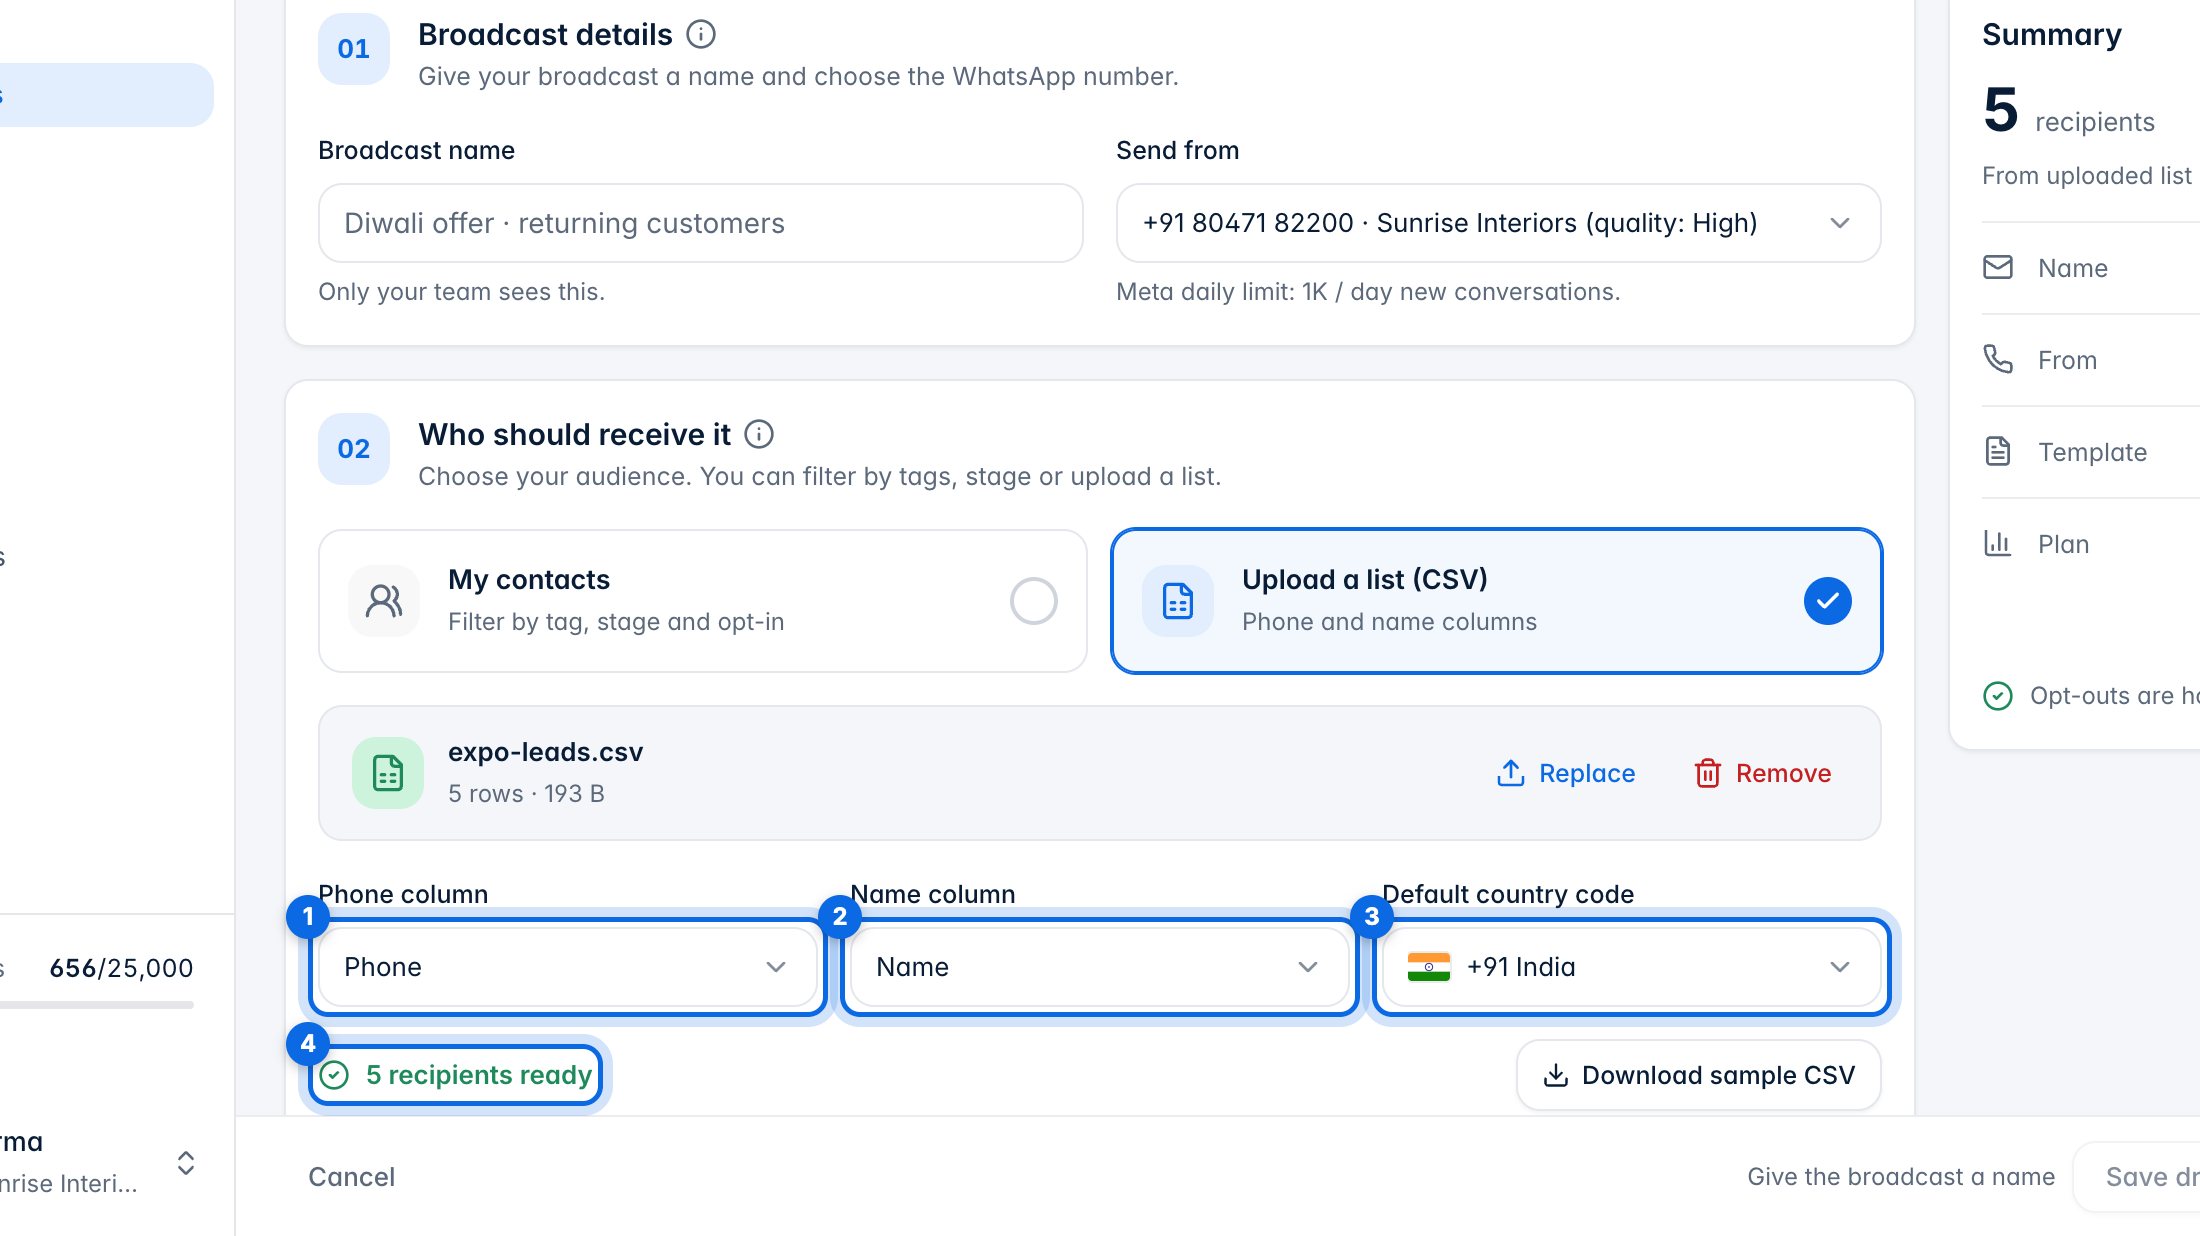
Check the phone column (1) and name column (2), and the country code for numbers written without one (3). HeloFlow shows how many recipients are ready (4). Numbers from a file haven't opted in on HeloFlow, so only message people who expect it.
5. Choose a template
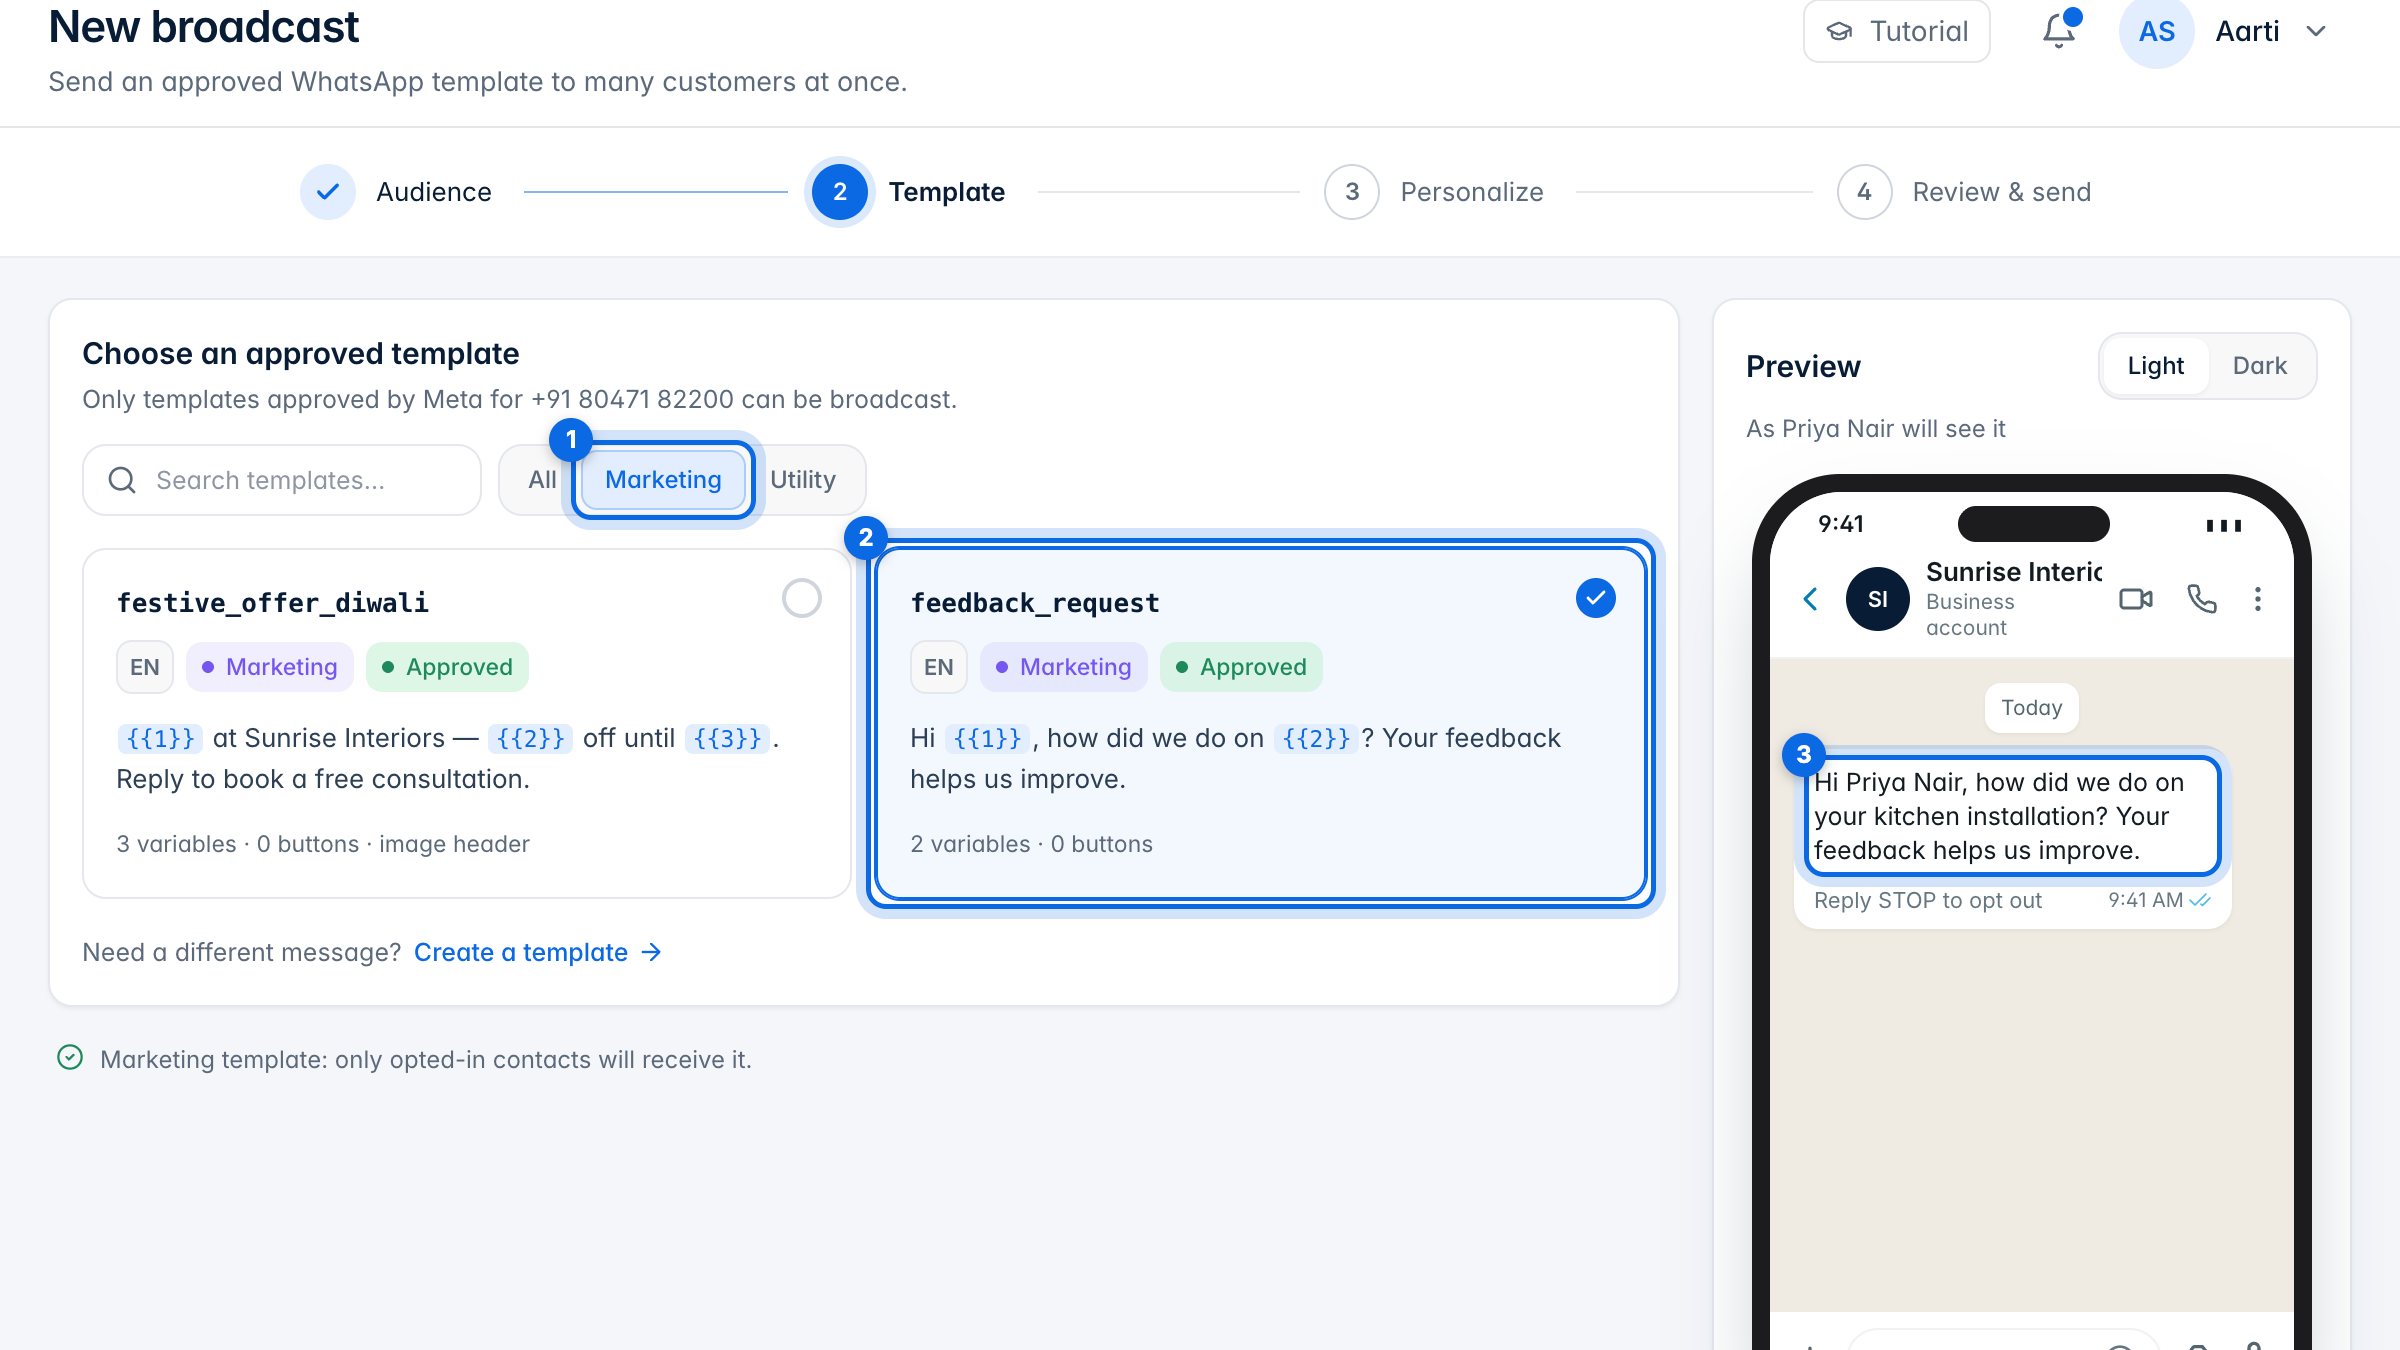
Click Next. Only templates Meta has approved for your number can be broadcast. Filter by Marketing or Utility (1), pick one (2), and the preview shows how it will look on the phone (3). A marketing template only goes to opted-in contacts.
6. Fill in the blanks
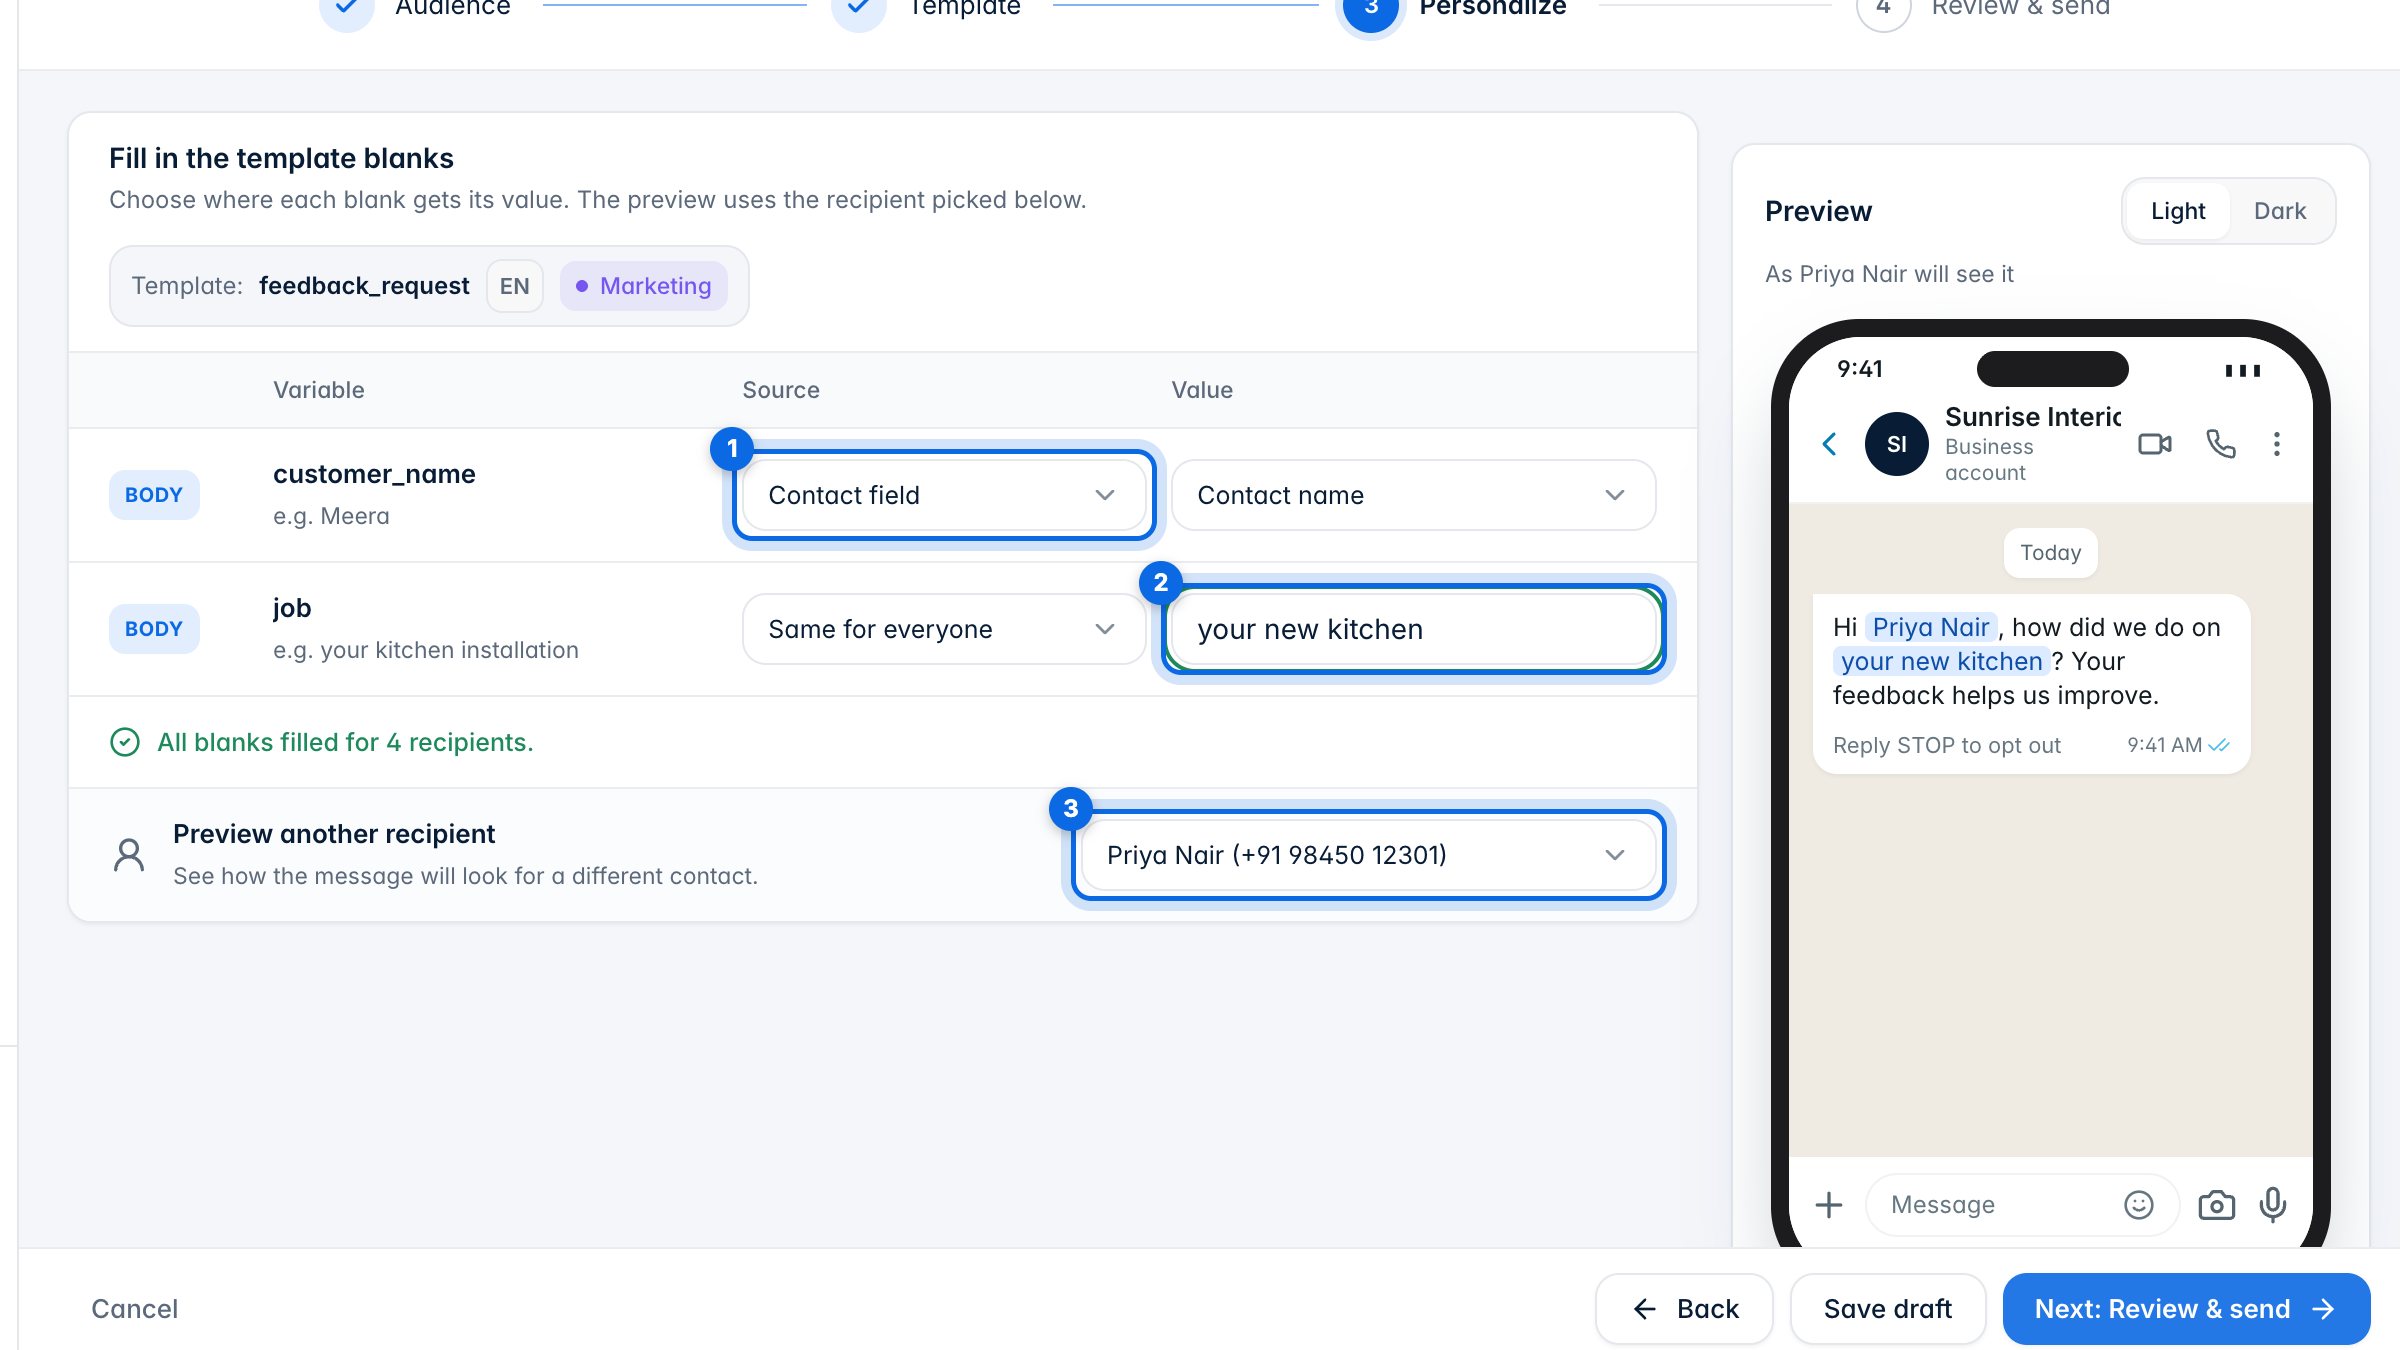
For each blank, choose where its value comes from (1): a contact field such as their name, or the same text for everyone, which you type in (2). With an uploaded list you can also use a column from the file. Pick another recipient (3) to check how it reads for them.
7. Review, test and schedule
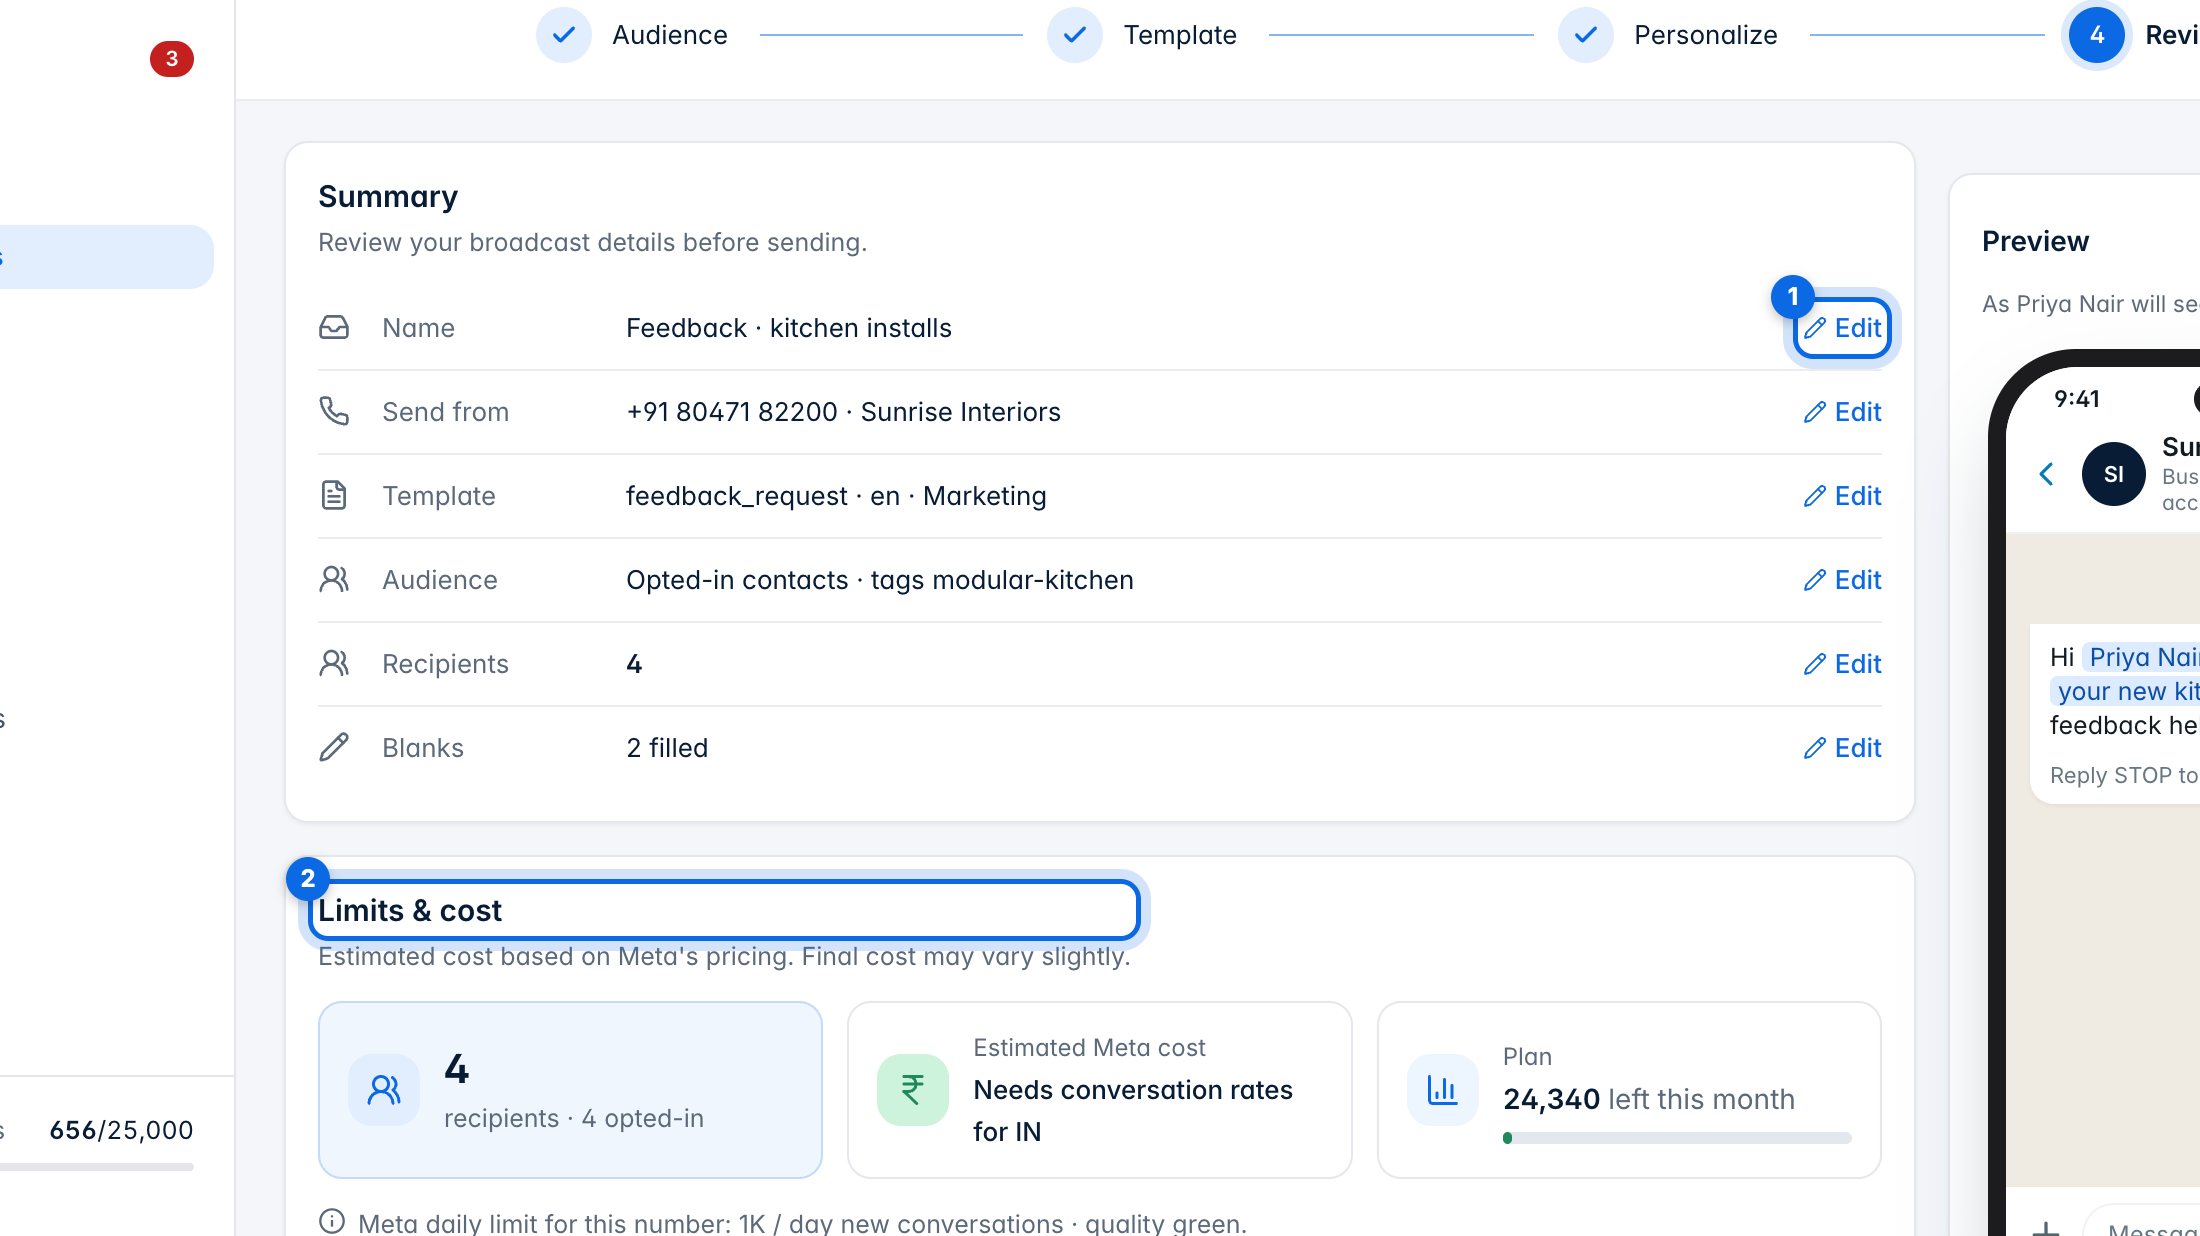
Click Next to review everything. Edit (1) takes you back to any part. Limits & cost (2) shows the number of recipients, an estimate of Meta's charge, and what's left on your plan. Meta bills your WhatsApp Business Account directly.
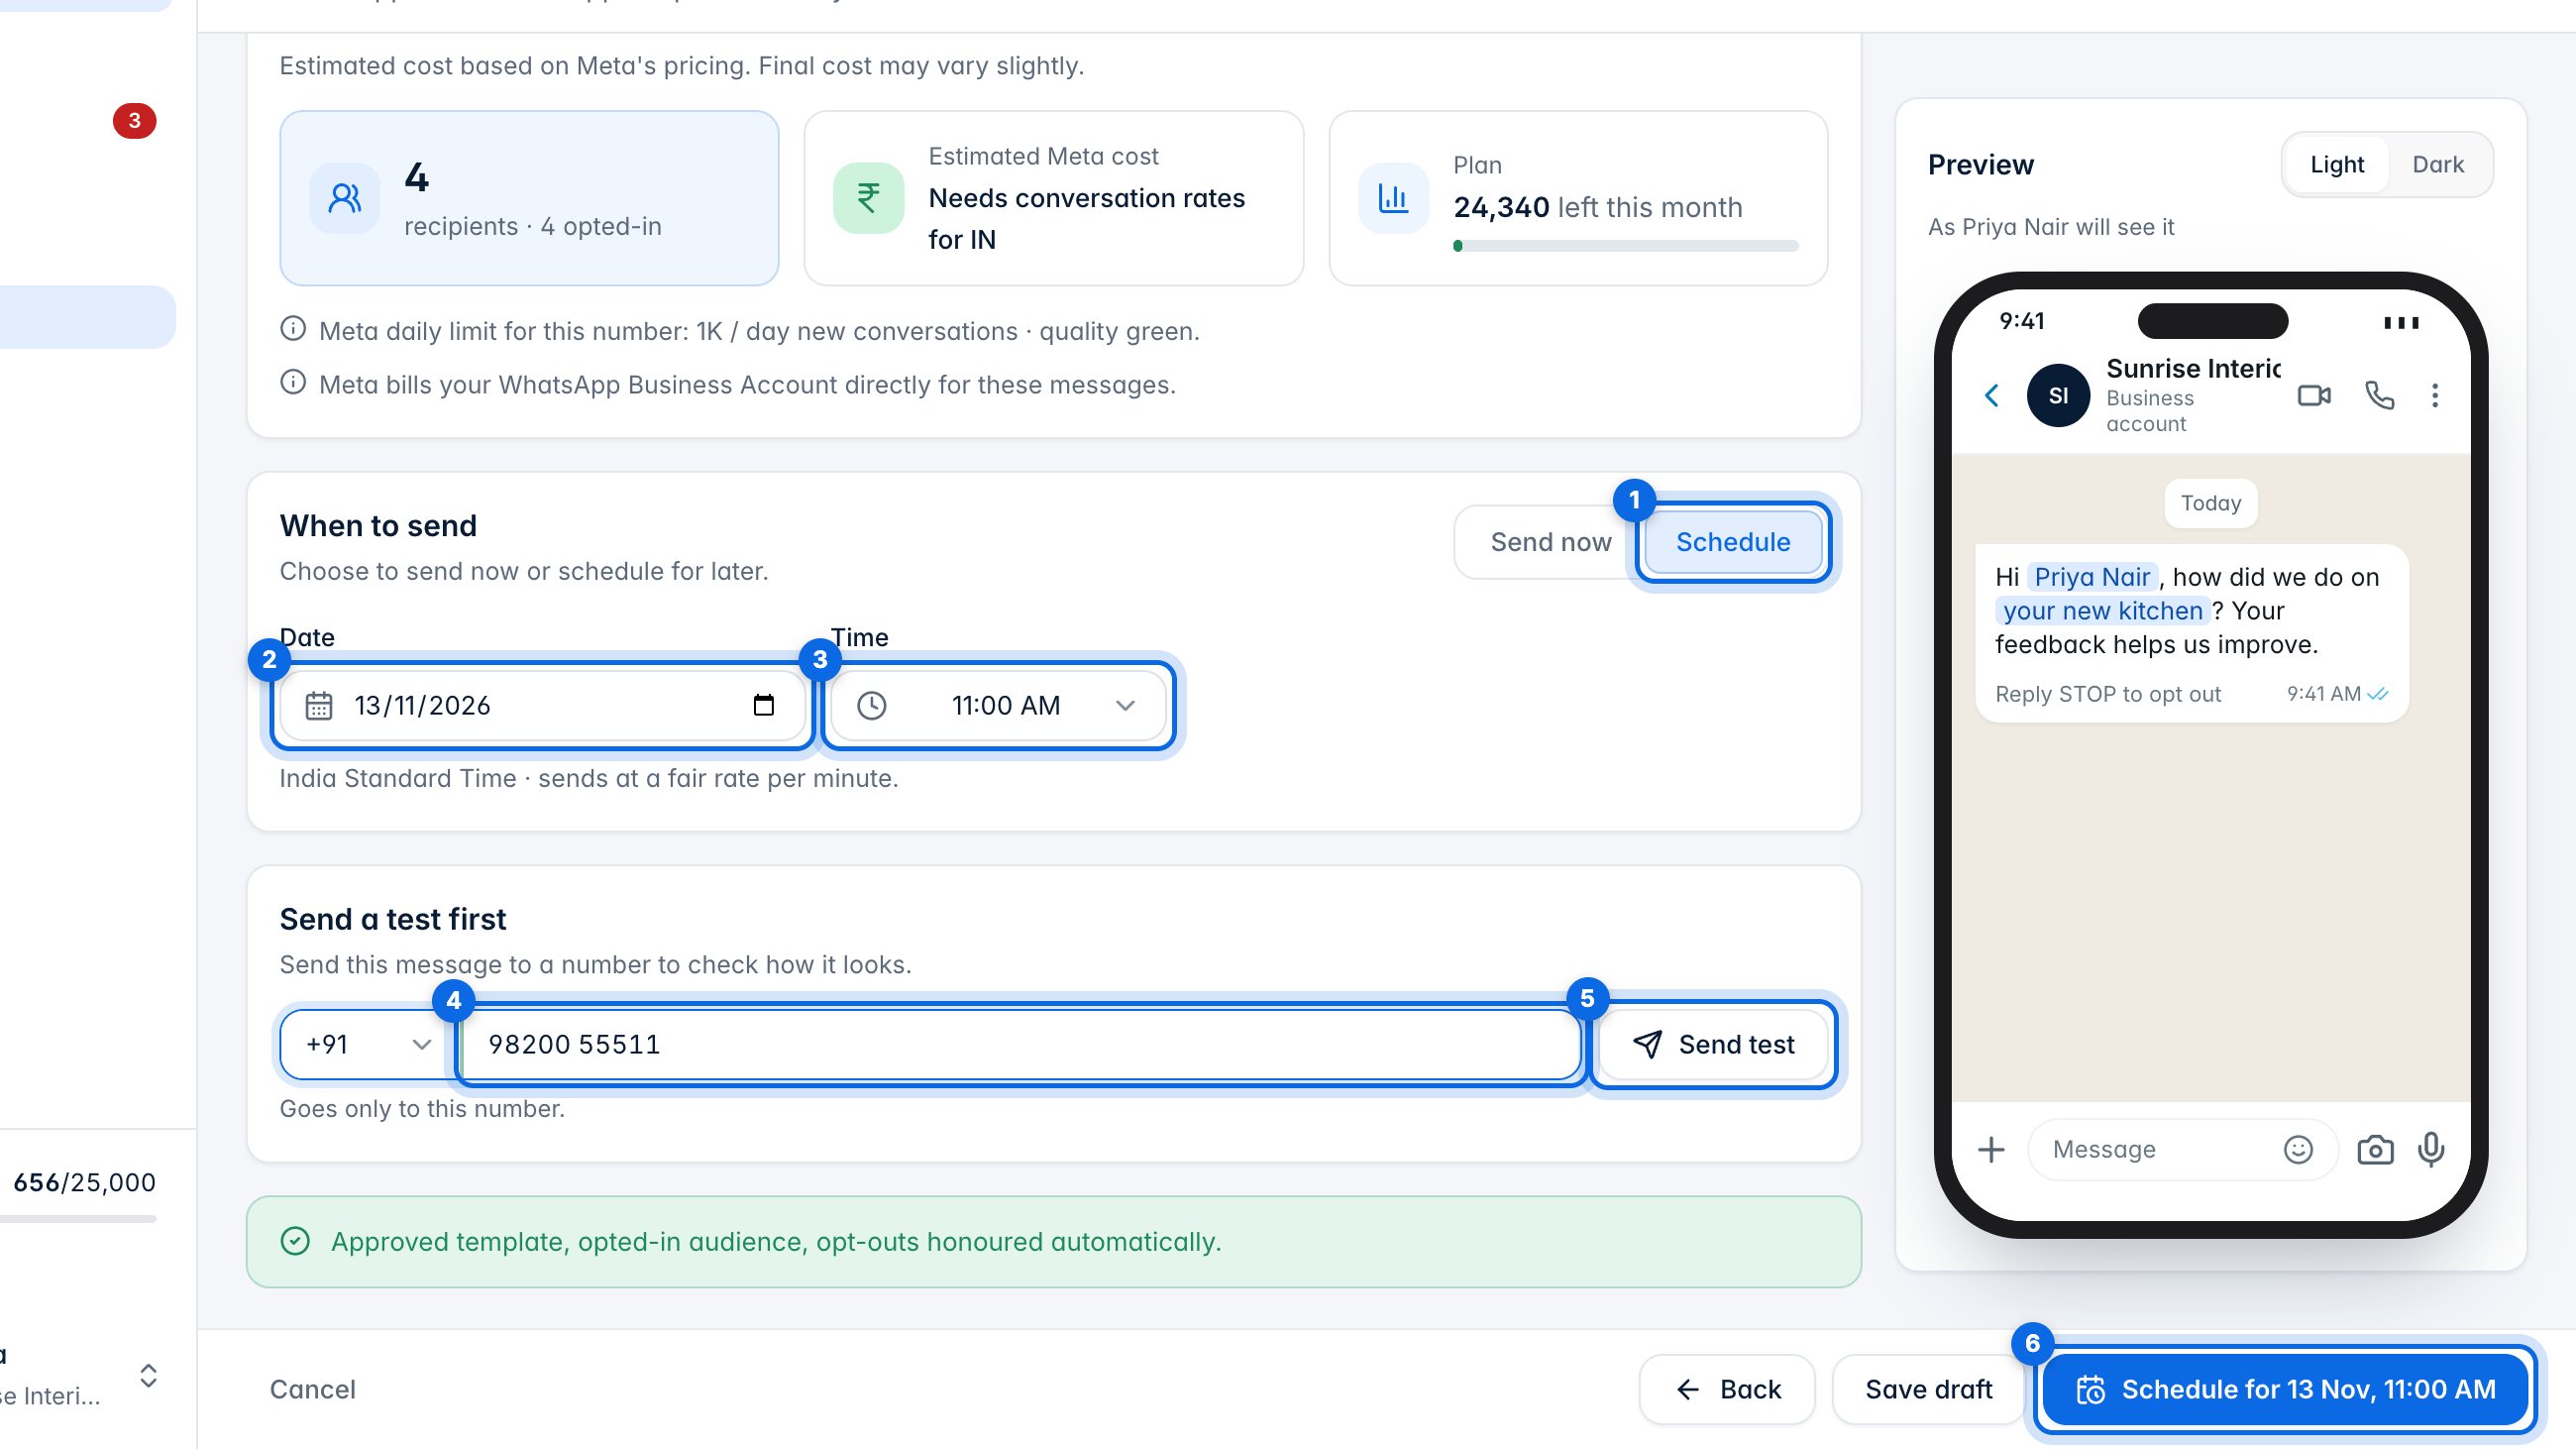
Send now starts straight away, at a steady rate that keeps your number healthy. Or choose Schedule (1) and pick a date (2) and time (3). To check the message first, enter your own number (4) and click Send test (5). Then click Schedule (6), or Send.
8. Read the report
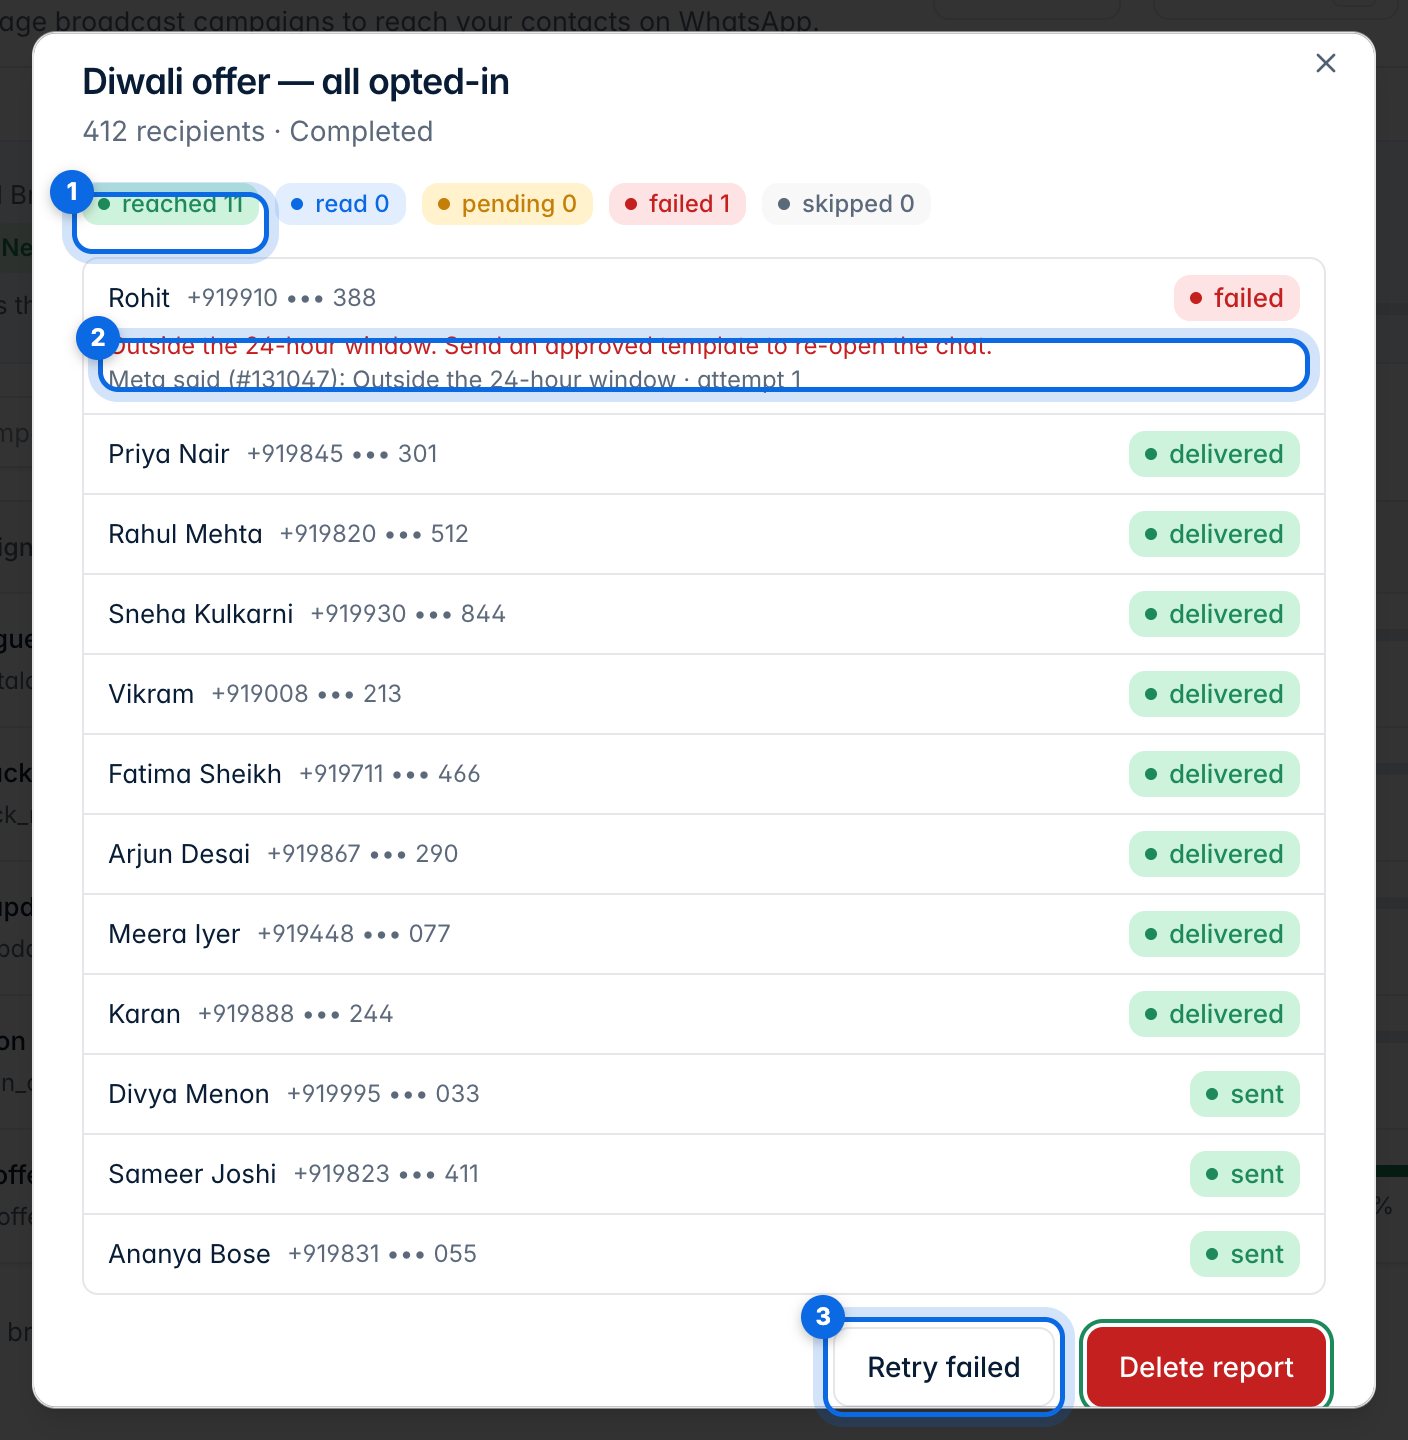
Click any broadcast to open its report. The counts at the top (1) show how many were reached, read, pending, failed and skipped. A failed message shows the reason (2). Retry failed (3) sends to those people again.
9. Retry, resend, cancel, export
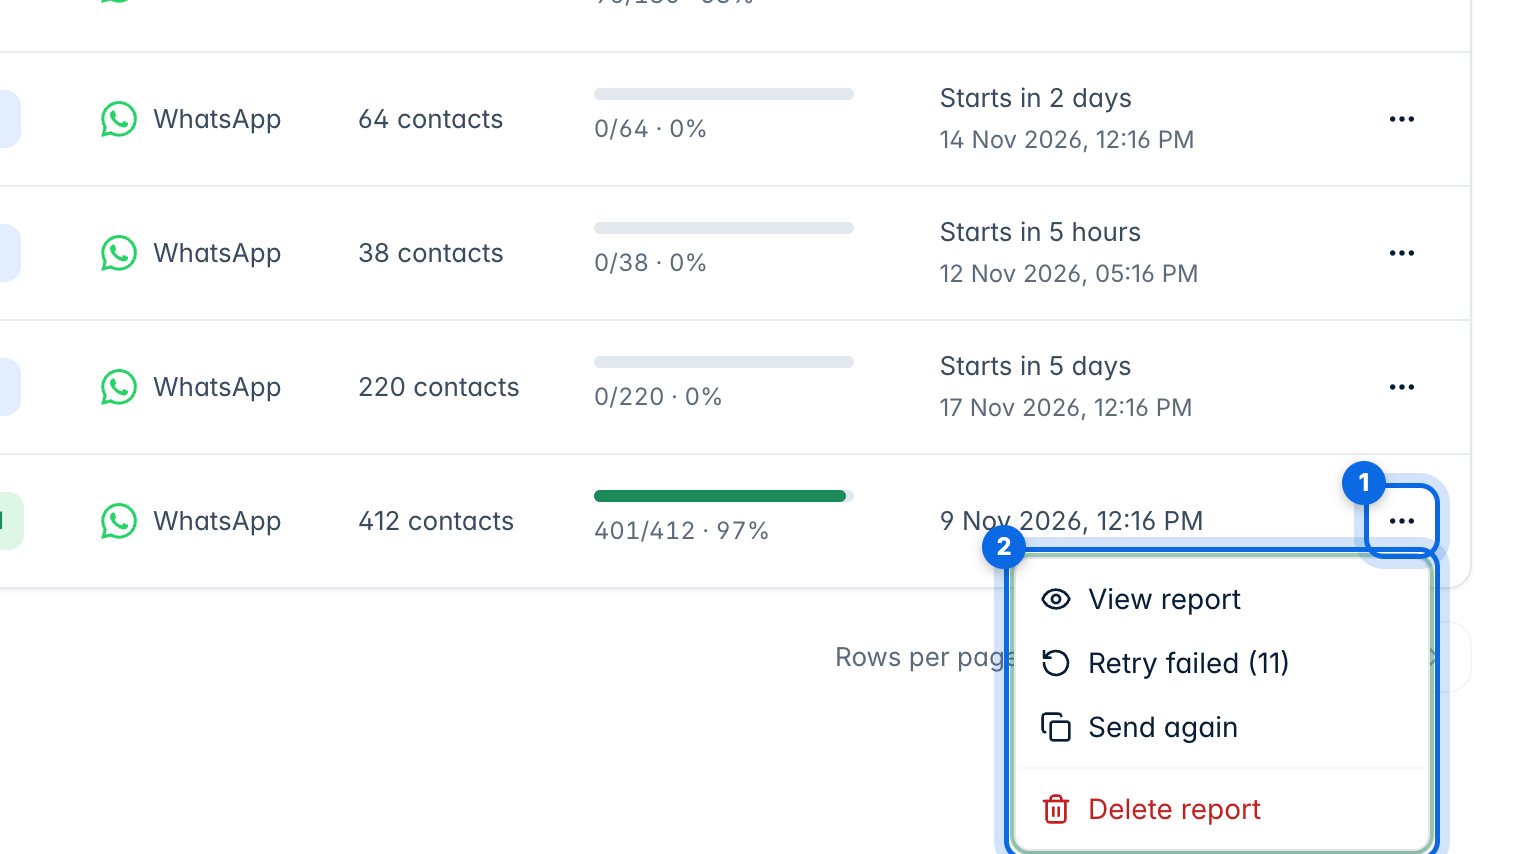
The ⋯ button on a row (1) opens the report, retries failed messages, or sends the same template again (2). A scheduled broadcast can be cancelled before it starts. Deleting a report doesn't recall messages already delivered.
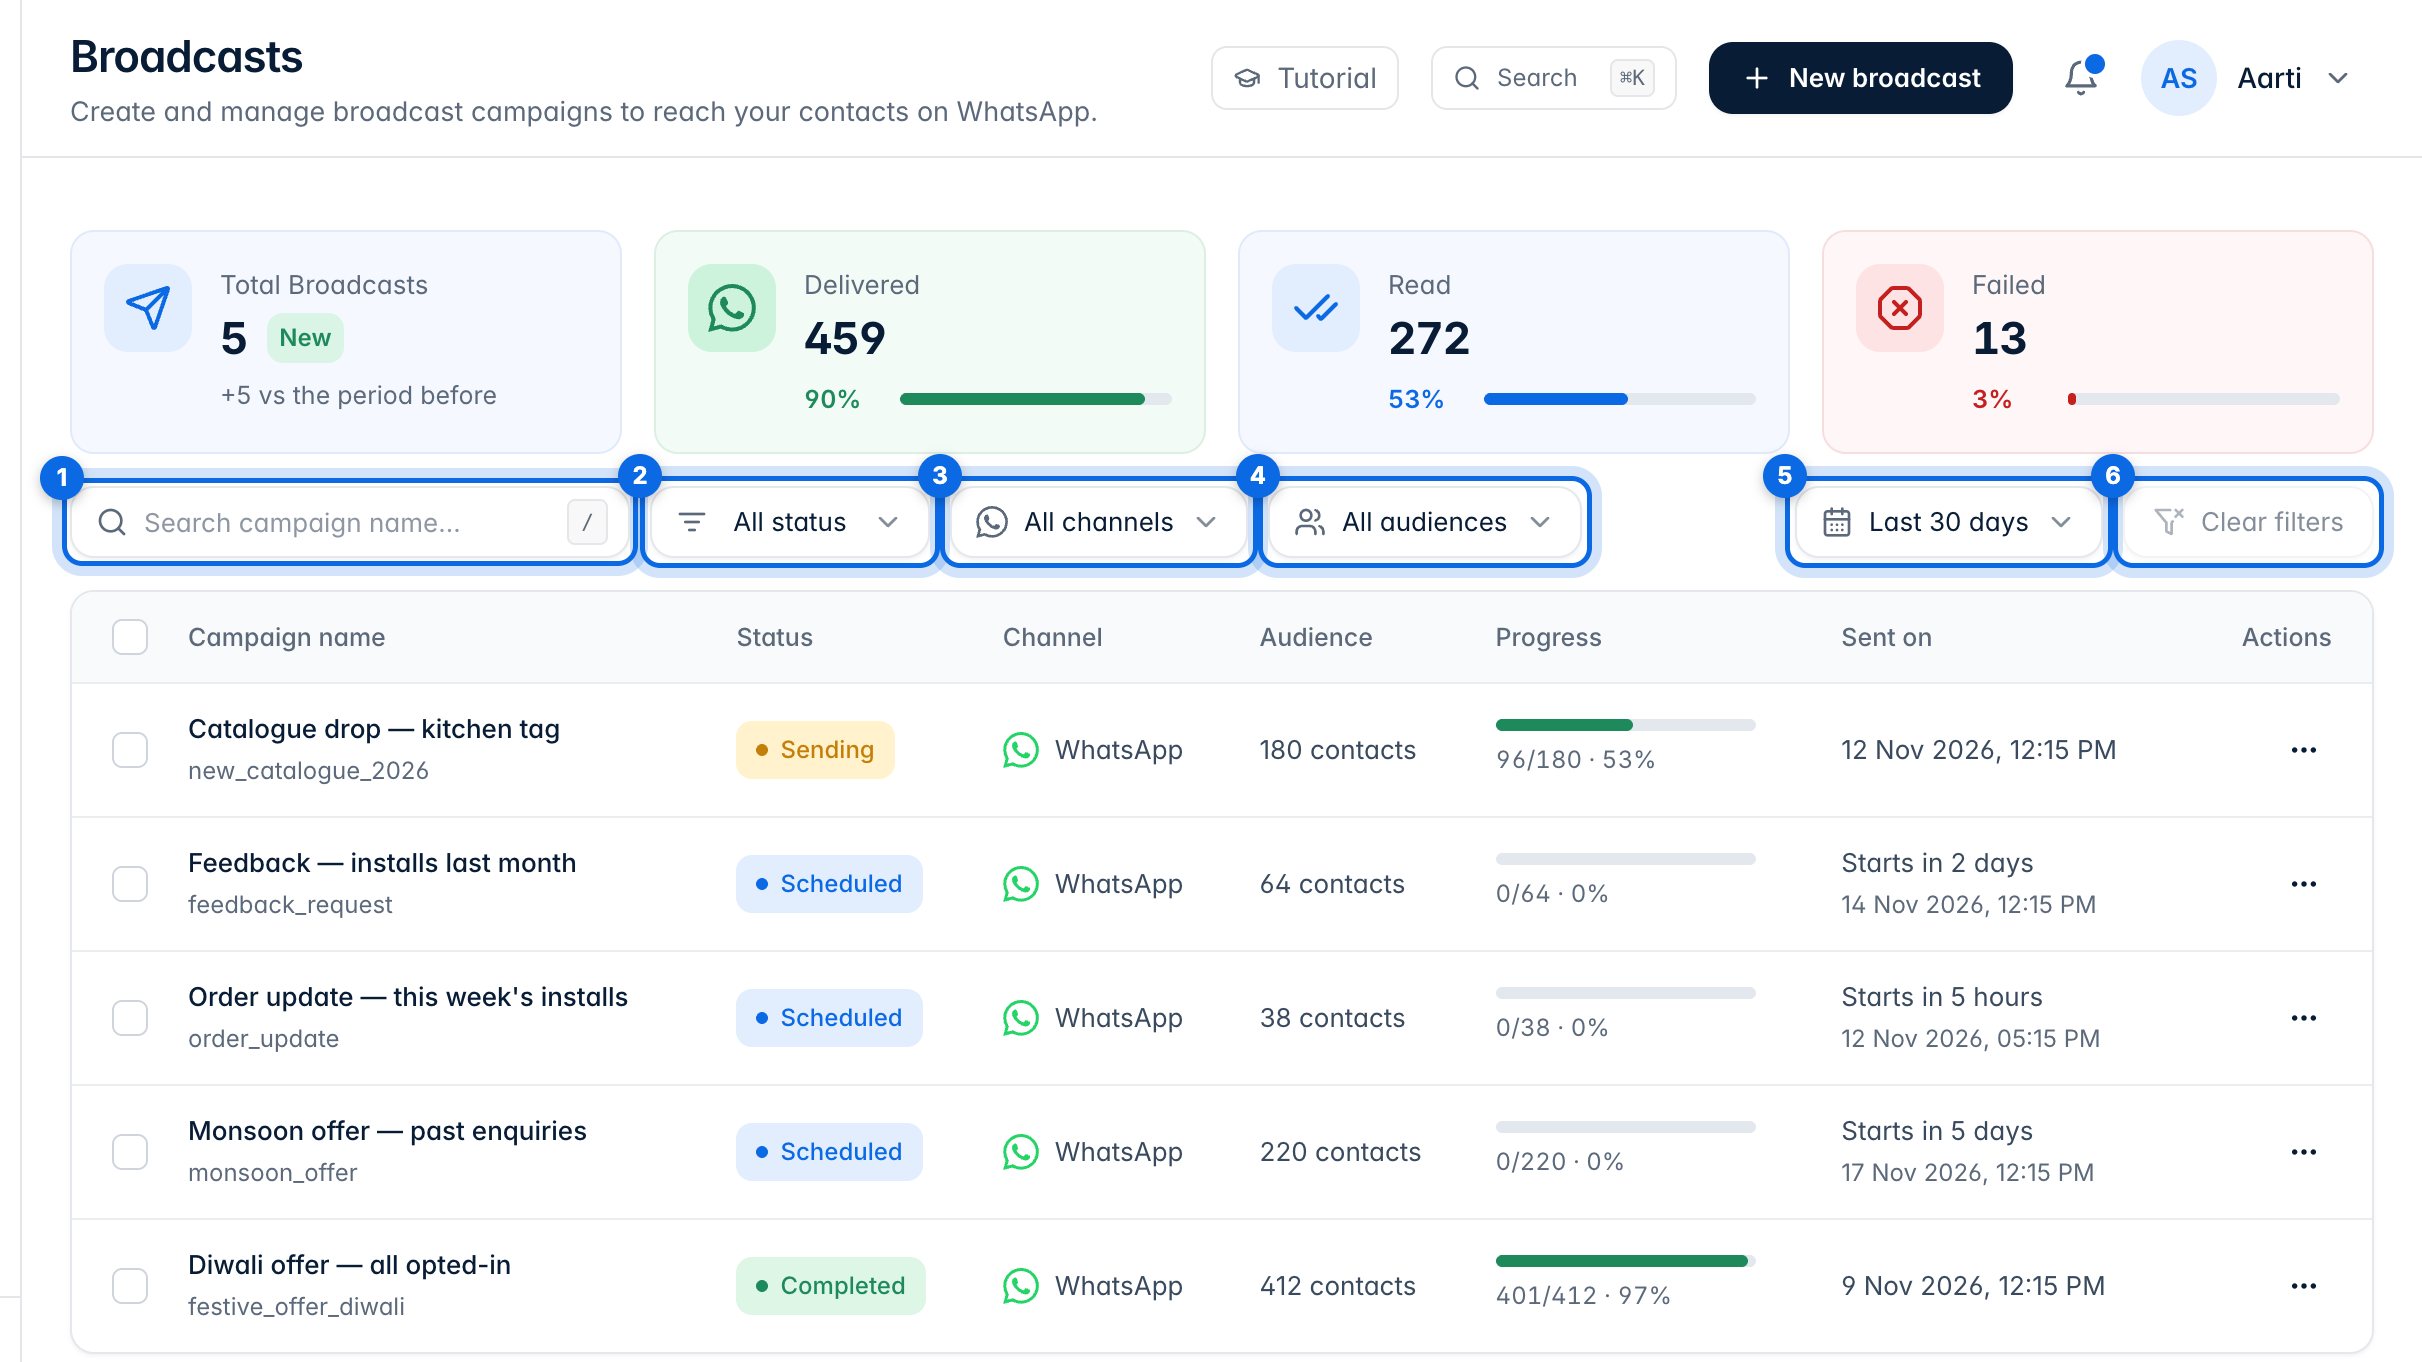
Tick broadcasts (1) to export them as a CSV (2) or delete their reports (3).