Inbox
Find a chat, reply, use saved replies and notes, and assign each conversation.
4 min video30 stepsEnglish and हिंदी
Language
Step by step
The same steps in writing, with a screenshot for each.
1. Find a conversation
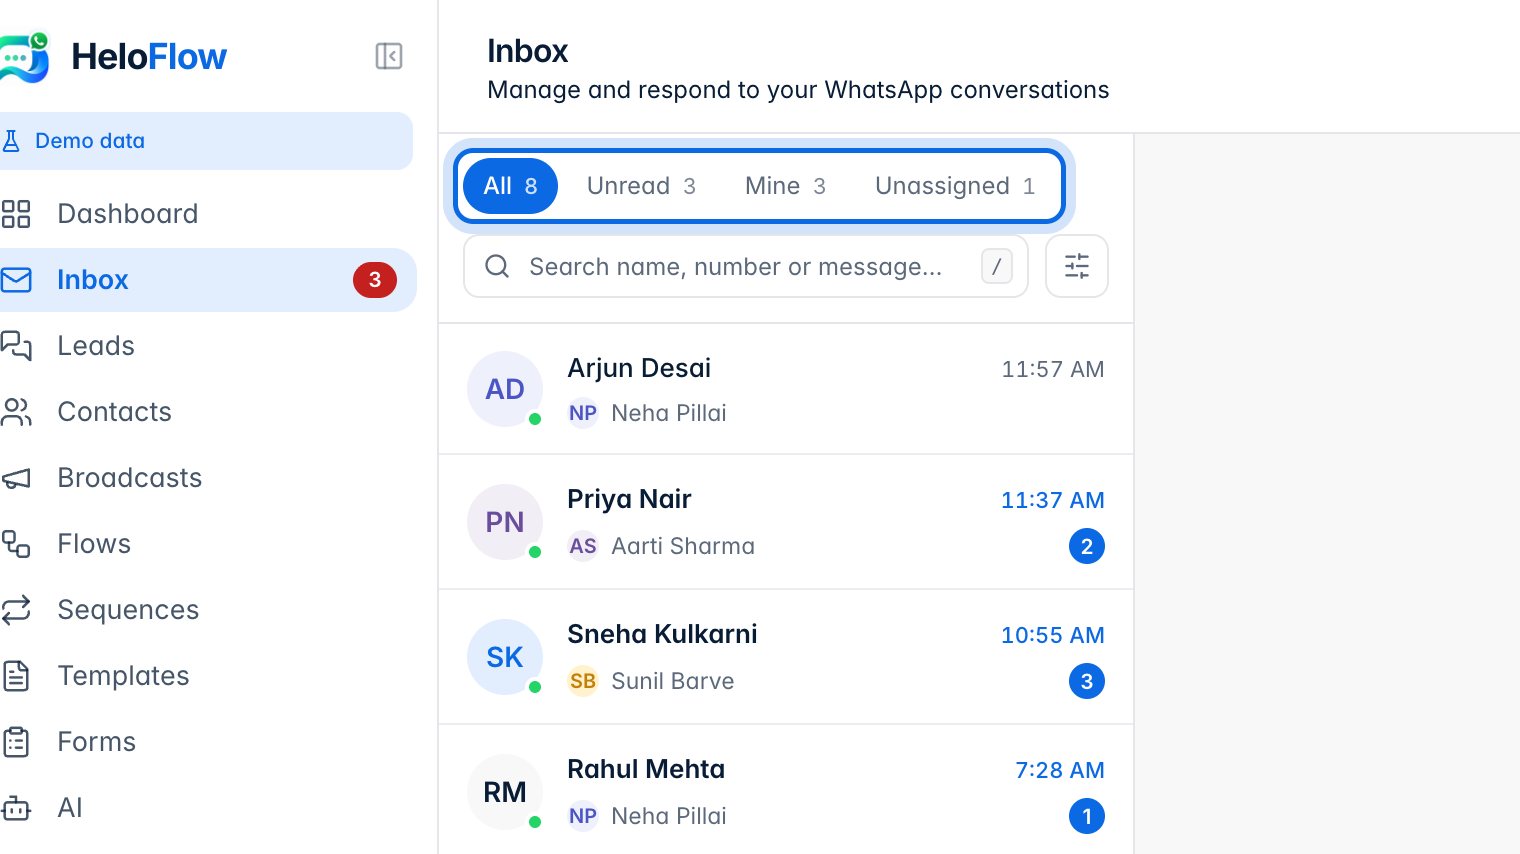
Use the tabs above the list to switch views: All, Unread, Mine (chats assigned to you) and Unassigned.
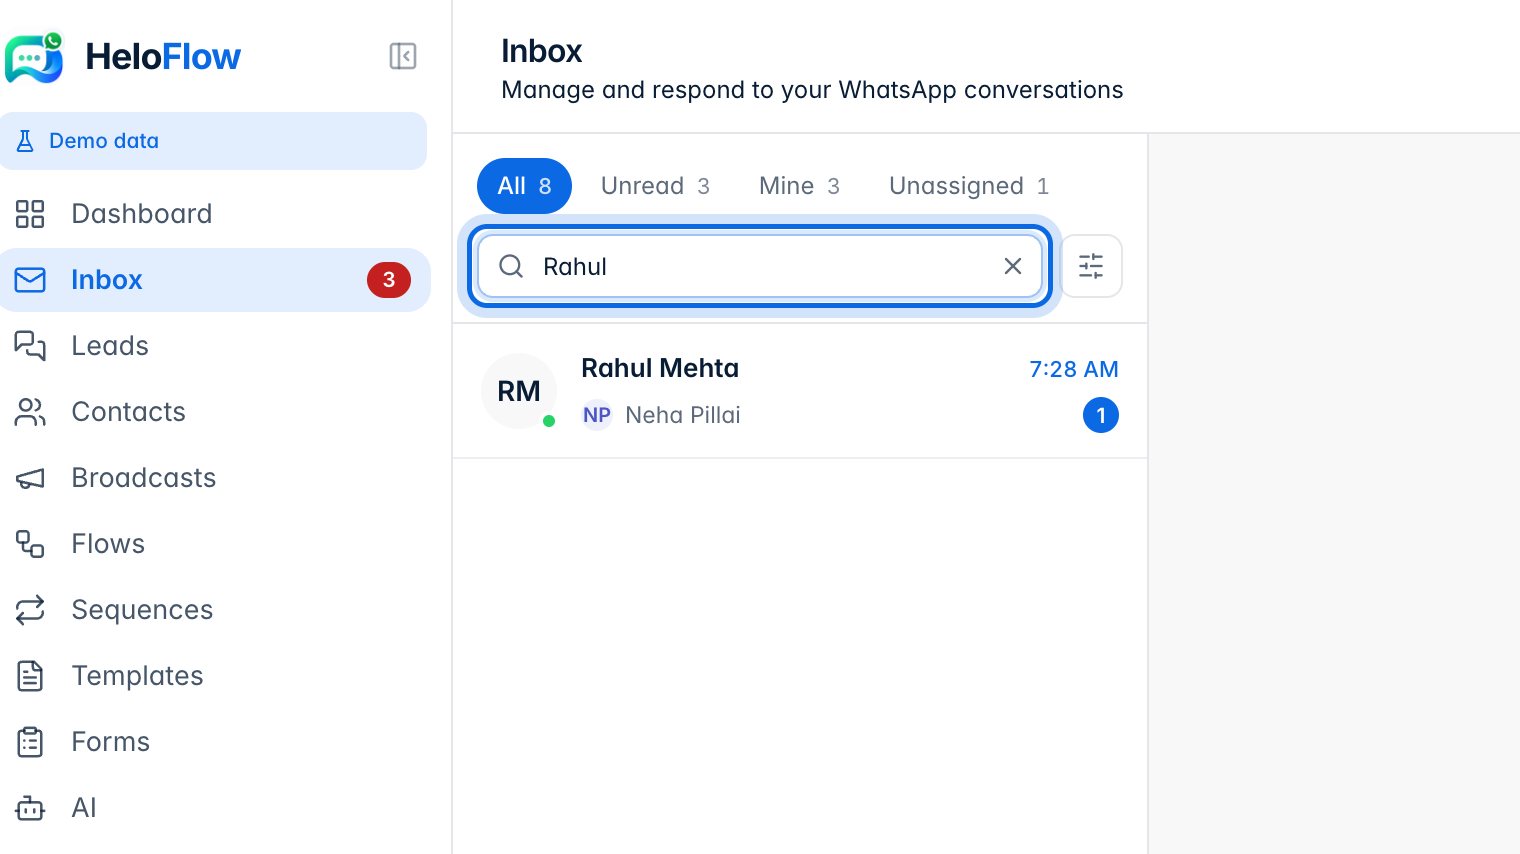
Type a name, a number or any word from a message in the search box. Press / on your keyboard to jump straight to it.
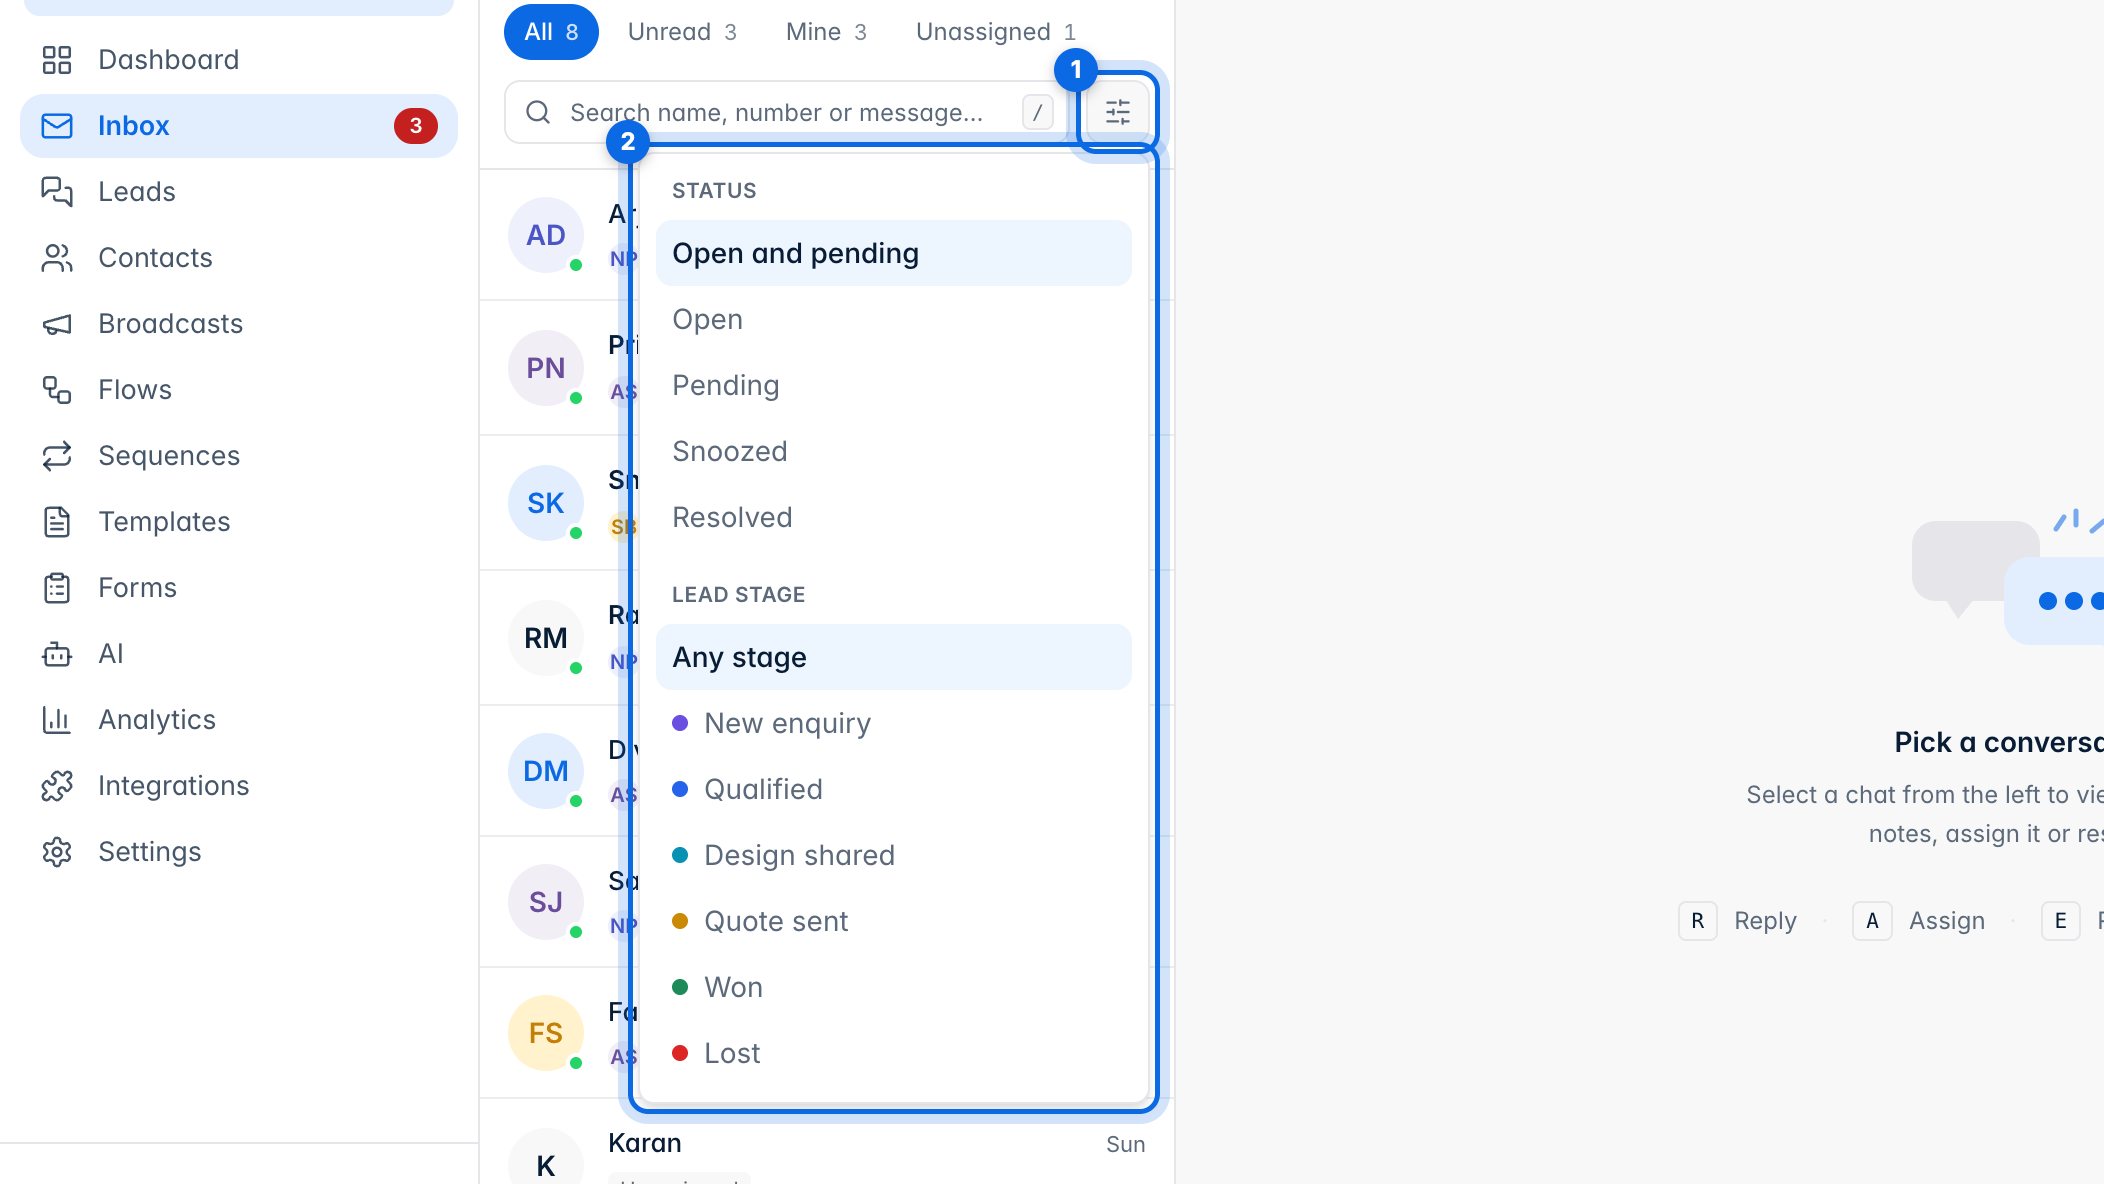
Click the filter button (1) to show only chats with a certain status or lead stage (2). Reset filters brings the full list back.
2. Reply to a customer
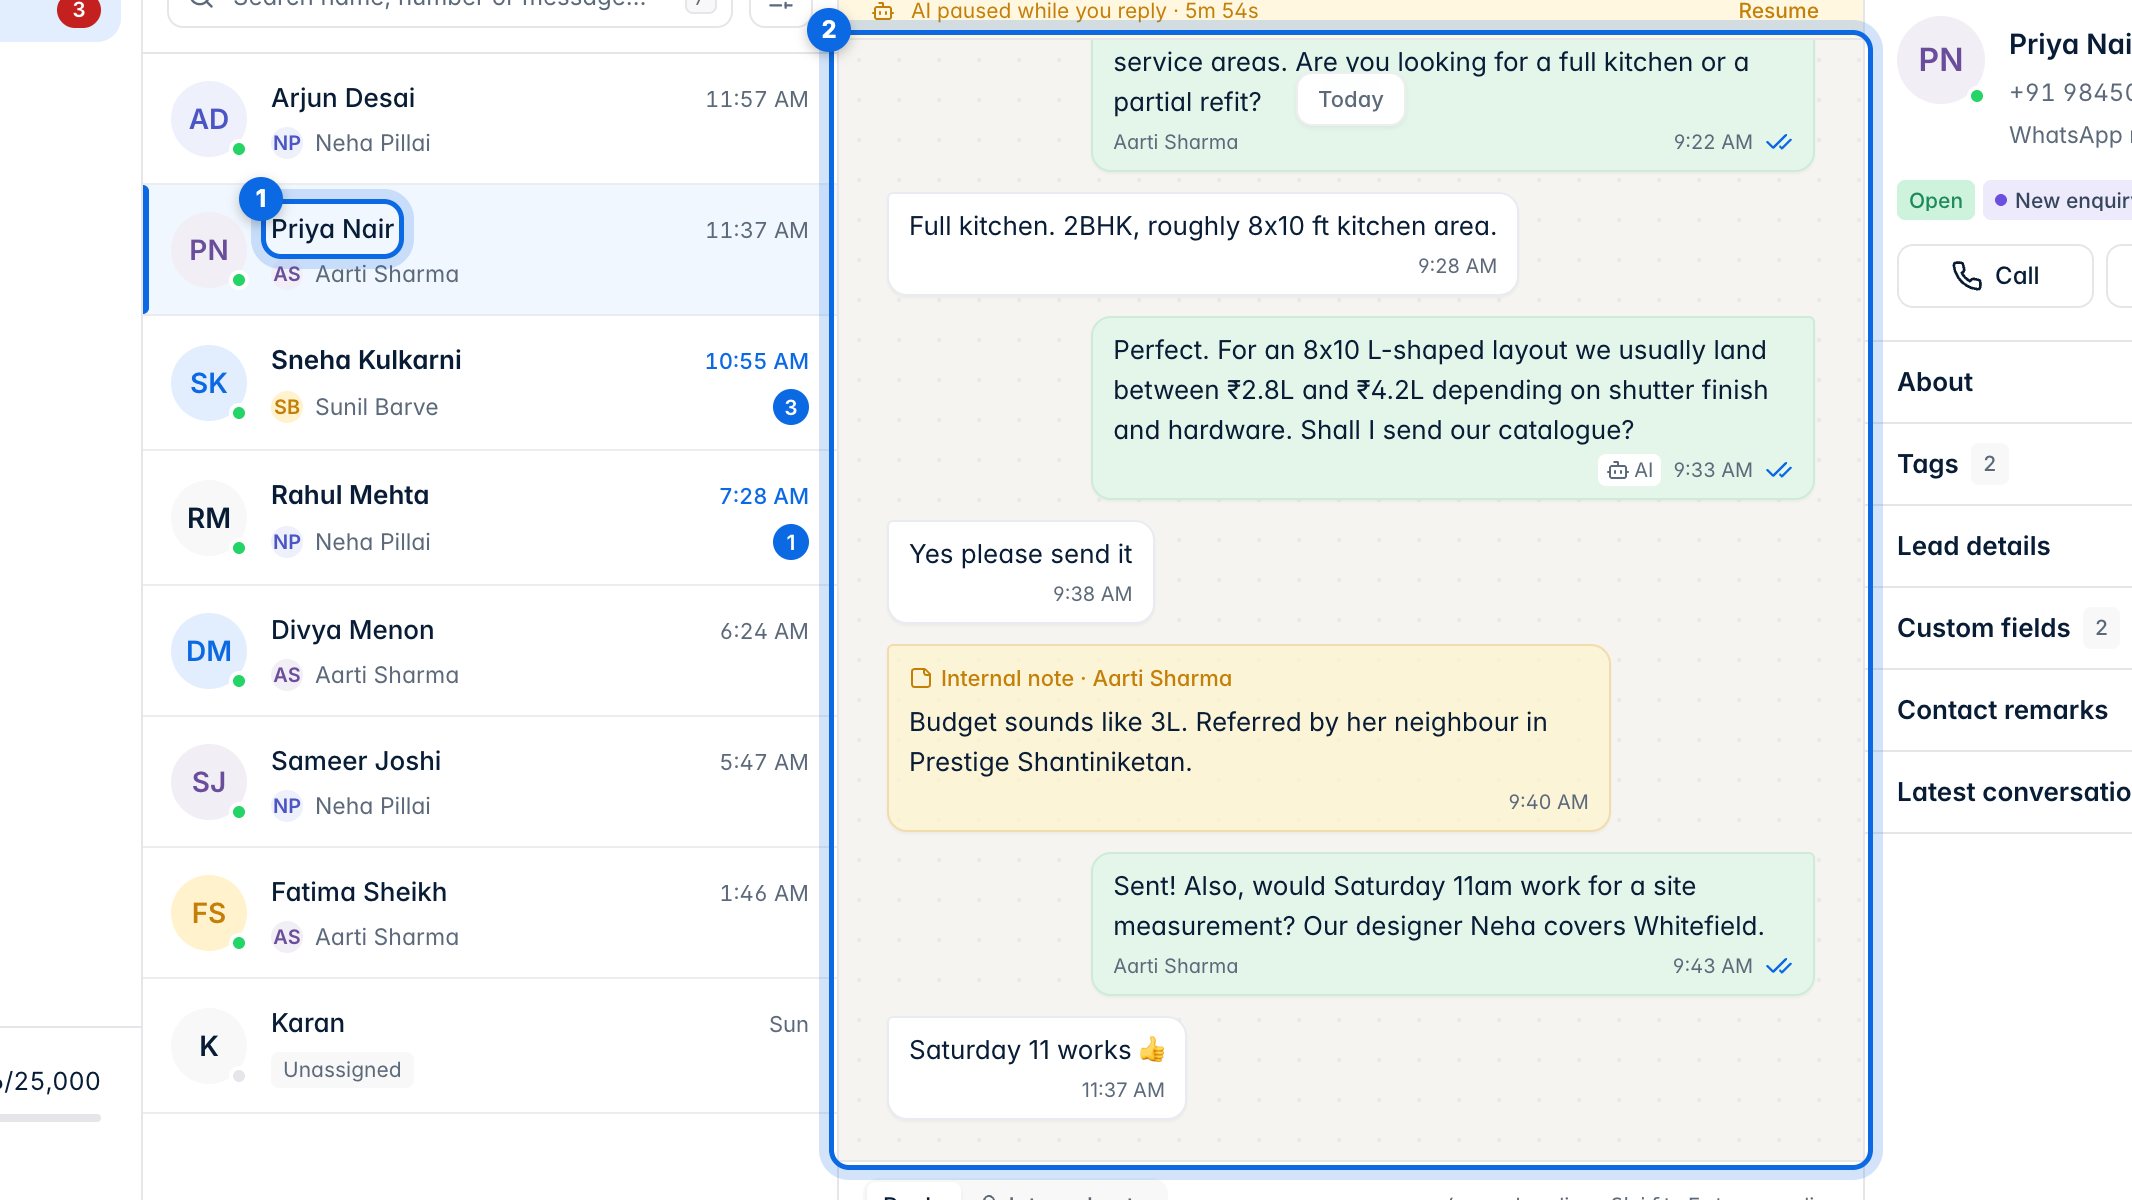
Click a conversation (1). The whole chat opens in the middle (2), with the customer's details on the right.
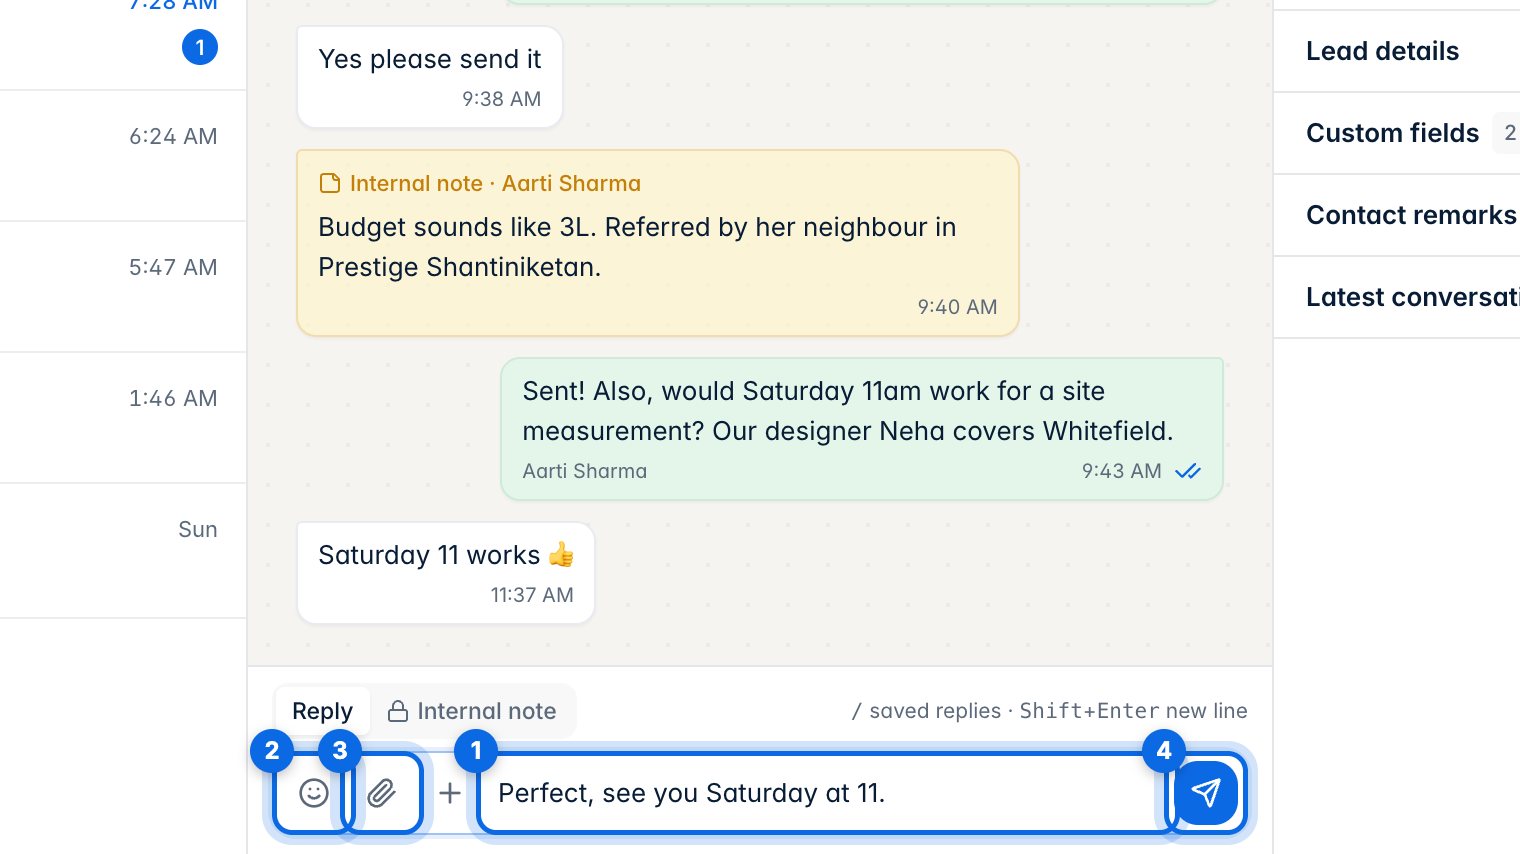
Write your reply in the box (1). Add emoji (2) or attach a photo or document (3), then press Enter or the send button (4). Shift + Enter starts a new line.
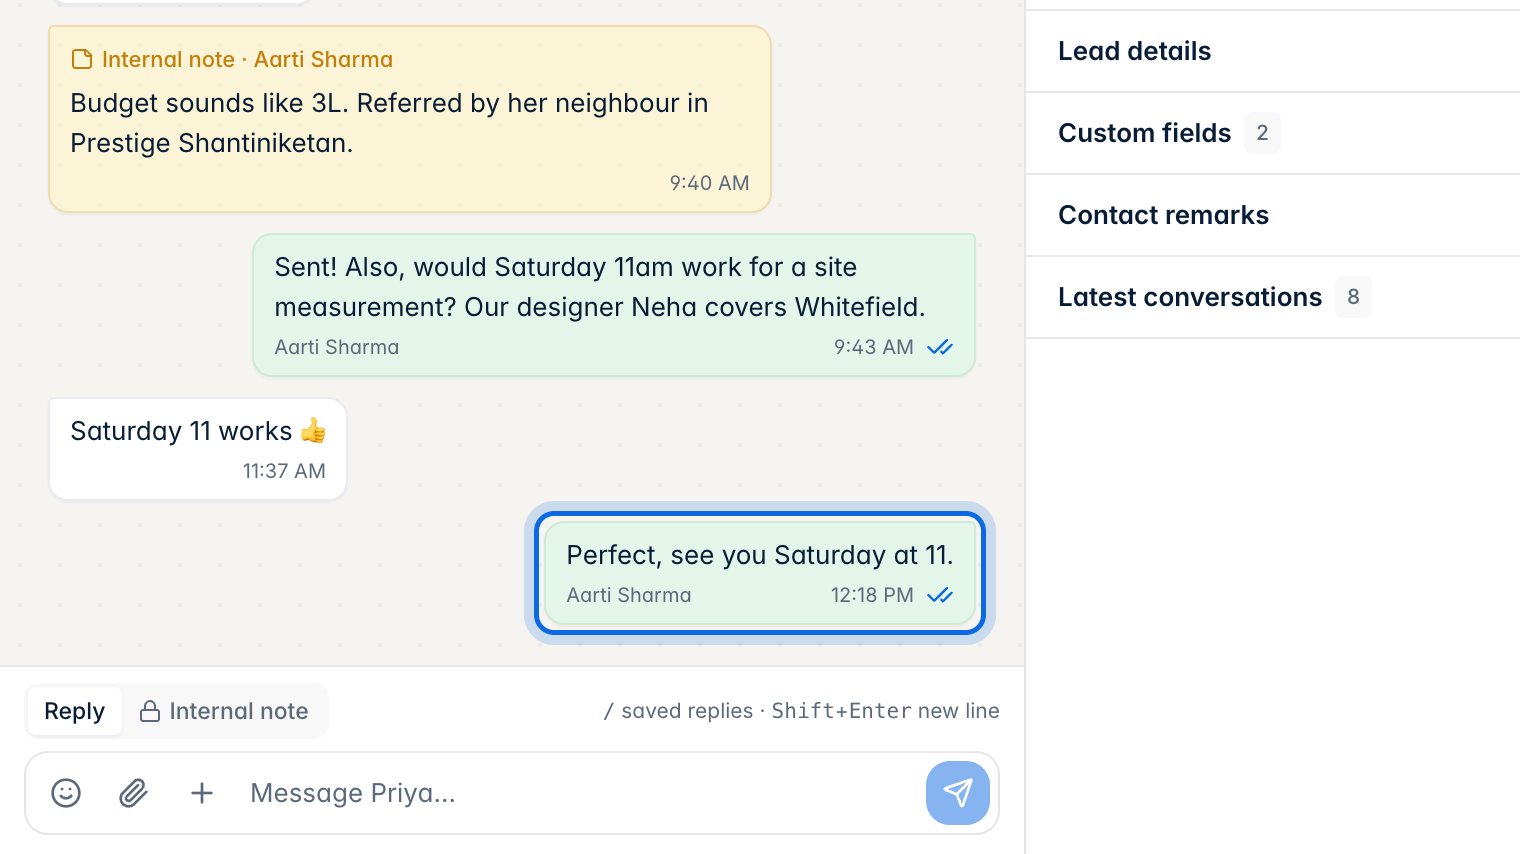
The ticks show what happened: one tick sent, two ticks delivered, blue ticks read.
3. Saved replies
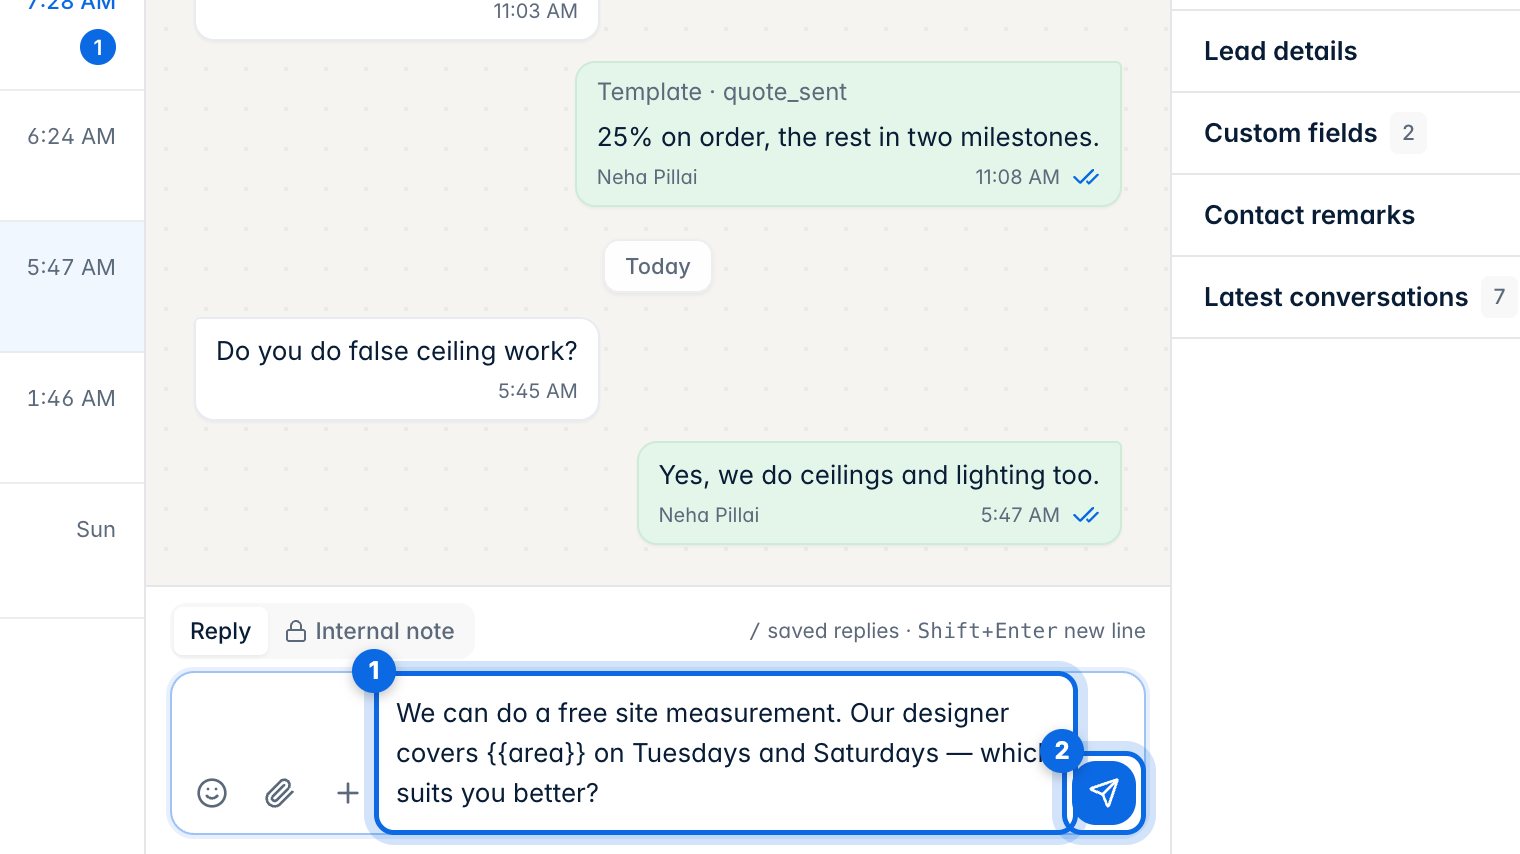
In the reply box (2), type / to see your saved replies (1).
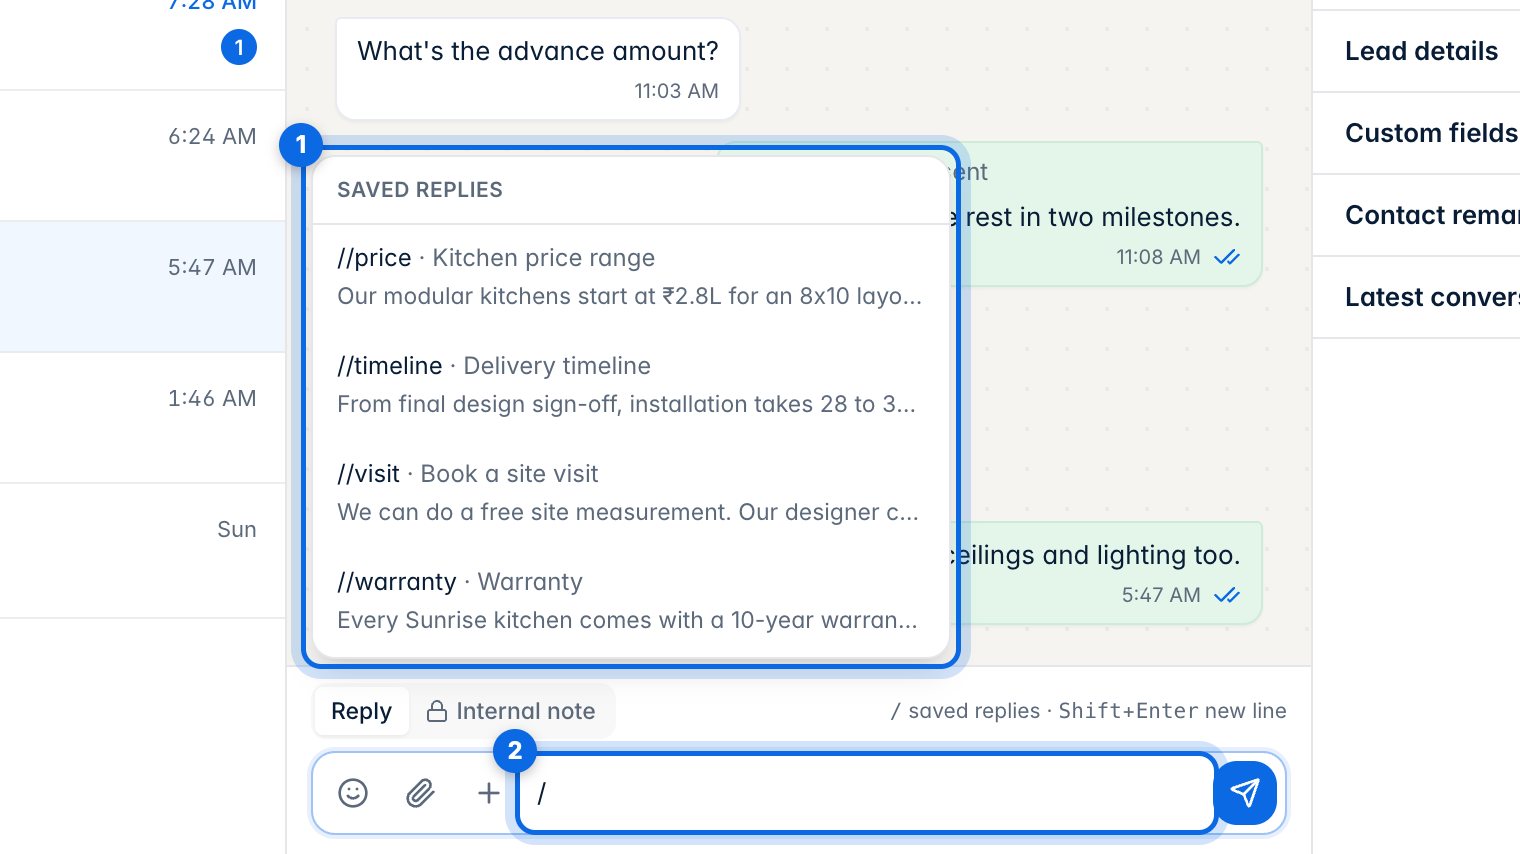
Click one to put it in the box (1). Change anything you need, then send (2). You can add and edit saved replies in Settings → Canned replies.
4. More ways to reply
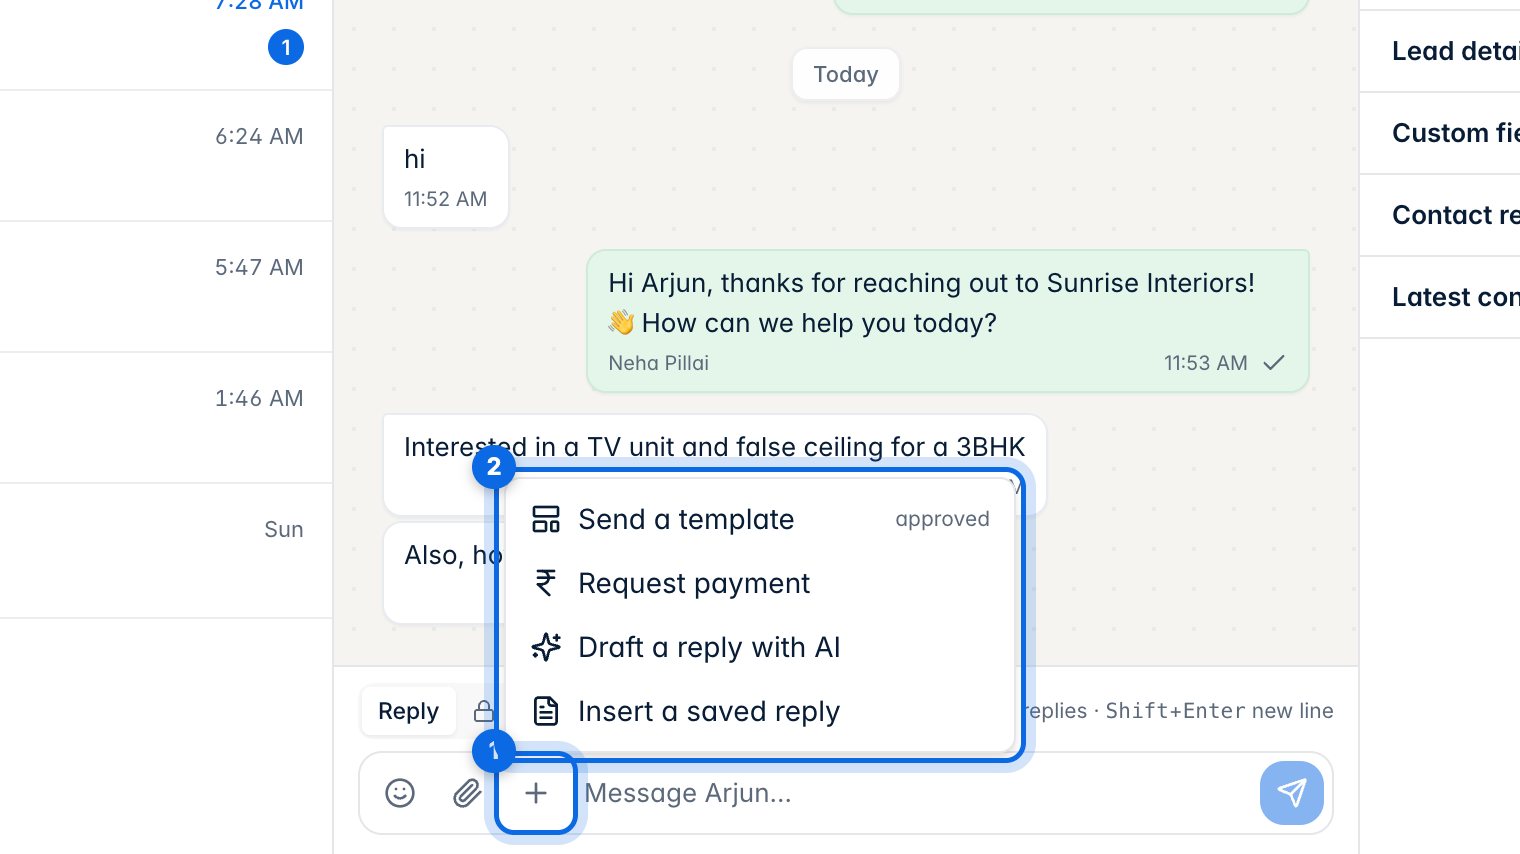
Click + next to the reply box (1) for more options (2): send a template, request a payment, draft a reply with AI or insert a saved reply.
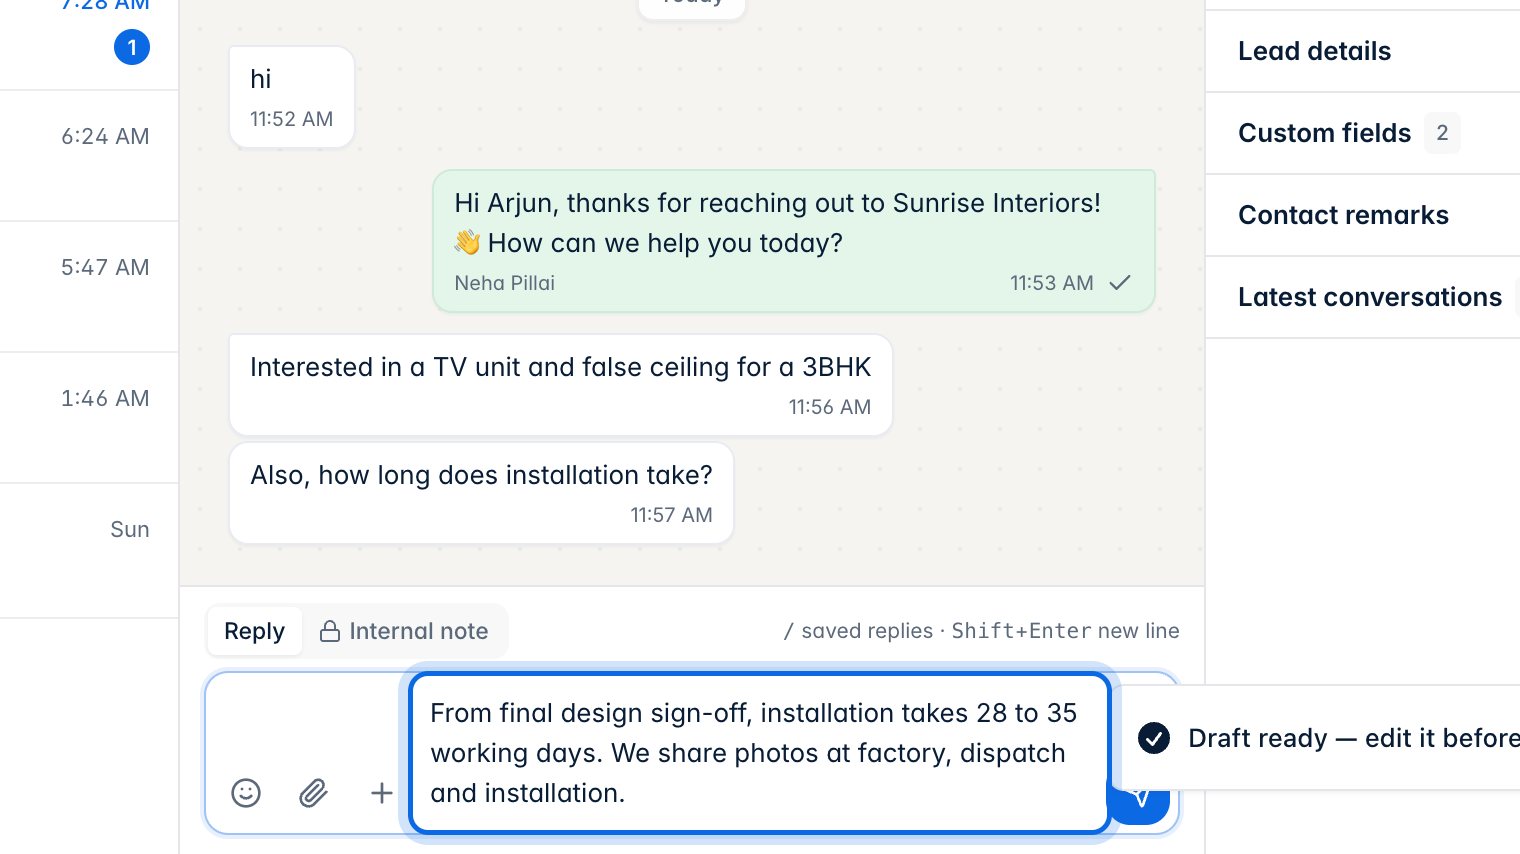
Draft a reply with AI writes an answer from your AI knowledge. Read it, edit it and send it yourself. If the AI isn't sure, it leaves the reply to you.
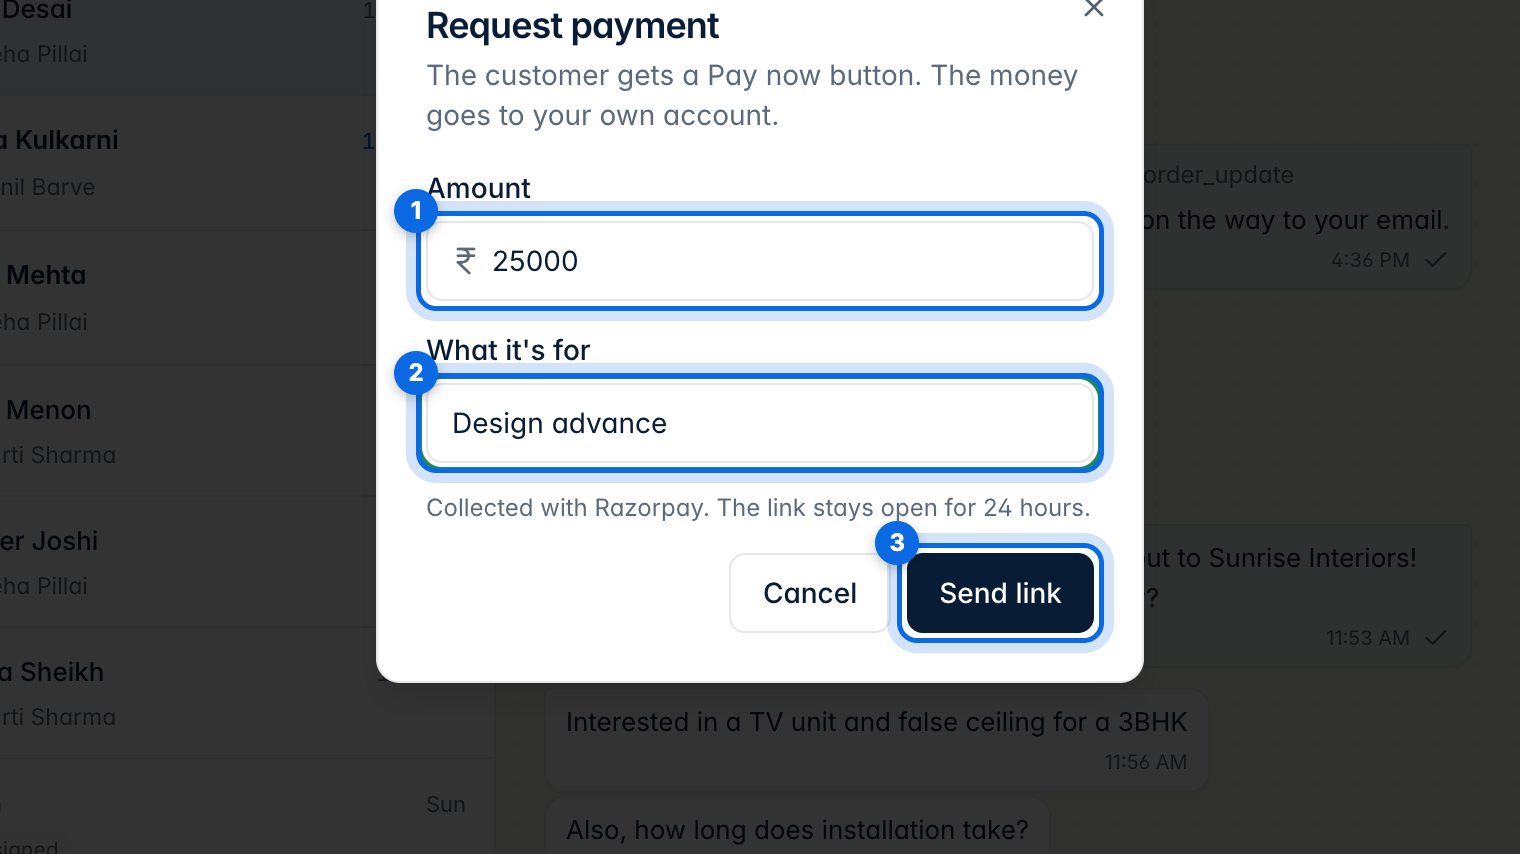
Request payment sends a Pay now button. Enter the amount (1) and what it's for (2), then click Send link (3). The money goes to your own Razorpay account.
5. Internal notes
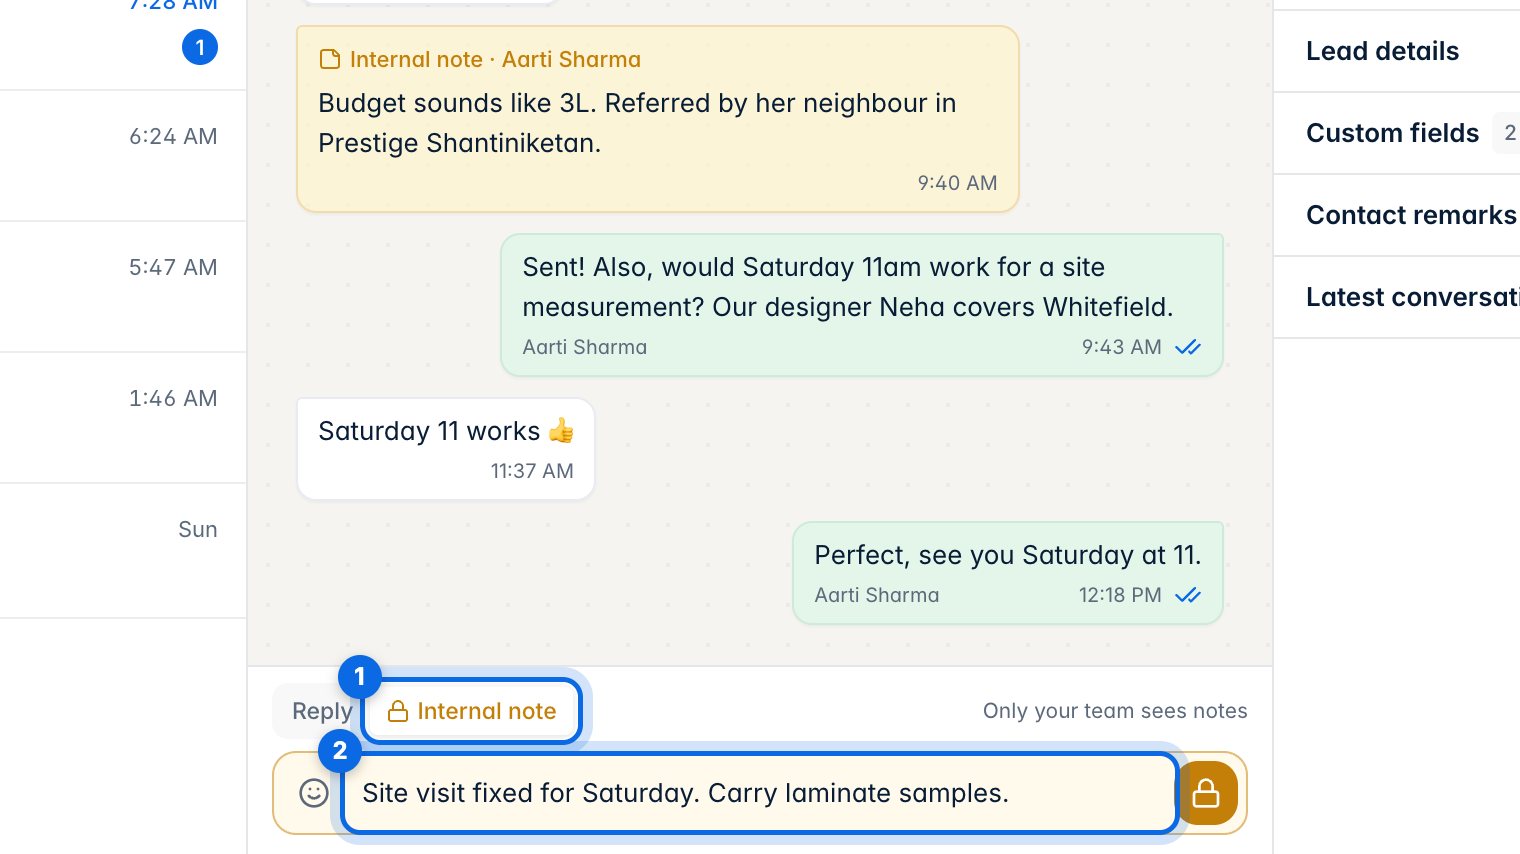
Switch the box to Internal note (1) and write your note (2).
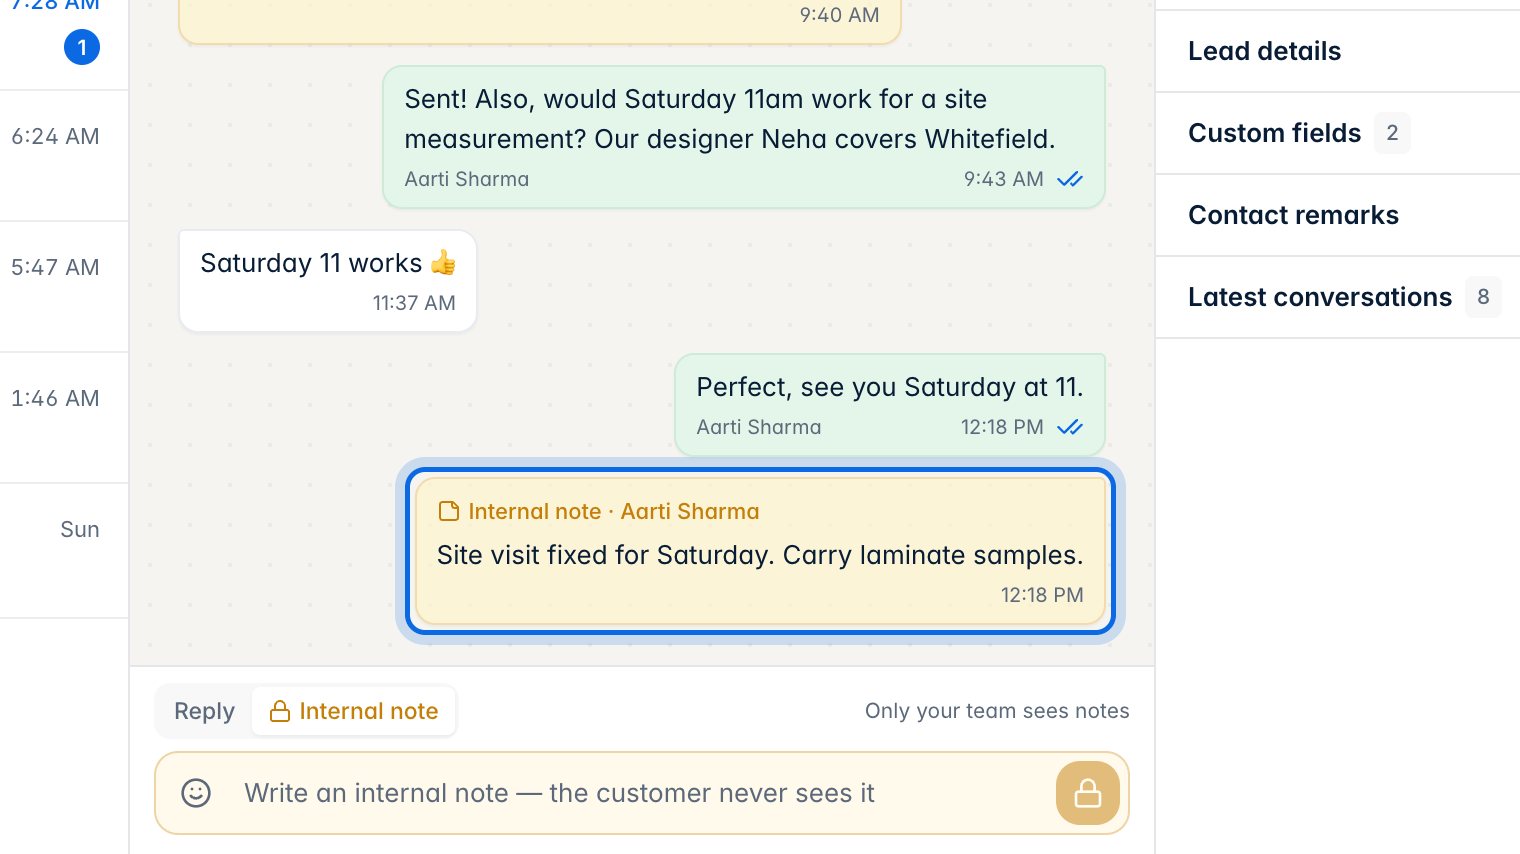
Press Enter. The note appears in yellow in the chat. Only your team sees it; it's never sent on WhatsApp.
6. Assign, label and set status
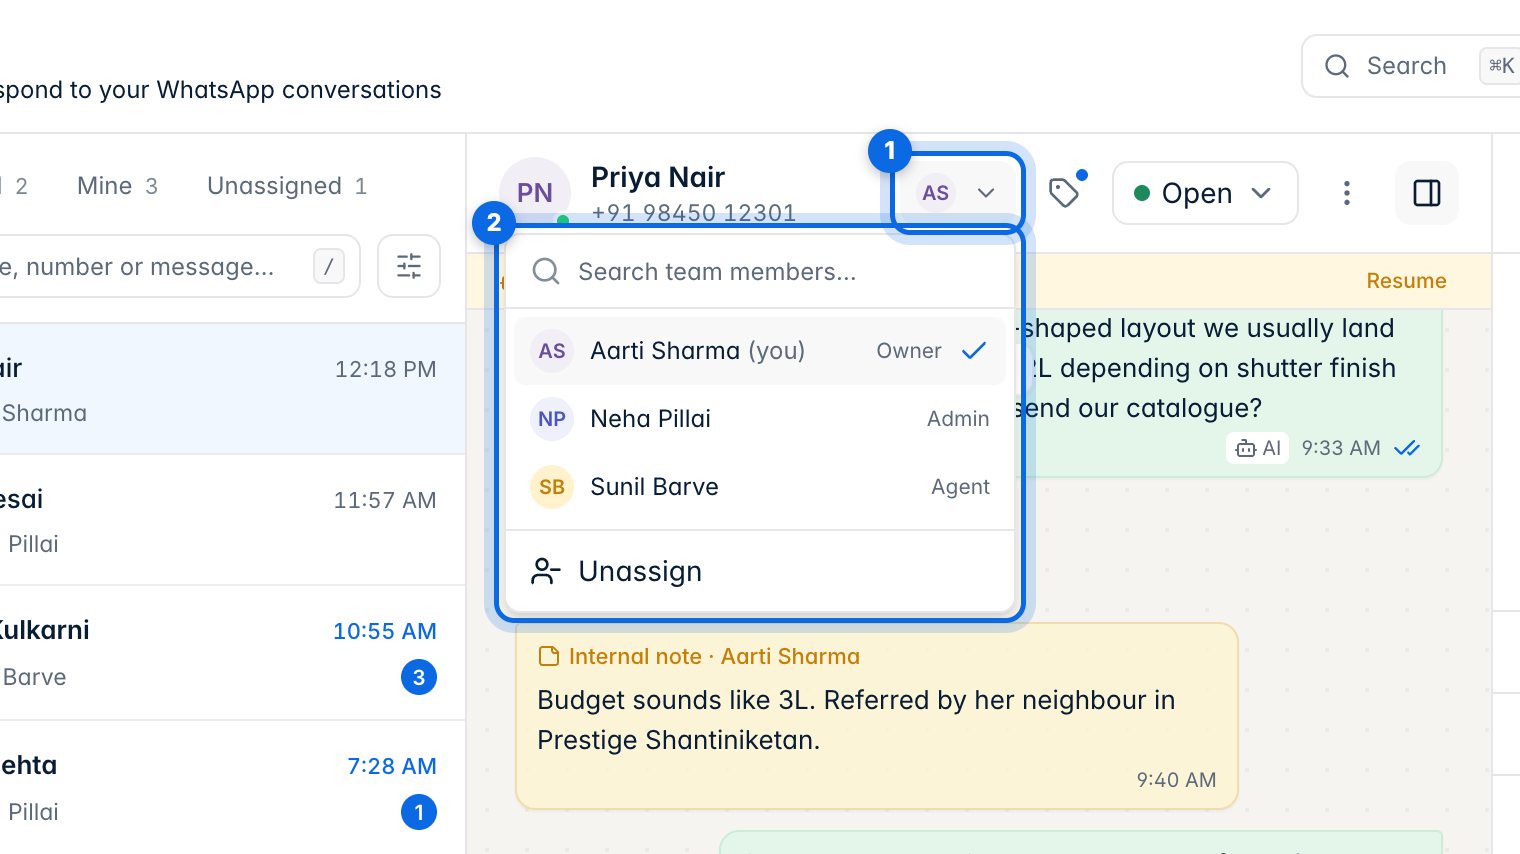
Click the person chip in the chat header (1) and choose a teammate (2) to hand the chat over. Shortcut: A.
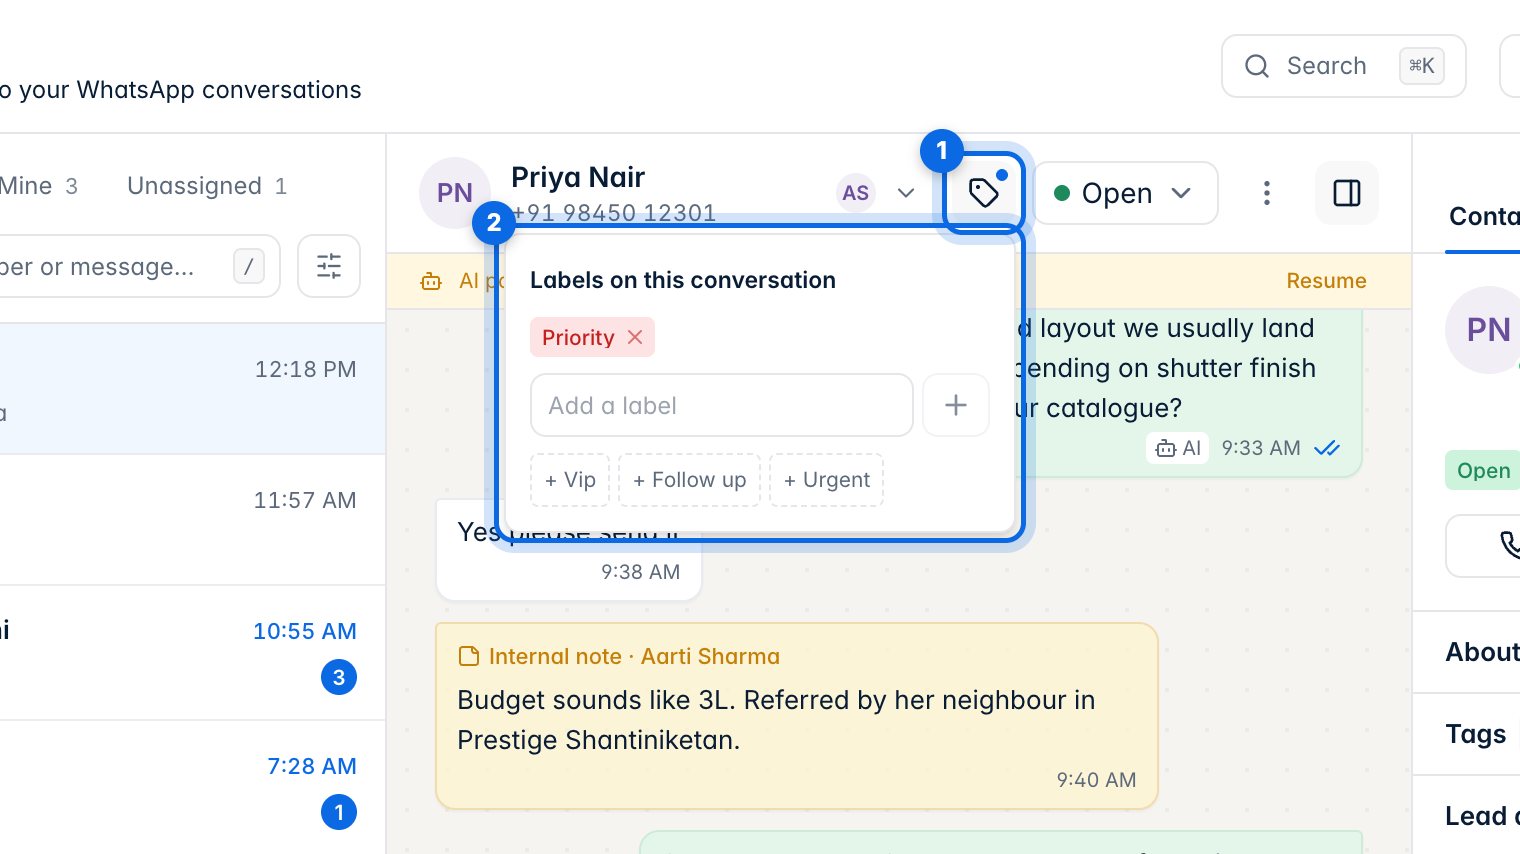
Click the label icon (1) to mark the chat, for example Priority or Urgent (2). You can also type a new label.
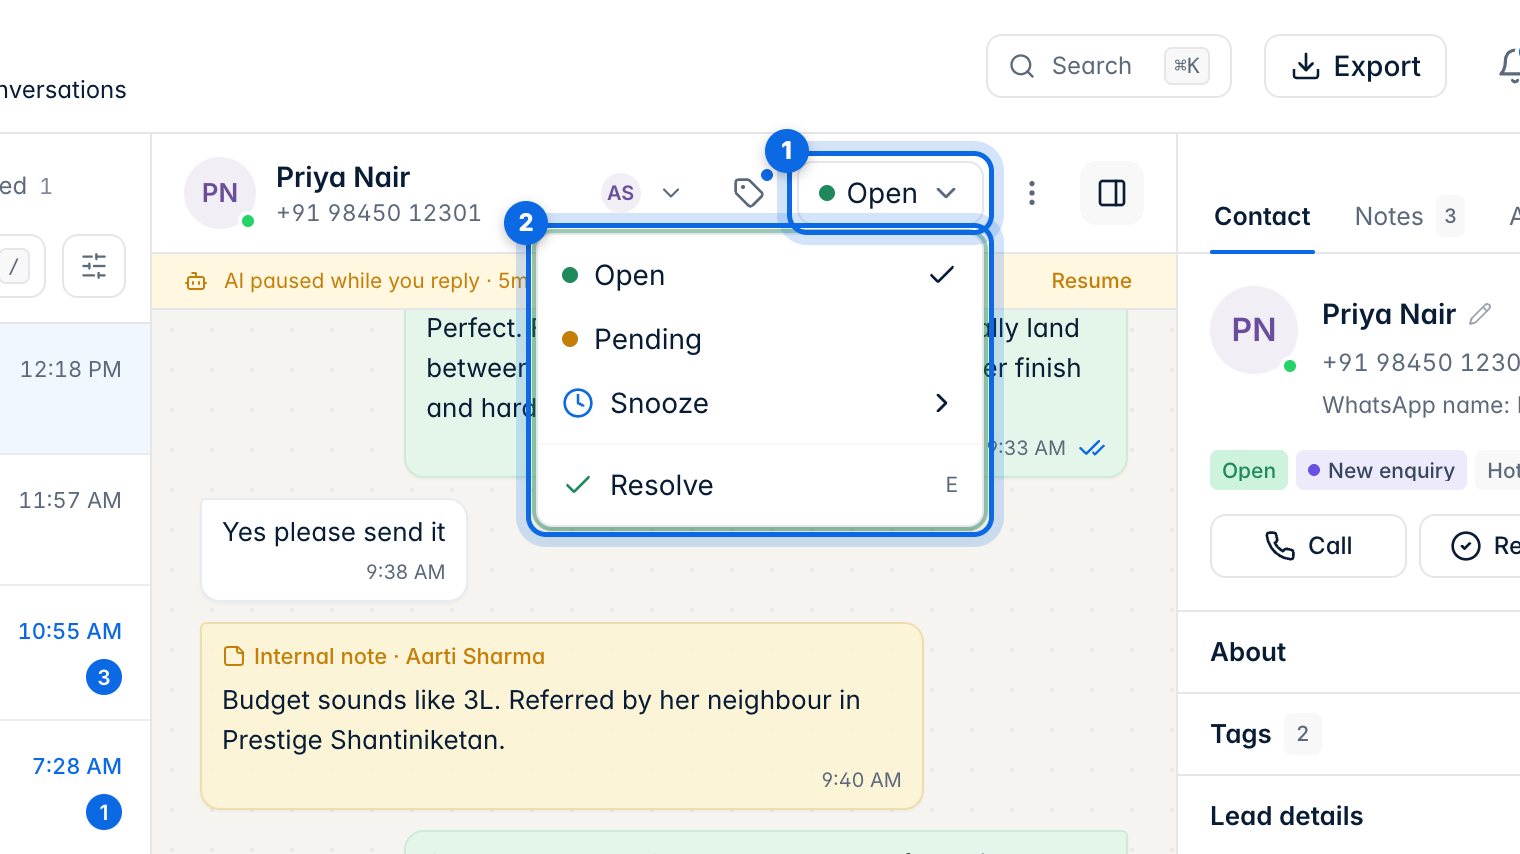
Use the status menu (1) to mark the chat Open, Pending, Snoozed or Resolved (2). Shortcut for resolve: E.
7. AI in a conversation
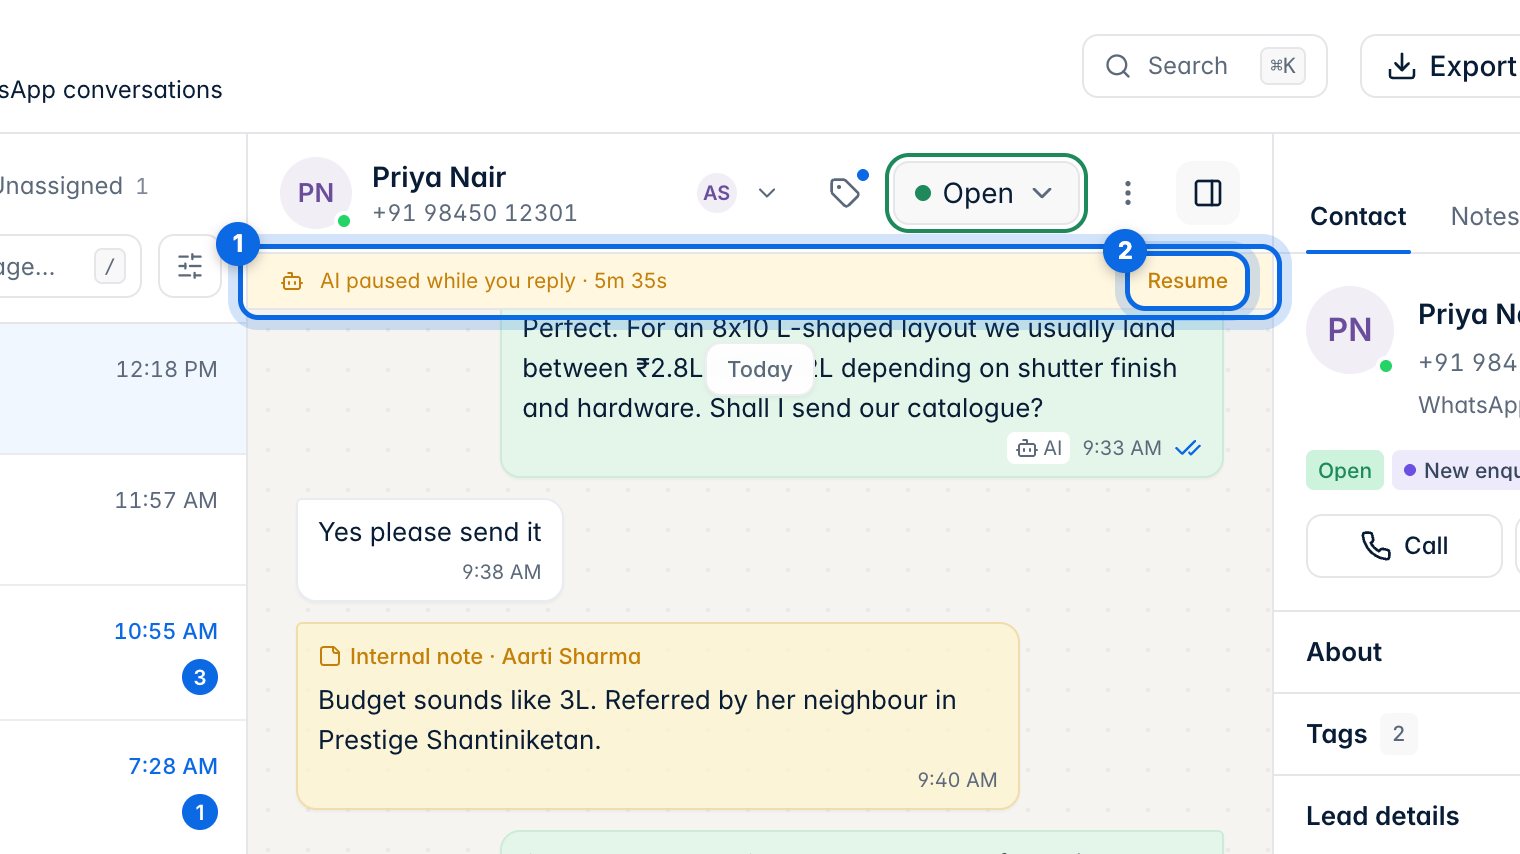
When someone on your team replies, the AI pauses in that chat so it never talks over you. The yellow bar shows how long (1); click Resume to switch it back on now (2).
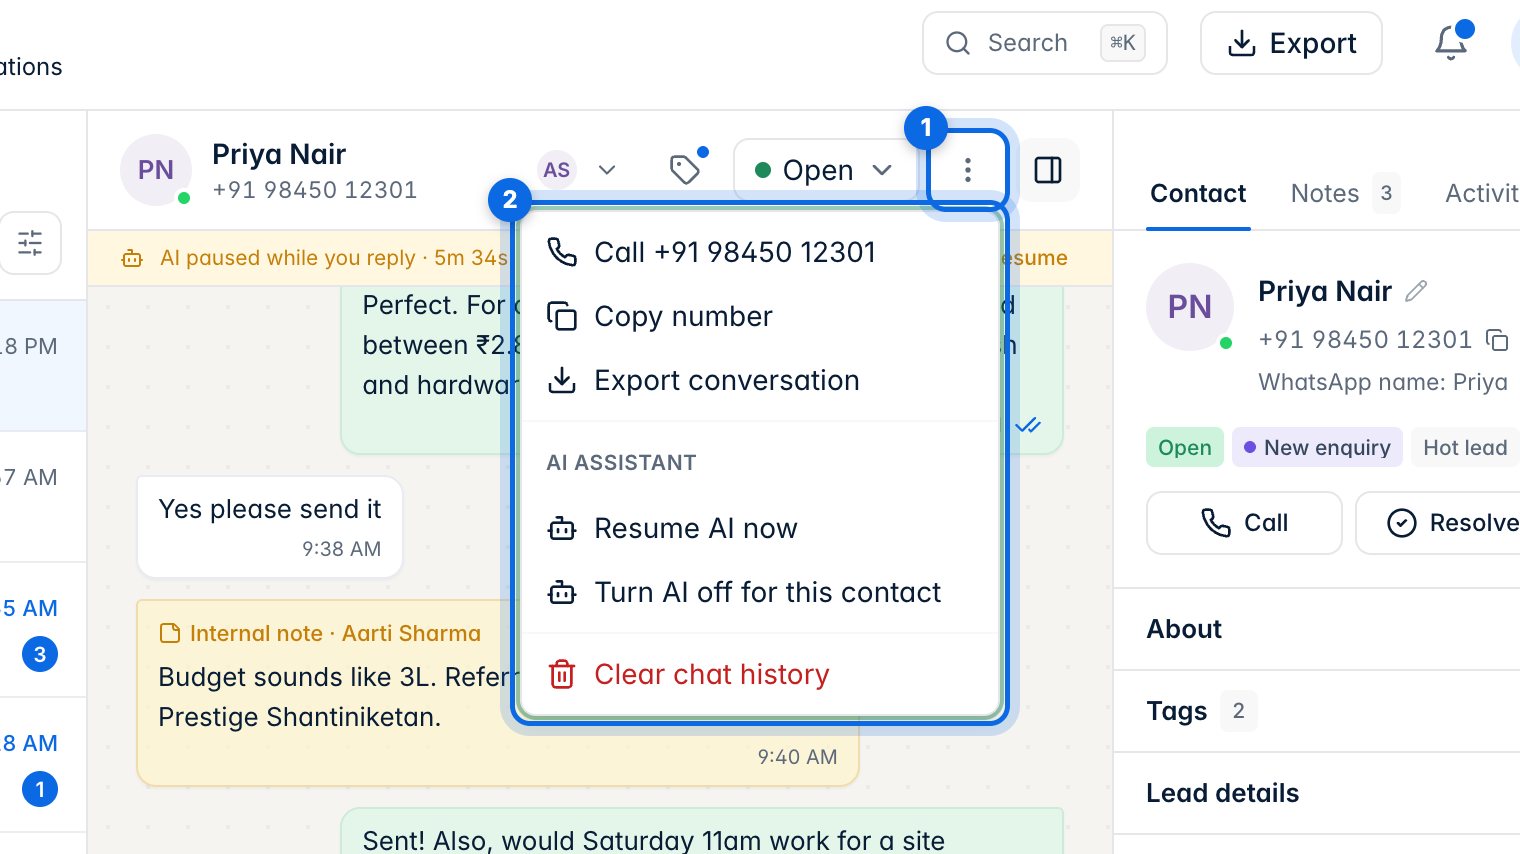
The ⋮ menu (1) has Call, Copy number, Export conversation and the AI switches for this contact (2).
8. The 24-hour window
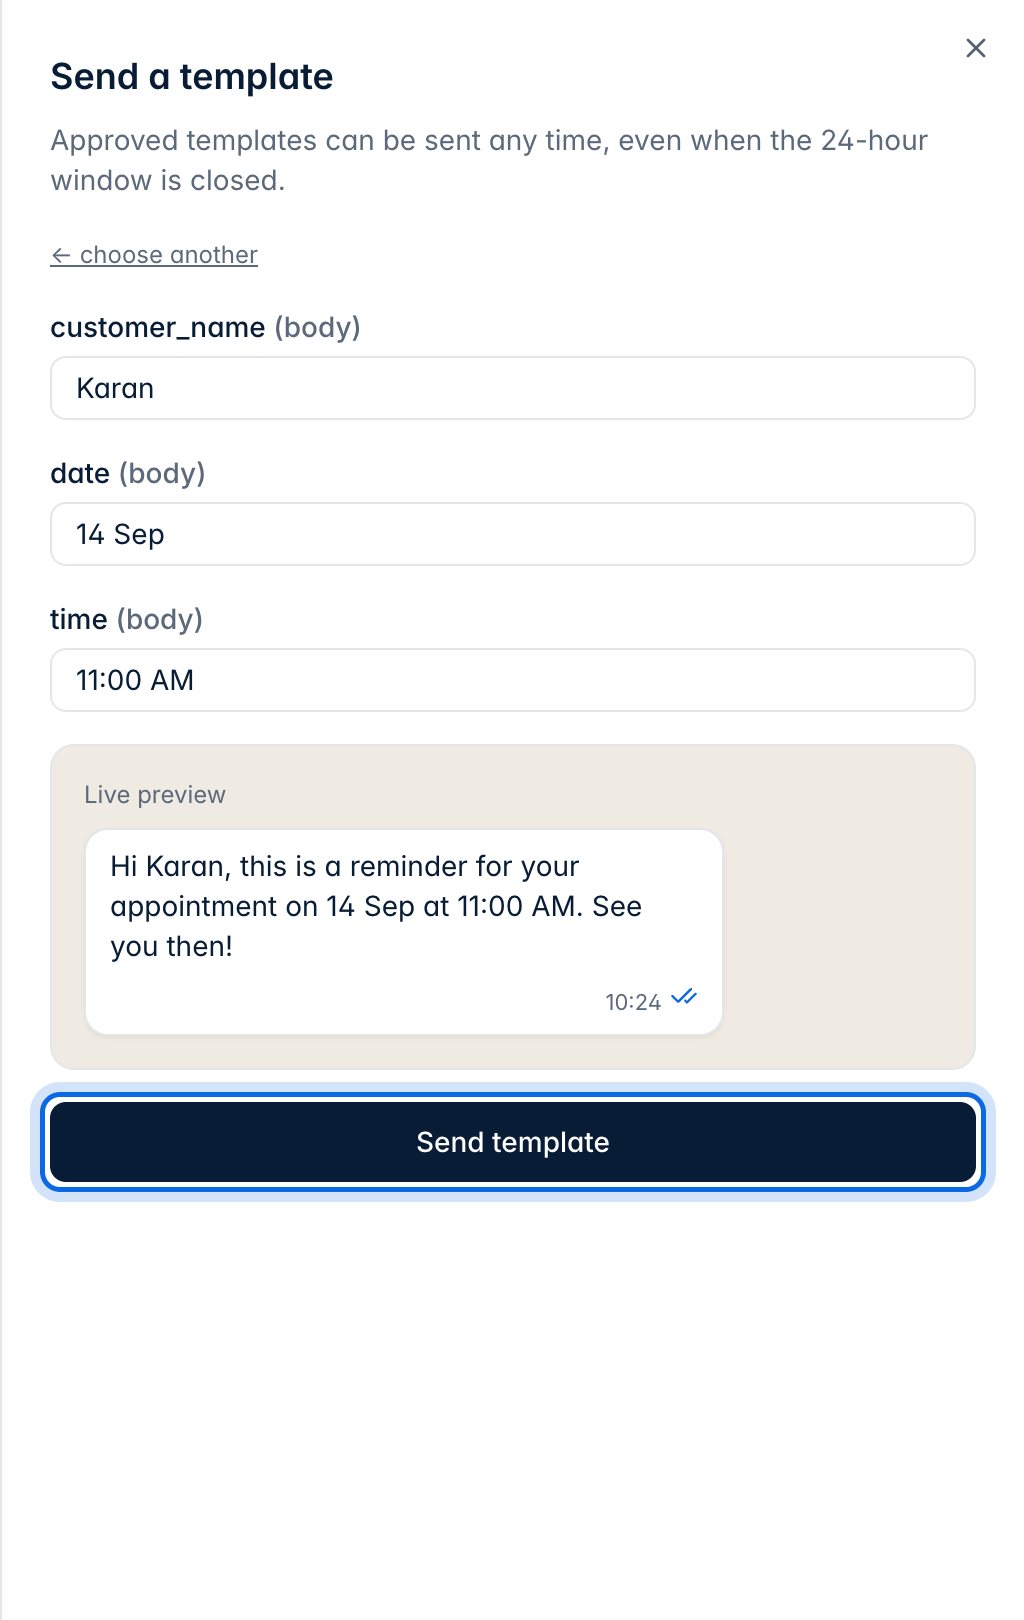
WhatsApp lets you send normal messages only within 24 hours of the customer's last message. After that, HeloFlow shows this notice.
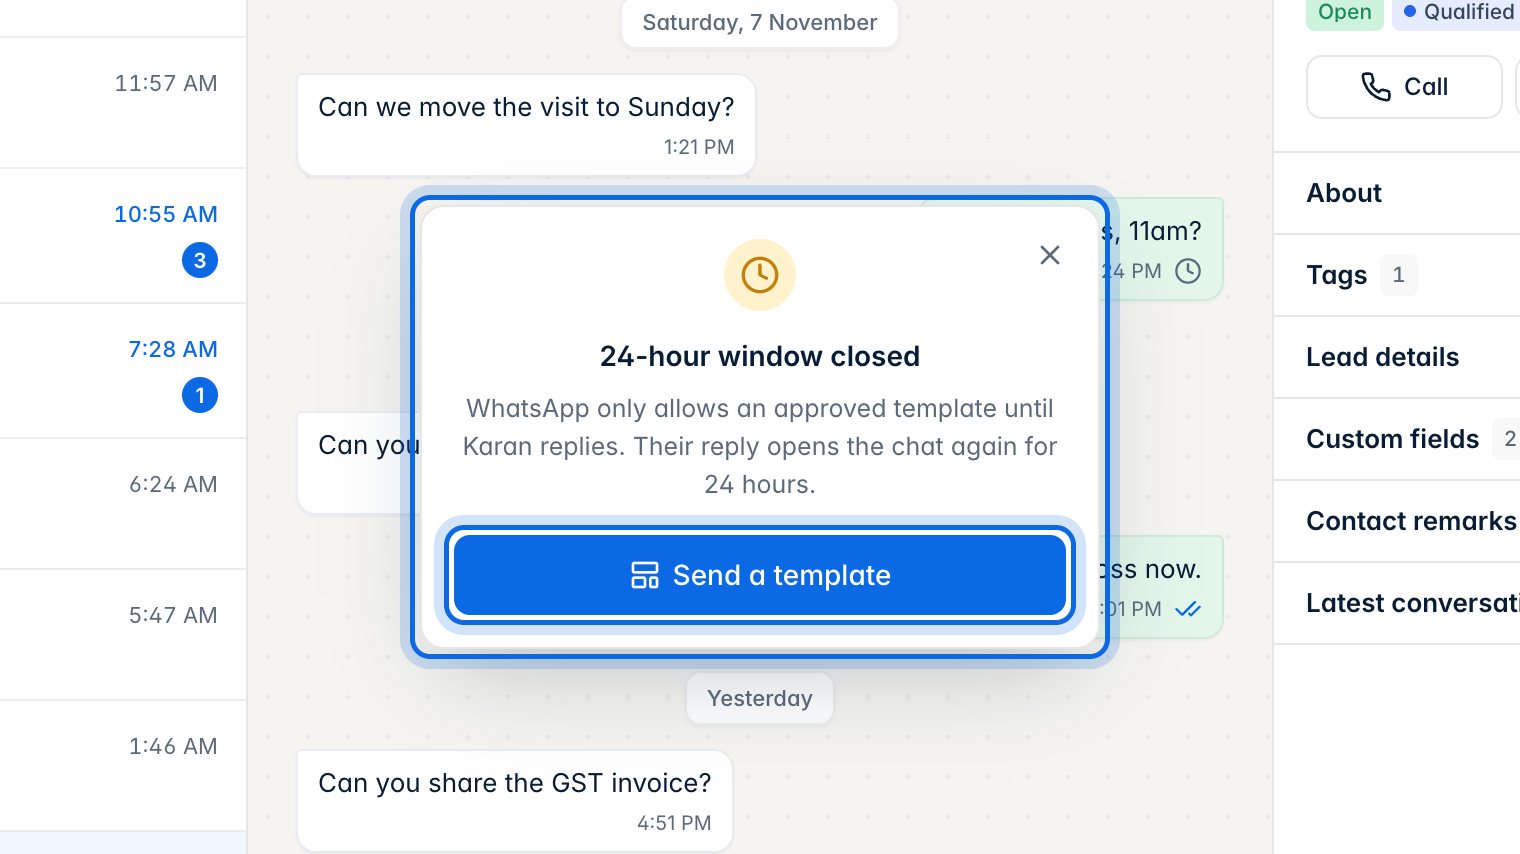
Click Send a template, pick an approved template, fill in the blanks and click Send template. When the customer replies, the chat opens again for 24 hours.
9. Contact details
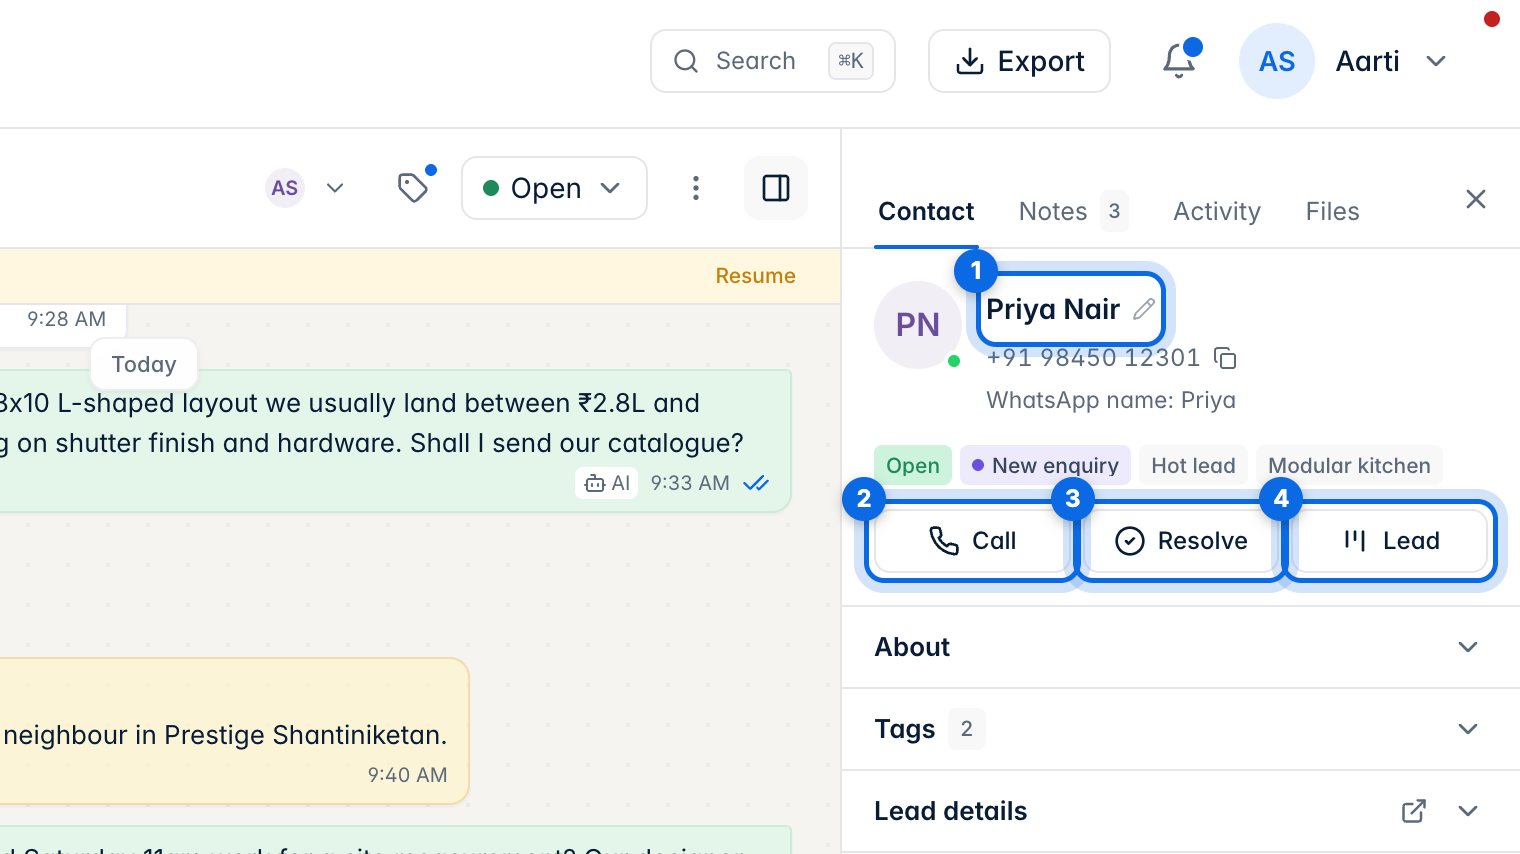
The panel on the right is about the customer. Click the name to edit it (1), or use Call (2), Resolve (3) and Lead (4).
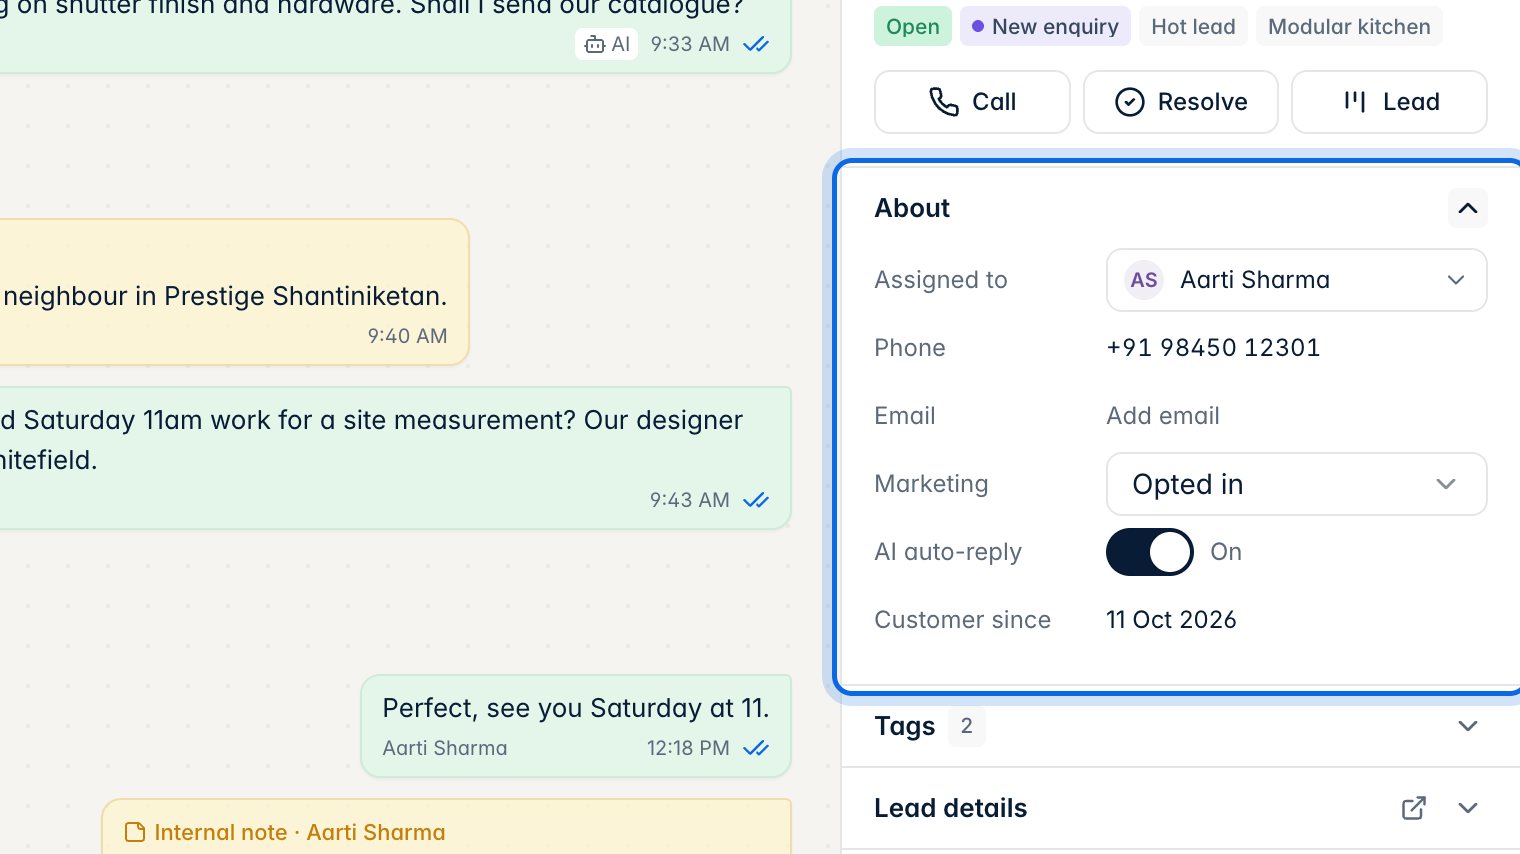
Open About to see who owns the contact, their phone and email, whether they agreed to marketing, and whether AI may reply to them. Click Add email to save one.
10. Tags
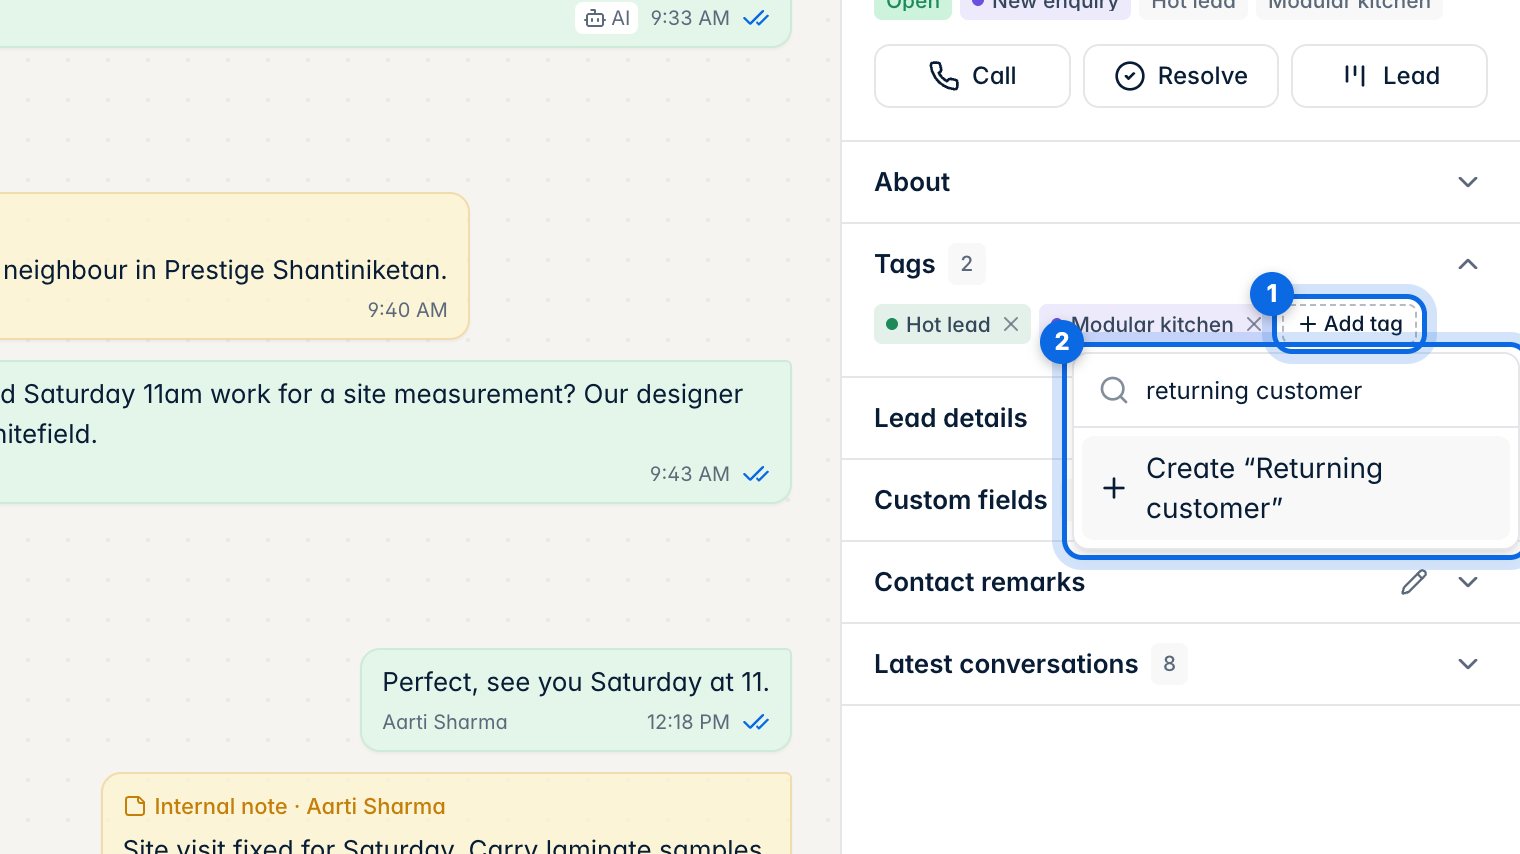
Open Tags and click Add tag (1). Pick an existing tag or type a new name and choose Create (2). Click × on a tag to remove it. Tags are used to filter contacts and to pick broadcast audiences.
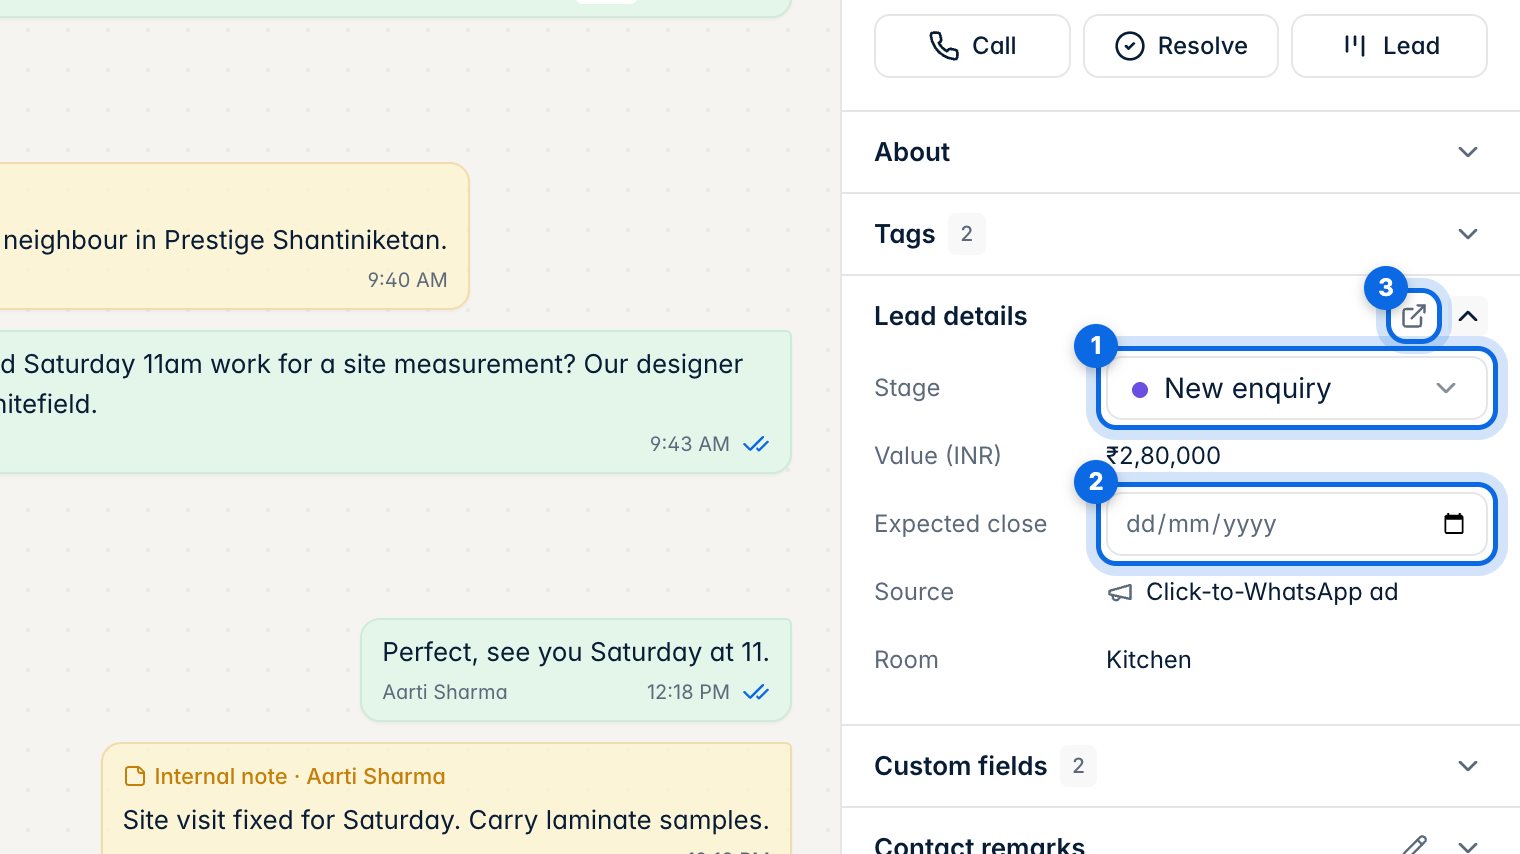
11. Lead details
Open Lead details to change the stage (1), the deal value and the expected close date (2). Changes save straight away. The arrow (3) opens the full lead in Leads.
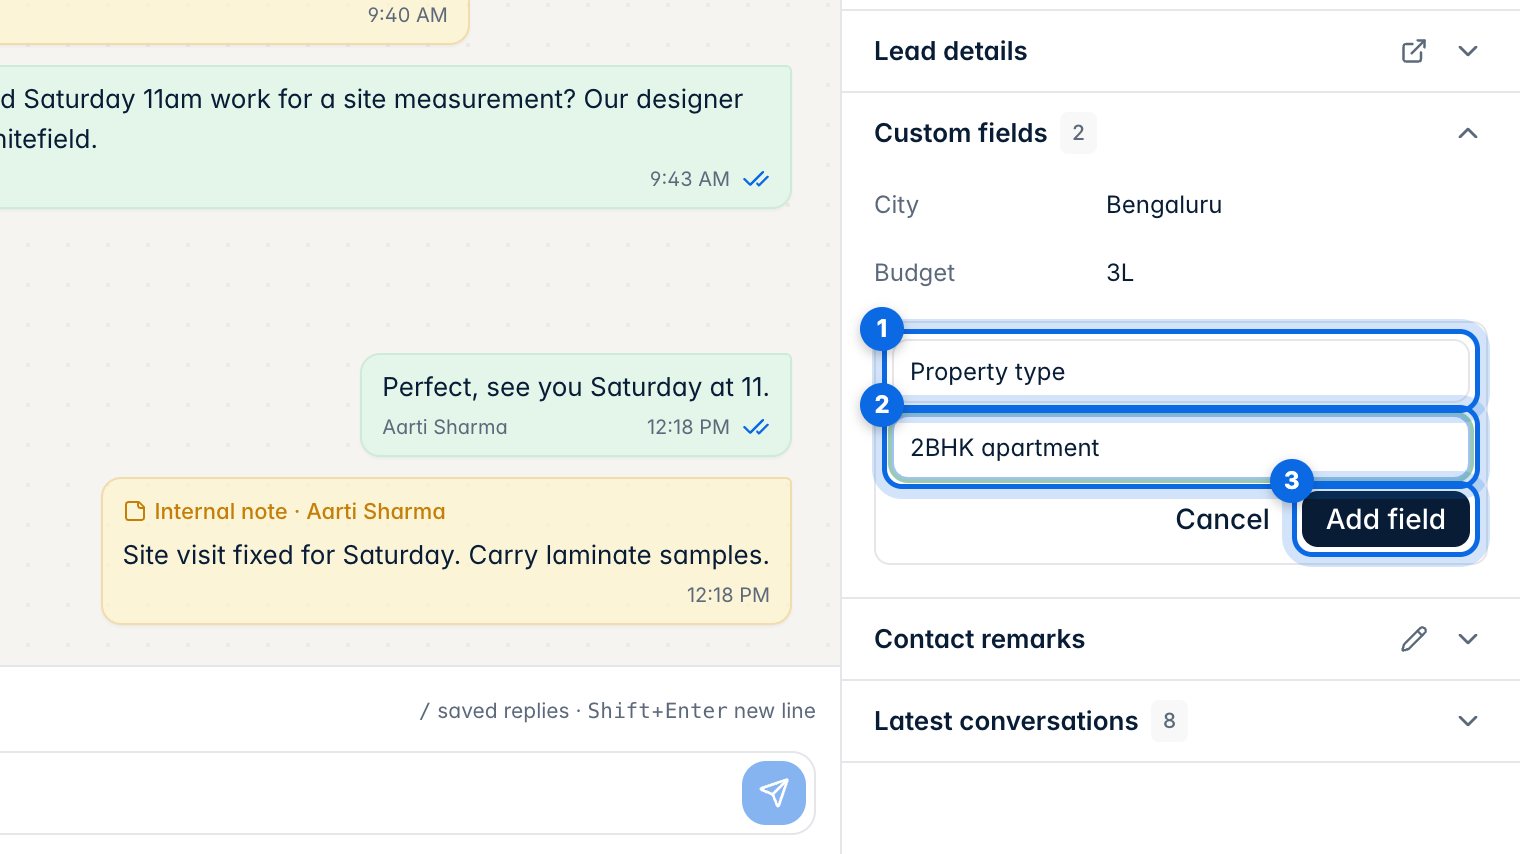
12. Custom fields
Click any value to edit it and press Enter to save. To add a new one, click Add custom field, type the field name (1) and value (2), then Add field (3).
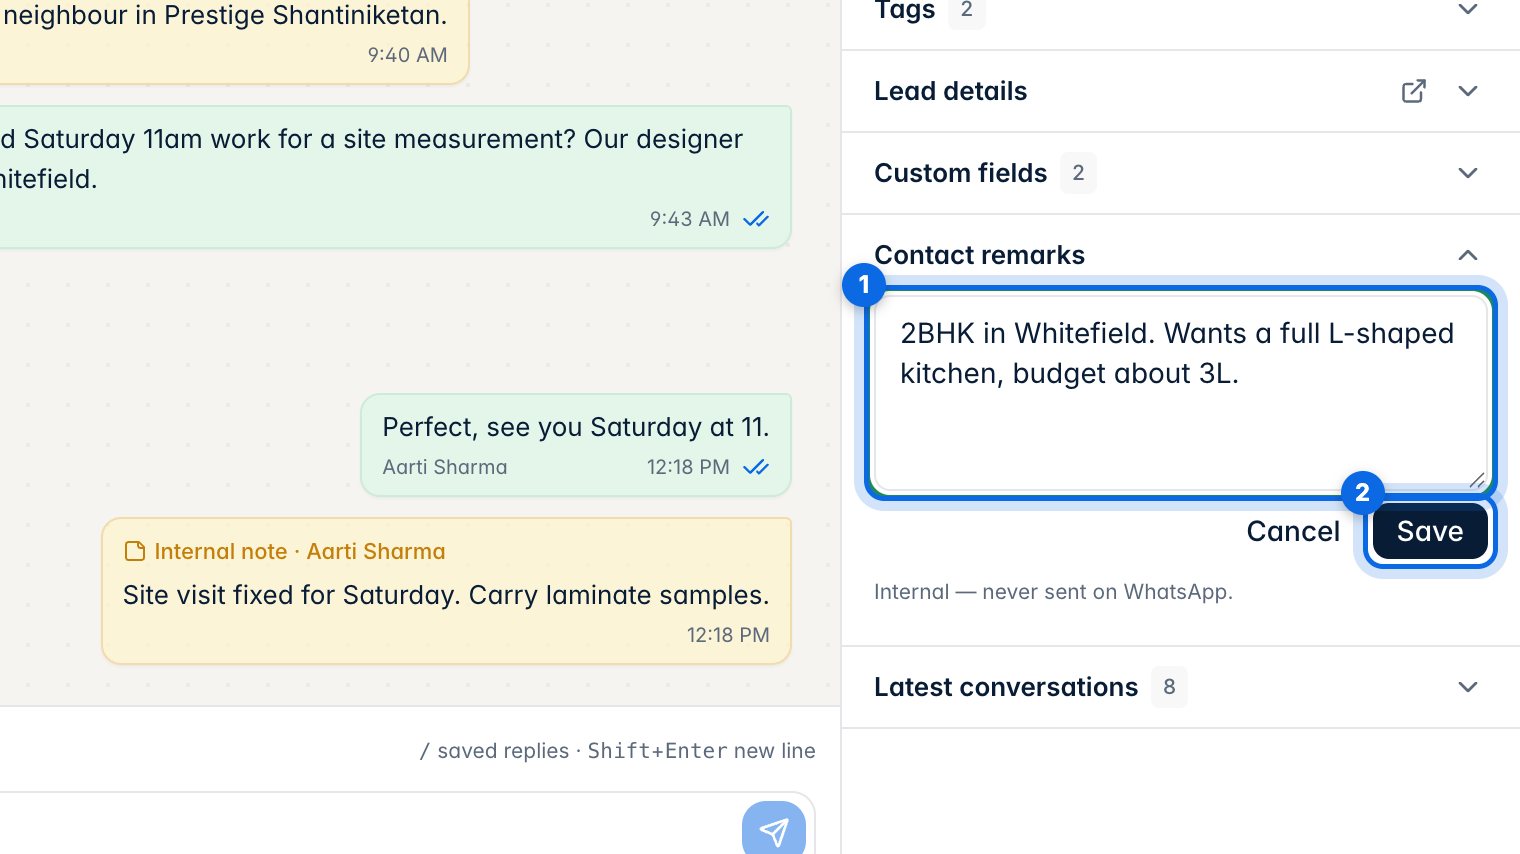
13. Contact remarks
Open Contact remarks, click the box (1) and write a short summary anyone on your team should know, then Save (2). Remarks are internal and never sent on WhatsApp.
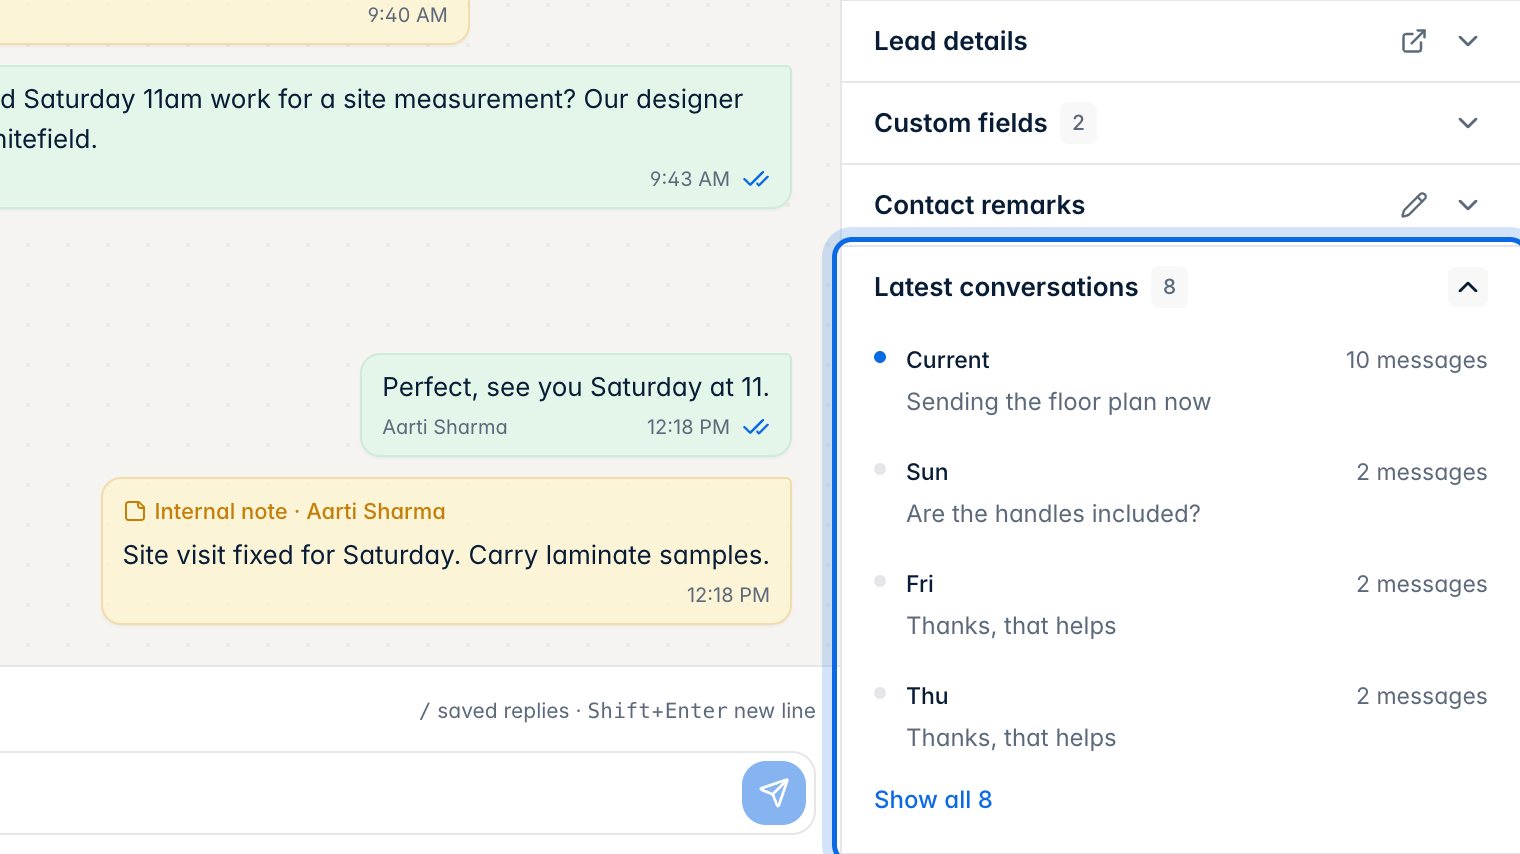
14. Latest conversations
Each row is an earlier conversation with this customer, with its date and number of messages. Click one to jump to that point in the chat.
15. Notes, Activity and Files
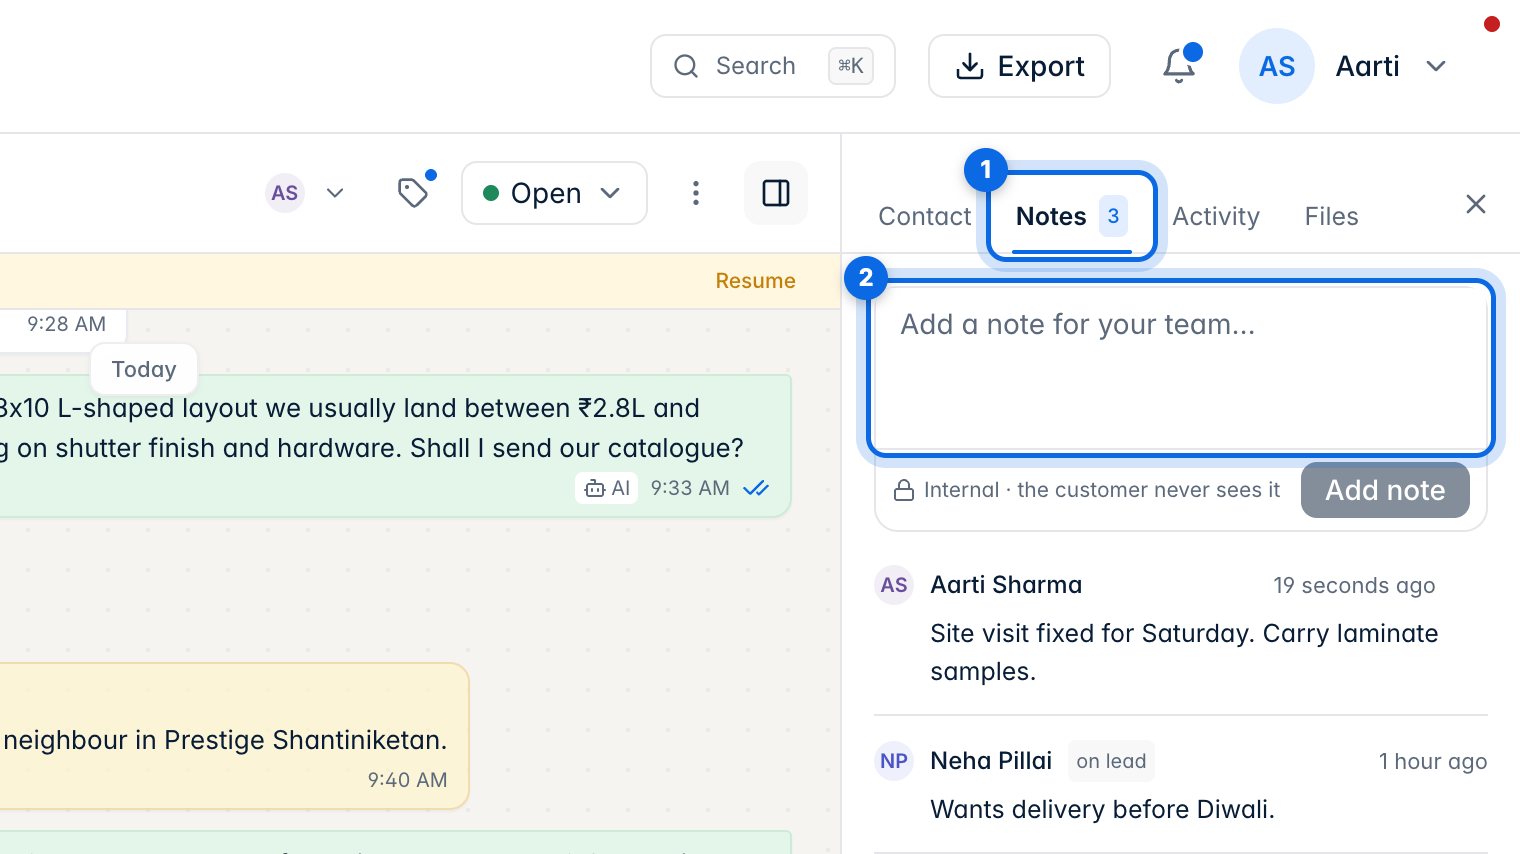
Notes (1) keeps every internal note on this contact in one list, and you can add one here too (2).
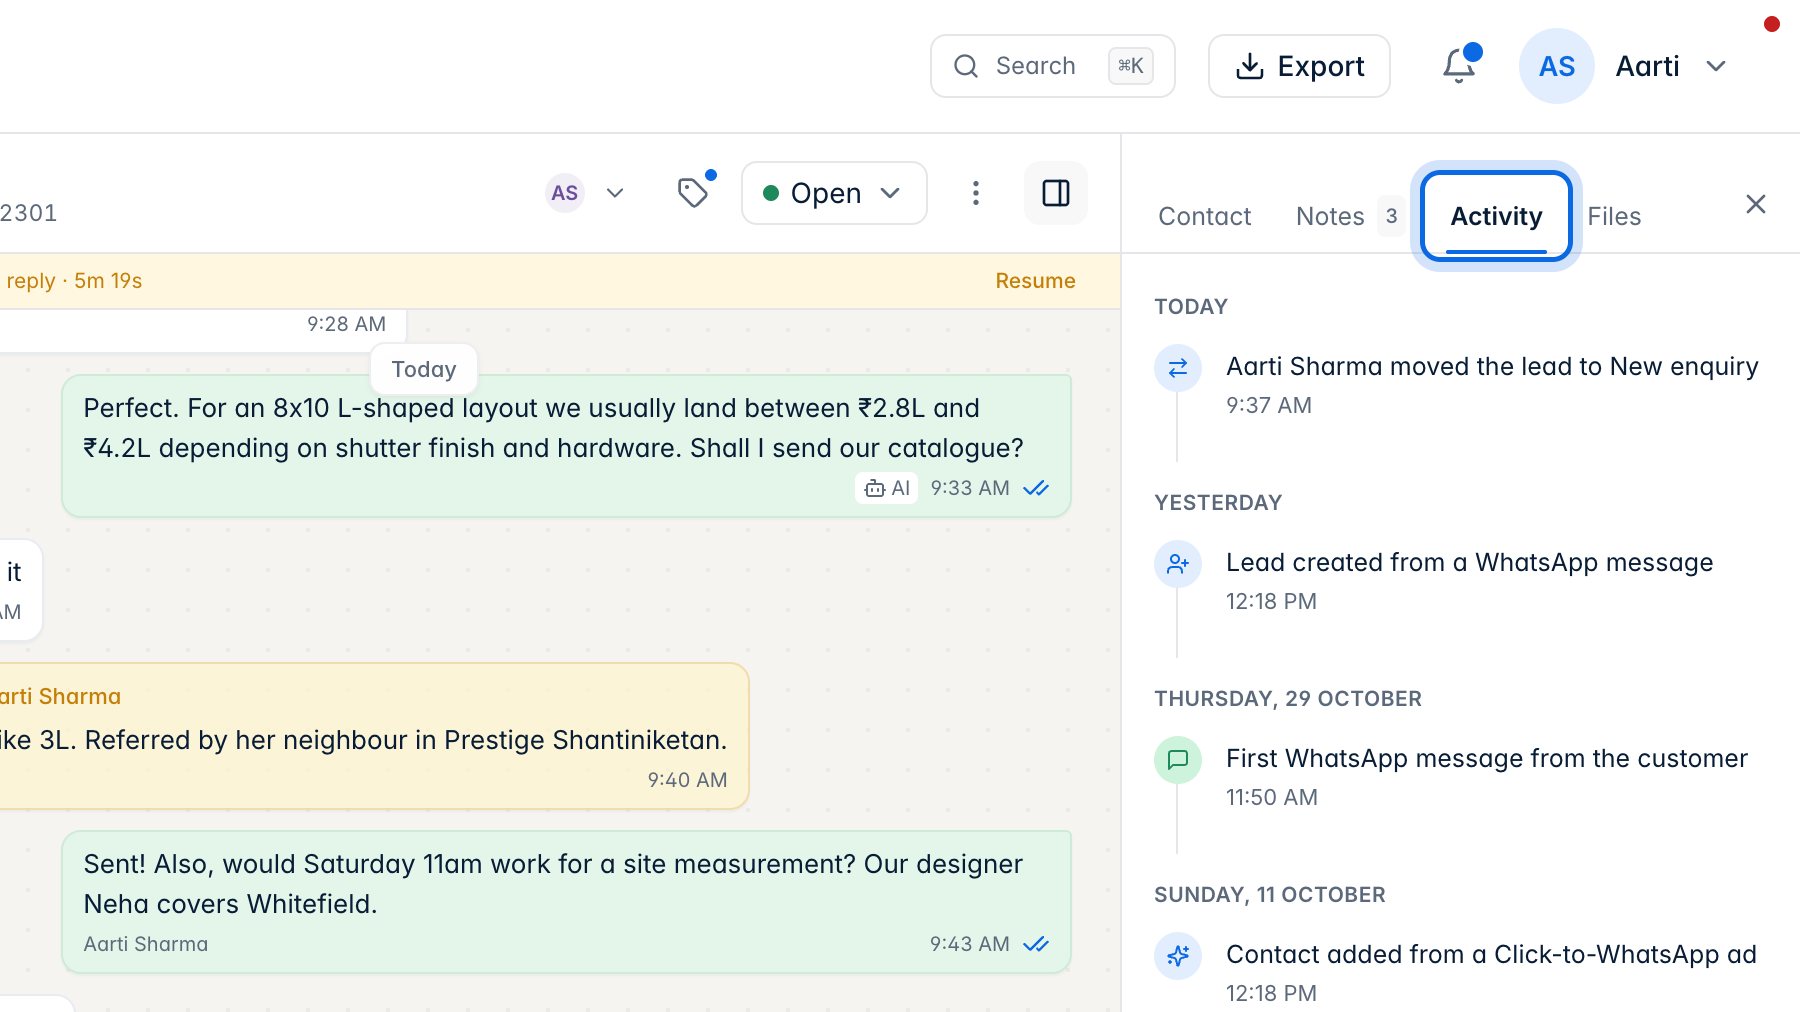
Activity shows what happened and when: stage changes, new leads, first message.
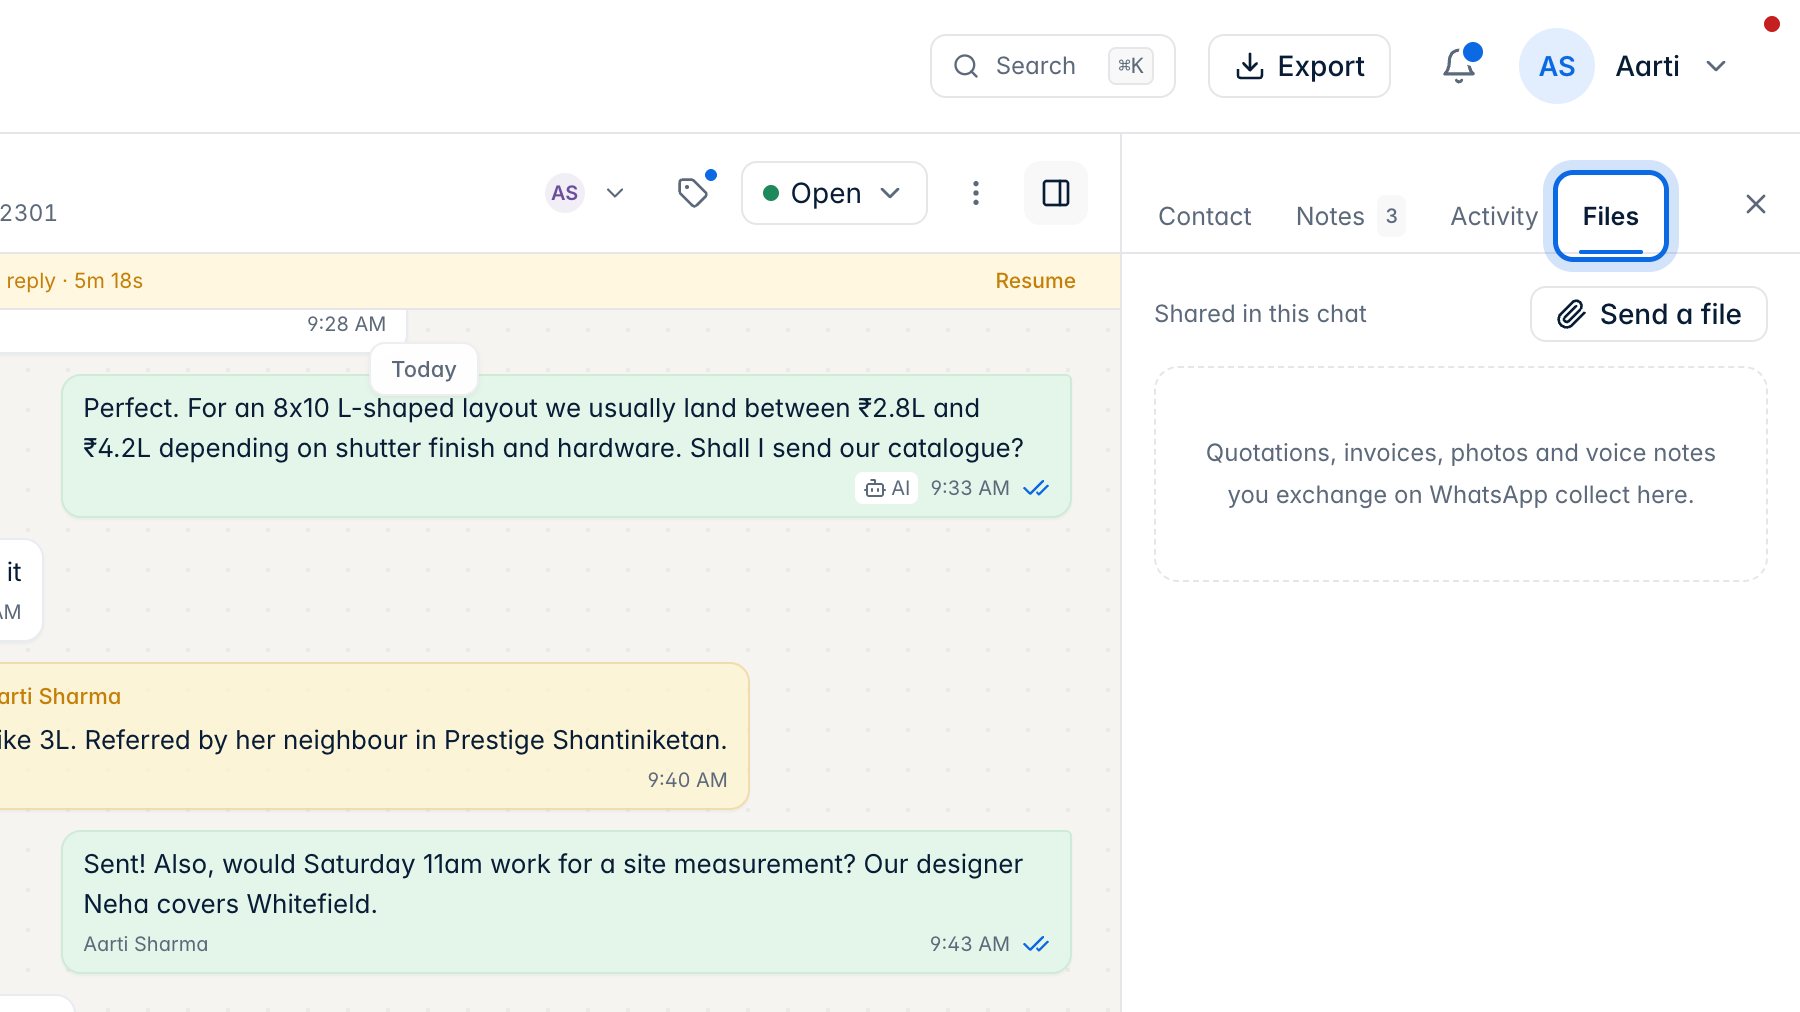
Files collects every photo, document and voice note shared in this chat.