Settings
Invite your team, set business hours, and manage your number, replies and tags.
2 min video16 stepsEnglish and हिंदी
Language
Step by step
The same steps in writing, with a screenshot for each.
1. Find your way around
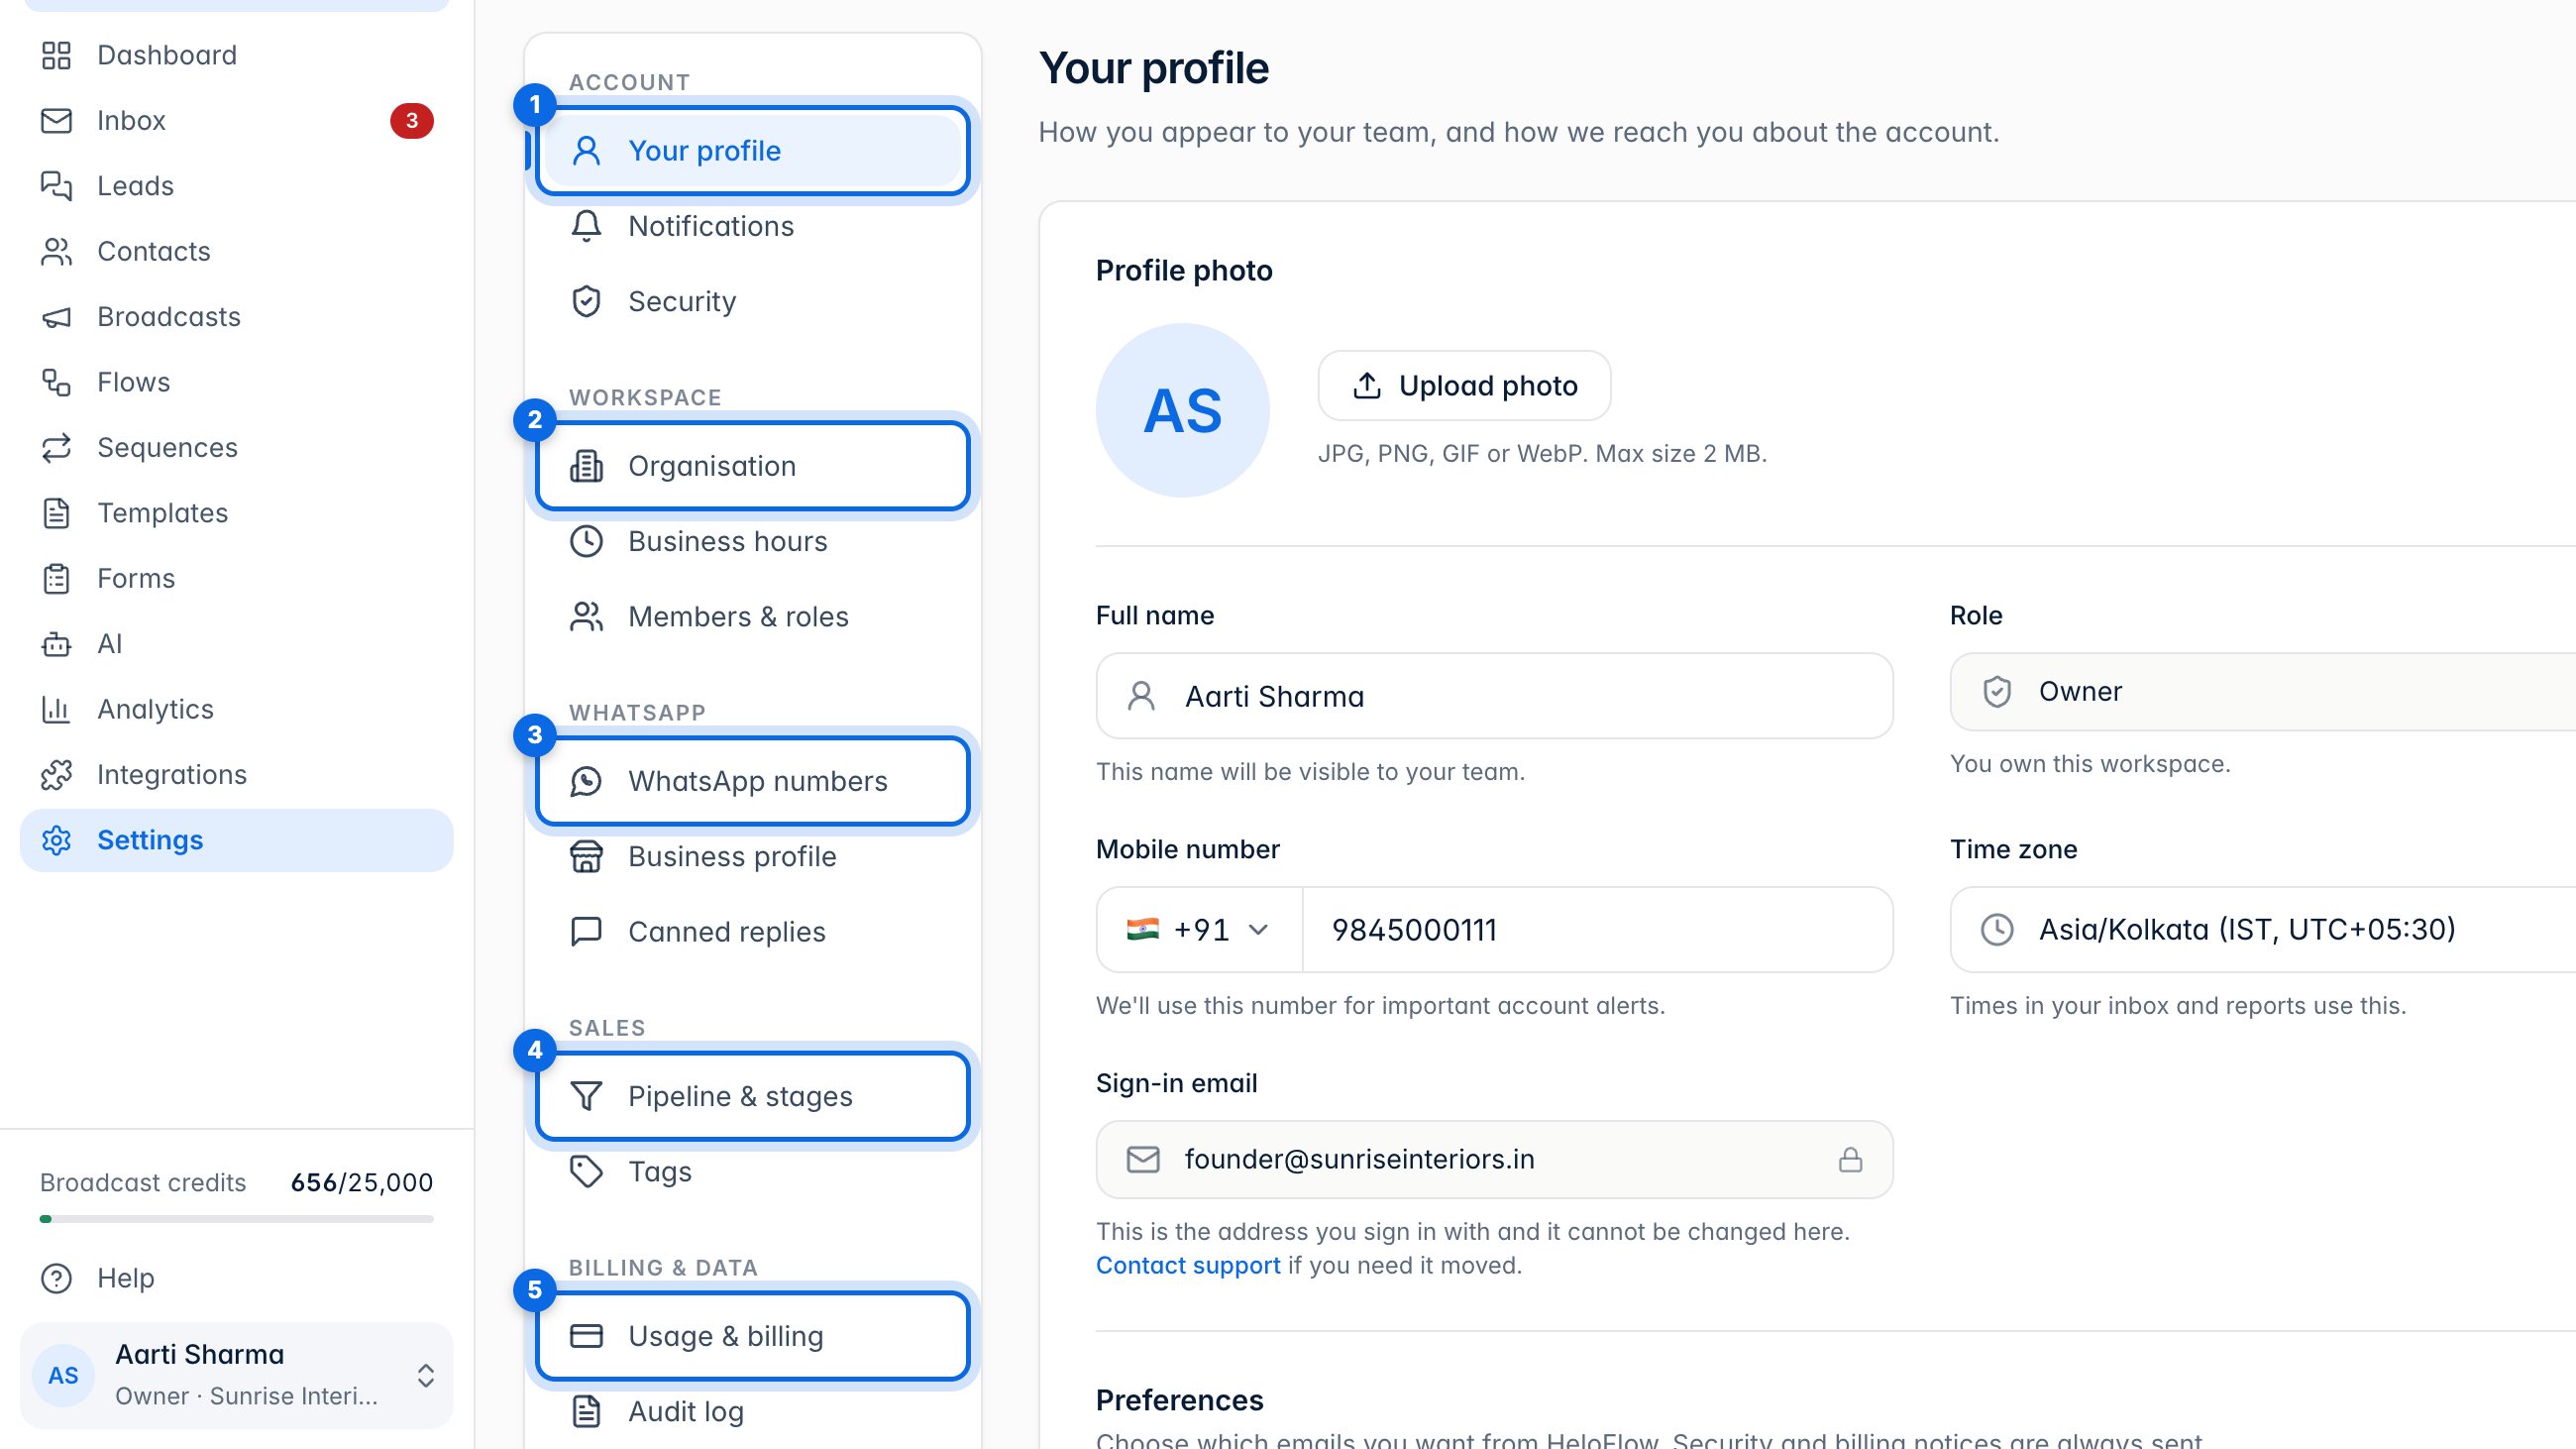
Settings is grouped on the left: your own account (1), the workspace (2), WhatsApp (3), sales (4), and billing and data (5).
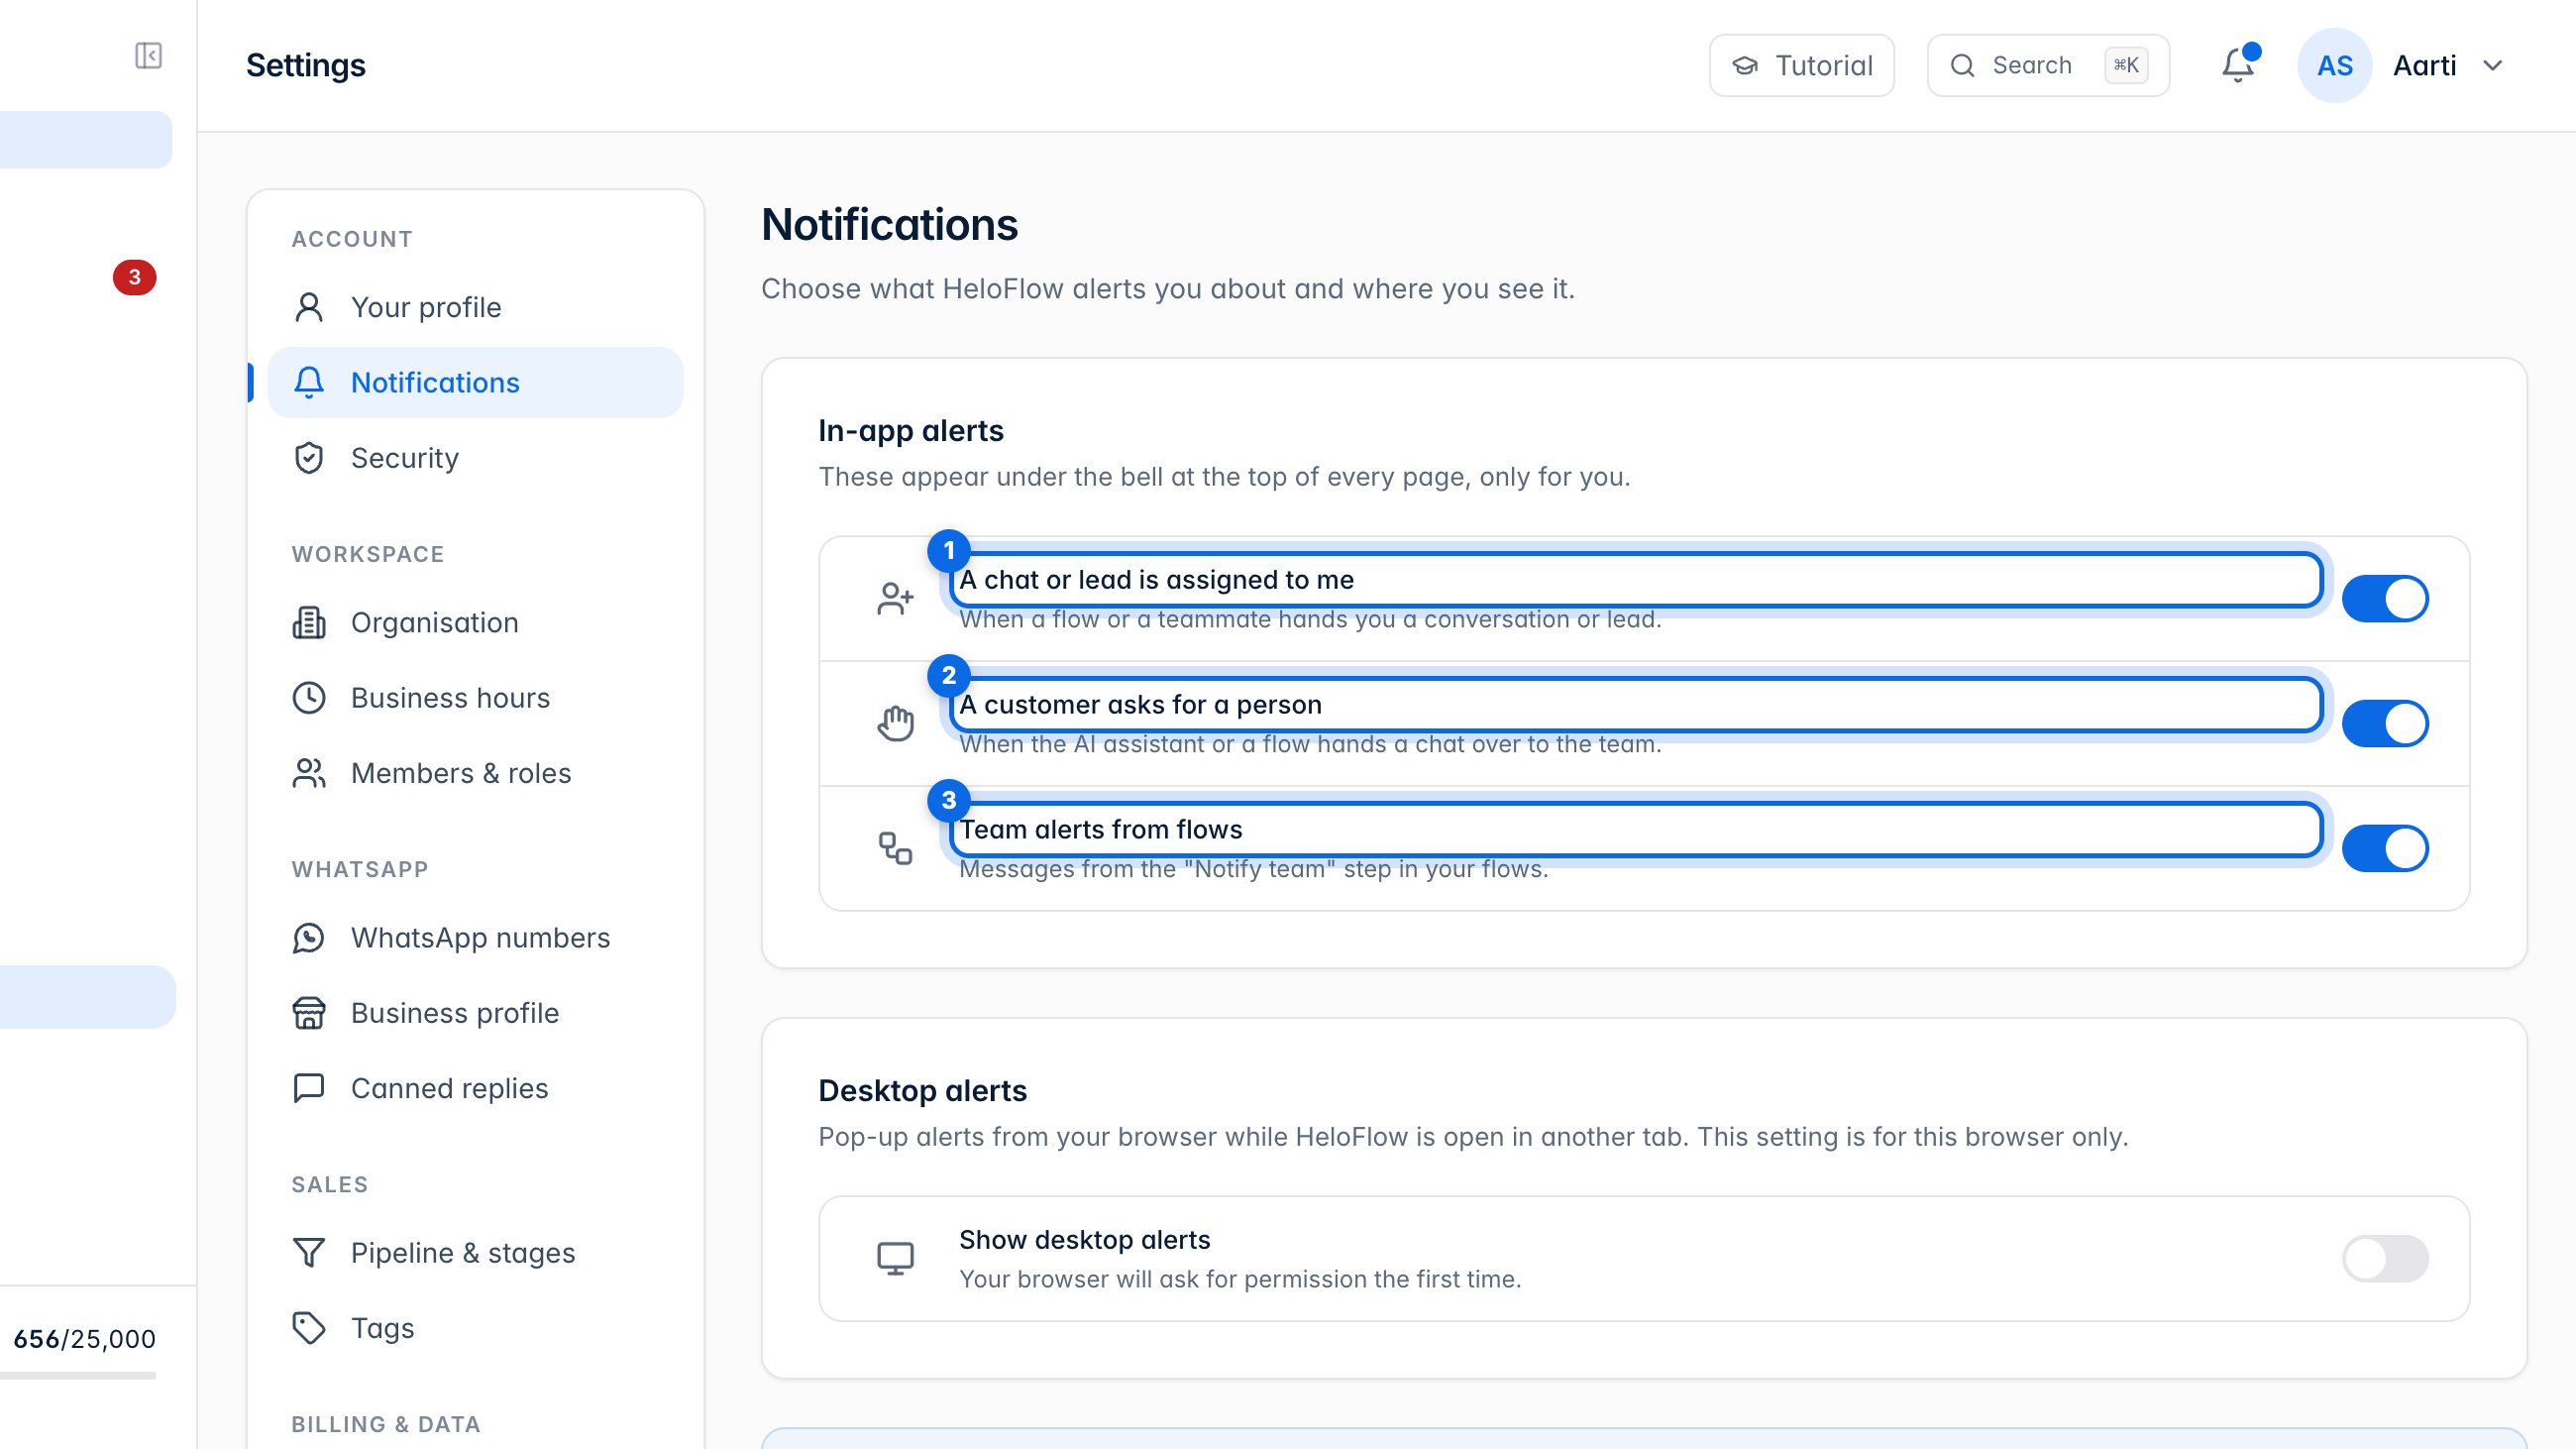
Notifications chooses what HeloFlow alerts you about: a chat or lead assigned to you (1), a customer asking for a person (2), or a team alert from a flow (3).
2. Invite your team
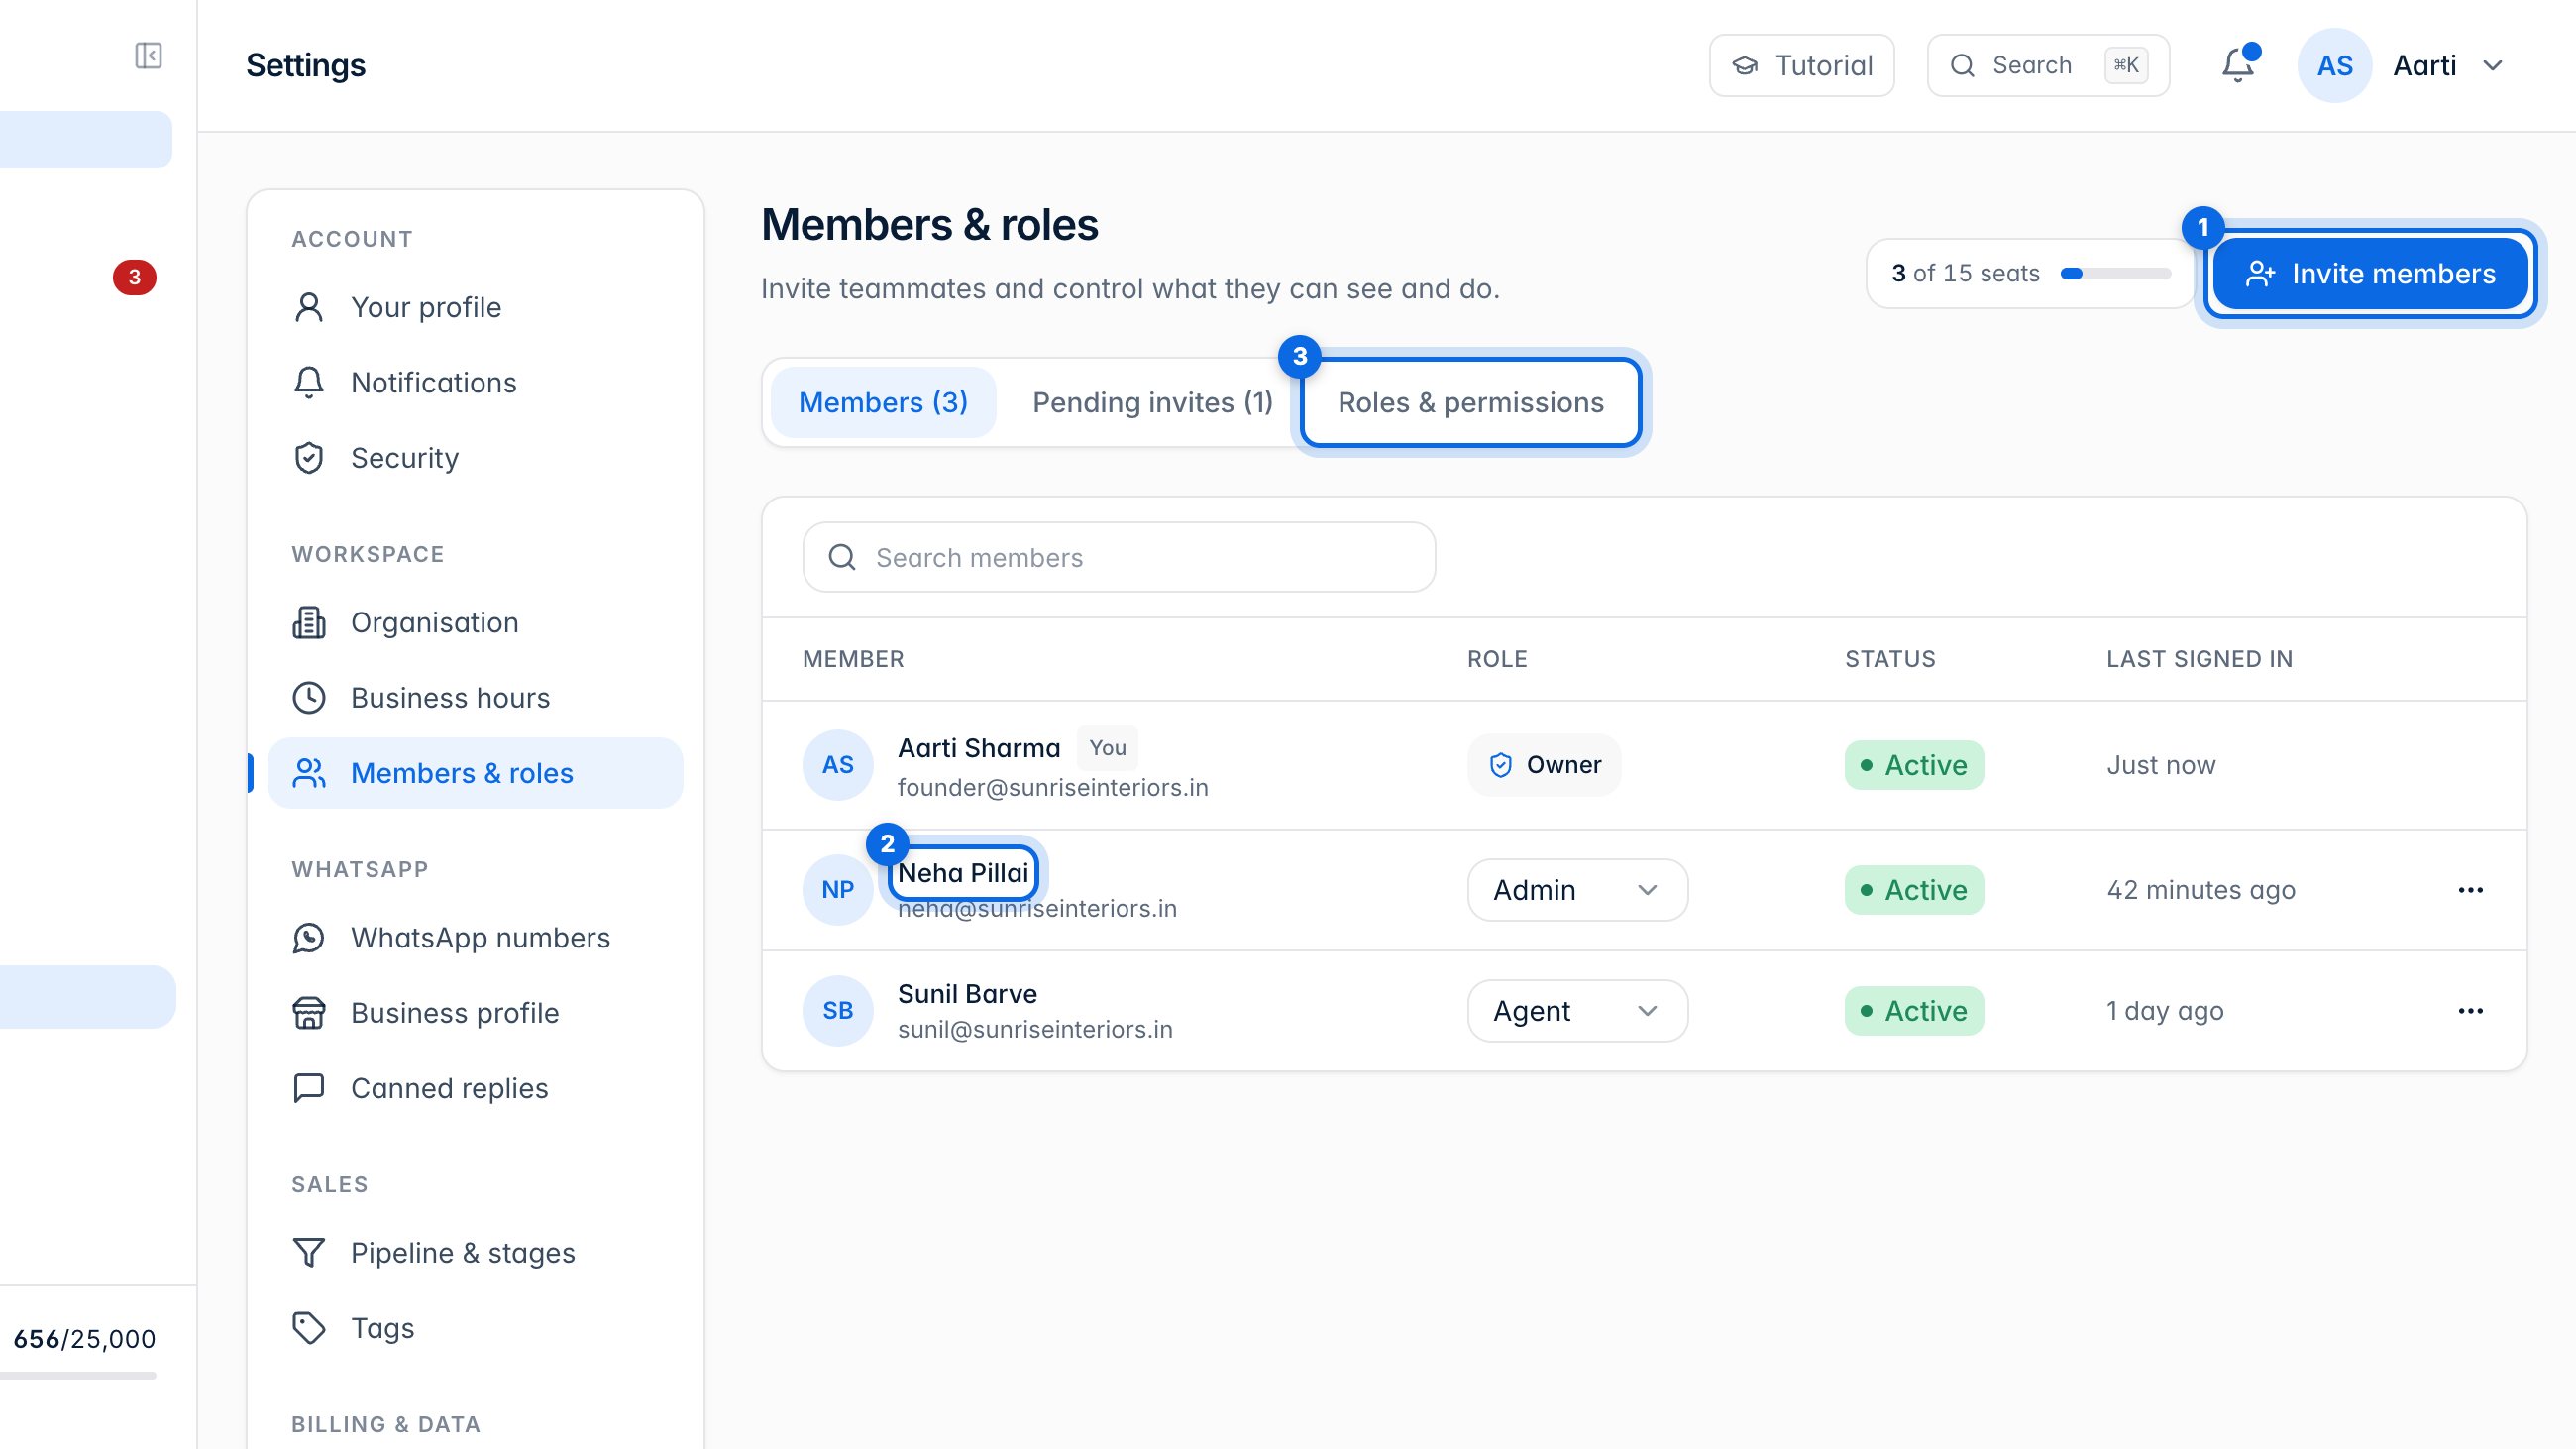
Members & roles lists your team. Invite members (1) adds people; click a member (2) to change their role, and Roles & permissions (3) shows what each role can do.
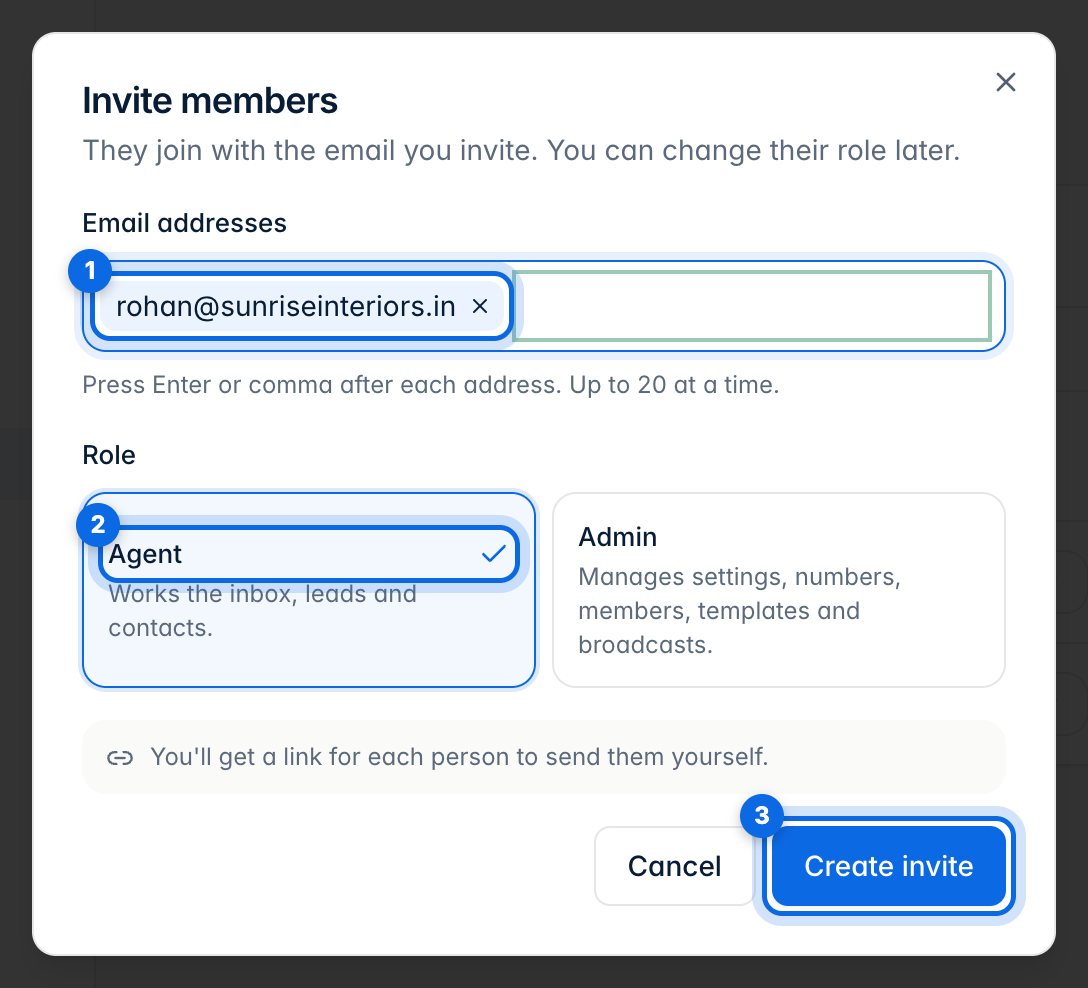
Type their email (1) and press Enter. Choose Agent for the inbox, leads and contacts, or Admin to also manage settings (2). Create invite (3) gives you a link to send them.
3. Business hours
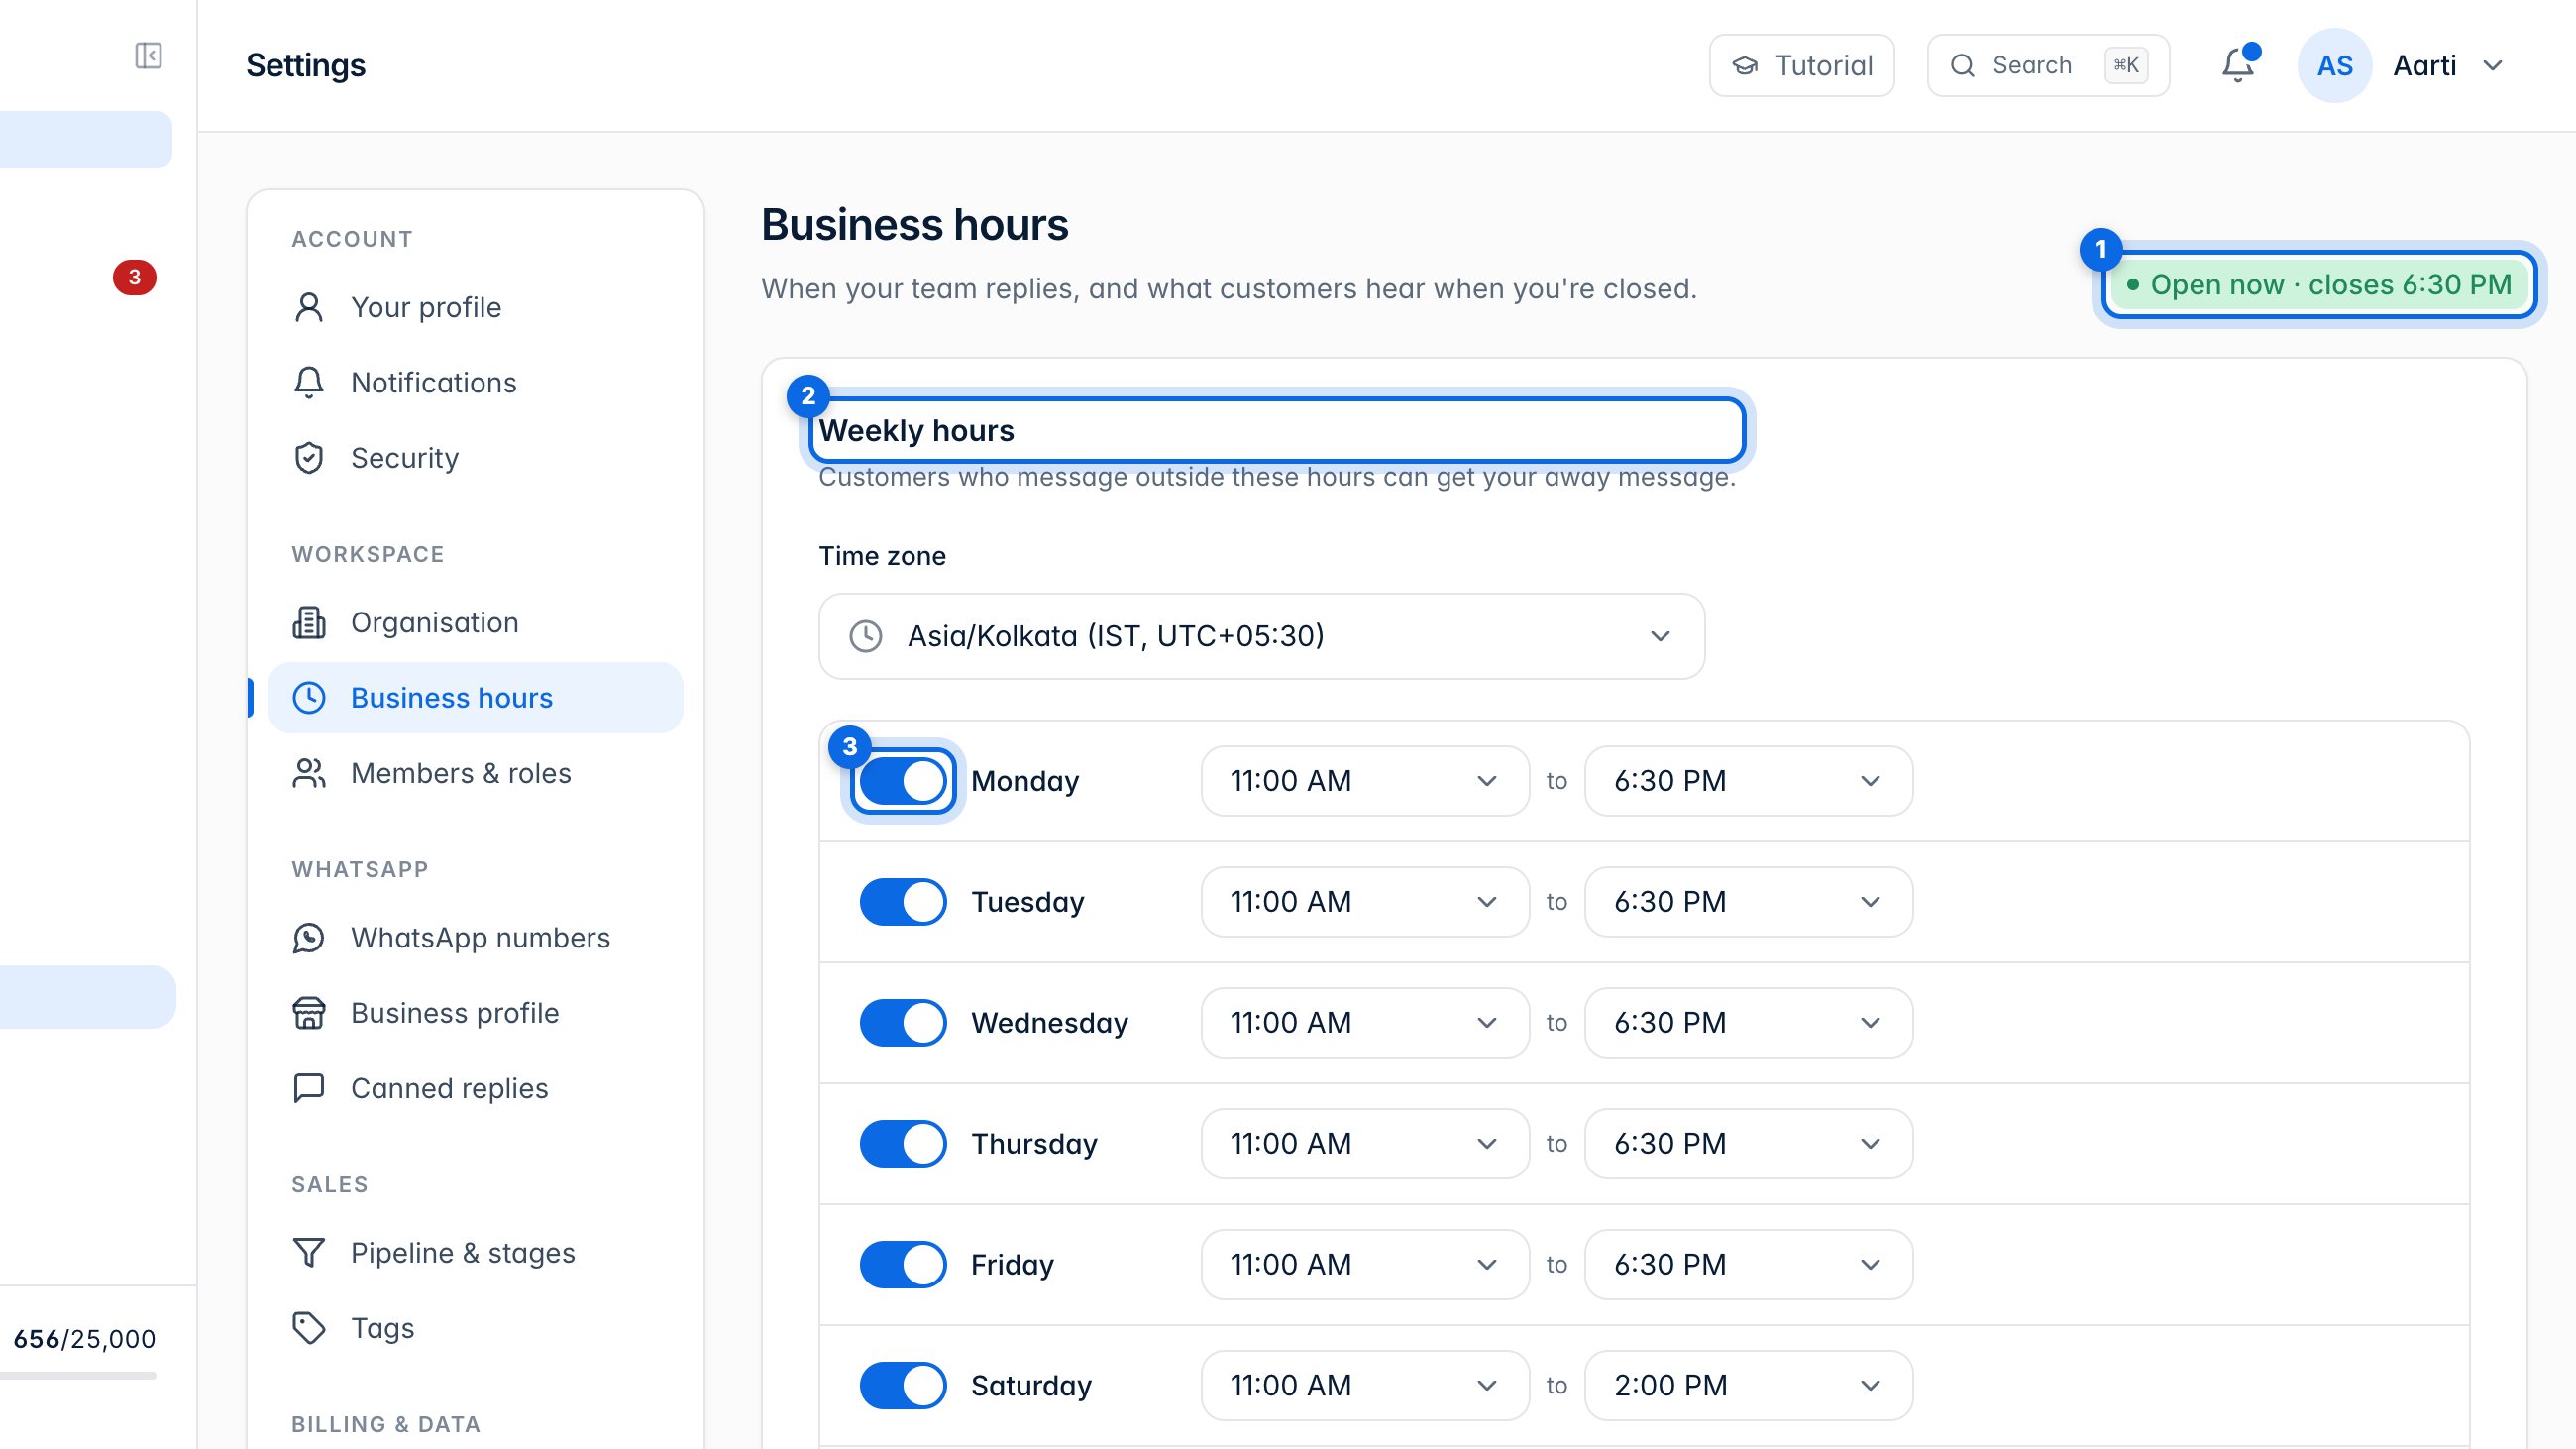
The badge shows whether you're open now (1). Set your weekly hours (2) and switch days on or off (3).
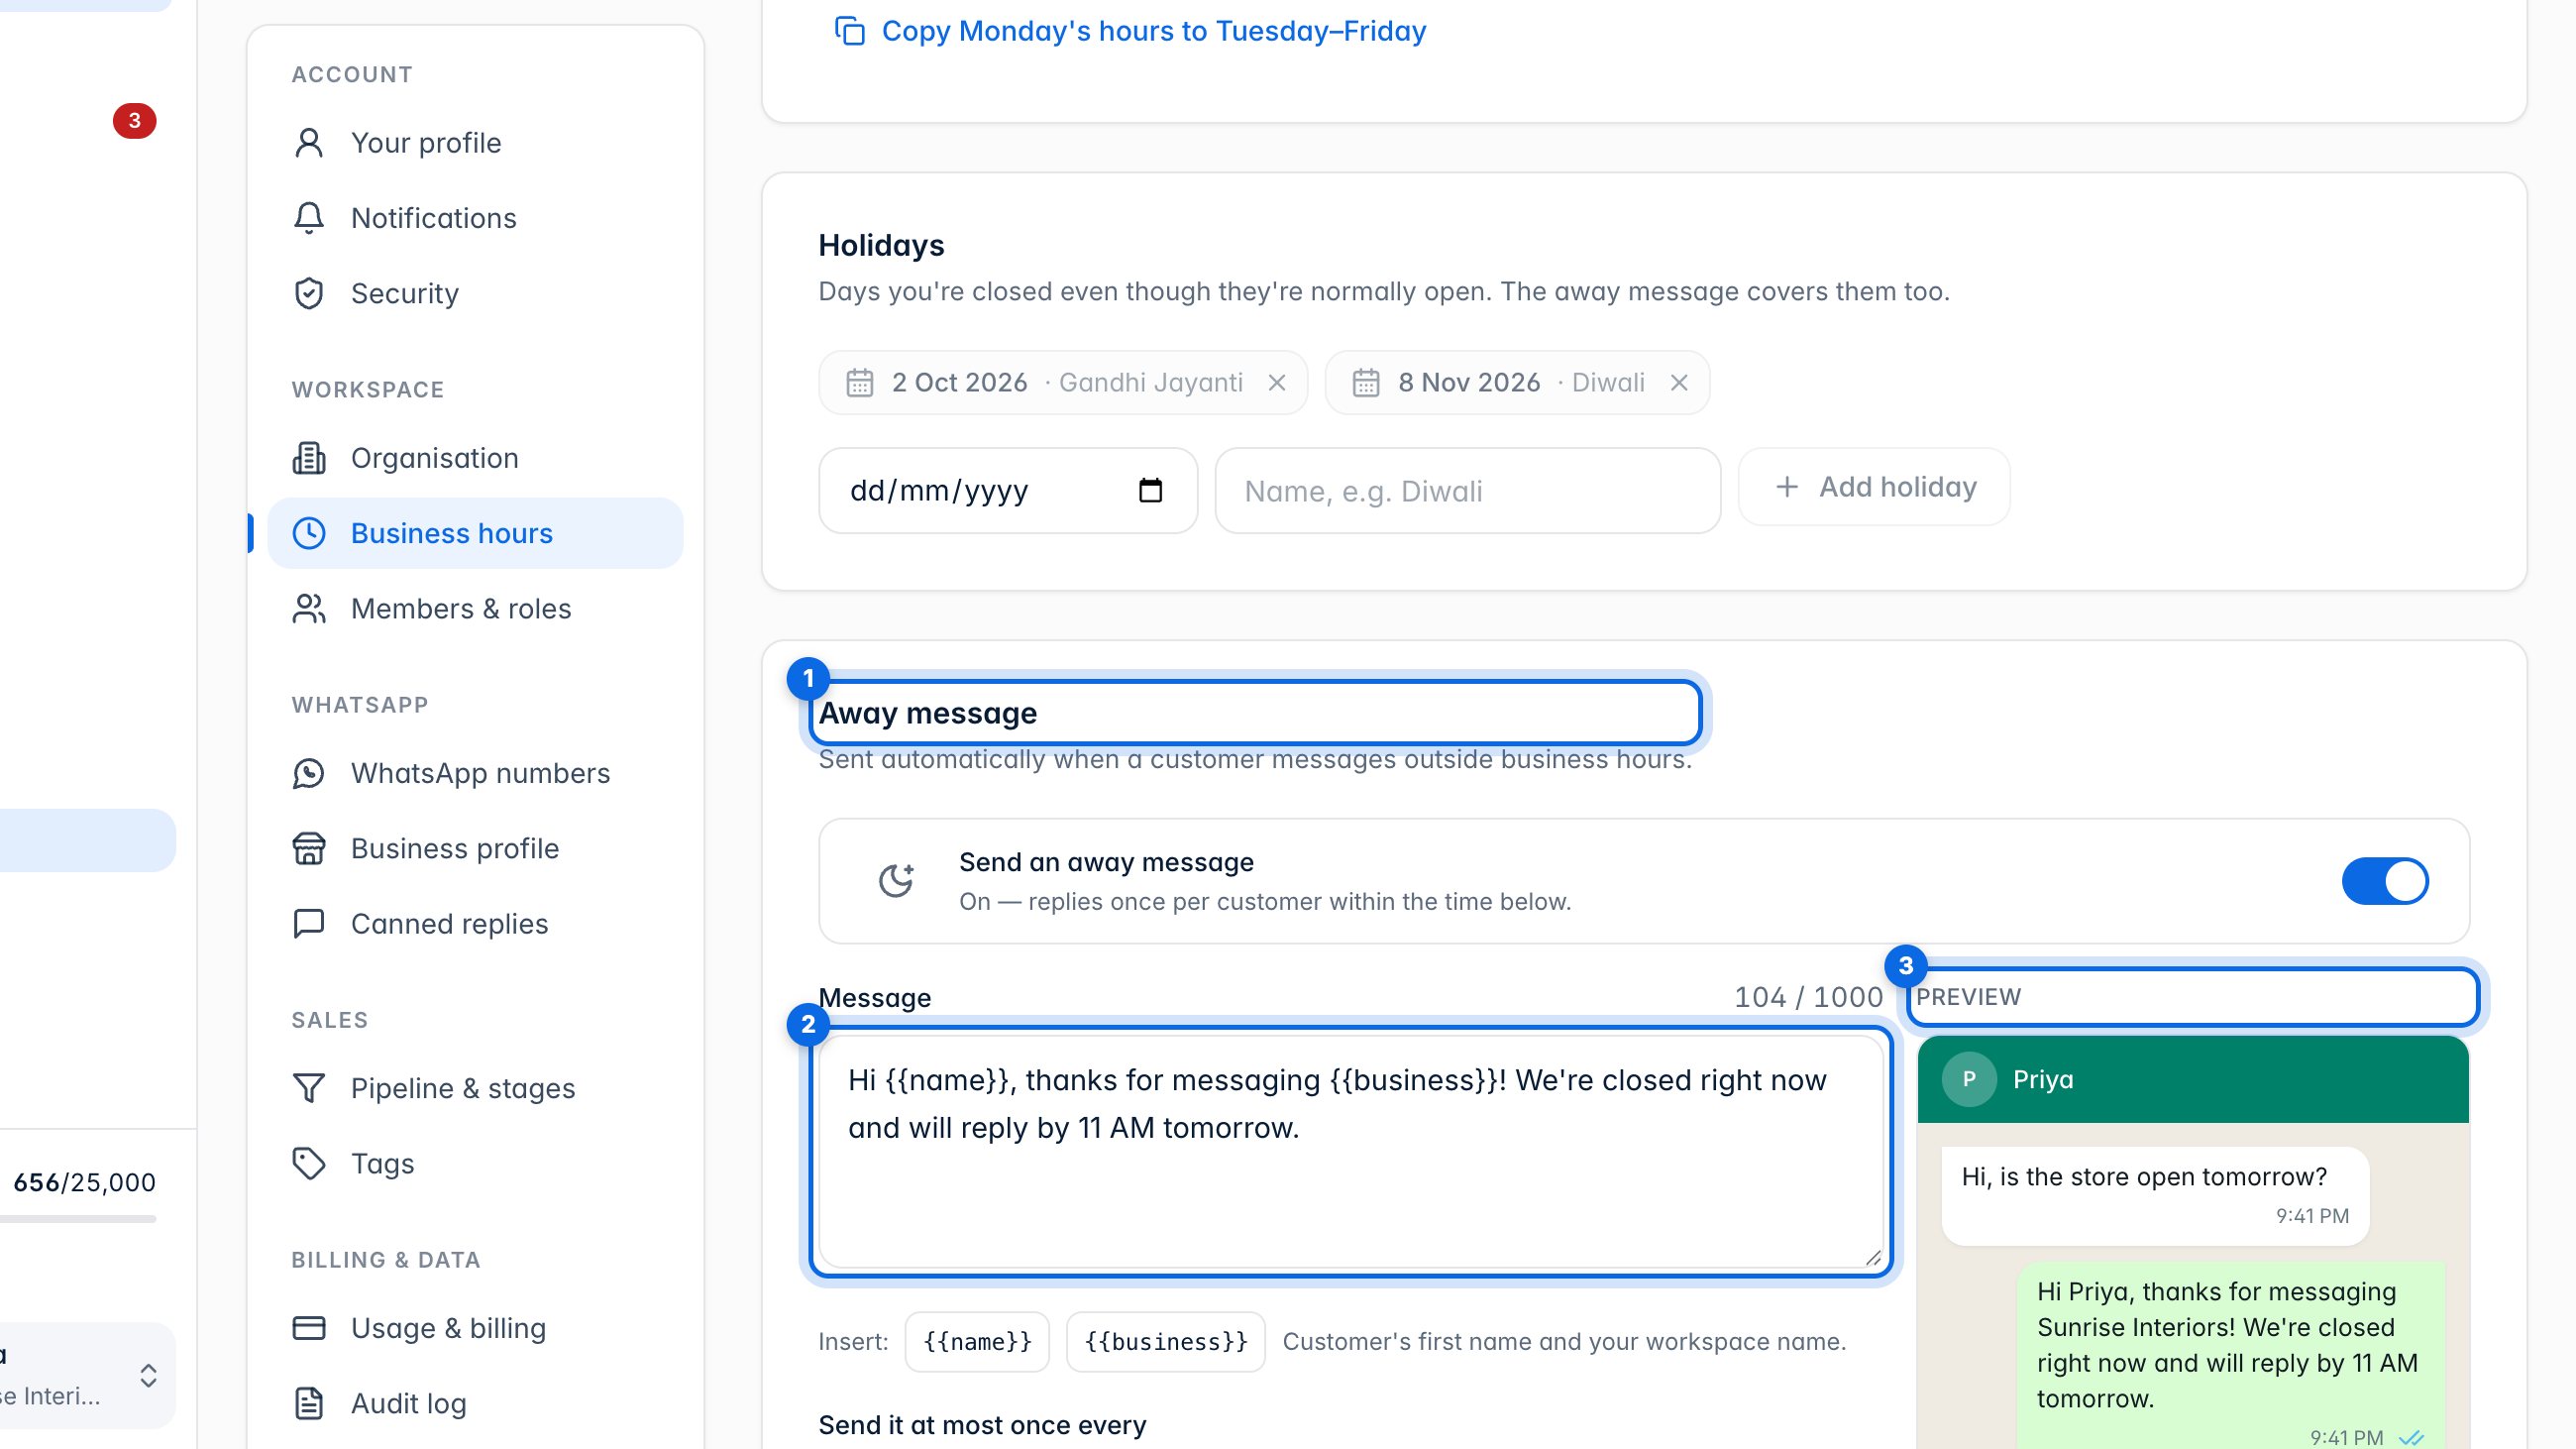
The away message (1) goes automatically to customers who write while you're closed. Write it (2) and check the preview (3).
4. WhatsApp number and profile
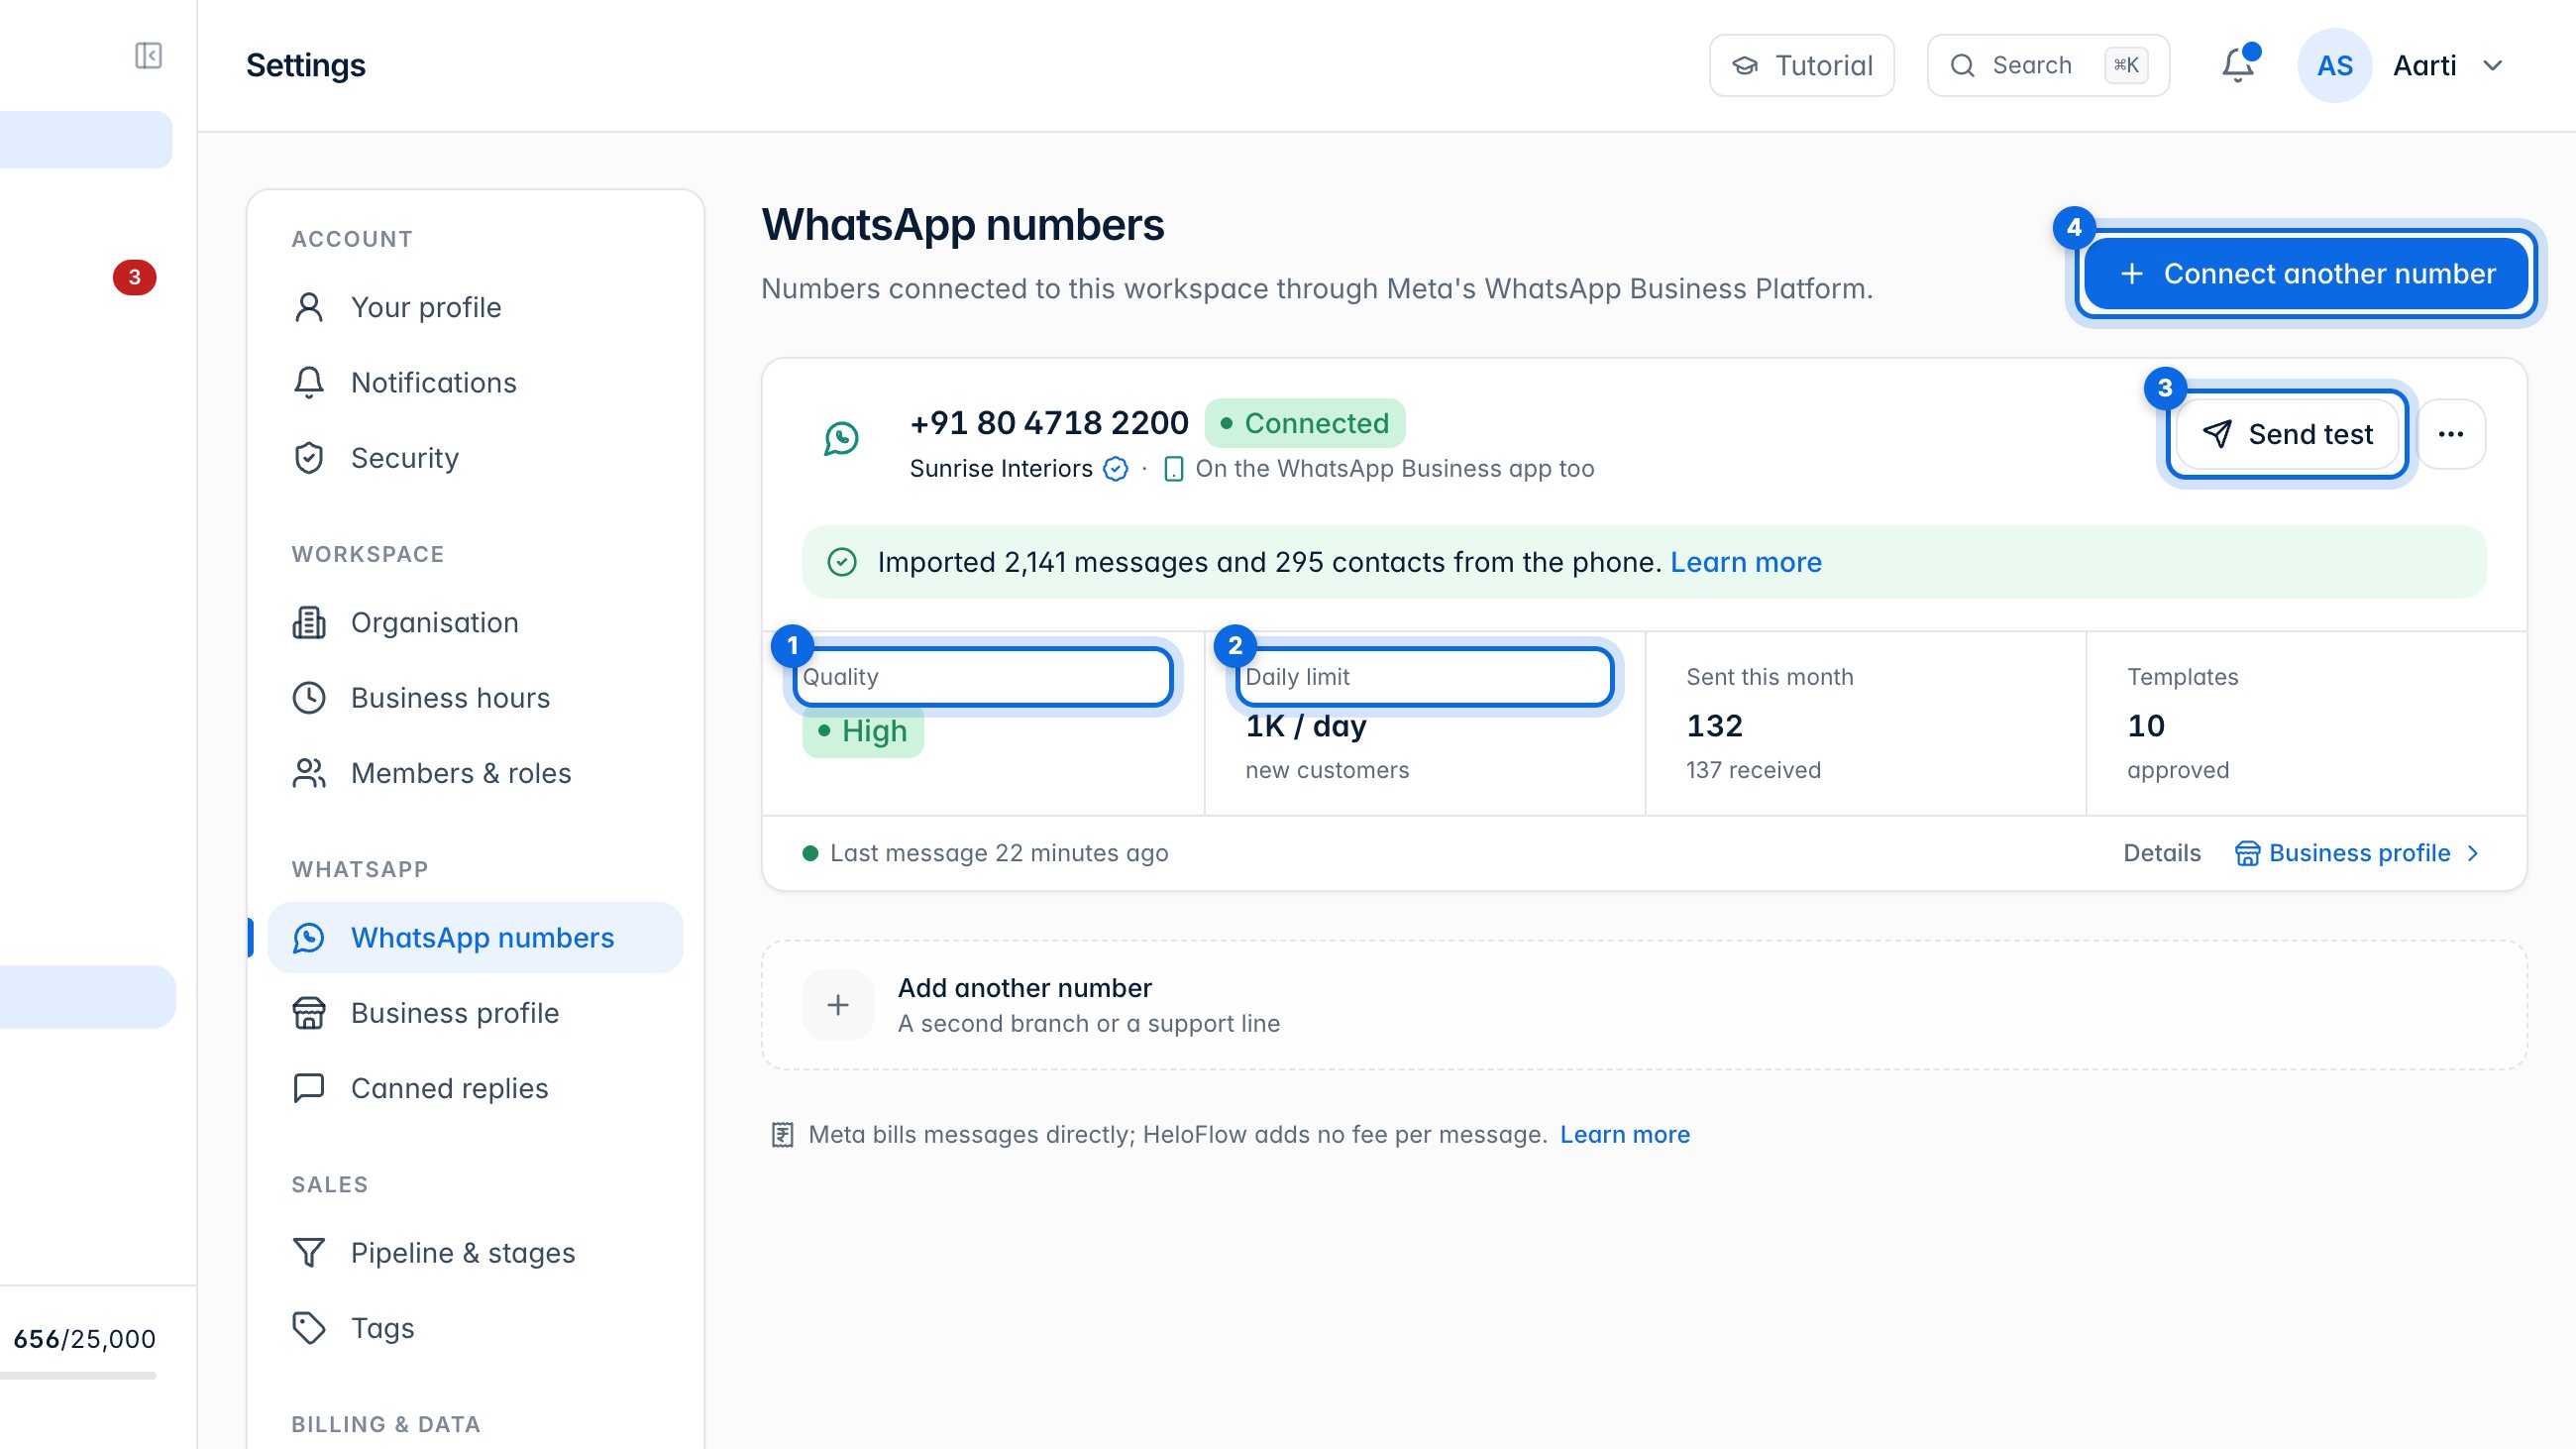
WhatsApp numbers shows each connected number with its quality (1) and Meta's daily limit (2). Send test (3) checks it, and you can connect another number (4).
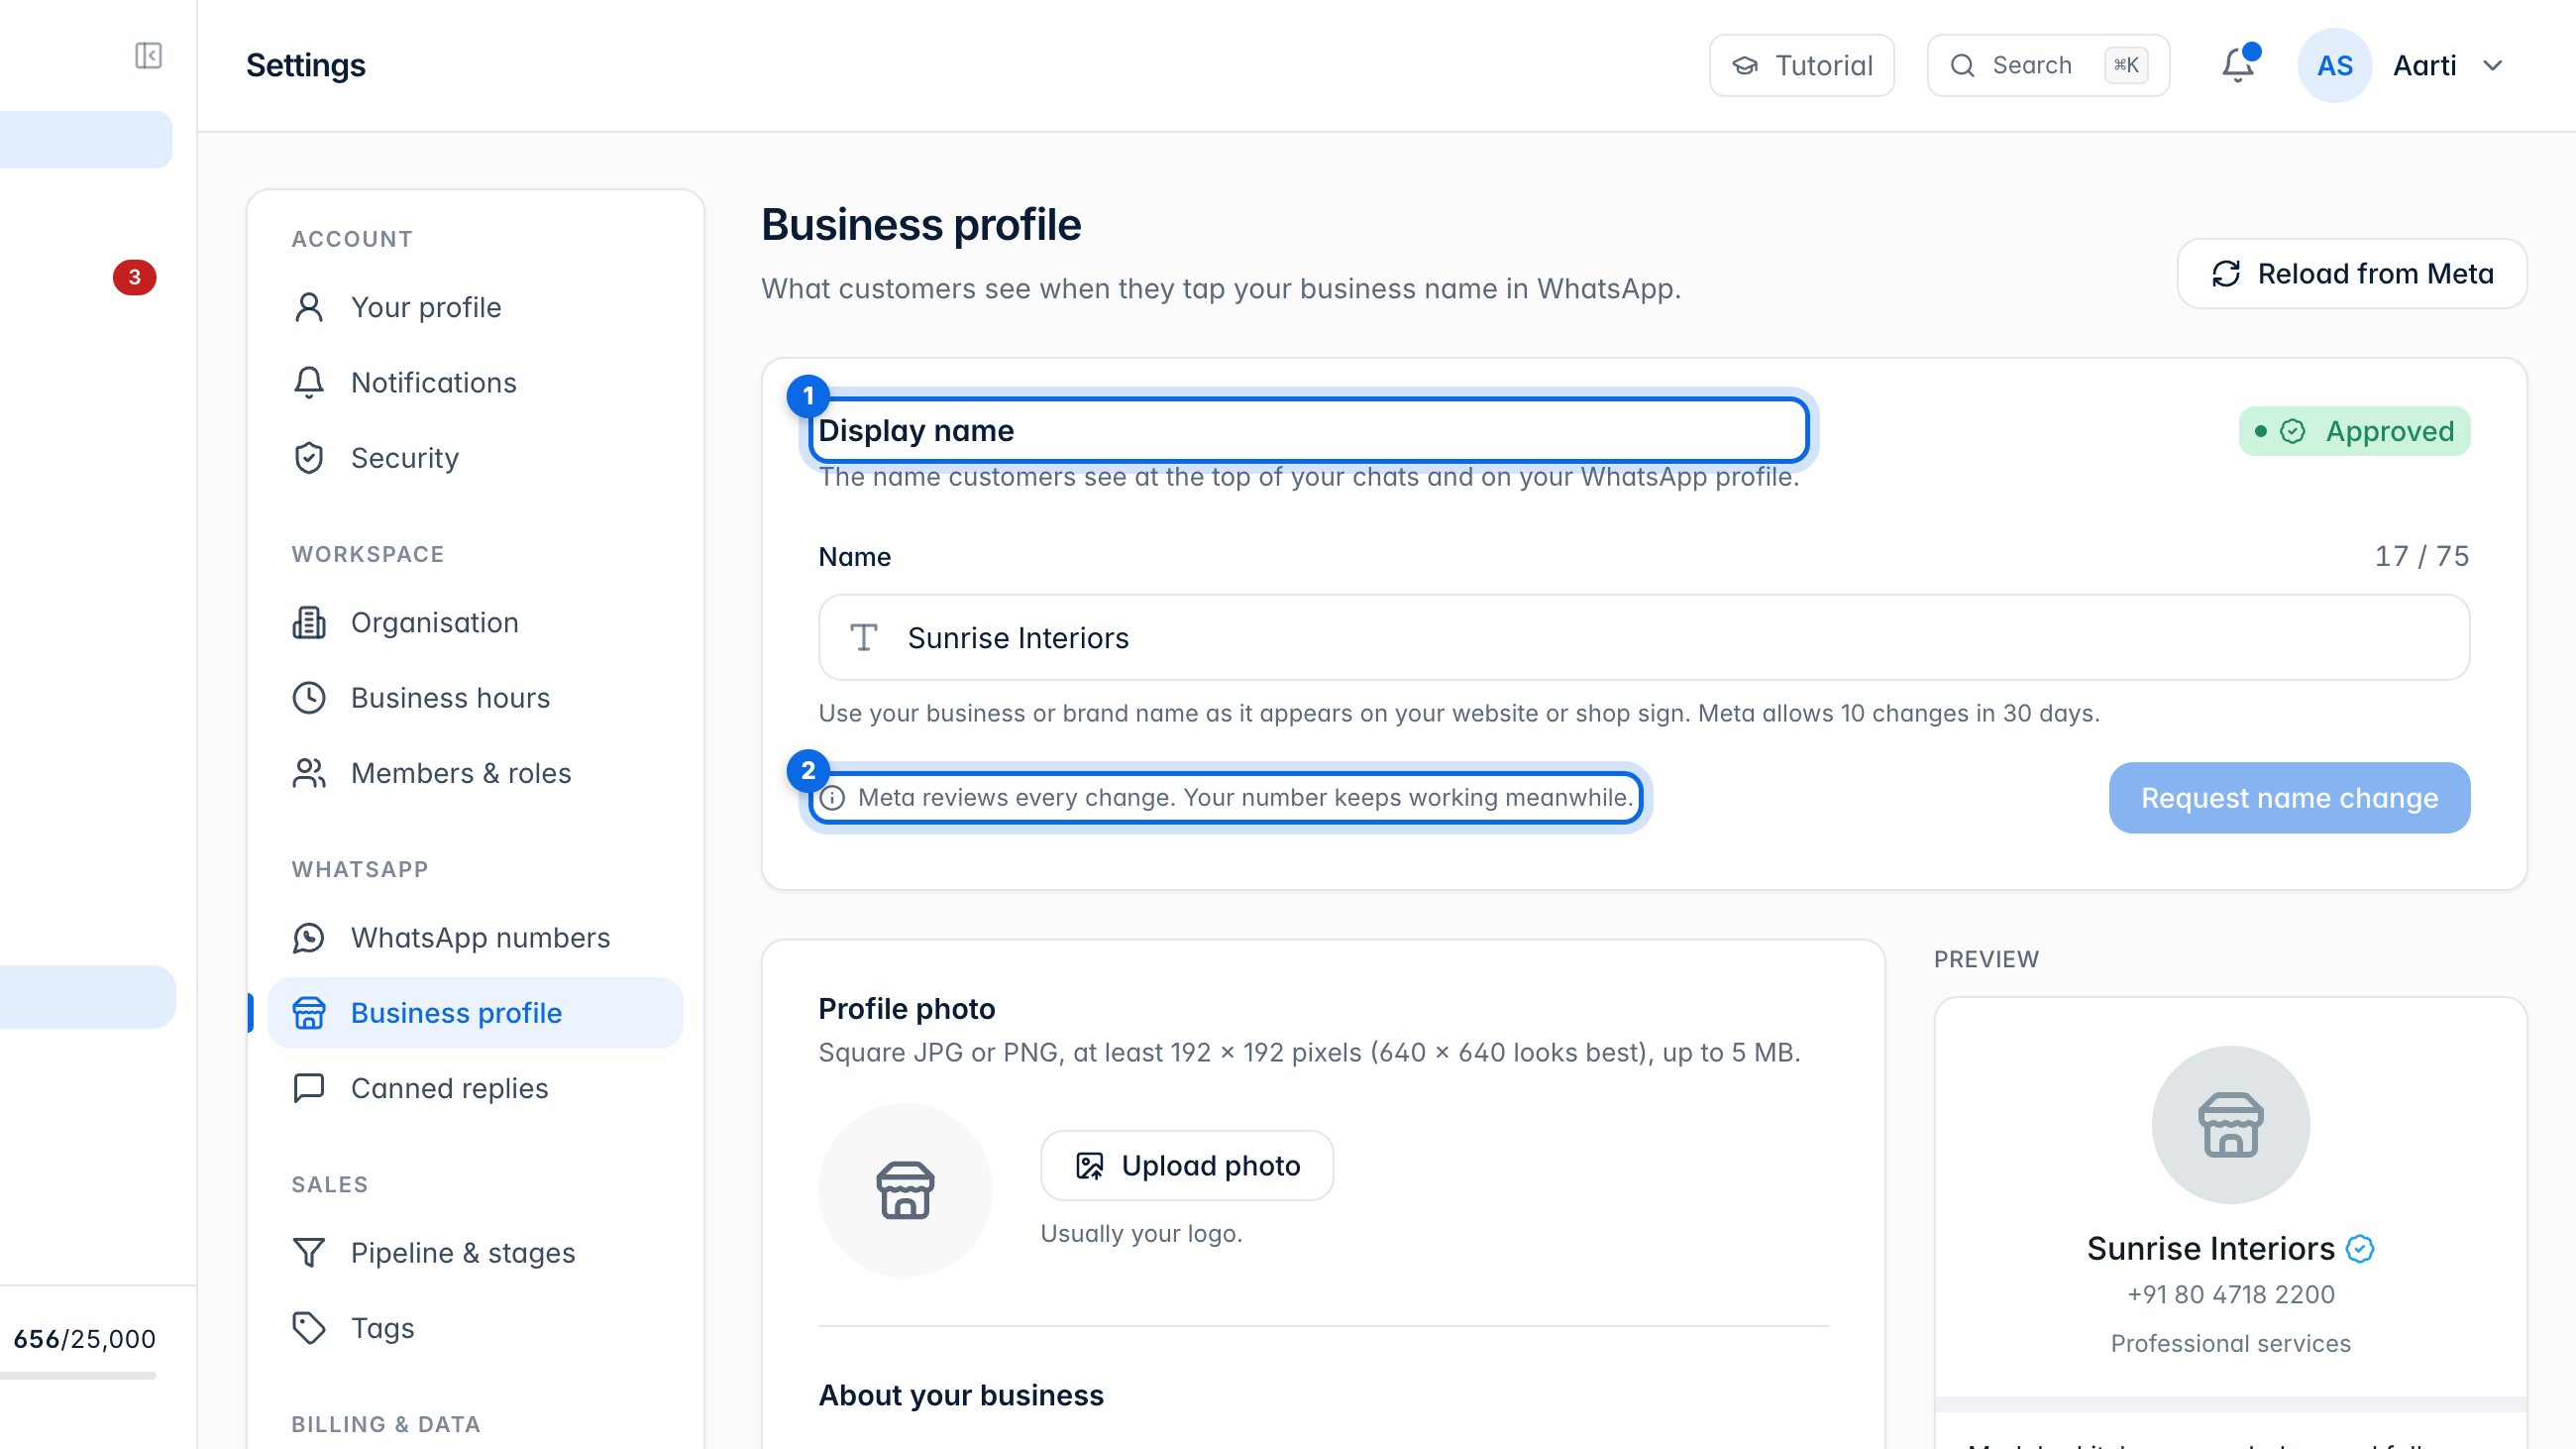
Business profile is what customers see when they tap your name: your display name (1), photo and details. Meta reviews every change (2), and your number keeps working meanwhile.
5. Canned replies
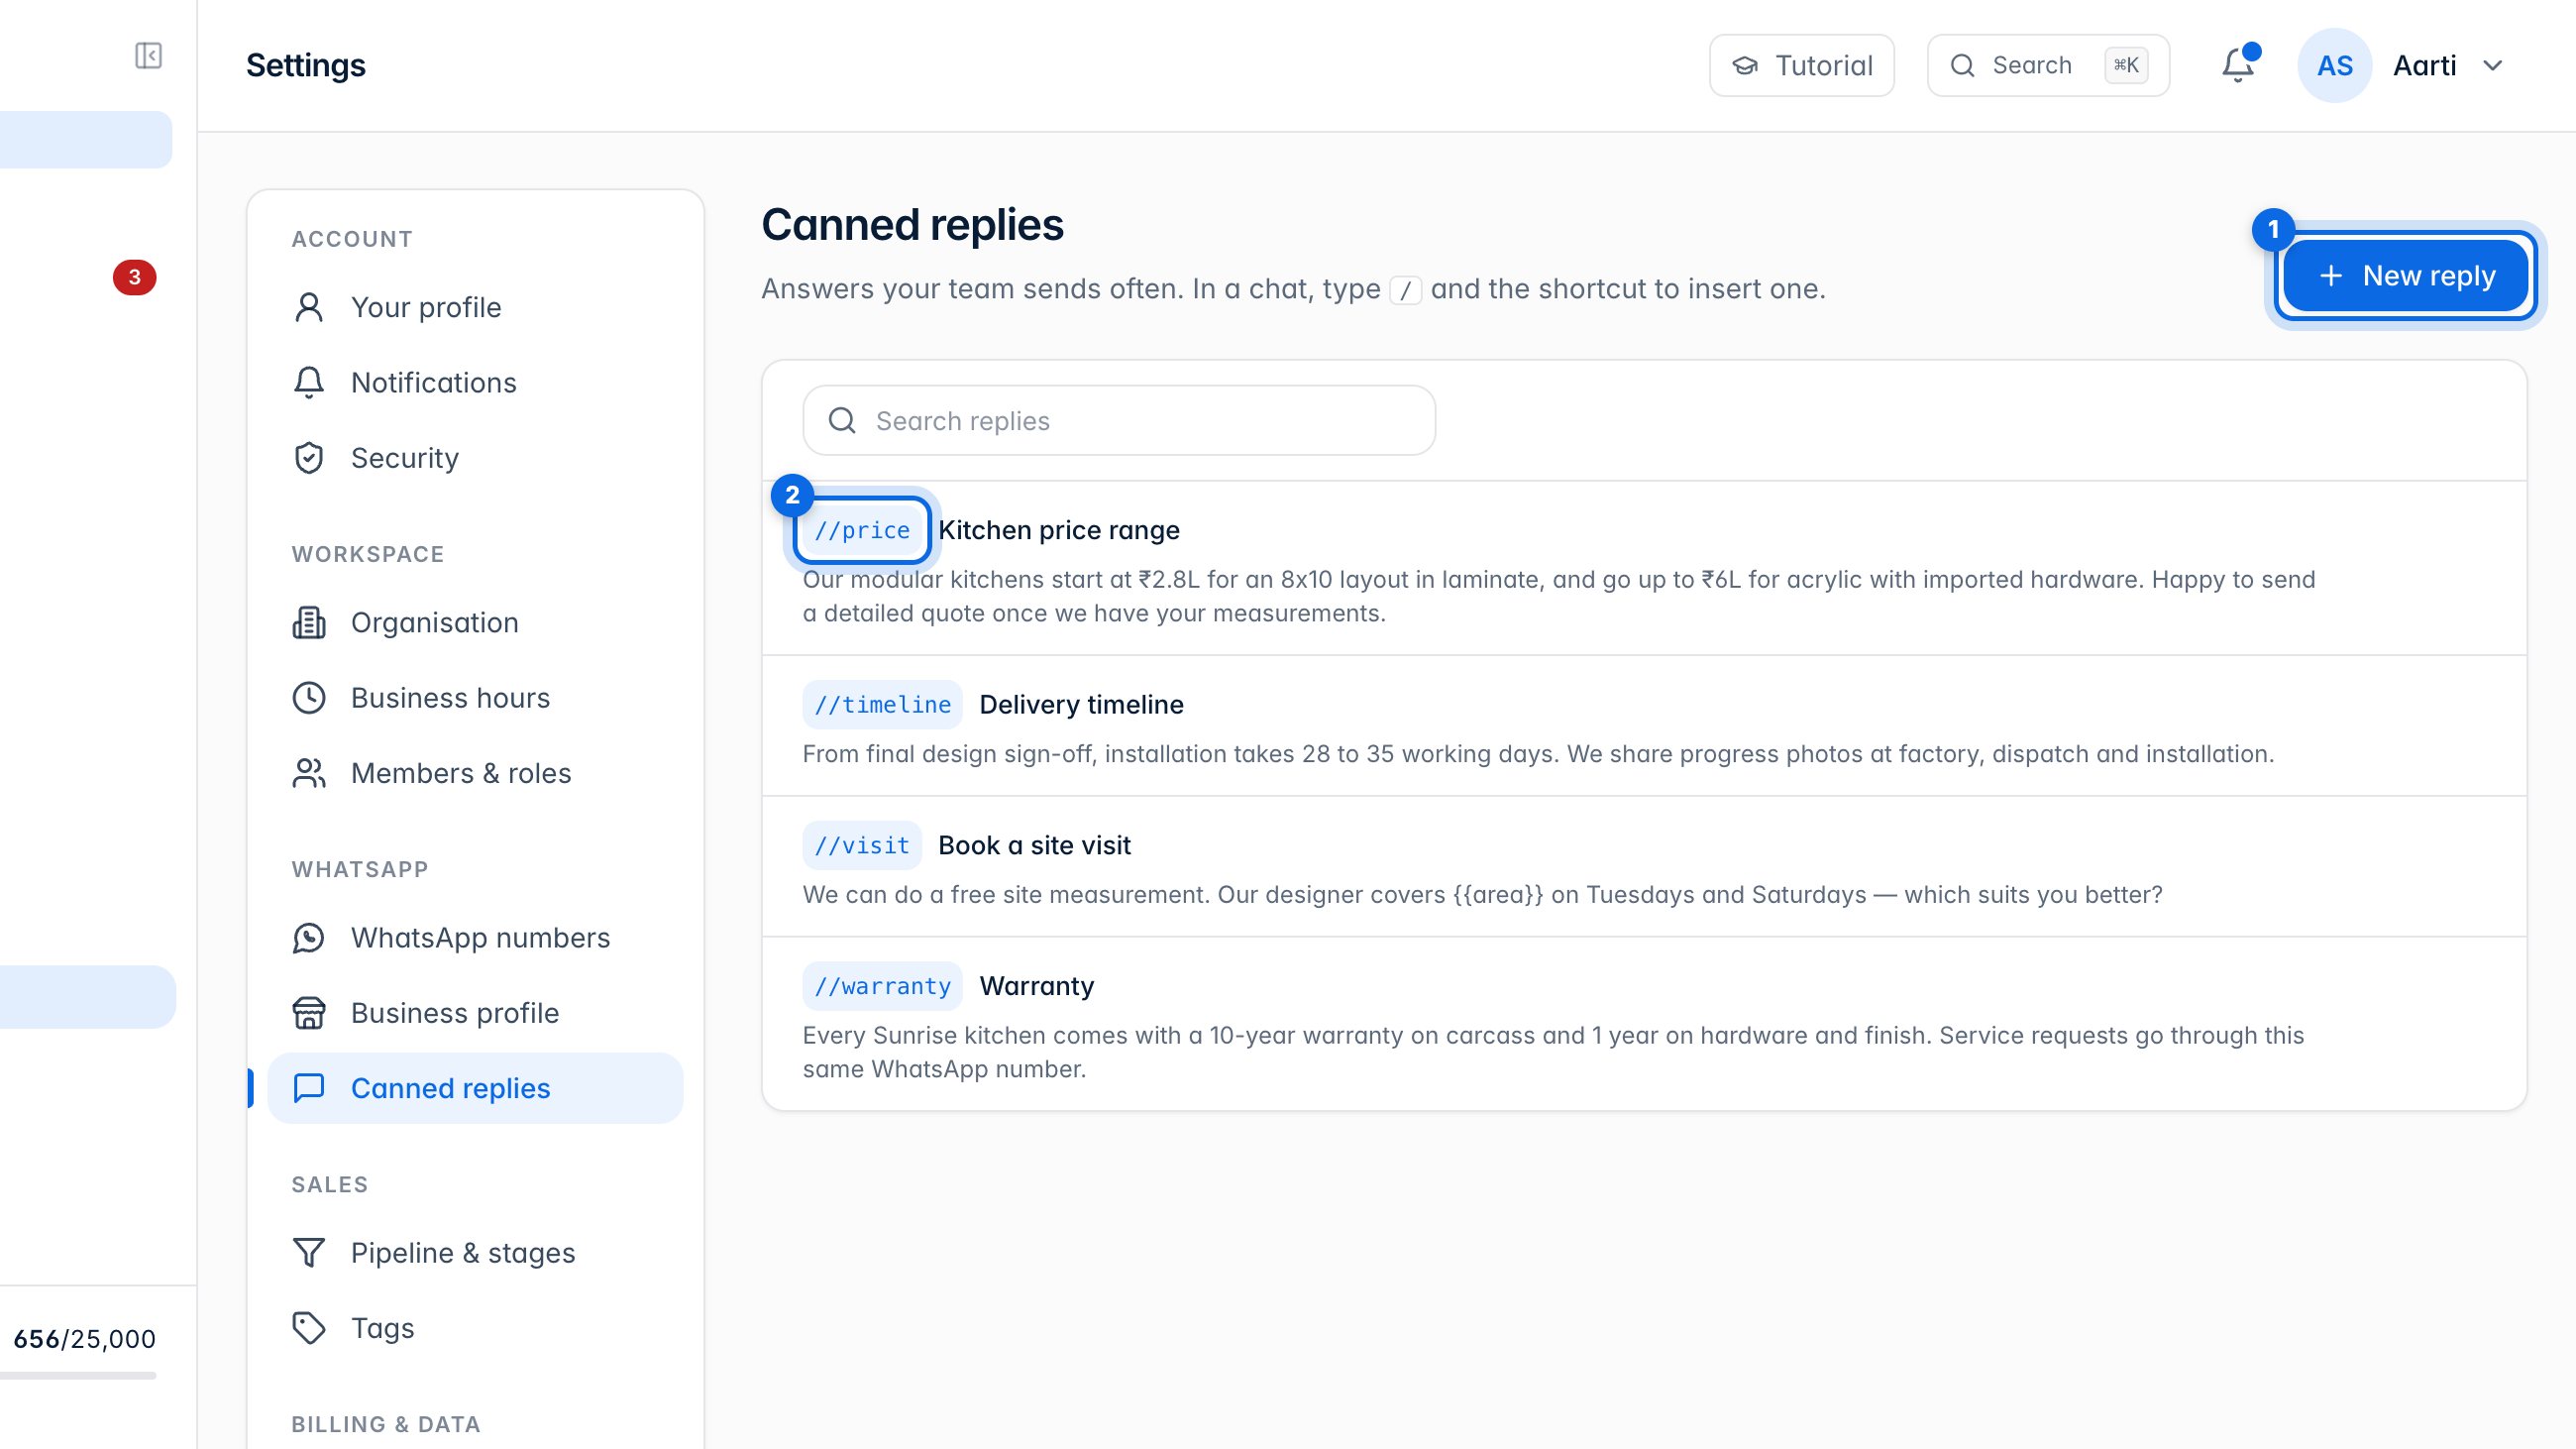
Canned replies are answers your team sends often. In a chat, type / and the shortcut (2) to insert one. New reply (1) adds another.
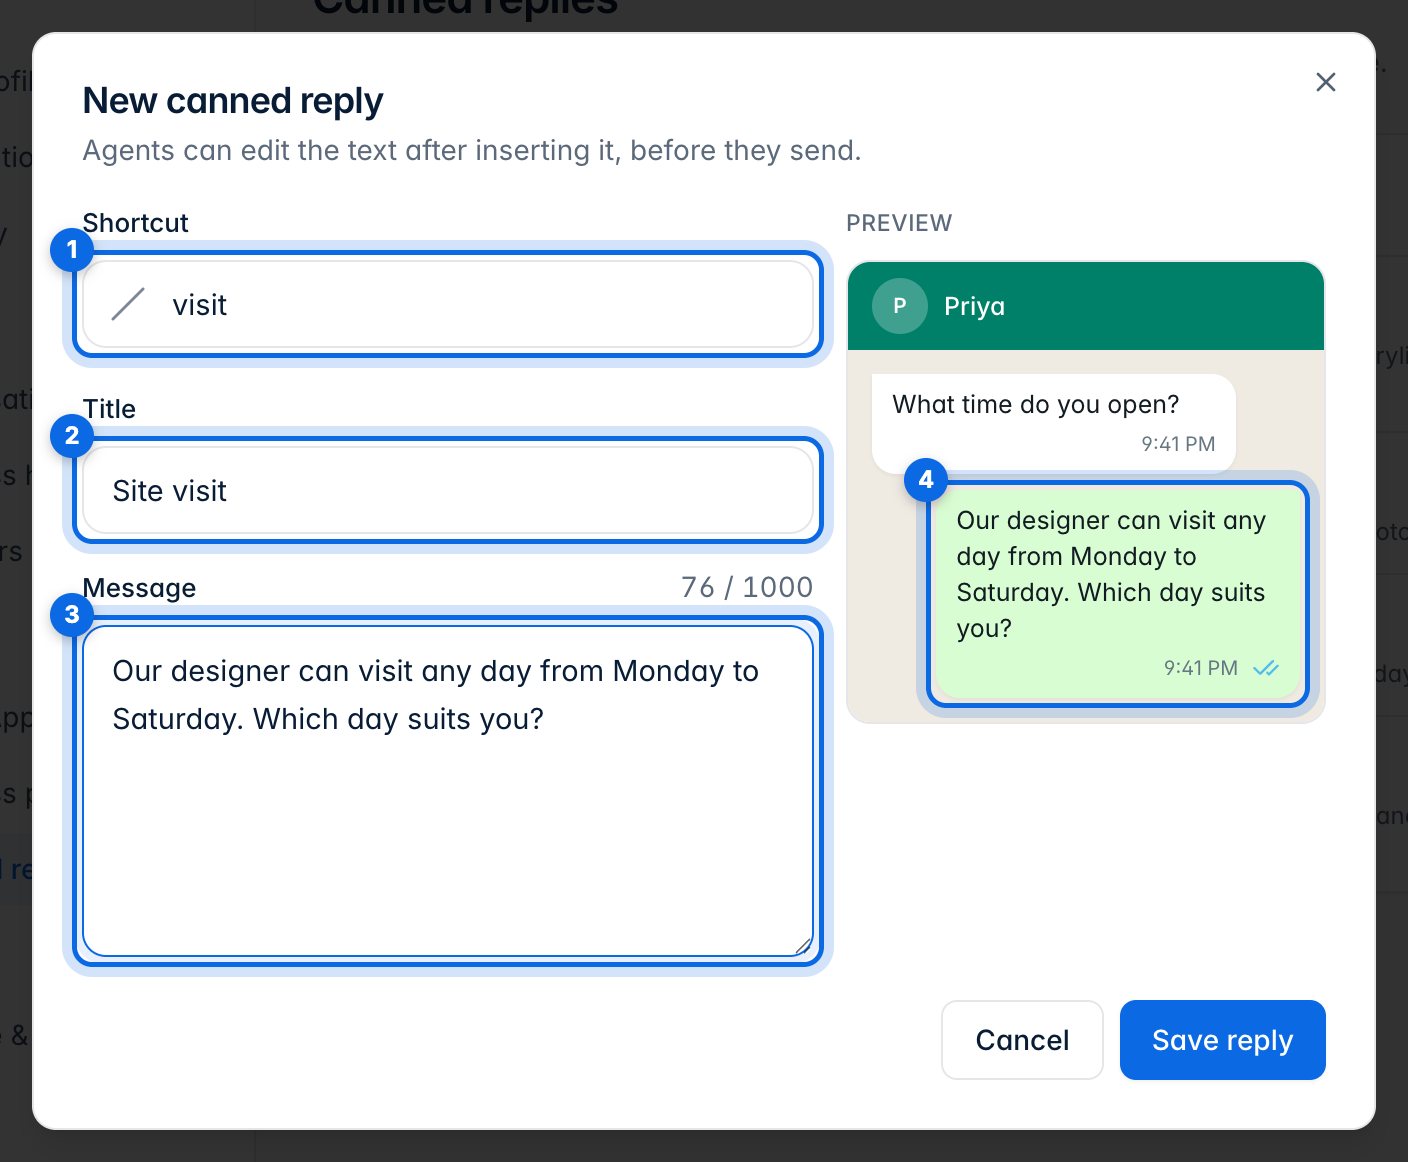
Give it a shortcut (1), a title (2) and the message (3). The preview (4) shows how it reads.
6. Pipeline stages and tags
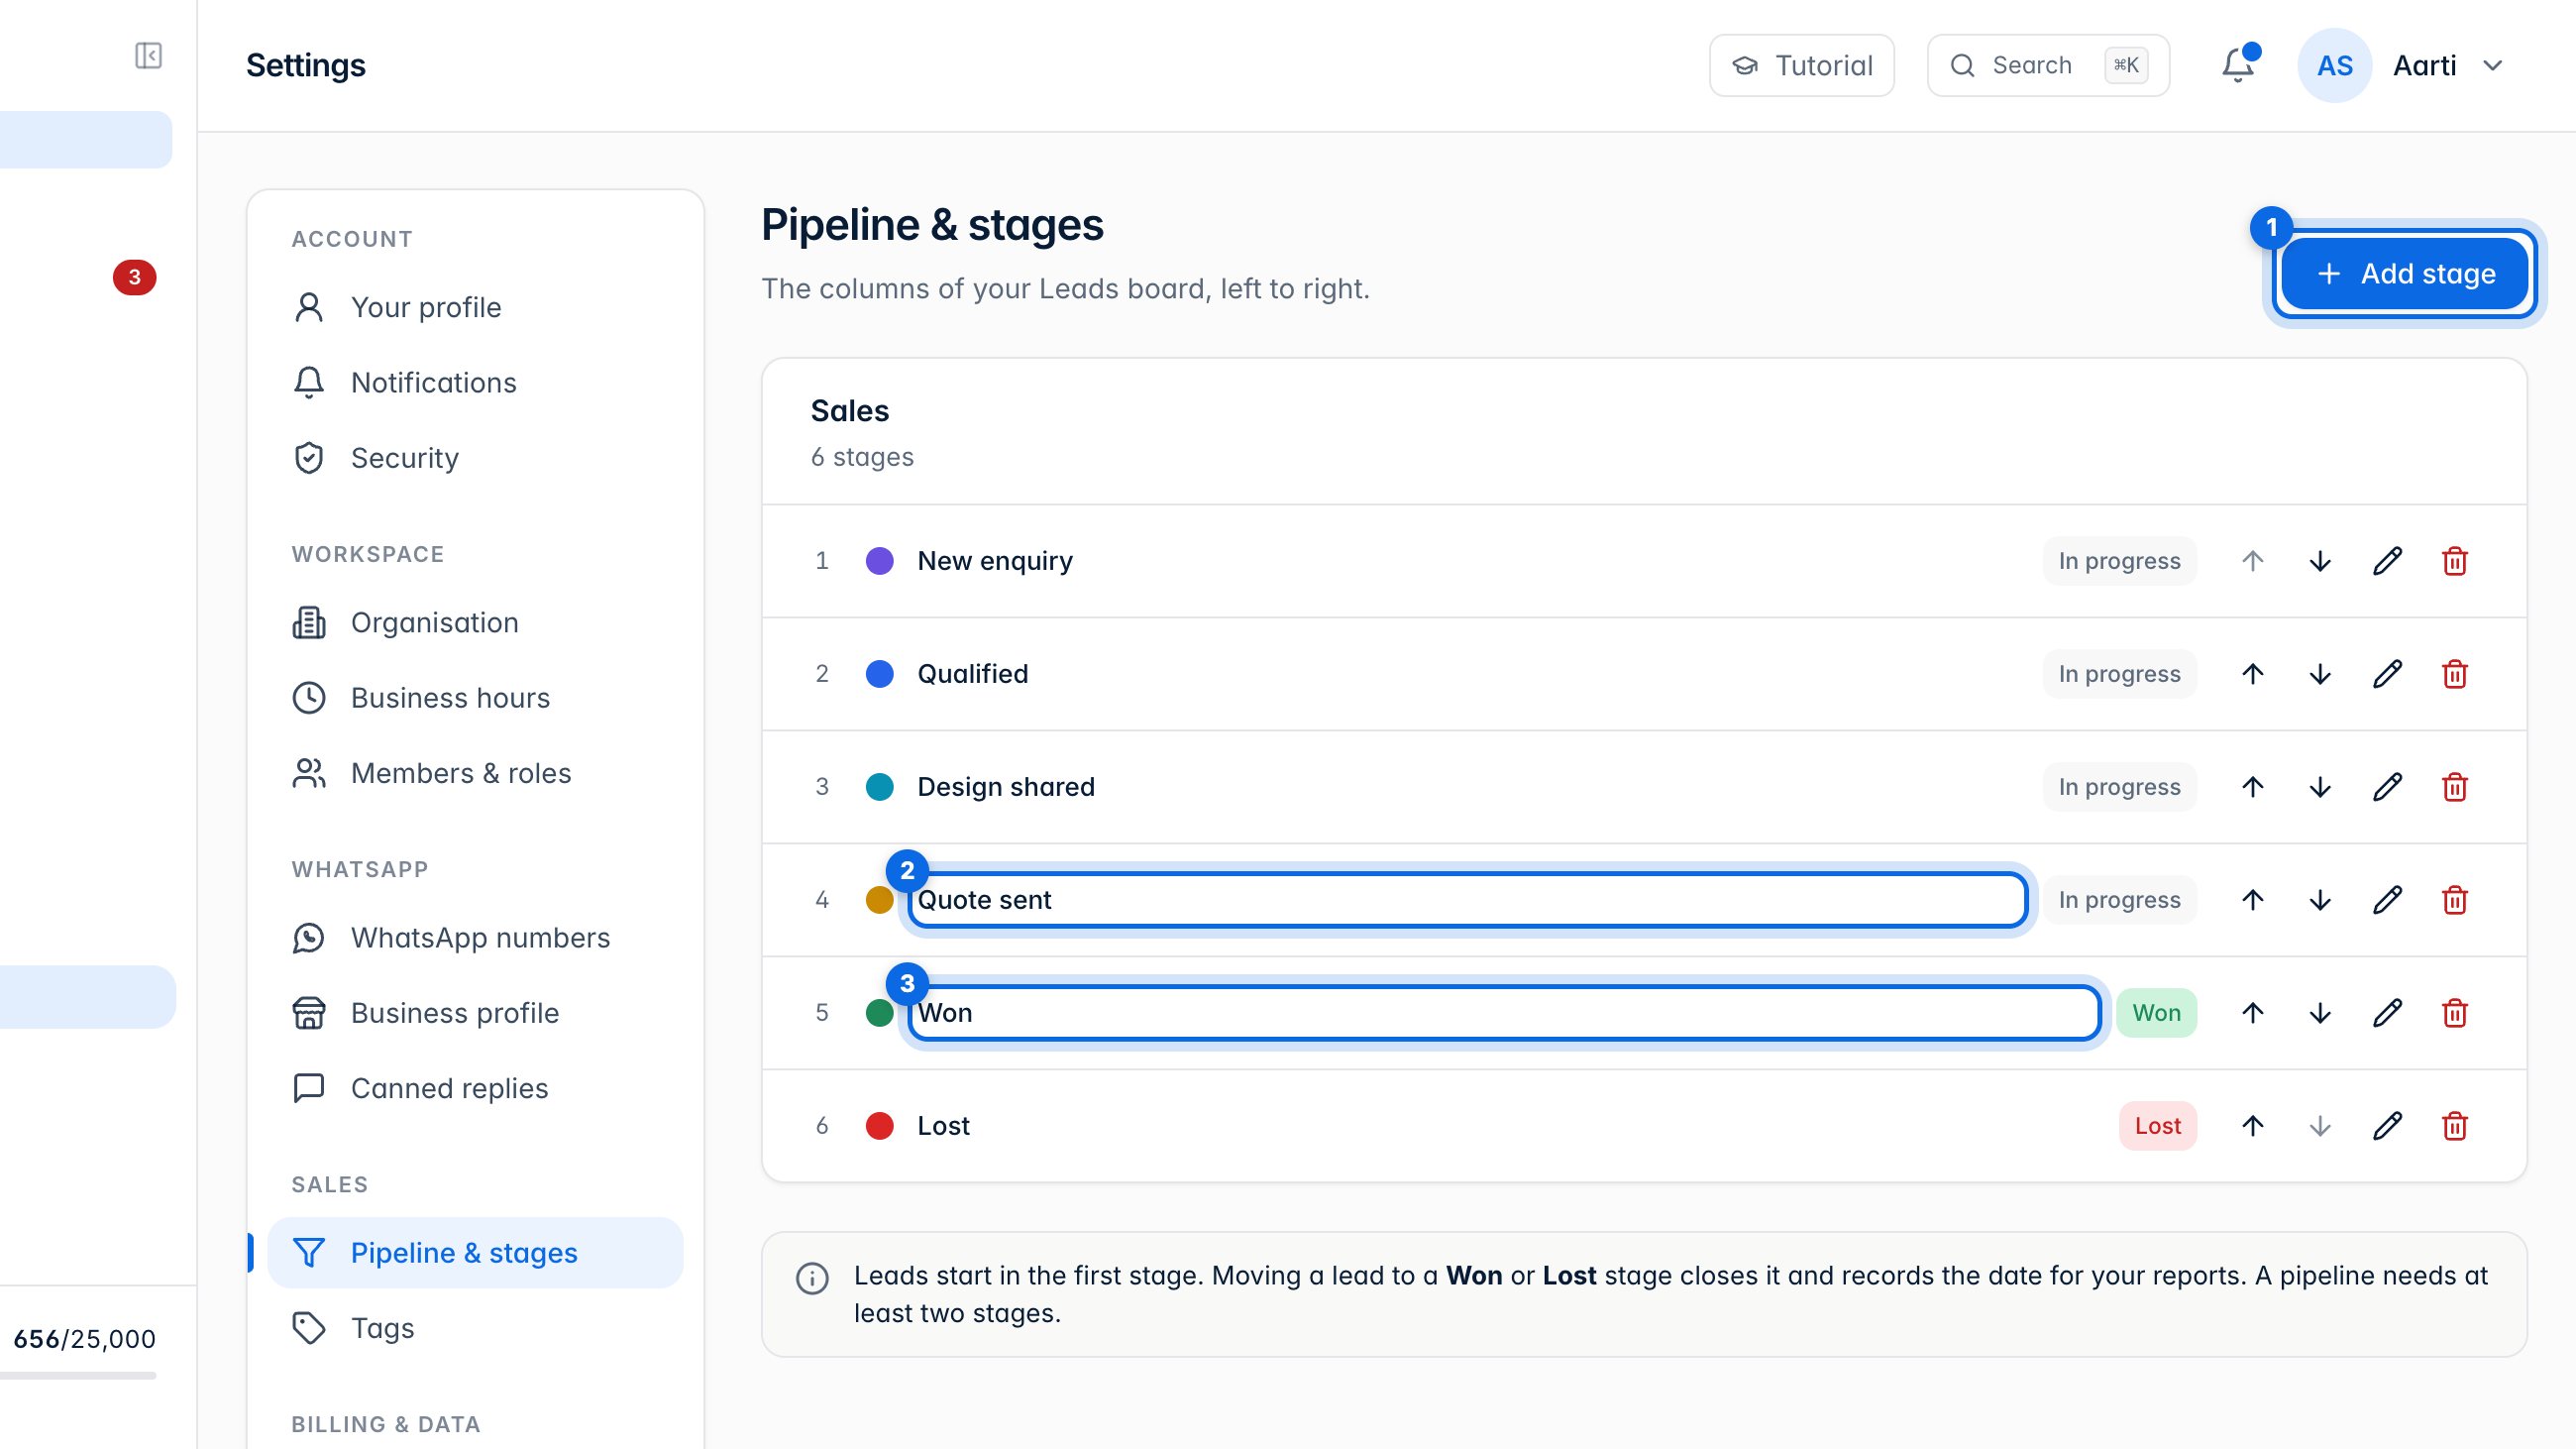
Pipeline & stages are the columns of your Leads board, left to right. Add stage (1) adds one; move stages with the arrows. Moving a lead to a Won (3) or Lost stage closes it.
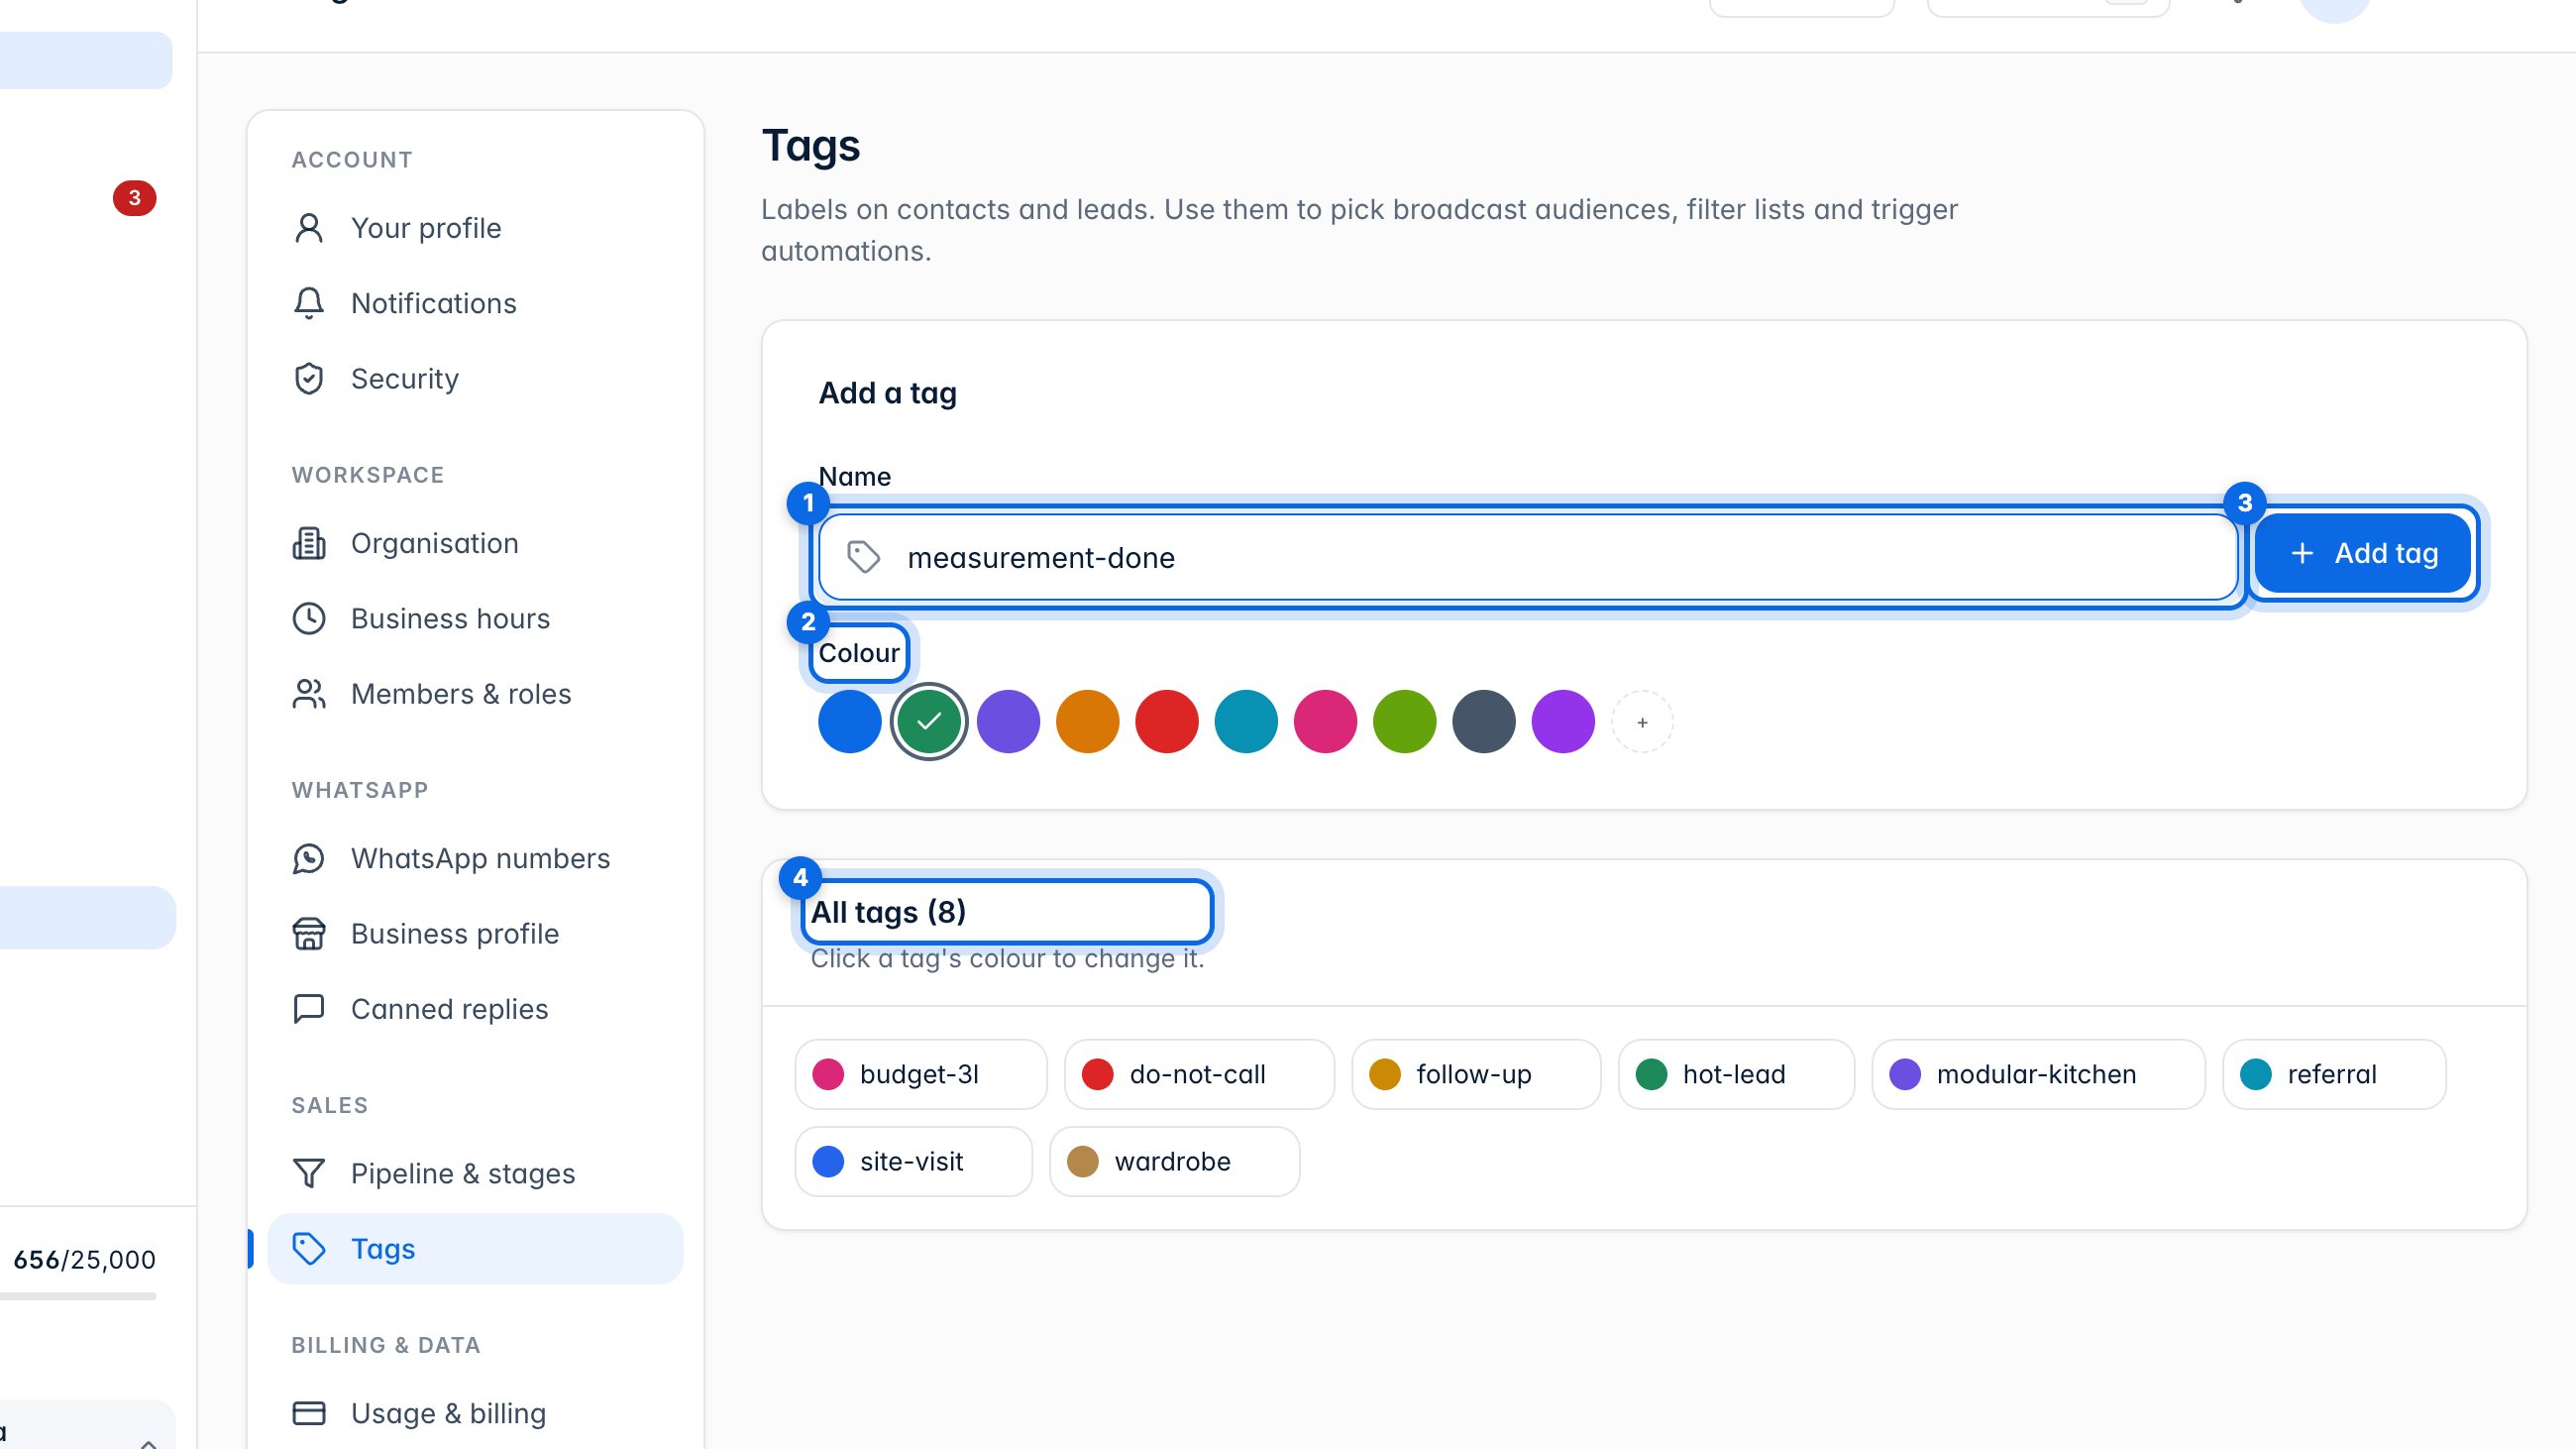
Tags label contacts and leads, for broadcast audiences, filters and automations. Name a tag (1), pick a colour (2) and click Add tag (3). All your tags are listed below (4).
7. Plan and usage
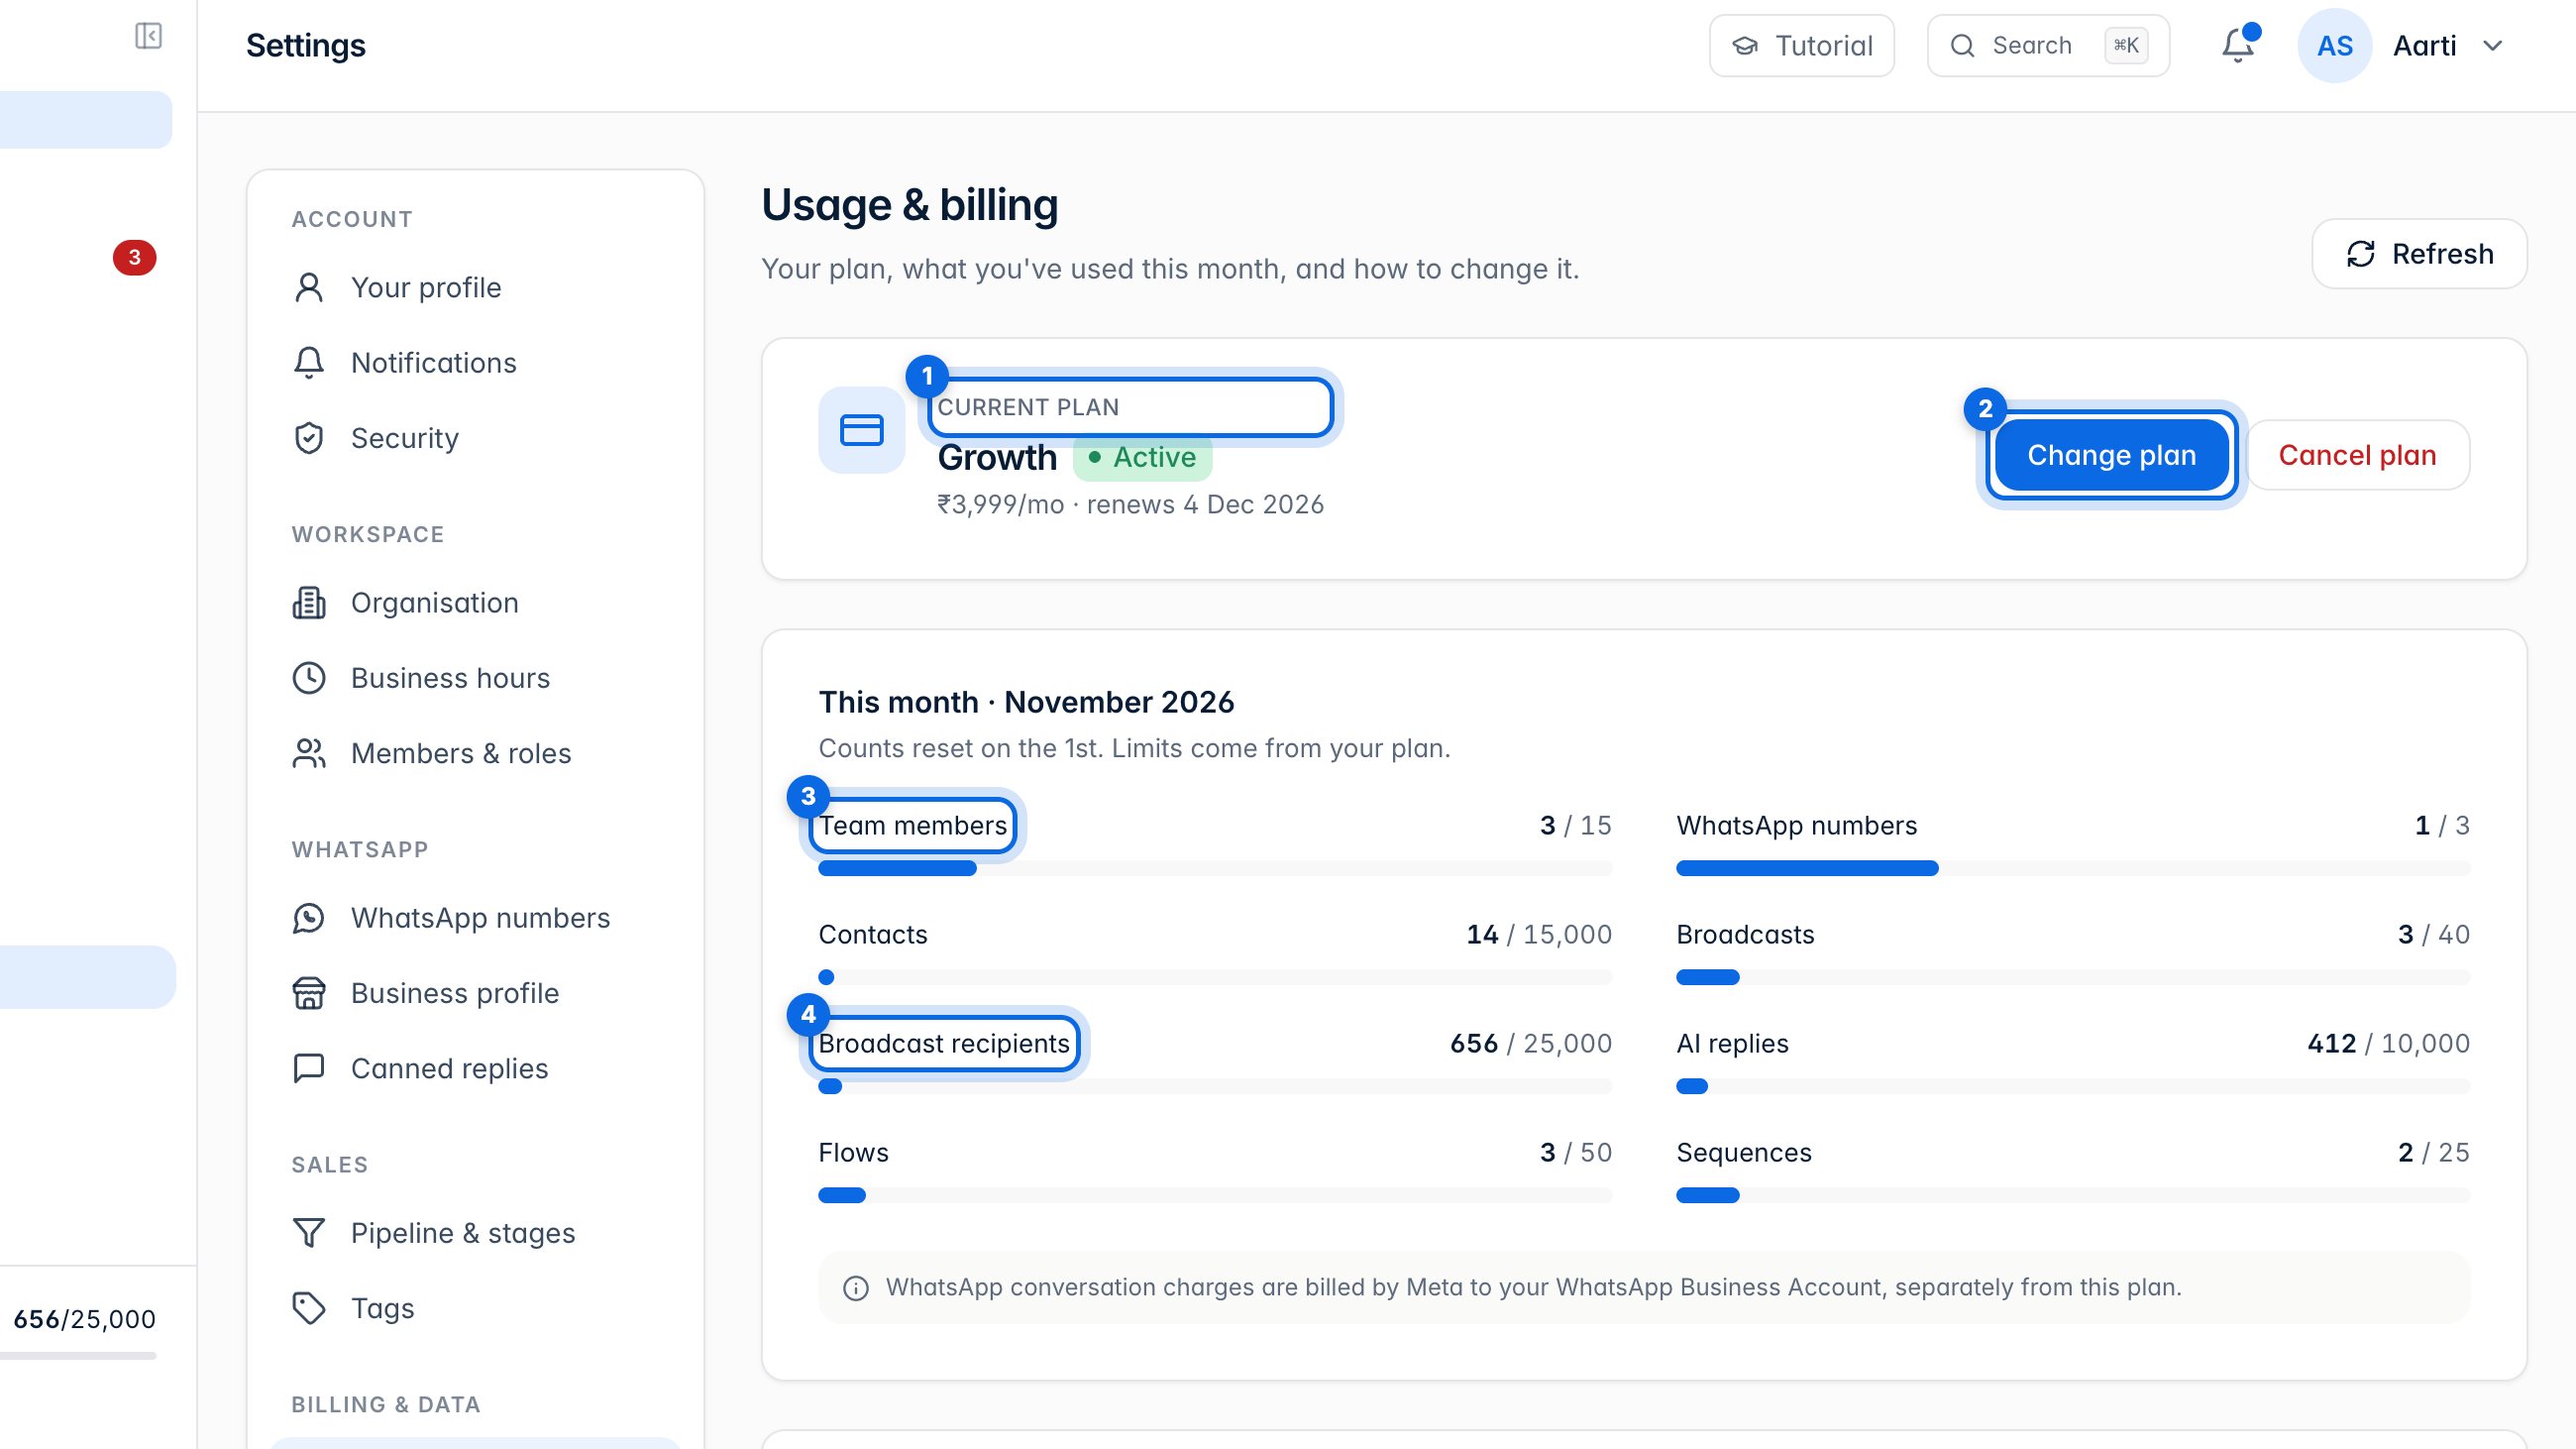
Usage & billing shows your plan (1) and lets you change it (2). Below, see how much you've used this month, like team members (3) and broadcast recipients (4). Counts reset on the 1st.
8. Security and your data
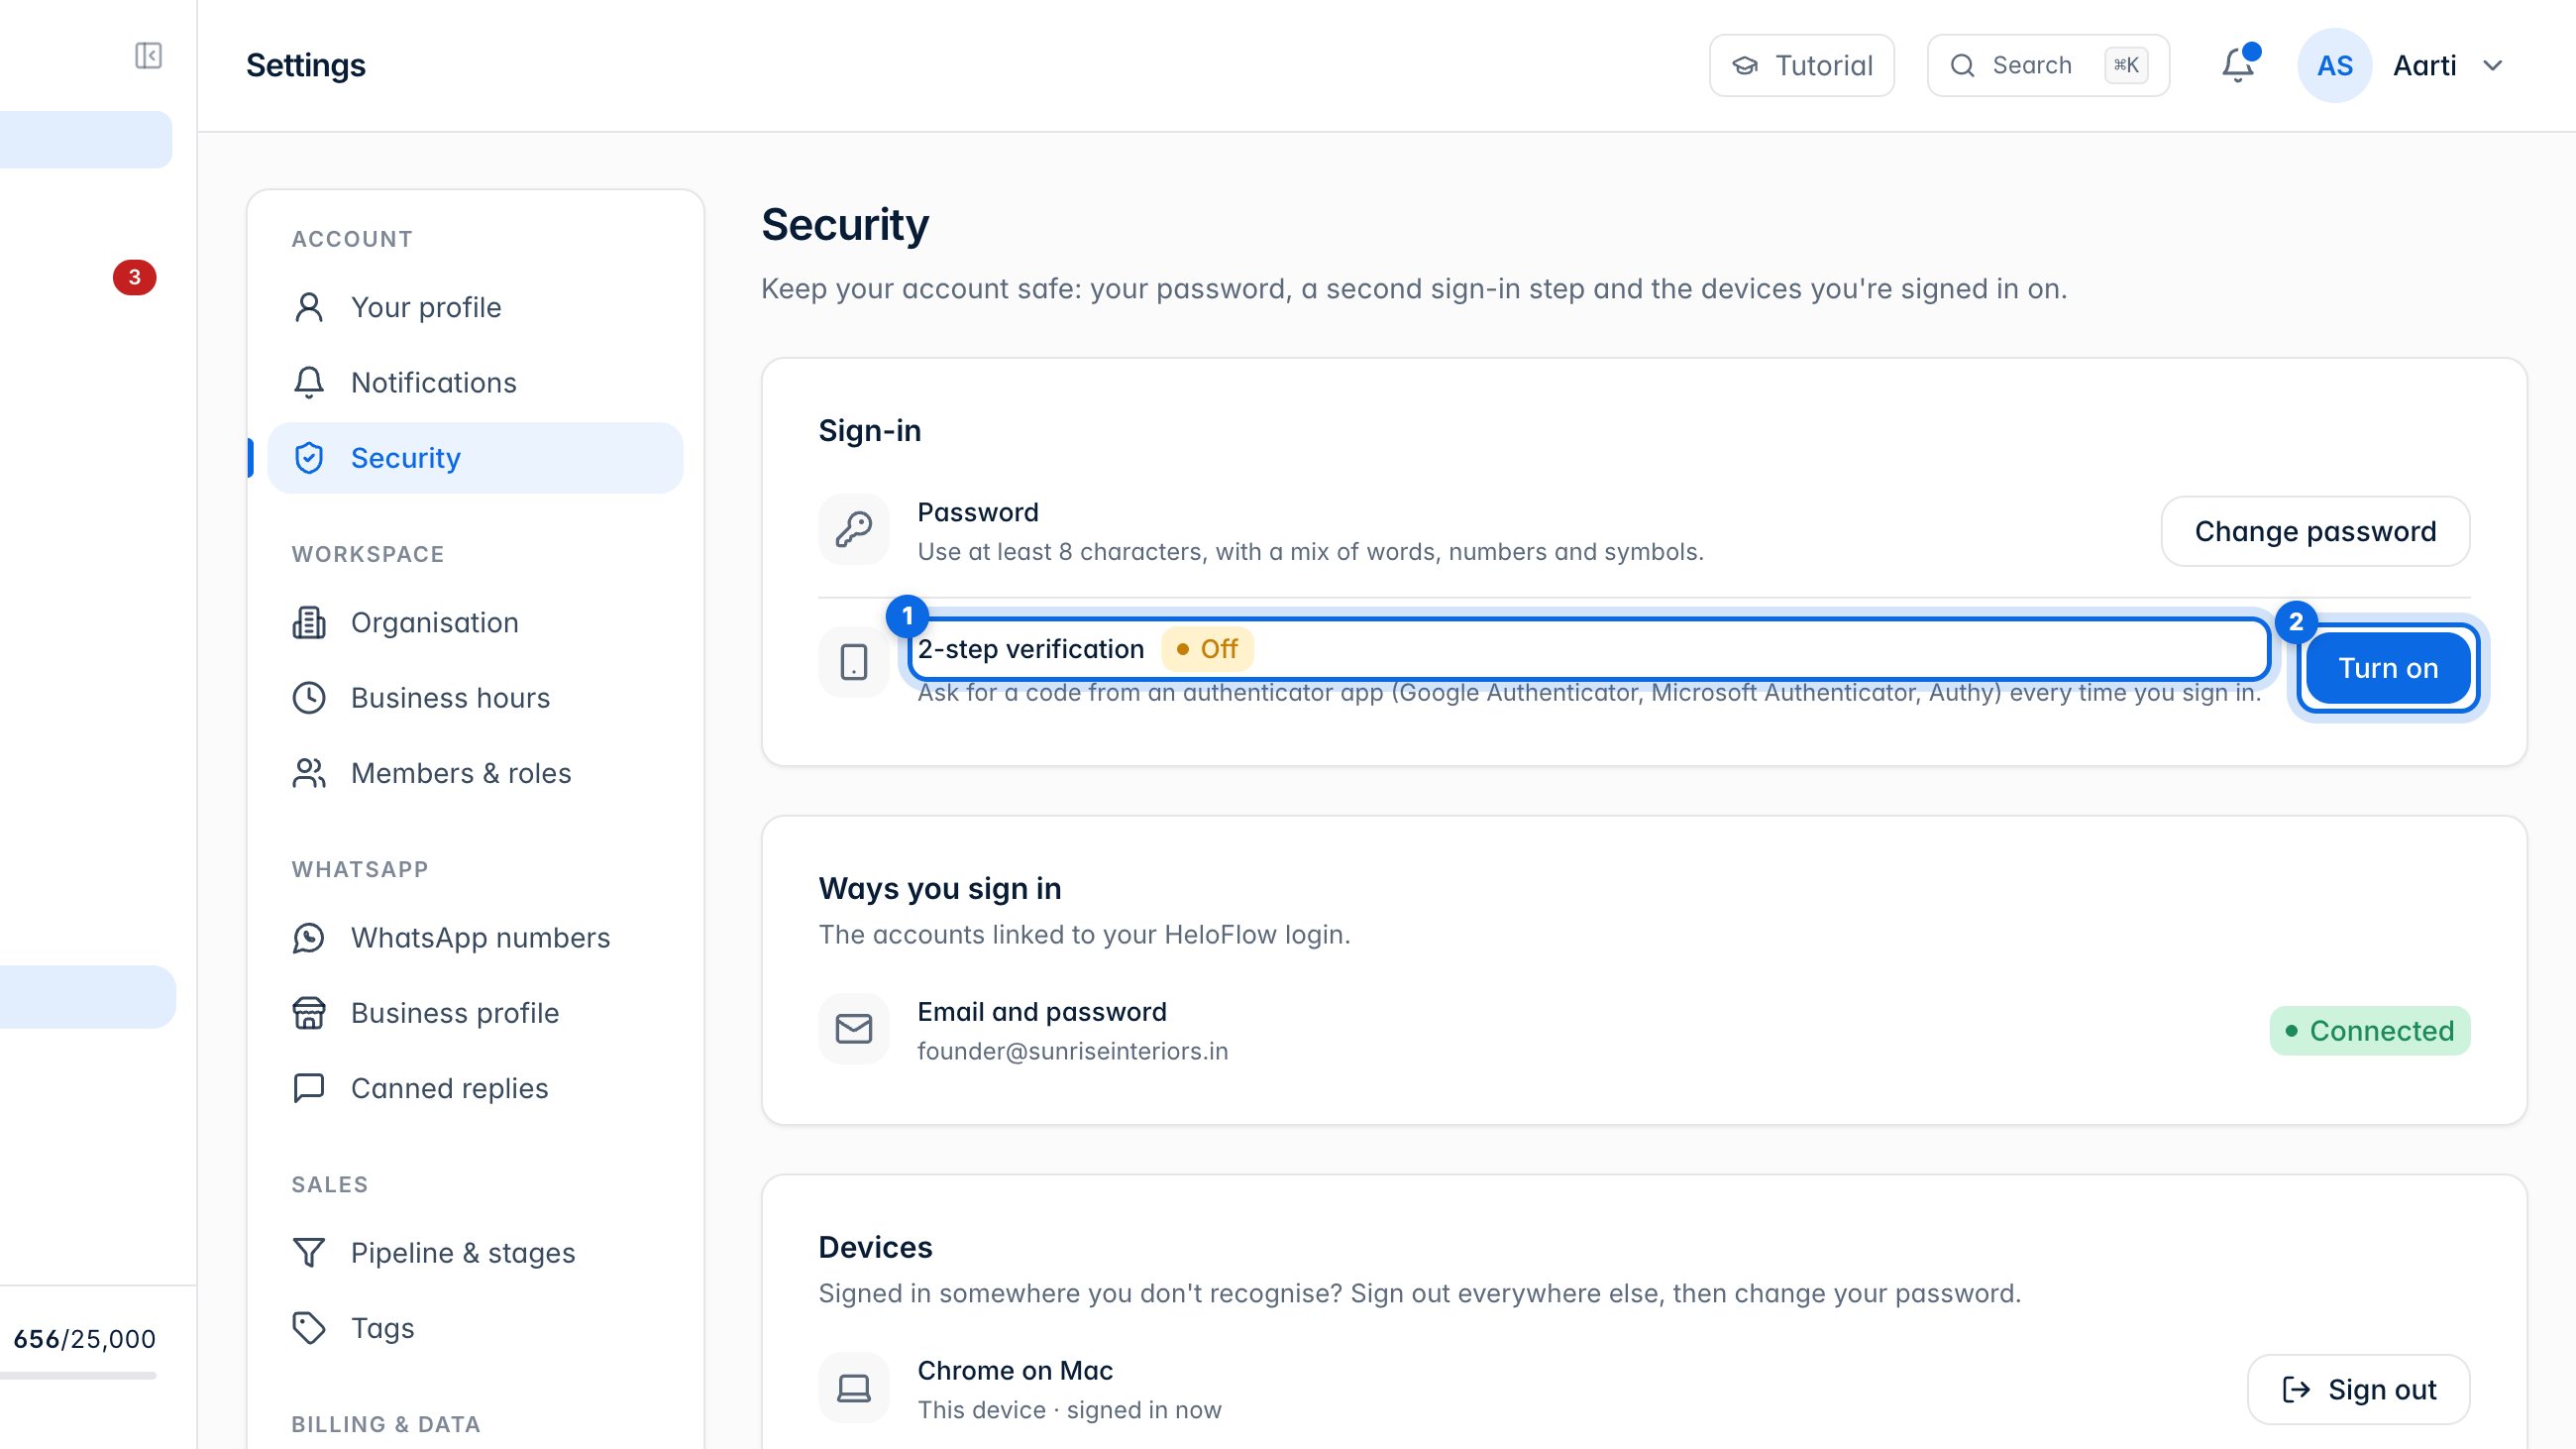
In Security, turn on 2-step verification (1, 2) so signing in also needs a code from an authenticator app.
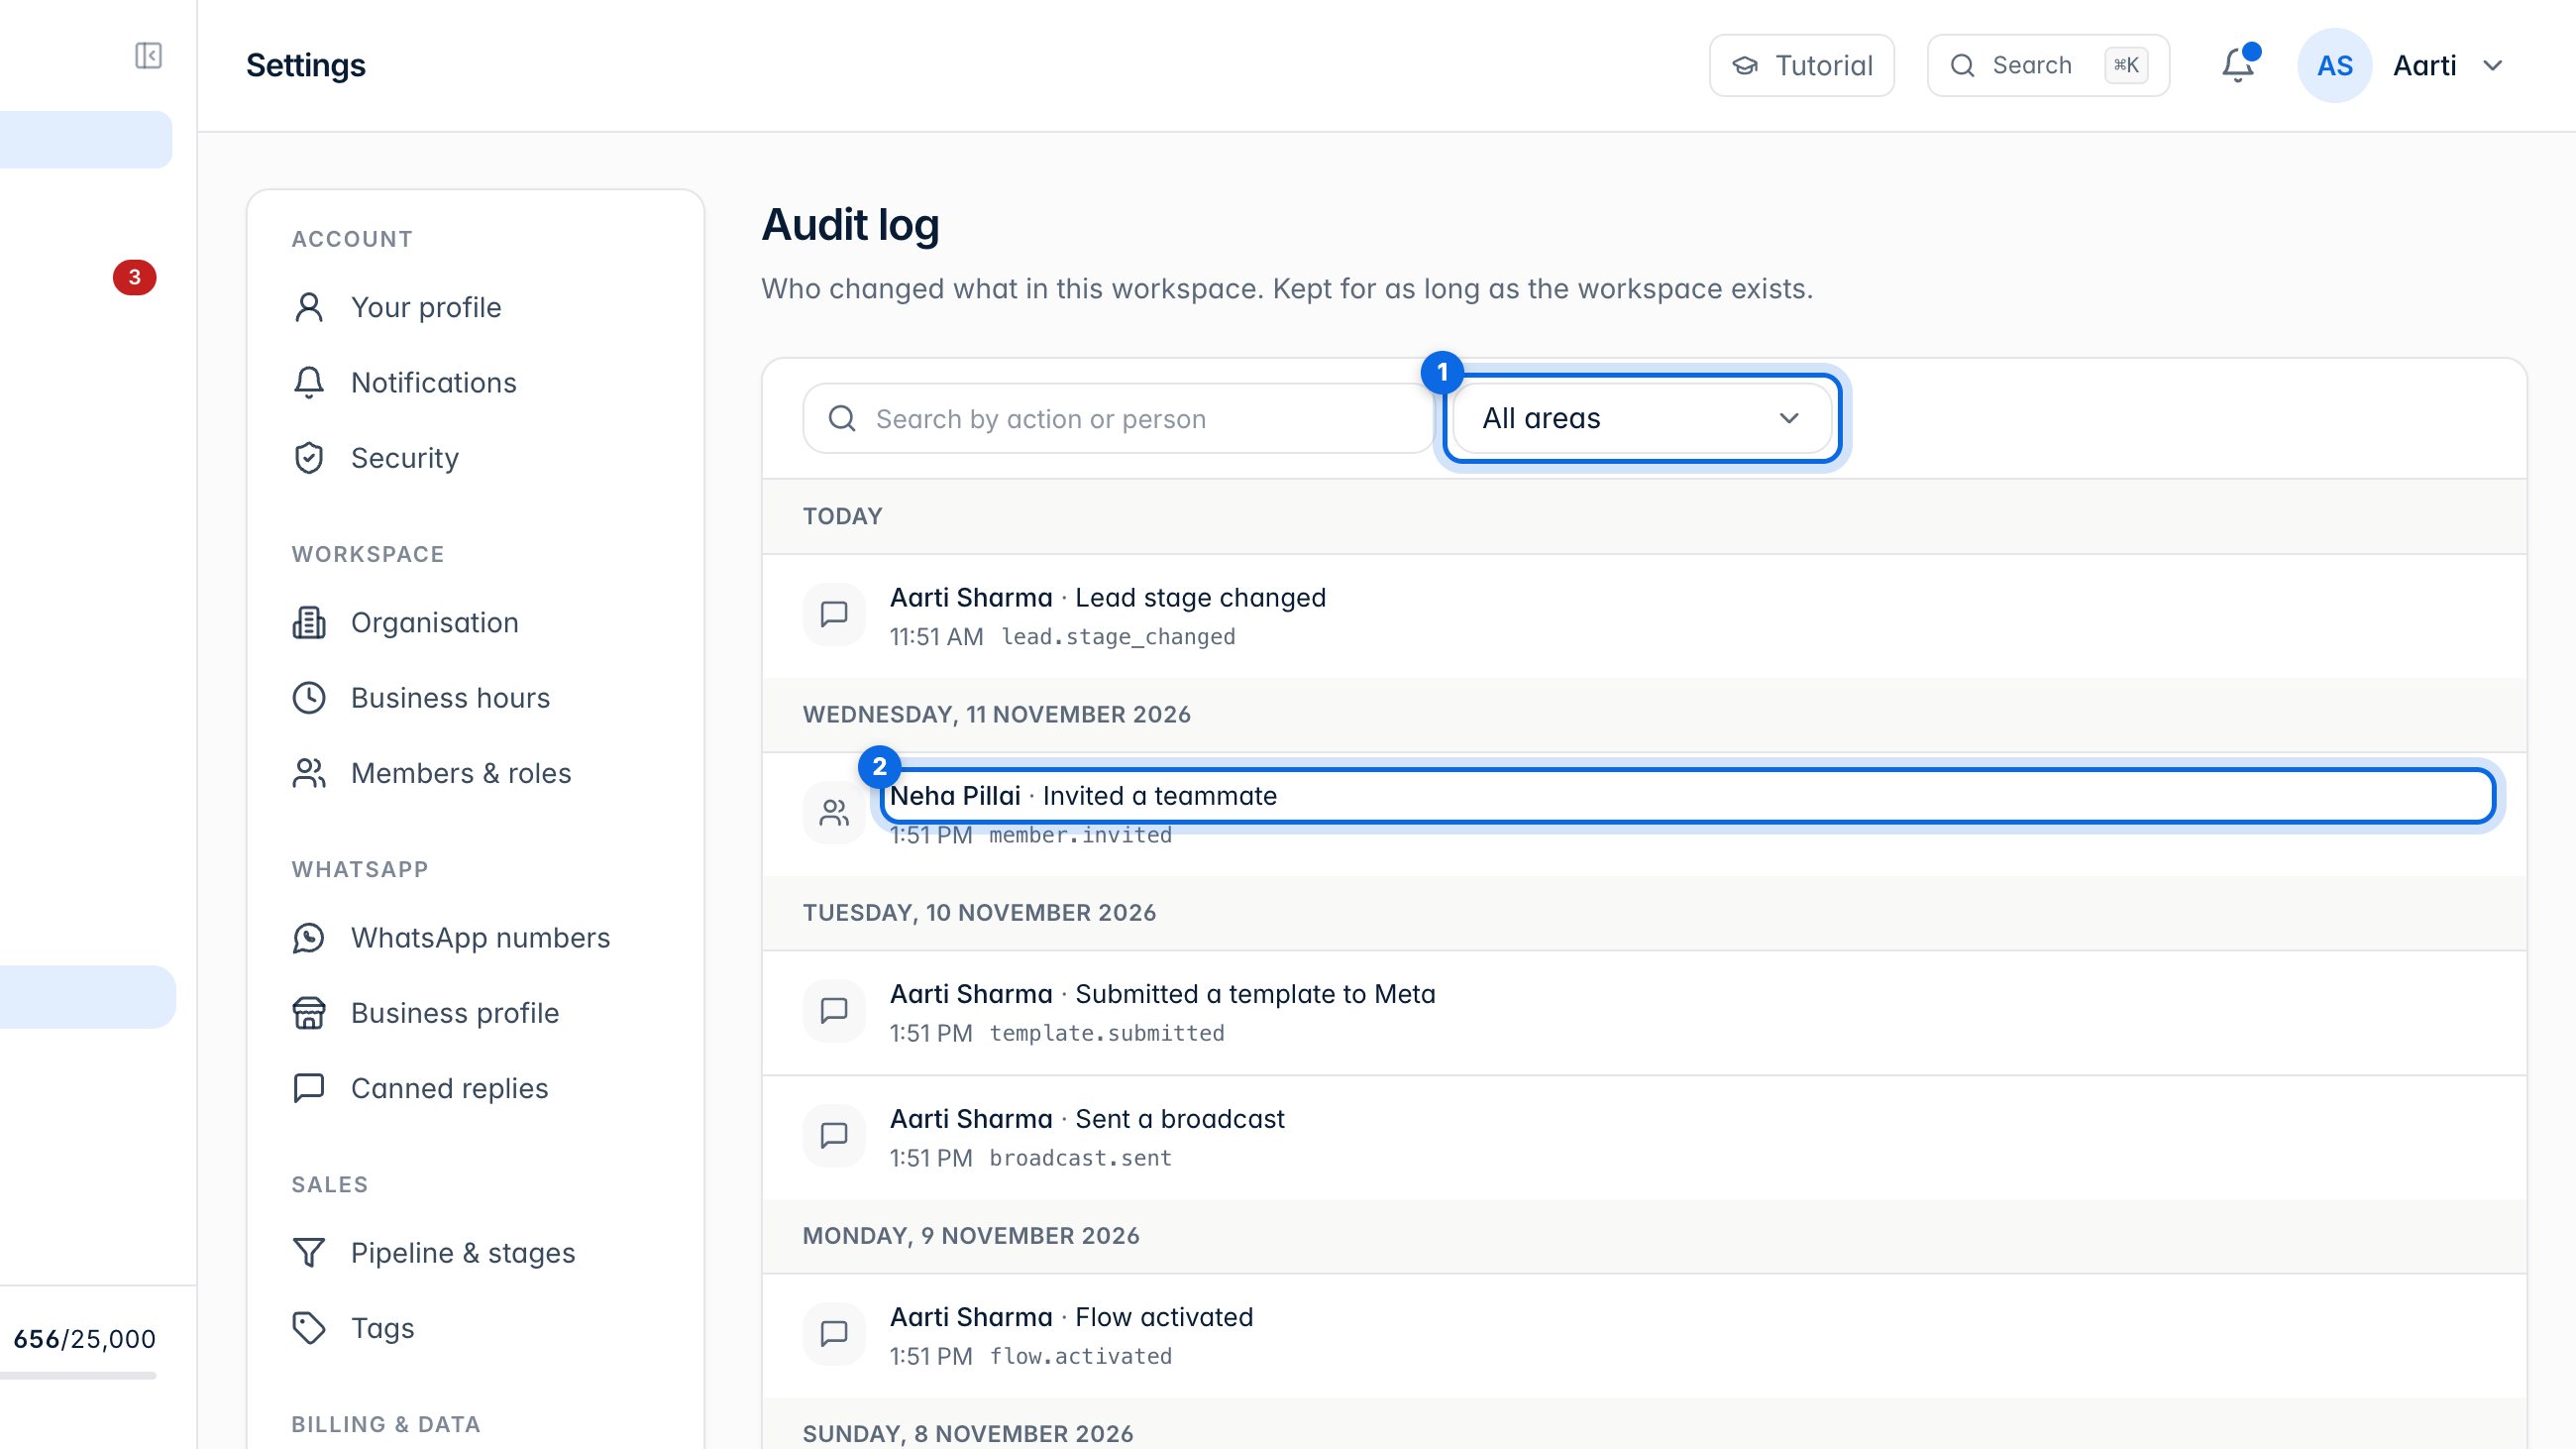
The Audit log shows who changed what. Filter it by area (1); each entry (2) names the person and the change.
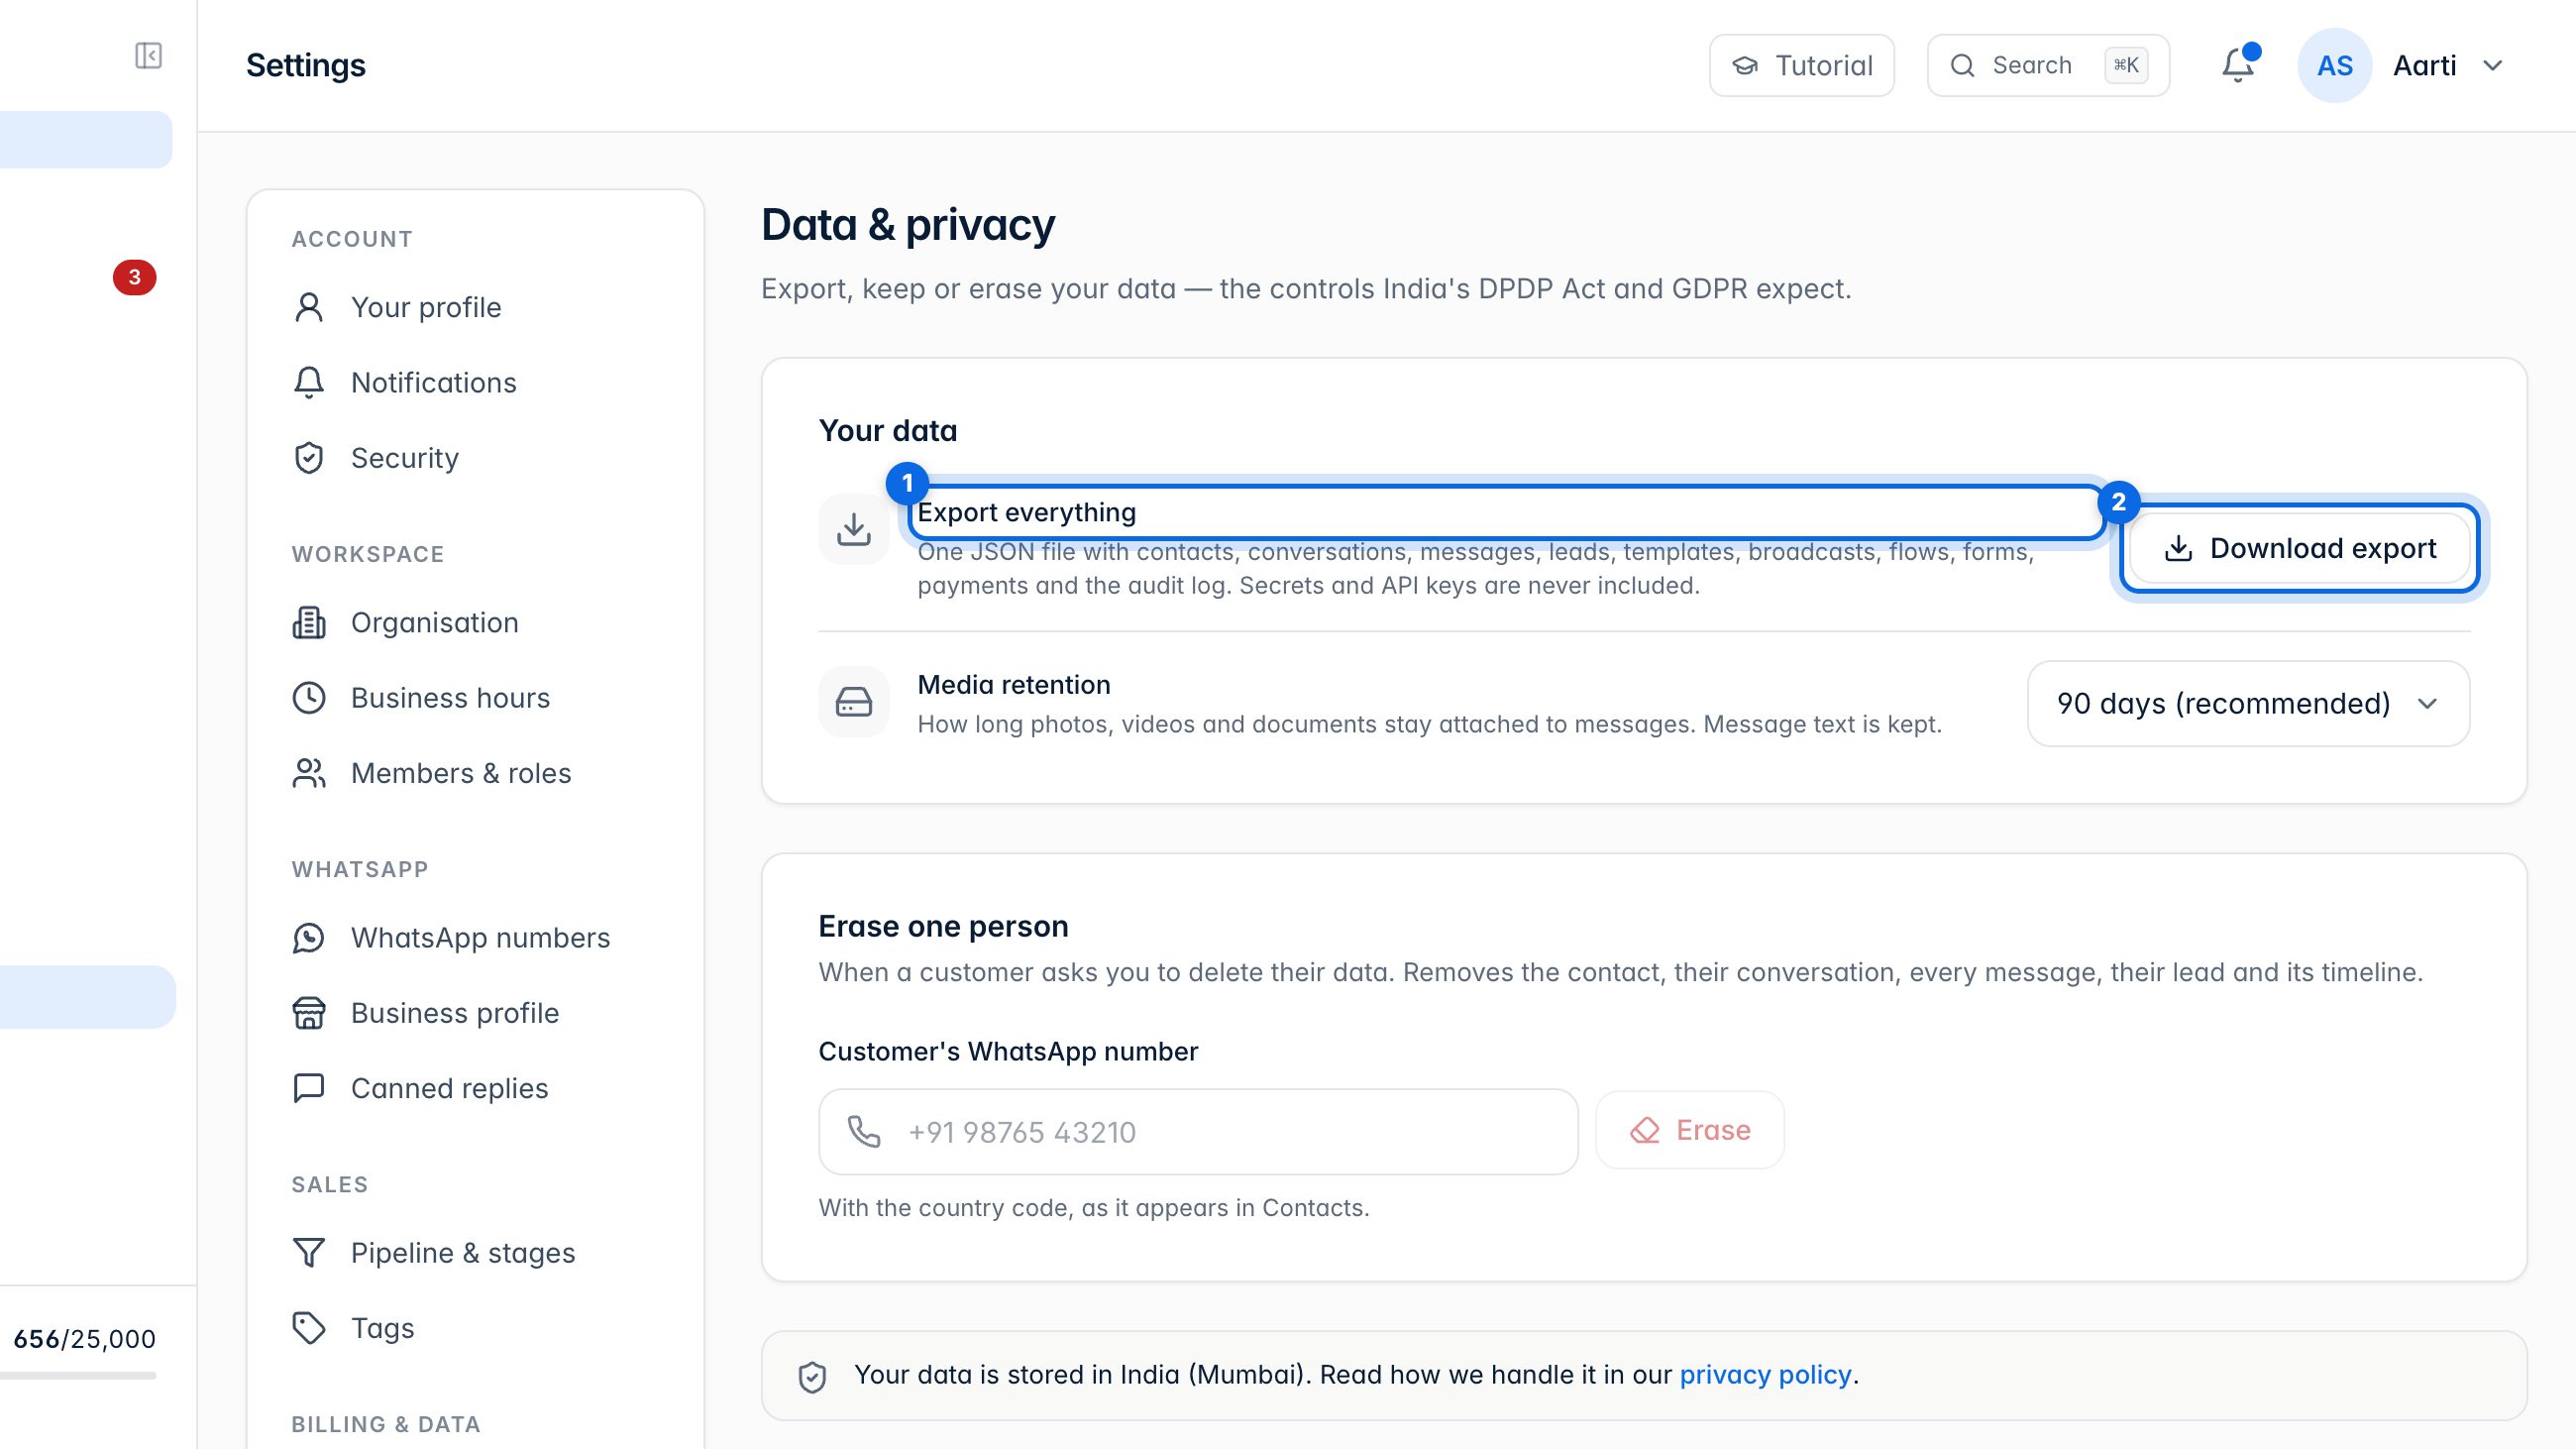
In Data & privacy, Export everything (1) downloads all your data as one file (2). Secrets and API keys are never included.